
Pollo Al Horno – the very name itself evokes the comforting warmth of a bustling kitchen, where the tantalizing aroma of perfectly roasted chicken gently wafts through the air. This isn’t just any baked chicken; it’s a culinary hug, a staple deeply embedded in the hearts and homes across Spain and Latin America. For generations, this beloved dish has been a symbol of family gatherings, Sunday lunches, and simple, profound satisfaction, passed down with love and tradition.
What makes a truly exceptional Pollo Al Horno so universally adored is its masterful balance of simplicity and rich, complex flavor. Imagine incredibly juicy, fall-off-the-bone tender meat encased in a beautifully crisp, golden-brown skin, seasoned to perfection with aromatic herbs and spices. I find it remarkable how such straightforward ingredients can combine to create an experience so deeply satisfying. It’s the ultimate weeknight warrior, requiring minimal hands-on time, yet yielding a dish that feels utterly gourmet. Whether you’re a seasoned chef or a kitchen novice, the promise of a succulent, flavorful meal with minimal fuss makes this recipe an undeniable favorite in my repertoire, guaranteeing smiles around the table.
Ingredients:
- For the Whole <strong>Pollo Al Horno</strong> (Chicken):
- 1 whole chicken, approximately 4-5 pounds (about 1.8-2.3 kg), preferably organic or free-range for the best flavor in your <strong>Pollo Al Horno</strong>.
- 2 tablespoons olive oil, extra virgin quality for richness.
- 1 large lemon, halved, for stuffing the cavity and adding zest to the marinade.
- 1 head of garlic, separated into cloves, peeled, and lightly smashed.
- Several sprigs of fresh rosemary and thyme, for aromatic depth.
- Kosher salt and freshly ground black pepper, to taste, for seasoning generously.
- For the Flavorful Marinade & Rub:
- 4-6 cloves garlic, minced very finely or grated using a microplane for maximum garlic dispersion.
- 1 tablespoon smoked paprika, for a beautiful color and a depth of smoky flavor that truly enhances our <strong>Pollo Al Horno</strong>.
- 1 teaspoon dried oregano, or 2 teaspoons fresh oregano, finely chopped.
- 1 teaspoon dried thyme, or 2 teaspoons fresh thyme leaves, stripped from the stems.
- 1/2 teaspoon ground cumin, for an earthy undertone.
- 1/4 teaspoon cayenne pepper (optional, for a subtle kick).
- Zest of 1 whole lemon (from the lemon used for stuffing), adding bright citrus notes.
- 2 tablespoons fresh lemon juice (from the lemon used for stuffing), to tenderize and brighten.
- 3 tablespoons olive oil, again, good quality extra virgin.
- 1 tablespoon red wine vinegar, for a touch of acidity and complexity.
- 1 teaspoon coarse sea salt, or kosher salt.
- 1/2 teaspoon freshly ground black pepper.
- For the Roasted Root Vegetables (Optional, but highly recommended with <strong>Pollo Al Horno</strong>):
- 1.5 pounds (about 680g) small potatoes, such as Yukon Gold or red potatoes, halved or quartered depending on size.
- 1 pound (about 450g) carrots, peeled and cut into 1-inch (2.5 cm) chunks.
- 1 large onion, cut into 8 wedges.
- 1 bell pepper (any color), deseeded and cut into large chunks.
- 2 tablespoons olive oil, for tossing the vegetables.
- 1/2 teaspoon dried rosemary, or 1 tablespoon fresh rosemary, chopped.
- Salt and freshly ground black pepper, to taste.
- Optional Garnish:
- Fresh parsley, chopped, for a final flourish.
- Extra lemon wedges, for serving.
Preparing the <strong>Pollo Al Horno</strong> Marinade
This is where we build the foundation of flavor for our incredible <strong>Pollo Al Horno</strong>. A robust marinade is crucial for infusing every fiber of the chicken with a delightful taste and ensuring it stays wonderfully moist during roasting. Don’t rush this step; the marinade is your secret weapon!
-
<h4>Gather Your Marinade Ingredients:</h4>
In a medium-sized bowl, combine all the ingredients for the marinade and rub. This includes your minced garlic, smoked paprika (oh, that color!), dried oregano, dried thyme, ground cumin, the optional cayenne pepper for a little warmth, fresh lemon zest, fresh lemon juice, olive oil, red wine vinegar, coarse sea salt, and black pepper. I love seeing all these vibrant colors and smelling the aromatic spices come together.
-
<h4>Whisk to Combine:</h4>
Using a whisk or a fork, vigorously mix everything together until it forms a thick, well-emulsified paste. You’ll want to make sure all the spices are fully incorporated into the liquids. This paste should be quite fragrant – take a moment to savor that beautiful aroma! This mixture is going to penetrate deeply into our <strong>Pollo Al Horno</strong>, creating layers of flavor.
-
<h4>Set Aside:</h4>
Once your marinade is ready, set it aside. We’ll be using it very soon. For me, preparing the marinade first ensures that it has a few extra minutes for the flavors to meld even further while I get the chicken ready.
Prepping the Chicken and Vegetables for Your <strong>Pollo Al Horno</strong>
Proper preparation of both the chicken and the vegetables is key to achieving a perfectly cooked and evenly flavored <strong>Pollo Al Horno</strong>. Taking the time here pays off immensely in the final dish.
-
<h4>Prepare the Whole Chicken:</h4>
First things first, remove the whole chicken from its packaging. Reach into the cavity and remove any giblets or neck, if present (you can save these for stock if you like, or discard them). This is a crucial step for a clean roasting experience.
Next, pat the chicken thoroughly dry with paper towels, both inside and out. This step is extremely important! A dry surface is essential for achieving that beautifully crispy skin that we all desire on our <strong>Pollo Al Horno</strong>. Moisture on the skin will steam rather than crisp, and we definitely want crisp!
-
<h4>Loosen the Skin and Apply Marinade:</h4;>
Gently use your fingers to loosen the skin over the breast and thigh areas of the chicken. Be careful not to tear it. This creates pockets where we can really pack in the flavor. Take about half of your prepared marinade and carefully rub it directly onto the meat under the skin. This ensures the breast meat, which can sometimes be bland, gets a direct hit of flavor. Trust me, this makes a huge difference in the overall taste of your <strong>Pollo Al Horno</strong>.
Then, take the remaining marinade and generously rub it all over the exterior of the chicken, ensuring every nook and cranny is coated. Don’t forget to get some into the leg joints and under the wings. Season the cavity lightly with salt and pepper.
-
<h4>Stuff the Cavity:</h4>
Into the chicken’s cavity, place the halved lemon, the lightly smashed garlic cloves, and the fresh sprigs of rosemary and thyme. These aromatics will infuse the chicken from the inside out as it roasts, contributing to a wonderfully fragrant <strong>Pollo Al Horno</strong>.
-
<h4>Truss the Chicken (Optional but Recommended):</h4>
Using kitchen twine, tie the legs of the chicken together. You can also tuck the wing tips underneath the chicken. Trussing helps the chicken cook more evenly and maintain a compact shape, which is great for presentation and uniform cooking.
-
<h4>Chill and Marinate:</h4>
Place the marinated chicken in a large roasting pan or on a plate, cover it loosely with plastic wrap, and refrigerate for at least 2 hours, or ideally overnight (8-12 hours). The longer it marinates, the more flavor will penetrate, leading to a truly spectacular <strong>Pollo Al Horno</strong>.
-
<h4>Prepare the Vegetables:</h4>
About 30-45 minutes before you plan to roast the chicken, remove it from the refrigerator to bring it closer to room temperature – this promotes more even cooking. While the chicken is resting, prepare your vegetables. In a large bowl, combine the potatoes, carrots, onion wedges, and bell pepper chunks. Drizzle with 2 tablespoons of olive oil, sprinkle with dried rosemary, salt, and black pepper. Toss everything together until the vegetables are evenly coated. These roasted vegetables will make a fantastic accompaniment to our <strong>Pollo Al Horno</strong>.
Roasting Your Perfect <strong>Pollo Al Horno</strong>
Now for the main event! Roasting the chicken to perfection involves careful temperature management and a bit of patience. This process will yield a <strong>Pollo Al Horno</strong> with juicy meat and wonderfully crispy skin.
-
<h4>Preheat Your Oven:</h4>
Preheat your oven to a high temperature, around 425°F (220°C). This initial high heat helps to achieve that beautiful crispy skin we talked about. Ensure the oven is fully preheated before placing the chicken inside.
-
<h4>Prepare the Roasting Pan:</h4>
Place the marinated chicken, breast-side up, in the center of your large roasting pan. If you don’t have a rack, you can create a makeshift one by placing some of the carrot and onion chunks directly under the chicken to slightly elevate it, allowing for better air circulation and crispier skin on the bottom.
-
<h4>Initial High-Heat Roast:</h4>
Roast the <strong>Pollo Al Horno</strong> for 20-25 minutes at 425°F (220°C). During this time, the skin will begin to brown and crisp up. Keep an eye on it to ensure it doesn’t burn.
-
<h4>Add Vegetables and Reduce Heat:</h4>
After the initial high-heat roasting, carefully remove the pan from the oven. Arrange your prepared, seasoned root vegetables around the chicken in the roasting pan. You can even tuck some underneath the chicken to absorb those delicious drippings. If you see that the chicken skin is browning too quickly, you can loosely tent it with aluminum foil.
Reduce the oven temperature to 375°F (190°C).
-
<h4>Continue Roasting and Basting:</h4>
Return the pan to the oven and continue roasting for another 60-90 minutes, or until the chicken is cooked through and the vegetables are tender. Every 20-30 minutes, I like to baste the chicken and stir the vegetables. To baste, simply spoon some of the pan drippings over the chicken. This helps to keep the skin moist and flavorful, contributing to a more succulent <strong>Pollo Al Horno</strong>.
<h5>Temperature Check is Key:</h5> The most accurate way to determine if your chicken is done is to use an instant-read meat thermometer. Insert the thermometer into the thickest part of the thigh, avoiding the bone. The internal temperature should reach 165°F (74°C). The juices should also run clear when you pierce the thigh with a knife.
-
<h4>Achieving Extra Crispy Skin (Optional):</h4>
If your chicken skin isn’t as crispy as you’d like it to be at the end of the cooking time, you can carefully increase the oven temperature back to 425°F (220°C) for the last 5-10 minutes of roasting, keeping a very close eye on it to prevent burning. This final burst of high heat can really finish off that perfect <strong>Pollo Al Horno</strong> skin.
Resting and Serving Your Delicious <strong>Pollo Al Horno</strong>
The final steps are just as important as the initial preparation. Resting the chicken ensures maximum juiciness, and a quick pan sauce from the drippings elevates the entire meal.
-
<h4>Rest the <strong>Pollo Al Horno</strong>:</h4>
Once your <strong>Pollo Al Horno</strong> has reached the correct internal temperature, carefully remove the roasting pan from the oven. Transfer the chicken to a large cutting board or serving platter. Loosely tent it with aluminum foil and let it rest for at least 15-20 minutes. Do not skip this step! Resting allows the juices to redistribute throughout the meat, ensuring every slice is incredibly moist and flavorful. If you cut into it too soon, all those delicious juices will run out onto your board, leaving you with drier chicken.
-
<h4>Prepare a Simple Pan Sauce (Optional):</h4>
While the chicken is resting, you can make a quick pan sauce. Carefully spoon off any excess fat from the roasting pan, leaving behind the delicious pan drippings and any caramelized bits. Place the roasting pan over medium heat on your stovetop (if it’s stovetop-safe; otherwise, transfer drippings to a saucepan). You can deglaze the pan by adding about 1/2 cup of chicken broth or white wine, scraping up all those flavorful browned bits from the bottom of the pan with a wooden spoon. Bring it to a simmer and let it reduce for a few minutes until slightly thickened. You can whisk in a pat of butter at the end for richness, and season to taste with salt and pepper. This simple sauce is a perfect complement to your <strong>Pollo Al Horno</strong>.
-
<h4>Carve and Serve:</h4>
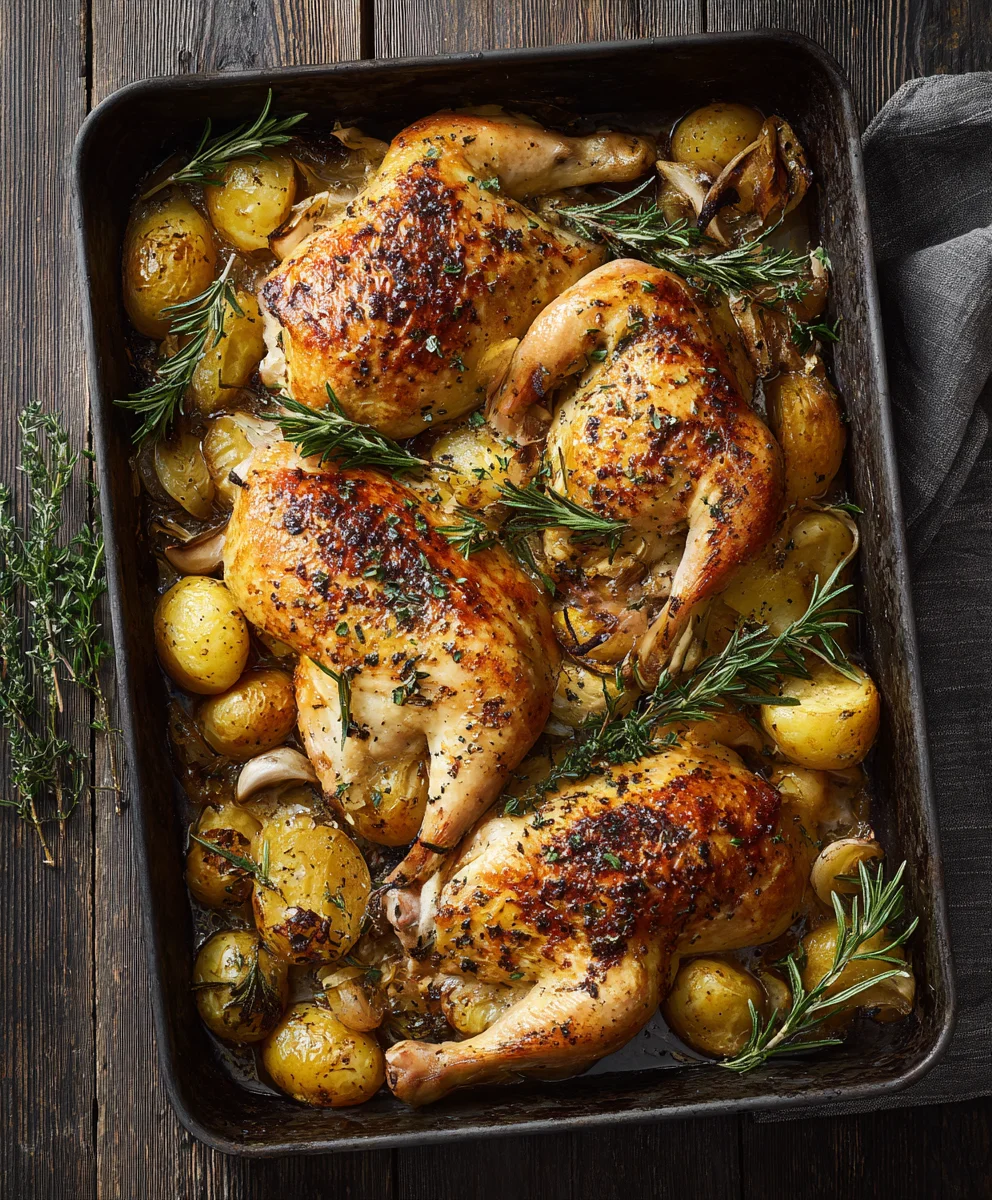
After the resting period, remove the twine from the chicken. Carve the <strong>Pollo Al Horno</strong> into your desired pieces – usually, I start by removing the legs and thighs, then the wings, and finally carve the breast meat. Arrange the carved chicken pieces alongside the tender roasted vegetables on a serving platter. Drizzle with the pan sauce, if you made one, and garnish with fresh chopped parsley and extra lemon wedges. I absolutely love how beautiful and inviting a perfectly roasted <strong>Pollo Al Horno</strong> looks on the table, especially when surrounded by those vibrant, tender vegetables.
-
<h4>Enjoy Your Homemade Masterpiece:</h4>
Serve immediately and revel in the delicious flavors and aromas of your homemade <strong>Pollo Al Horno</strong>. It’s a meal that truly warms the soul and satisfies the palate, perfect for a family dinner or entertaining friends. The effort you put into the marinade and careful roasting really shines through in every bite of this succulent chicken and tender vegetables.
Conclusion:
And there you have it, my friends! We’ve reached the delicious culmination of our culinary journey with what I genuinely believe is one of the most satisfying and effortlessly impressive dishes you could ever pull together in your own kitchen. This isn’t just another chicken recipe; it’s an experience, a symphony of flavors and textures that will undoubtedly earn you rave reviews from anyone lucky enough to share a meal with you. I’ve poured my heart into perfecting this one, and I’m so excited for you to discover its magic.
Why is this particular recipe a must-try, you ask? Well, let me tell you. First, there’s the sheer simplicity. Despite its incredible depth of flavor and show-stopping presentation, this dish requires minimal fuss and effort. You’ll spend more time anticipating the incredible aroma filling your home than you will actually prepping it. It’s the kind of recipe that makes you feel like a culinary wizard without needing a wand (or hours of advanced training!). Second, the flavor profile is simply unmatched. We’re talking about chicken that’s impossibly tender on the inside, practically falling off the bone, while the skin achieves that coveted, irresistible golden-brown crispness that crackles with every bite. Each morsel is infused with aromatic herbs, savory spices, and a richness that’s both comforting and profoundly satisfying. It’s a dish that truly nourishes the soul, reminding us of the simple joys of good food prepared with love.
But the true beauty of this recipe lies in its incredible versatility. While it’s absolutely spectacular on its own, I love to get creative with how I present and serve it. For a hearty, comforting meal, imagine serving generous portions of this succulent chicken alongside a mound of fluffy, fragrant basmati rice, perfectly cooked to absorb all those incredible pan juices. Alternatively, roasted root vegetables like carrots, parsnips, and sweet potatoes, tossed in a little olive oil and fresh rosemary, make an excellent companion, their earthy sweetness complementing the savory chicken beautifully. If you’re leaning towards something lighter, a vibrant green salad with a zesty vinaigrette provides a wonderful contrast, cutting through the richness of the chicken with its crisp freshness. For a truly classic touch, a simple mashed potato, creamy and buttery, is always a winner. You can even roast some potatoes directly in the same pan during the last 45 minutes of cooking, letting them soak up all those glorious drippings for an all-in-one masterpiece.
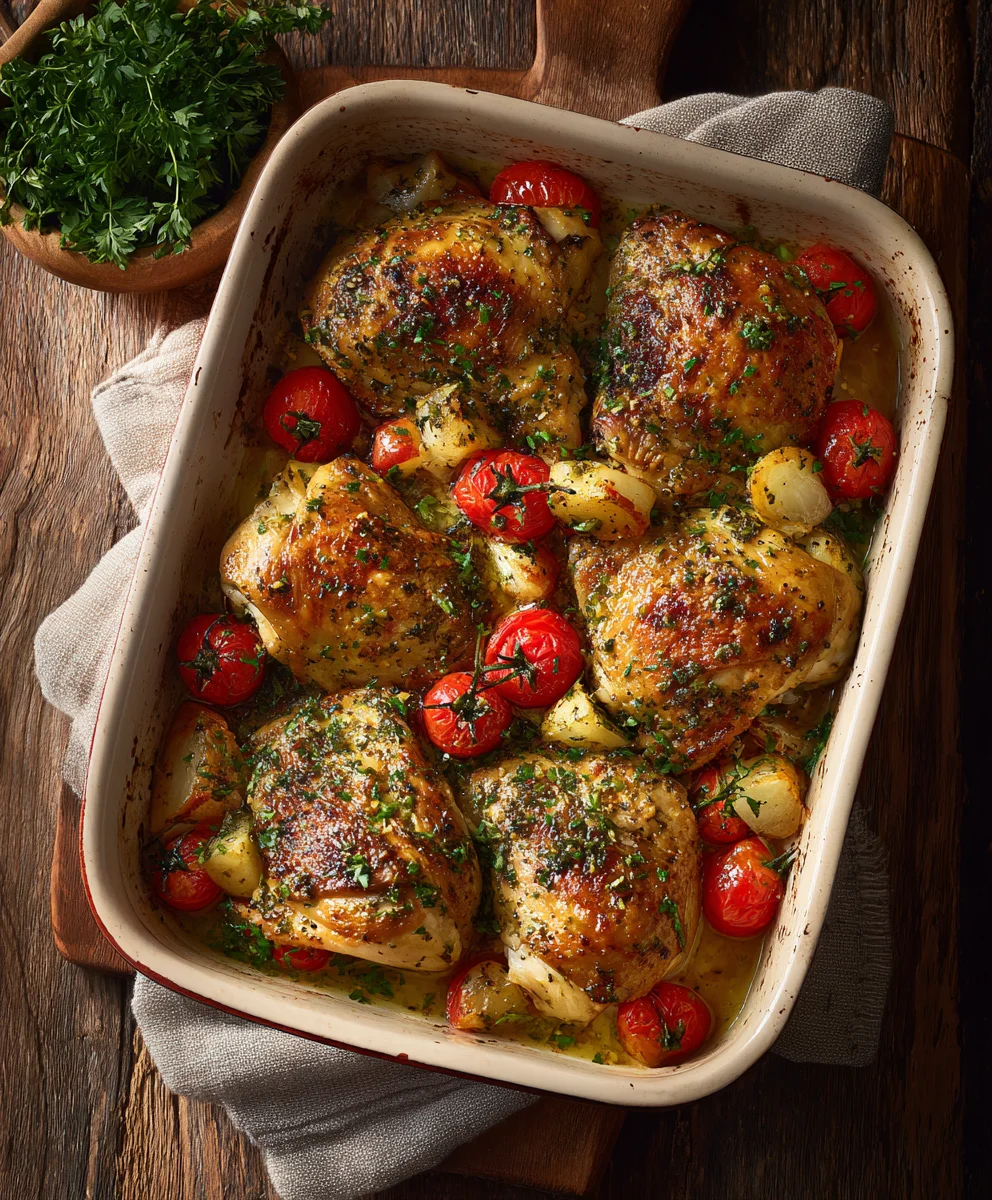
Now, let’s talk variations, because making a recipe your own is half the fun! Feel free to experiment with different herb combinations. A sprig of fresh sage or a sprinkle of dried marjoram can introduce new layers of aroma. For a slightly different citrus kick, swap out the lemon for orange slices; the sweetness of the orange pairs wonderfully with the savory chicken. If you enjoy a bit of heat, a pinch of red pepper flakes or a dash of smoked paprika can add a subtle warmth without overwhelming the other flavors. For a truly Mediterranean twist, consider adding some Kalamata olives and cherry tomatoes to the roasting pan during the last 20 minutes, allowing them to soften and release their juices into the sauce. And remember, this technique isn’t limited to a whole chicken! You can easily adapt this recipe for chicken pieces – thighs, drumsticks, or even boneless breasts – simply adjusting the cooking time accordingly until they are cooked through and beautifully golden. Each variation offers a unique spin on a beloved classic, ensuring that you can enjoy this dish time and time again without ever feeling like you’re eating the “same old thing.”
I truly hope that reading about this incredible dish has sparked a fire in your culinary heart. I encourage you, with all the enthusiasm I can muster, to roll up your sleeves and give this recipe a try this week. It’s perfect for a cozy family dinner, impressive enough for entertaining guests, and even makes fantastic leftovers for lunch the next day. Don’t be afraid to put your own personal stamp on it; cooking should always be an adventure! Once you’ve experienced the pure joy of making and tasting this perfect
Pollo Al Horno
, I would absolutely love to hear about it. Share your successes, your serving ideas, and any creative variations you come up with in the comments below. Snap a picture and let me know how it turned out! Your feedback not only brightens my day but also helps inspire other home cooks in our community. Happy cooking, my friends, and prepare to fall in love with your new favorite chicken dish!
Authentic Pollo Al Horno – Best Juicy Baked Chicken Recipe
Pollo Al Horno is a culinary hug, deeply embedded in the hearts and homes across Spain and Latin America. This recipe delivers incredibly juicy, fall-off-the-bone tender chicken with crisp, golden-brown skin, seasoned to perfection with aromatic herbs and spices. It’s a universally adored dish, offering rich flavor with minimal fuss, perfect for any cook.
Ingredients
-
1 whole chicken, 4-5 lbs (1.8-2.3 kg)
-
5 tbsp olive oil, extra virgin
-
2 large lemons (1 halved, 1 zested and juiced)
-
1 head garlic + 4-6 cloves garlic, minced or lightly smashed
-
Several sprigs fresh rosemary
-
Several sprigs fresh thyme
-
Kosher salt, to taste
-
Freshly ground black pepper, to taste
-
1 tbsp smoked paprika
-
1 tsp dried oregano (or 2 tsp fresh, chopped)
-
1 tsp dried thyme (or 2 tsp fresh leaves)
-
1/2 tsp ground cumin
-
1/4 tsp cayenne pepper (optional)
-
1 tbsp red wine vinegar
-
1 tsp coarse sea salt
-
1.5 lbs (680g) small potatoes, halved or quartered (optional)
-
1 lb (450g) carrots, peeled, cut into 1-inch chunks (optional)
-
1 large onion, cut into 8 wedges (optional)
-
1 bell pepper (any color), deseeded, cut into large chunks (optional)
-
1/2 tsp dried rosemary (or 1 tbsp fresh, chopped, for vegetables)
-
1/2 cup chicken broth (for pan sauce, as non-alcohol alternative to white wine)
-
1 pat butter (optional, for pan sauce)
-
Fresh parsley, chopped (for garnish)
-
Extra lemon wedges (for garnish)
Instructions
-
Step 1
In a bowl, combine minced garlic, smoked paprika, dried oregano, dried thyme, ground cumin, cayenne (if using), lemon zest and juice, 3 tbsp olive oil, red wine vinegar, 1 tsp coarse sea salt, and 1/2 tsp black pepper. Whisk until a thick paste forms. -
Step 2
Remove giblets from chicken and pat dry thoroughly inside and out. Gently loosen skin over breast and thighs, being careful not to tear it. -
Step 3
Rub half of the prepared marinade under the chicken skin directly onto the meat. Then, rub the remaining marinade generously over the entire exterior of the chicken. Lightly season the cavity with salt and pepper. -
Step 4
Stuff the chicken cavity with the halved lemon, lightly smashed garlic cloves, and fresh rosemary and thyme sprigs. Optionally, tie the chicken legs together with kitchen twine and tuck wing tips for even cooking. -
Step 5
Place the marinated chicken in a large roasting pan or on a plate, cover loosely with plastic wrap, and refrigerate for at least 2 hours, or ideally overnight (8-12 hours), to allow flavors to penetrate deeply. -
Step 6
About 30-45 minutes before roasting, remove chicken from the refrigerator to bring it closer to room temperature. In a large bowl, toss the potatoes, carrots, onion wedges, and bell pepper chunks with 2 tbsp olive oil, 1/2 tsp dried rosemary, salt, and black pepper until evenly coated. -
Step 7
Preheat oven to 425°F (220°C). Place the marinated chicken, breast-side up, in the center of your large roasting pan. Roast for 20-25 minutes to begin browning and crisping the skin. -
Step 8
Carefully remove the pan from the oven. Arrange the seasoned root vegetables around the chicken. If the chicken skin is browning too quickly, loosely tent it with aluminum foil. Reduce oven temperature to 375°F (190°C). Return to oven and continue roasting for another 60-90 minutes. -
Step 9
Every 20-30 minutes, baste the chicken with pan drippings and stir the vegetables. Chicken is done when an instant-read thermometer inserted into the thickest part of the thigh (avoiding bone) reaches 165°F (74°C), and juices run clear. For extra crispy skin, optionally increase oven to 425°F (220°C) for the last 5-10 minutes, watching closely to prevent burning. -
Step 10
Once cooked, carefully remove the roasting pan from the oven. Transfer the chicken to a large cutting board or serving platter. Loosely tent it with aluminum foil and let it rest for at least 15-20 minutes to allow juices to redistribute. -
Step 11
While the chicken is resting, make a quick pan sauce. Spoon off any excess fat from the roasting pan. Place the pan over medium heat on your stovetop (if stovetop-safe). Deglaze the pan by adding 1/2 cup chicken broth, scraping up all flavorful browned bits from the bottom. Bring to a simmer and reduce for a few minutes until slightly thickened. Whisk in an optional pat of butter and season to taste with salt and pepper. -
Step 12
After resting, remove twine from the chicken. Carve into desired pieces. Arrange the carved chicken pieces alongside the tender roasted vegetables on a serving platter. Drizzle with the pan sauce, if made, and garnish with fresh chopped parsley and extra lemon wedges. Serve immediately.
Important Information
Nutrition Facts (Per Serving)
It is important to consider this information as approximate and not to use it as definitive health advice.
Allergy Information
Please check ingredients for potential allergens and consult a health professional if in doubt.


Leave a Comment