
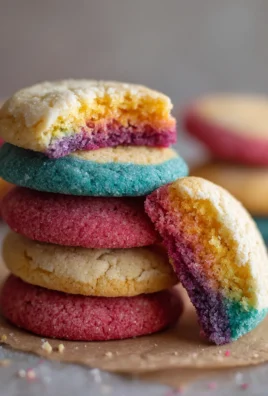
Awesome Rainbow Cookies Recipe – what a delightful phrase to begin our culinary journey! I am absolutely thrilled to share with you today a recipe that brings an explosion of color and flavor to any occasion. Imagine a cookie that isn’t just a treat for your taste buds, but a feast for your eyes, with its distinct vibrant layers, rich almond essence, and a delicate hint of chocolate. This isn’t merely a dessert; it’s a celebration baked into every bite.
These iconic cookies, often known as Italian Rainbow Cookies or Seven-Layer Cookies, hold a cherished place in Italian-American culture, especially during holidays and family gatherings. Historically, their green, white, and red layers represented the Italian flag, making them a delicious symbol of heritage and pride. Over the years, they’ve evolved into the beautiful multicolored confections we adore today, a testament to joy and tradition.
Why You’ll Fall in Love with This Awesome Rainbow Cookies Recipe
People absolutely adore this dish for so many reasons. Beyond their stunning visual appeal, these cookies offer an unparalleled combination of moist, cake-like texture, the distinct nutty flavor of almond paste, and the perfect balance of fruit jam and a rich dark chocolate topping. They are surprisingly satisfying, making them a perfect addition to any dessert spread or a thoughtful homemade gift. I promise you, crafting these beautiful cookies is a truly rewarding experience, and the resulting smiles from those who taste them are priceless.

Ingredients:
- For the Cookie Layers:
- 1 pound (454g) almond paste, preferably in a log form
- 1 ¾ cups (350g) granulated sugar
- 1 cup (226g) unsalted butter, softened to room temperature
- 4 large eggs, separated (yolks and whites)
- 1 teaspoon pure almond extract
- 2 cups (240g) all-purpose flour, sifted
- ½ teaspoon salt
- Red food coloring gel (such as AmeriColor Super Red or Wilton No-Taste Red)
- Green food coloring gel (such as AmeriColor Leaf Green or Wilton Leaf Green)
- For the Filling and Glaze:
- 1 (12-ounce) jar apricot jam or raspberry jam, high quality, seedless (about 1 ½ cups)
- 12 ounces (340g) good quality dark chocolate (e.g., bittersweet or semi-sweet chocolate chips or chopped bar)
- 2 tablespoons vegetable shortening or coconut oil (for the chocolate glaze)
Equipment You’ll Need:
- Stand mixer with paddle attachment
- Several large mixing bowls
- Rubber spatulas
- 3 half-sheet (13×18 inch) baking pans
- Parchment paper
- Offset spatula or butter knife for spreading batter and jam
- Wire cooling racks
- Plastic wrap
- A heavy, flat object for pressing (e.g., another baking sheet or cutting board with canned goods)
- Double boiler setup or microwave-safe bowl for melting chocolate
- Very sharp chef’s knife or serrated knife
- Ruler (optional, for precise trimming and slicing)
Phase 1: Preparing the Almond Cake Layers – The Foundation of Your Awesome Rainbow Cookies
- Preheat and Prepare Your Pans: First things first, let’s get our oven ready. Preheat your oven to 350°F (175°C). While it’s heating up, prepare your three half-sheet (13×18 inch) baking pans. Line each pan completely with parchment paper, making sure the paper extends up the sides a little if possible. This isn’t just to prevent sticking; it helps with easy removal of the thin cake layers later on. A little trick I like to use is to lightly spray the pan with non-stick spray before putting down the parchment; this helps the paper stay put.
- Cream the Almond Paste and Sugar: In the bowl of your stand mixer fitted with the paddle attachment, break up the almond paste. If it’s very firm, you might need to roughly chop it first. Add the granulated sugar to the bowl. Beat on medium speed for about 3-5 minutes, or until the almond paste is completely broken down and combined with the sugar, forming a coarse, sandy mixture. This step is crucial for ensuring a smooth batter without lumps of almond paste, which would impact the texture of your finished cookies.
- Incorporate the Butter: Add the softened unsalted butter to the almond paste mixture. Continue beating on medium-high speed for another 5-7 minutes, scraping down the sides of the bowl frequently with a rubber spatula. You’re looking for a mixture that is light in color, fluffy, and significantly increased in volume. This creaming action incorporates air, which contributes to the tender crumb of these delightful cakes.
- Add Egg Yolks and Extract: With the mixer on low speed, add the egg yolks one at a time, beating well after each addition until fully incorporated. Once all yolks are in, increase the speed to medium and beat for about 2 minutes until the mixture is cohesive and glossy. Stir in the pure almond extract. The almond extract really amplifies that classic “Awesome Rainbow Cookies Recipe” flavor profile.
- Whip the Egg Whites: In a separate, very clean mixing bowl (or a clean stand mixer bowl), using the whisk attachment, beat the egg whites on medium-high speed until they form stiff peaks. They should hold their shape firmly when you lift the whisk. Ensure there’s no trace of yolk or grease in the bowl or on the whisk, as this will prevent the whites from whipping properly. These whipped egg whites are key to the light and airy texture of the cookie layers.
- Fold in Dry Ingredients and Egg Whites: Add the sifted all-purpose flour and salt to the almond paste mixture, mixing on low speed until just combined. Be careful not to overmix at this stage; overmixing develops gluten, which can lead to tough cookies. Then, gently fold in about a third of the whipped egg whites into the batter to lighten it, then carefully fold in the remaining egg whites in two additions until no streaks of white remain. Gentleness is the name of the game here – you want to preserve as much of that lovely air you incorporated as possible.
- Divide and Color the Batter: Divide the batter evenly into three separate medium-sized bowls. Eyeballing it is fine, or you can use a kitchen scale for precision, aiming for about 2 cups of batter per bowl. Now for the fun part that gives our “Awesome Rainbow Cookies Recipe” their iconic look! To one bowl, add enough red food coloring gel to achieve a vibrant red hue – remember, gel colors are concentrated, so start with a little and add more if needed. To another bowl, add green food coloring gel for a rich green color. Leave the third portion plain; this will bake into a lovely pale yellow color. Mix each colored batter gently until the color is uniform throughout.
Phase 2: Baking the Rainbow Layers – Patience Makes Perfect
- Spread the Batter Evenly: Take one portion of the colored batter (e.g., the green one) and dollop it onto one of your parchment-lined baking pans. Using an offset spatula or the back of a spoon, carefully spread the batter evenly across the entire surface of the parchment paper, from edge to edge. The goal here is a very thin, uniform layer. Take your time to ensure the thickness is consistent, as this affects baking time and the final look of your “Awesome Rainbow Cookies.” Repeat this process for the plain (yellow) batter on the second pan and the red batter on the third pan.
- Bake Individually: Bake each cake layer one at a time in your preheated oven for 8-10 minutes. These layers bake quickly, so keep a close eye on them! They are done when the edges are lightly golden and the top springs back slightly when gently touched. Do not overbake, as these thin layers can dry out very easily, making them crumbly and harder to work with later. Overbaking is a common pitfall to avoid with this specific “Awesome Rainbow Cookies Recipe.”
- Cool Completely: As each layer comes out of the oven, immediately slide the parchment paper with the cake onto a wire cooling rack. Allow them to cool completely at room temperature. They need to be fully cooled before assembly to prevent the jam from melting and the layers from tearing.
Phase 3: Assembling Your Awesome Rainbow Cookies – Layer by Delicious Layer
- Trim the Cake Layers: Once all three cake layers are completely cooled, gently peel the parchment paper off the back of each one. Place them on a clean, flat surface. Using a very sharp knife and a ruler (if you want precise edges), carefully trim the edges of each cake layer to create perfectly straight rectangles. This step is important for a neat, professional-looking cookie once they’re sliced. Don’t worry if you lose a little bit; the trimmings are great for a chef’s snack!
- Prepare the Jam: In a small saucepan over low heat, gently warm the apricot or raspberry jam, stirring frequently, until it’s slightly thinner and easily spreadable. You don’t want it boiling, just warm and fluid. This makes it easier to spread a thin, even layer and helps it adhere better to the cake.
- Assemble the Layers: Choose your first layer (I usually start with green) and place it on a large piece of plastic wrap laid on your work surface. Spread a thin, even layer of the warmed jam over the entire surface of the green cake.
- Add the Middle Layer: Carefully place the plain (yellow) cake layer directly on top of the jam-covered green layer, aligning the edges as perfectly as you can. Apply another thin, even layer of the warmed jam over the yellow cake.
- Complete the Stack: Gently place the red cake layer on top of the jam-covered yellow layer, again aligning the edges. Do not spread jam on this top (red) layer yet. At this point, you should have a beautiful, vibrant stack of green, yellow, and red cake layers, separated by shimmering jam. This iconic color combination is what makes these cookies so recognizable and contributes to the “Awesome Rainbow Cookies Recipe” allure.
- Press and Chill: Carefully wrap the entire stack tightly in the plastic wrap you used as a base. Then, place the wrapped cake block on a baking sheet or cutting board. Now, for a critical step: place another baking sheet or cutting board on top of the wrapped cake, and weigh it down with something heavy, like a few canned goods or heavy books. This gentle pressing helps the layers adhere firmly to each other and compacts the cake, making it much easier to slice cleanly later. Transfer the weighted cake block to the refrigerator and chill for at least 4-6 hours, or preferably overnight. This chilling period is non-negotiable for success; it allows the cake to firm up and the jam to set, which is vital for perfect slices of your “Awesome Rainbow Cookies.”
Phase 4: Preparing the Chocolate Glaze – The Perfect Finishing Touch
- Melt the Chocolate: Once your cookie block has thoroughly chilled, it’s time to prepare the glorious chocolate topping! In a double boiler or a microwave-safe bowl, combine the dark chocolate chips (or chopped chocolate) and the vegetable shortening or coconut oil. If using a double boiler, place it over simmering water, ensuring the bottom of the bowl doesn’t touch the water. Stir gently until the chocolate is completely melted and smooth. If using a microwave, heat in 30-second intervals, stirring well after each, until smooth and glossy. Be careful not to overheat the chocolate, as it can seize or become grainy. The shortening helps create a wonderfully smooth, slightly soft, and shiny glaze that won’t crack too much when you cut the cookies.
Phase 5: Finishing and Slicing Your Awesome Rainbow Cookies – The Grand Reveal!
- Glaze the First Side: Remove the chilled, pressed cake block from the refrigerator and unwrap it. Place the block on a wire rack set over a piece of parchment paper or a clean baking sheet (to catch any drips). Pour about half of the melted chocolate glaze over the top surface of the cake. Using an offset spatula or the back of a spoon, quickly spread the chocolate evenly from edge to edge.
- Chill to Set First Layer: Carefully transfer the glazed cake block back to the refrigerator and chill for about 15-20 minutes, or until the chocolate is just set but still a little tacky. This allows the first layer of chocolate to firm up enough to handle.
- Glaze the Second Side: Once the first chocolate layer is set, carefully flip the cake block over so the unglazed side is now facing up. This can be a bit tricky, so do it gently and confidently. Pour the remaining melted chocolate glaze over this new top surface and spread it evenly, just as you did before. Return the cake block to the refrigerator for another 30-60 minutes, or until both layers of chocolate are completely firm and hard. This thorough chilling is absolutely essential for clean cuts later.
- The Art of Slicing – The Secret to Perfect Awesome Rainbow Cookies: Now for the moment of truth! Remove the fully chilled and chocolate-glazed block from the refrigerator. Place it on a stable cutting board. Here’s my absolute best tip for slicing these “Awesome Rainbow Cookies” cleanly: Use a very sharp, thin-bladed chef’s knife. For each cut, dip the knife into a tall glass of very hot water, wipe it completely dry with a clean cloth, then make one swift, firm cut straight down through the cake. Repeat this hot-knife-wipe-cut process for every single slice. This technique warms the chocolate slightly, preventing it from cracking and creating beautifully smooth edges on your cookies.
- Trim and Cut into Portions: First, trim off about ¼ inch from all four sides of the block to create perfectly neat, clean edges, revealing those gorgeous rainbow layers. Now, cut the large block into desired cookie sizes. Traditionally, “Awesome Rainbow Cookies” are small rectangles, typically about 1×2 inches or 1×1.5 inches. You can slice the block into long strips first (about 1 inch wide), then cut those strips into individual cookies. Aim for consistent sizes for the most appealing presentation.
- Serve and Store: Arrange your beautiful “Awesome Rainbow Cookies” on a platter and watch them disappear! These cookies are best stored in an airtight container at room temperature for up to a week, or in the refrigerator for longer freshness. They also freeze exceptionally well for up to a month, making them perfect for preparing ahead of time for special occasions. Enjoy the fruits of your labor!

Conclusion:
And there you have it, my friends! We’ve journeyed through the creation of a truly magnificent treat, a dessert that promises to brighten any day and delight every palate. If you’ve been following along, you already know that this isn’t just another cookie recipe; it’s an experience, a burst of color and flavor that brings genuine smiles. I genuinely believe that trying this recipe will become one of your most rewarding kitchen adventures, transforming simple ingredients into something truly extraordinary. The vibrant hues alone are enough to lift spirits, making these cookies not just a snack, but a celebration in every bite. They stand out on any dessert table, sparking conversations and drawing admiration, proving that a little effort in the kitchen can lead to truly memorable results. This recipe is more than just instructions; it’s an invitation to infuse joy and creativity into your baking, a testament to how food can be both delicious and visually stunning. It’s the kind of baking project that feels special from start to finish, culminating in a product you’ll be incredibly proud to share.
Why This Recipe is an Absolute Must-Try:
What makes this particular recipe stand head and shoulders above the rest? It’s the seamless blend of visual spectacle and incredible taste. Each layer, with its distinct color, contributes to an overall aesthetic that is simply breathtaking. But beyond the beauty, the texture – that perfect balance of tender crumb and delicate chew – combined with the subtle almond notes and the luscious jam filling, creates a flavor profile that is utterly irresistible. It’s a sensory masterpiece! Imagine the pure delight on faces young and old when they encounter these cookies for the first time. They’re perfect for making a statement at potlucks, adding a festive touch to holiday gatherings, or simply bringing a splash of unexpected joy to your everyday life. This recipe is designed to be accessible, allowing bakers of all skill levels to achieve stunning, professional-looking results. You’ll be amazed at what you can create with a bit of patience and a lot of heart. The satisfaction of stacking those beautifully colored layers and then slicing through them to reveal the rainbow within is a joy that every home baker deserves to experience. It’s a labor of love, yes, but one that rewards you tenfold with compliments and happy eaters. This isn’t just baking; it’s edible art, and you, my friend, are the artist.
Elevating Your Rainbow Cookie Experience: Serving & Variation Ideas
Now that you’ve mastered the art of creating these beauties, let’s talk about how to make them even more special. While they are undoubtedly magnificent on their own, a few thoughtful touches can elevate your rainbow cookies to new heights. For a simple yet elegant presentation, arrange them on a pristine white platter, allowing their colors to truly pop. They make fantastic homemade gifts, carefully layered in a decorative box lined with parchment paper – a thoughtful gesture that shows you went the extra mile. Consider pairing them with a tall glass of cold milk for a classic comfort, or a warm cup of coffee or tea for a more sophisticated treat. They also make an incredible topping for vanilla bean ice cream, crumbling a few pieces over a scoop for an instant dessert transformation. But why stop there? Let your creativity shine with these variations:
- Flavor Swaps: Experiment with different extracts! Instead of almond, try a hint of orange zest or a touch of pure vanilla bean paste for a different aroma. You could even use a different jam filling – apricot for a sunnier taste, or raspberry for a more tart counterpoint.
- Color Themes: While the rainbow is iconic, don’t be afraid to customize the colors for specific occasions. Think red and green for Christmas, pastels for Easter or a baby shower, or even monochromatic shades for a chic, modern look. Food coloring is your friend here!
- Chocolate Drizzle: For an extra layer of decadence, melt some high-quality dark or white chocolate and drizzle it artfully over the cooled cookies. A sprinkle of edible glitter or themed sprinkles can add even more sparkle.
- Shaping Fun: If you’re feeling adventurous, once the layers are assembled and chilled, you can carefully use small cookie cutters (stars, hearts, mini circles) to create unique shapes before slicing into bars. This is especially fun for kids’ parties.
The possibilities are truly endless, and each variation offers a fresh take on an already beloved treat. Don’t hesitate to experiment with what you have on hand and what flavors you love most; that’s part of the fun of baking!
Your Turn! Try the Awesome Rainbow Cookies Recipe Today!
So, what are you waiting for? I wholeheartedly encourage you to roll up your sleeves, gather your ingredients, and dive into making this wonderful recipe. I promise you, the effort is entirely worth the reward. There’s something incredibly therapeutic about the process, from mixing the vibrant colors to carefully layering them, and then that ultimate moment of slicing into the finished product to reveal those breathtaking layers. This Awesome Rainbow Cookies Recipe isn’t just about baking; it’s about creating memories, sharing joy, and impressing everyone lucky enough to taste them. They are a conversation starter, a mood lifter, and a testament to the fact that home baking can be truly spectacular. Once you’ve made them, I would absolutely love to hear about your experience! Did you try a new flavor variation? What was your favorite part of the process? Did they bring smiles to your family and friends? Please, share your photos and stories with me and the community. Your triumphs, your questions, your unique twists – it all inspires others and helps us grow as a baking family. Happy baking, and enjoy every single colorful bite!
Awesome Rainbow Cookies Recipe: Colorful & Fun!
A delightful recipe for vibrant Italian Rainbow Cookies (Seven-Layer Cookies) featuring distinct colorful layers, rich almond essence, and a delicate hint of chocolate, perfect for any celebration or family gathering.
Ingredients
-
1 lb (454g) almond paste
-
1 ¾ cups (350g) granulated sugar
-
1 cup (226g) unsalted butter, softened
-
4 large eggs, separated
-
1 tsp pure almond extract
-
2 cups (240g) all-purpose flour, sifted
-
½ tsp salt
-
Red food coloring gel
-
Green food coloring gel
-
1 (12oz) jar apricot or raspberry jam (approx. 1 ½ cups)
-
12 oz (340g) dark chocolate
-
2 tbsp vegetable shortening or coconut oil
Instructions
-
Step 1
Preheat oven to 350°F (175°C). Line three 13×18 inch baking pans with parchment paper. In a stand mixer with paddle attachment, beat almond paste and sugar for 3-5 minutes. Add softened butter; beat 5-7 minutes until light and fluffy. -
Step 2
Add egg yolks one at a time on low speed, then beat for 2 minutes on medium. Stir in almond extract. In a separate, clean bowl with whisk attachment, whip egg whites to stiff peaks. -
Step 3
Fold sifted flour and salt into the almond mixture until just combined. Gently fold in whipped egg whites in two additions. Divide batter evenly into three bowls. Color one red, one green, and leave one plain (yellow); mix gently. -
Step 4
Spread each colored batter evenly and thinly onto a prepared pan. Bake each layer individually for 8-10 minutes. Immediately slide parchment with baked cake onto a wire cooling rack to cool completely. Once cooled, gently peel off parchment and trim edges of each layer for neat rectangles. -
Step 5
Gently warm apricot or raspberry jam until slightly thinner. Assemble layers: Place one cake layer (e.g., green) on plastic wrap, spread a thin jam layer. Top with plain (yellow) layer, align, spread another thin jam layer. Top with red layer. Tightly wrap the stack, weigh down, and chill 4-6 hours or overnight. -
Step 6
Once chilled, melt dark chocolate and vegetable shortening/coconut oil until smooth. Unwrap cake block. Pour about half the chocolate glaze over the top surface; spread evenly. Chill for 15-20 minutes until set but tacky. -
Step 7
Carefully flip the cake block. Pour remaining chocolate glaze over the new top surface and spread evenly. Return to the refrigerator for another 30-60 minutes, or until both chocolate layers are completely firm. -
Step 8
For slicing: Dip a very sharp, thin-bladed knife into hot water, wipe dry, then make one swift, firm cut straight down through the cake. Repeat for every slice. Trim off ¼ inch from all four sides. Cut the block into small rectangles, typically about 1×2 inches or 1×1.5 inches. Serve and store in an airtight container.
Important Information
Nutrition Facts (Per Serving)
It is important to consider this information as approximate and not to use it as definitive health advice.
Allergy Information
Please check ingredients for potential allergens and consult a health professional if in doubt.


Leave a Comment