
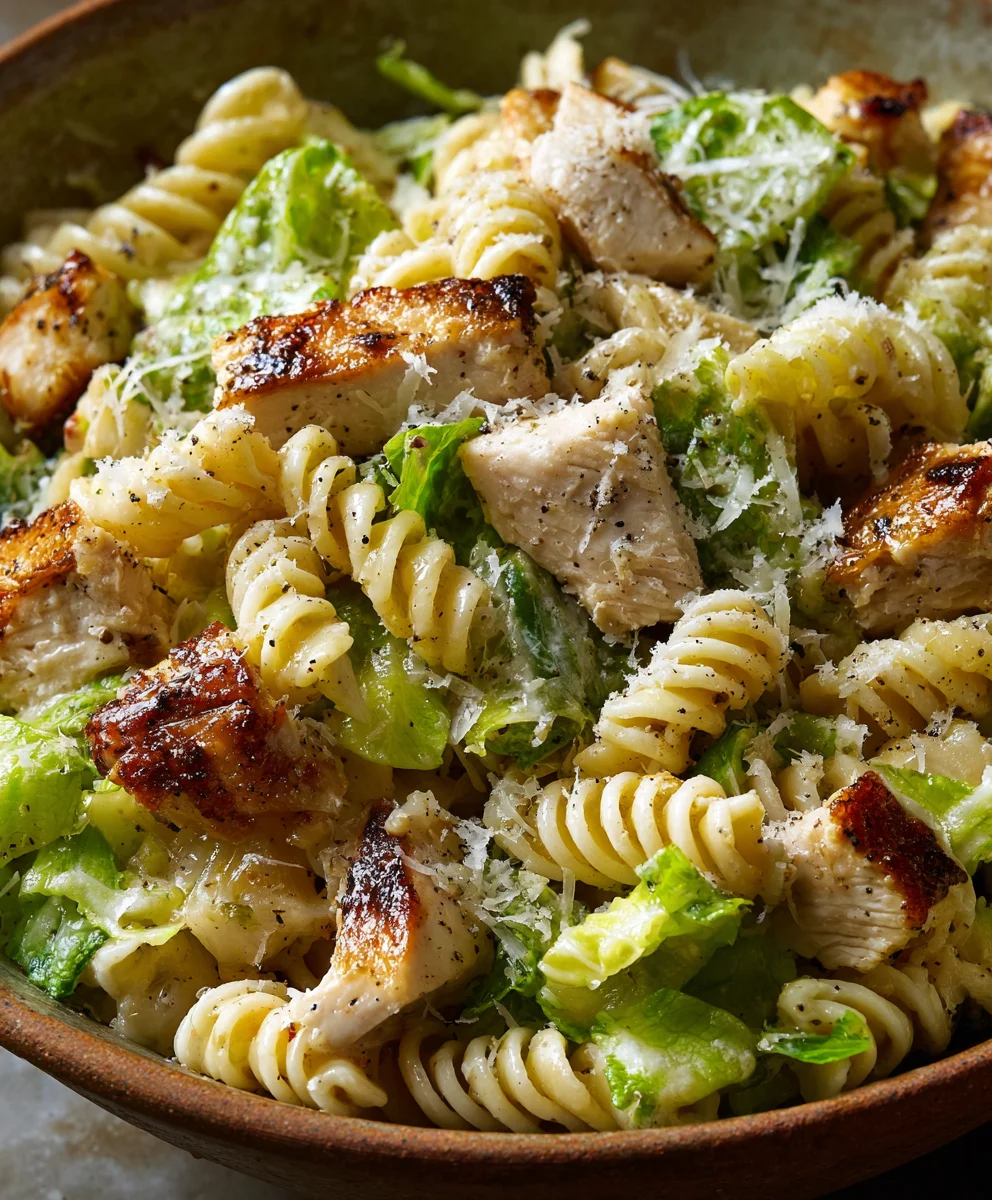
Chicken Caesar Pasta Salad – what a delightful symphony of flavors and textures! I’m absolutely thrilled to present what I believe is the ultimate solution for your lunch, dinner, or next potluck dilemma. Imagine the classic, beloved Caesar salad, elevated with the satisfying addition of tender pasta and succulent chicken, creating a truly unforgettable experience.
The original Caesar salad, reputedly born in Tijuana, Mexico, by chef Caesar Cardini, captured hearts worldwide with its simple yet profound combination of crisp romaine, garlicky croutons, Parmesan, and a distinctive tangy dressing. My version, the Chicken Caesar Pasta Salad, respectfully builds upon this iconic foundation, transforming it into a hearty, main-course-worthy dish that retains all the charm of its predecessor.
People simply adore this creation because it marries convenience with irresistible taste. It’s wonderfully refreshing, yet substantial enough to be incredibly filling. The creamy, zesty dressing coats every piece of al dente pasta, seasoned chicken, and crunchy crouton, offering a perfect balance of savory, tangy, and fresh notes in every single bite. It’s not just a side; it’s a complete meal that’s perfect for making ahead, ensuring stress-free enjoyment whenever hunger strikes.
Ingredients:
- For the Chicken:
- 2 large boneless, skinless chicken breasts (about 1.5 – 2 lbs total)
- 1 tablespoon olive oil (plus more for cooking)
- 1 teaspoon garlic powder
- 1 teaspoon onion powder
- 1/2 teaspoon smoked paprika
- 1/2 teaspoon dried oregano
- 1/4 teaspoon black pepper
- 1/2 teaspoon salt (or to taste)
- Optional: 1 tablespoon fresh lemon juice for marinating
- For the Pasta:
- 12 ounces (about 340g) short pasta, such as rotini, fusilli, penne, or farfalle
- 1 tablespoon olive oil (for tossing pasta)
- Salt for pasta water
- For the Caesar Dressing (Homemade – yields about 1.5 cups):
- 1/2 cup good quality mayonnaise
- 1/4 cup extra virgin olive oil
- 3 tablespoons fresh lemon juice (from about 1-2 lemons)
- 2 cloves garlic, minced very finely or grated
- 1 tablespoon Dijon mustard
- 1 tablespoon Worcestershire sauce
- 1 teaspoon anchovy paste (optional, but highly recommended for authentic flavor)
- 1/2 cup finely grated Parmesan cheese, plus more for garnish
- 1/4 teaspoon black pepper
- Salt to taste (start with 1/4 teaspoon)
- For the Salad Base & Toppings:
- 2 large heads of romaine lettuce, washed, dried, and chopped into bite-sized pieces
- 2 cups prepared croutons (store-bought or homemade)
- 1/2 cup freshly grated Parmesan cheese, plus extra for serving
- Optional garnish: Fresh parsley or chives, finely chopped
Perfectly Cooked Chicken for Your Chicken Caesar Pasta Salad
To truly elevate our Chicken Caesar Pasta Salad, we’ll start with perfectly seasoned and cooked chicken. This step is crucial for flavor and texture, ensuring every bite is as delicious as possible. Whether you prefer grilling for a smoky char or pan-searing for a beautifully caramelized crust, the goal is tender, juicy chicken that complements the creamy pasta and crisp lettuce. Taking the time to properly prepare the chicken will make a noticeable difference in the overall quality and enjoyment of your dish, turning a simple salad into a truly memorable meal. We want robust, savory flavors that stand up to the zesty dressing and hearty pasta, making it a star component of this delightful Chicken Caesar Pasta Salad.
- Prepare the Chicken: Begin by taking your boneless, skinless chicken breasts and patting them completely dry with paper towels. This seemingly small step is critical because moisture on the surface of the chicken can prevent it from browning effectively, leading to steaming rather than searing. A dry surface allows for that desirable golden-brown crust. Place the patted-dry chicken breasts on a clean cutting board, ready for seasoning.
- Seasoning the Chicken: In a small bowl, combine all your dry seasonings: the garlic powder, onion powder, smoked paprika, dried oregano, black pepper, and salt. Give them a quick stir to ensure they’re well mixed. Now, sprinkle this aromatic seasoning blend generously and evenly over both sides of the chicken breasts. Don’t be shy – we want flavor to penetrate! If you wish to add an extra layer of brightness and help tenderize the meat, you can drizzle a tablespoon of fresh lemon juice over the seasoned chicken at this stage. The acidity helps break down muscle fibers slightly and introduces a lovely tang that will marry well with the Caesar flavors.
- Marinate (Optional but Recommended): For deeper flavor and enhanced juiciness, allow the seasoned chicken to sit at room temperature for 15-20 minutes. If you have more time, which is always a bonus, cover the chicken and refrigerate it for at least 30 minutes, or even up to 4 hours. This brief marination period allows the spices to truly penetrate the meat, infusing it with a robust flavor that will shine through in every forkful of your Chicken Caesar Pasta Salad. This step isn’t strictly mandatory if you’re short on time, but it certainly contributes to a more flavorful and tender result.
- Cook the Chicken (Pan-Searing Method): If you’re opting for a pan-seared approach, heat 1 tablespoon of olive oil in a large, heavy-bottomed skillet or a cast-iron pan over medium-high heat. Allow the oil to get shimmering and hot, almost to the smoking point. Carefully place the seasoned chicken breasts in the hot pan, ensuring not to overcrowd it. If your pan is small, it’s better to cook the chicken in batches to maintain high heat and achieve a good sear. Sear for 5-7 minutes per side, without moving the chicken too much, until you achieve a beautiful, deeply golden-brown crust. The internal temperature, when measured with a meat thermometer inserted into the thickest part, should register 165°F (74°C). The initial high heat creates that wonderful crust, while the medium-high setting ensures even cooking without burning the exterior before the interior is done.
- Cook the Chicken (Grilling Method): For a smoky char, preheat your grill to medium-high heat, aiming for a temperature around 400-450°F (200-230°C). Once hot, lightly oil the grill grates to prevent sticking. Carefully place the seasoned chicken breasts directly on the hot grill. Grill for approximately 5-7 minutes per side, or until beautiful, distinct grill marks appear and the internal temperature reaches a safe 165°F (74°C). Grilling imparts a wonderful smoky flavor that pairs exceptionally well with the rich, tangy Caesar dressing in this pasta salad, adding another layer of complexity to your Chicken Caesar Pasta Salad.
- Rest and Slice: Once your chicken is perfectly cooked, remove it from the pan or grill and immediately transfer it to a clean cutting board. Tent it loosely with aluminum foil and allow it to rest for at least 5-10 minutes. This resting period is incredibly crucial! It allows the meat’s juices, which have been driven to the center during cooking, to redistribute evenly throughout the chicken. Skipping this step can result in dry, less flavorful chicken as the juices will simply run out when you cut into it. After resting, slice the chicken against the grain into bite-sized pieces or thin strips, depending on your preference. These perfectly cooked chicken pieces are now ready to be the savory heart of your Chicken Caesar Pasta Salad.
Al Dente Pasta Perfection for Your Chicken Caesar Pasta Salad
The pasta is the foundational element of our Chicken Caesar Pasta Salad, and achieving the right texture is paramount for a truly satisfying dish. We’re aiming for perfectly al dente – tender enough to eat comfortably, but with a slight, pleasant chewiness – and thoroughly cooled. Cooling is vital not only to prevent the pasta from clumping together but also to ensure it absorbs the dressing beautifully without becoming soggy. The right pasta shape will also hold up well and distribute evenly throughout the salad, making every bite of your Chicken Caesar Pasta Salad a textural delight.
- Boil Water: Grab your largest pot and fill it with at least 4-6 quarts of water. The generous amount of water helps the pasta cook evenly and prevents it from sticking. Now, add a substantial amount of salt – I usually add 1-2 tablespoons. This isn’t just about salting the water; it’s about seasoning the pasta itself from the inside out. Since this is a cold dish, the pasta won’t be absorbing flavor from a hot sauce later, so pre-seasoning it is absolutely vital for a flavorful Chicken Caesar Pasta Salad. Bring this generously salted water to a rolling, vigorous boil over high heat before adding any pasta.
- Cook the Pasta: Once your water is at a furious boil, add the 12 ounces of your chosen short pasta (rotini, fusilli, penne, or farfalle are excellent choices for their ability to trap dressing). Stir immediately and occasionally during cooking to prevent the pasta from sticking to the bottom of the pot or to itself. Cook the pasta according to the package directions, but always aim for al dente. This usually means cooking for the minimum recommended time, or even a minute less. The best way to know for sure is to taste a piece of pasta: it should be tender but still have a slight, pleasant resistance when you bite into it. That’s al dente perfection! Overcooked pasta will become mushy and won’t hold up well in a cold salad, compromising the texture of your Chicken Caesar Pasta Salad.
- Drain and Rinse: As soon as the pasta reaches that perfect al dente stage, immediately drain it into a colander. For cold pasta salads, it’s a crucial step to rinse the pasta thoroughly under cold running water. This rinsing serves multiple important purposes: it instantly stops the cooking process (preventing it from becoming overcooked), removes excess starch that can make the pasta sticky, and quickly cools it down. Continue rinsing and tossing the pasta gently in the colander until it is completely cool to the touch. This step ensures your pasta remains separate and firm.
- Toss with Olive Oil: After the pasta is completely cool and has been thoroughly rinsed, give the colander a good shake to remove as much excess water as possible. Transfer the cooled pasta to a large mixing bowl. Drizzle it with 1 tablespoon of olive oil and toss gently but thoroughly. This simple step prevents the pasta from sticking together as it cools further and waits to be assembled. It also adds a lovely, subtle richness and a slight sheen, ensuring that each individual piece of pasta remains distinct and ready to be beautifully coated in the dressing for your delightful Chicken Caesar Pasta Salad.
Crafting the Zesty Caesar Dressing for Your Chicken Caesar Pasta Salad
The Caesar dressing is, without a doubt, the most pivotal component of this entire dish. It’s the magical element that unifies all the distinct flavors and textures into a harmonious, creamy, tangy, and utterly irresistible embrace. While a good quality store-bought dressing can certainly work in a pinch for a quick fix, I wholeheartedly recommend taking a few extra minutes to make your own from scratch. The fresh flavors are simply unparalleled, elevating your Chicken Caesar Pasta Salad from good to absolutely extraordinary. A homemade dressing allows you to control the intensity and balance of each flavor, ensuring it perfectly suits your palate and the other ingredients.
- Prepare Garlic and Lemon: First, let’s get our foundational fresh ingredients ready. If you haven’t already, mince your garlic cloves very finely. For the smoothest dressing texture, you can use a garlic press or grate the garlic on a microplane. This ensures the garlic flavor is evenly distributed without any large, overpowering chunks. Next, squeeze your lemons to get fresh lemon juice. Freshly squeezed lemon juice is paramount here; bottled juice simply won’t offer the same vibrant, zesty brightness that is characteristic of an authentic Caesar dressing.
- Combine Wet Ingredients: In a medium-sized bowl (or a jar if you prefer to shake), combine the 1/2 cup of good quality mayonnaise (which provides the creamy base), the 1/4 cup of extra virgin olive oil (for richness and body), the 3 tablespoons of fresh lemon juice (for essential tang), the finely minced garlic, the 1 tablespoon of Dijon mustard (which adds a wonderful piquant depth and acts as an emulsifier), and the 1 tablespoon of Worcestershire sauce (for a savory, complex umami note). If you’re incorporating anchovy paste (and I truly encourage you to, as it provides that authentic umami depth and classic Caesar flavor without tasting “fishy” at all), add 1 teaspoon now. Whisk all these ingredients vigorously until they are thoroughly combined and the mixture is smooth and emulsified.
- Add Cheese and Seasoning: Now, stir in the 1/2 cup of finely grated Parmesan cheese and the 1/4 teaspoon of black pepper. Whisk again until everything is well incorporated. The Parmesan cheese not only adds a salty, nutty flavor but also helps to thicken the dressing slightly, giving it that luxurious texture that will beautifully coat every piece of your Chicken Caesar Pasta Salad.
- Taste and Adjust: This is arguably the most important step: taste the dressing! A perfect Caesar dressing should be bright, tangy, savory, and beautifully balanced. Take a small spoonful and really savor the flavors. Does it need a pinch more salt? Start with 1/4 teaspoon and add more if needed. Perhaps a little more lemon juice for an extra pop of brightness, or a touch more Worcestershire for a deeper savory note? Don’t be shy about adjusting it until it truly sings to your palate. Remember, this homemade dressing is destined to be the star of your Chicken Caesar Pasta Salad, so ensure it’s absolutely perfect for your taste.
- Chill (Optional): If you have the luxury of time, I highly recommend covering the dressing and refrigerating it for at least 30 minutes, or even longer. This resting period allows all the incredible flavors to meld, deepen, and fully develop, making the dressing even more complex and delicious. However, if you’re eager to proceed, it can certainly be used immediately after preparation.
- Quick Note on Store-Bought Dressing Enhancement: If time constraints mean you’re opting for a store-bought Caesar dressing, you can still significantly elevate it to mimic a homemade quality! Pour your desired amount of store-bought dressing into a bowl. Then, whisk in some fresh minced garlic, a generous squeeze of fresh lemon juice, a dash of Worcestershire sauce, and a substantial grating of fresh Parmesan cheese. Taste and adjust these additions until the dressing achieves a brighter, fresher, and more complex flavor profile. This simple enhancement will greatly improve the overall taste of your Chicken Caesar Pasta Salad.
Prepping the Fresh Elements and Croutons for Your Chicken Caesar Pasta Salad
With our chicken cooked to perfection, our pasta perfectly al dente and cooled, and our zesty Caesar dressing ready to go, we’re now just a few steps away from assembling our magnificent Chicken Caesar Pasta Salad. This phase focuses on preparing the fresh, crunchy components that provide vital contrast and texture, ensuring every bite is dynamic and satisfying. Freshness and proper preparation here are paramount to the success of the salad, as these elements deliver that essential crispness and zest.
- Wash and Chop Romaine: Take your two large heads of romaine lettuce. Begin by removing any outer leaves that appear wilted, damaged, or discolored; we only want the freshest, crispest parts. Separate the remaining leaves and wash them thoroughly under cold running water to remove any dirt or debris. To ensure your salad isn’t watered down, it’s crucial to dry the lettuce completely. You can use a salad spinner, which is highly effective, or gently pat the leaves dry with clean paper towels. Excess moisture on the lettuce will dilute your carefully crafted dressing, so aim for as dry as possible. Once dry, stack the leaves and chop them into uniform, bite-sized pieces, roughly 1-inch squares. Place the chopped romaine in a very large mixing bowl – you’ll need ample space for tossing all the components together without making a mess.
- Prepare Croutons: Croutons are a hallmark of any Caesar salad, adding that essential crunch. If you’re using store-bought croutons, simply measure out 2 cups and set them aside. If you prefer the superior flavor and texture of homemade croutons, you can easily make them: simply toss cubed day-old bread with a little olive oil, garlic powder, salt, and pepper, then toast them in a hot pan or oven until they are golden brown and wonderfully crisp. The key is to allow them to cool completely before adding them to the salad. Adding warm croutons can wilt the lettuce, and adding them too early can lead to sogginess, so patience here ensures their delightful crunch in your Chicken Caesar Pasta Salad.
- Grate Parmesan: For the best flavor and texture in your Chicken Caesar Pasta Salad, ensure you have plenty of freshly grated Parmesan cheese ready. This will be used both within the salad mixture and for garnishing individual servings. Freshly grated Parmesan has a far superior, sharper flavor and a finer, melt-in-your-mouth texture compared to pre-shredded varieties, which often contain anti-caking agents that can give them a slightly grainy mouthfeel. Using a microplane or fine grater will give you beautiful, delicate curls of cheese that integrate perfectly.
Bringing It All Together: Assembling Your Ultimate Chicken Caesar Pasta Salad
The moment we’ve been working towards has arrived! Now it’s time to combine all of our carefully prepared and delicious components into one glorious, satisfying, and utterly irresistible Chicken Caesar Pasta Salad. This final step is all about gentle but thorough mixing to ensure every ingredient is evenly coated with that incredible dressing and integrated into a harmonious whole. Getting the balance right here is key to achieving that perfect blend of flavors and textures that makes this dish so beloved.
- Combine Major Components: In the very large mixing bowl that currently holds your fresh, crisp chopped romaine lettuce, carefully add the cooled, olive-oil-tossed pasta. Next, incorporate the perfectly cooked and sliced chicken. Finally, sprinkle in 1/2 cup of freshly grated Parmesan cheese. Ensure there’s enough room in the bowl to comfortably toss everything without spillage – a crowded bowl makes for a challenging assembly!
- Dress the Salad: Now for the star of the show – the Caesar dressing! Pour about half to two-thirds of your prepared dressing over the ingredients in the bowl. Here’s a crucial tip: always start with less dressing than you think you need! It’s far easier to add more dressing later if the salad seems too dry than it is to rectify an over-dressed, soggy salad. Our goal is for the salad to be well-coated and flavorful, but certainly not swimming in dressing. You want just enough to cling to every ingredient without making anything heavy or wet.
- Toss Gently but Thoroughly: Using large salad tongs, two spatulas, or even your clean hands (which can be very effective for a gentle but thorough mix), begin to gently toss all the ingredients together. Work from the bottom up, ensuring that the dressing is evenly distributed and coats every single piece of pasta, chicken, and lettuce. Continue tossing until everything looks uniformly distributed and lightly dressed. Taste a small piece. If you feel it needs more dressing, add it a tablespoon at a time, tossing gently after each addition, until it reaches your desired level of creaminess and flavor saturation. The goal is a light, even coating, not a heavy saturation.
- Add Croutons: This is a key moment for texture. Add the 2 cups of croutons to the bowl. Toss once or twice more, just enough to incorporate them into the salad without letting them get overly saturated or soggy. I always add the croutons as late as possible during the assembly process to maximize their crunch, which is a vital textural element in a great Chicken Caesar Pasta Salad.
- Final Taste and Adjust: Before serving, take a small portion of the assembled Chicken Caesar Pasta Salad and taste it. This is your last opportunity to perfect the flavors. Does it need a pinch more salt or pepper to really sing? Perhaps a final squeeze of fresh lemon juice for an extra burst of brightness? Don’t hesitate to make these small adjustments; they can elevate a good salad to a truly outstanding one.
- Serve Immediately or Chill: Your incredible Chicken Caesar Pasta Salad is now ready to be enjoyed! For the absolute best texture, especially for the crispness of the croutons and the freshness of the romaine, I highly recommend serving it fresh and immediately after assembly. However, if you’re making it ahead of time, you can store it in an airtight container in the refrigerator for up to 1-2 days. If you plan on chilling it, it’s often best to hold back the croutons and add them just before serving to prevent them from becoming soggy and losing their delightful crunch.
- Garnish and Enjoy: Serve individual generous portions of this magnificent Chicken Caesar Pasta Salad. For an extra touch of elegance and flavor, garnish each serving with an additional sprinkle of freshly grated Parmesan cheese. If you have some on hand, a dash of freshly chopped parsley or chives can add a lovely pop of color and an extra layer of freshness. Prepare for rave reviews and savor every delicious bite of this ultimate crowd-pleaser!
Conclusion:
Essentially, what we’ve whipped up today isn’t just another dish; it’s a culinary triumph that truly brings together the best of all worlds. I genuinely believe this recipe for our incredible Chicken Caesar Pasta Salad is going to become a staple in your home, just as it has in mine. It’s the perfect harmony of robust, savory flavors, satisfying textures, and surprising simplicity, making it an absolute game-changer for busy weeknights, leisurely weekend lunches, or even impressive potluck contributions.
What truly sets this particular Chicken Caesar Pasta Salad apart is its unparalleled convenience without sacrificing an ounce of flavor. We’re talking about a meal that comes together quickly, utilizing ingredients you likely already have or can easily source. The tender, seasoned chicken provides a hearty protein punch, beautifully complemented by the al dente pasta that soaks up every drop of that tangy, creamy Caesar dressing. Then, the crisp freshness of the romaine lettuce, the sharp bite of Parmesan, and the delightful crunch of croutons create a symphony of textures that keeps every mouthful exciting. It’s not just a salad; it’s a full-bodied, satisfying meal that manages to feel both indulgent and refreshingly light all at once. I’ve found myself reaching for this recipe time and time again because it consistently delivers on taste, ease, and sheer enjoyment. It’s the kind of dish that makes you feel like a gourmet chef, even on your most hectic days. The balance of creamy, zesty, and savory notes is simply irresistible, and the inclusion of pasta transforms what could be a light side into a hearty main event, ensuring everyone leaves the table feeling perfectly content. This salad is a true testament to how simple, fresh ingredients can come together to create something truly spectacular and memorable.
Serving Suggestions to Elevate Your Meal
Now, while our Chicken Caesar Pasta Salad is undoubtedly a complete meal in itself, there are always ways to elevate the experience or tailor it to different occasions. For a light lunch, a generous bowl of this salad needs absolutely no accompaniment. However, if you’re serving it for dinner, consider pairing it with a simple side of warm, crusty garlic bread to soak up any extra dressing – a truly divine combination. Alternatively, a cup of homemade tomato basil soup could offer a lovely contrast in temperature and flavor profile, making for a cozy and comforting spread. For a summer barbecue, it shines brightly as a sophisticated side dish alongside grilled burgers, sausages, or even a simple grilled salmon fillet. Its cool, refreshing nature perfectly balances the warmth of grilled meats. You could also serve smaller portions in individual cups or elegant shot glasses for a chic party appetizer, making it easy for guests to mingle and enjoy. For a brunch gathering, it would be a vibrant addition, offering a savory counterpoint to sweeter pastries or fruit platters. Don’t underestimate its potential as a make-ahead dish for picnics or beach days, as the flavors only deepen and meld beautifully after a few hours in the fridge.
Creative Variations to Make it Your Own
One of the most wonderful aspects of cooking is the freedom to experiment and customize, and this Chicken Caesar Pasta Salad is incredibly versatile. Don’t feel bound by the exact ingredients; let your creativity soar! If you’re looking to mix up the protein, cooked shrimp or even flaky baked salmon would make fantastic substitutes for the chicken, adding a different dimension of flavor. For a vegetarian option, consider roasted chickpeas for a textural crunch and protein boost, or grilled halloumi cheese for a salty, chewy bite. Feeling adventurous with your greens? While romaine is classic, baby spinach or mixed greens can also work beautifully. You could even toss in some sun-dried tomatoes for a sweet and tangy burst, or finely diced red onion for an extra zing. A sprinkle of crumbled feta cheese instead of or in addition to Parmesan introduces a lovely salty creaminess. And for those who love a bit of heat, a pinch of red pepper flakes or a dash of hot sauce in the dressing can truly awaken the palate. Homemade croutons, perhaps seasoned with garlic and herbs, will always be superior to store-bought, adding that extra special touch. Consider adding some crispy bacon bits for an extra layer of smoky flavor and crunch, or even some thinly sliced avocado for a creamy, rich element. The possibilities are truly endless, allowing you to adapt this recipe to suit any dietary preference or just your current craving, making it a fantastic canvas for your culinary imagination.
Now that you have all the tips, tricks, and inspiration, I wholeheartedly encourage you to roll up your sleeves and give this incredible Chicken Caesar Pasta Salad a try. It’s more than just a recipe; it’s an invitation to experience simple culinary joy. I promise you, the flavors will speak for themselves, and you’ll wonder why you haven’t been making this all along. Once you’ve whipped up your own batch, please don’t keep the deliciousness to yourself! I would absolutely love to hear about your experience. Did you add a unique twist? Was it a hit with your family or friends? Snap a photo, share your thoughts in the comments below, or even tag me on your social media. Your feedback and creativity inspire me and our entire community. So go ahead, create some magic in your kitchen today, and let’s celebrate good food together!
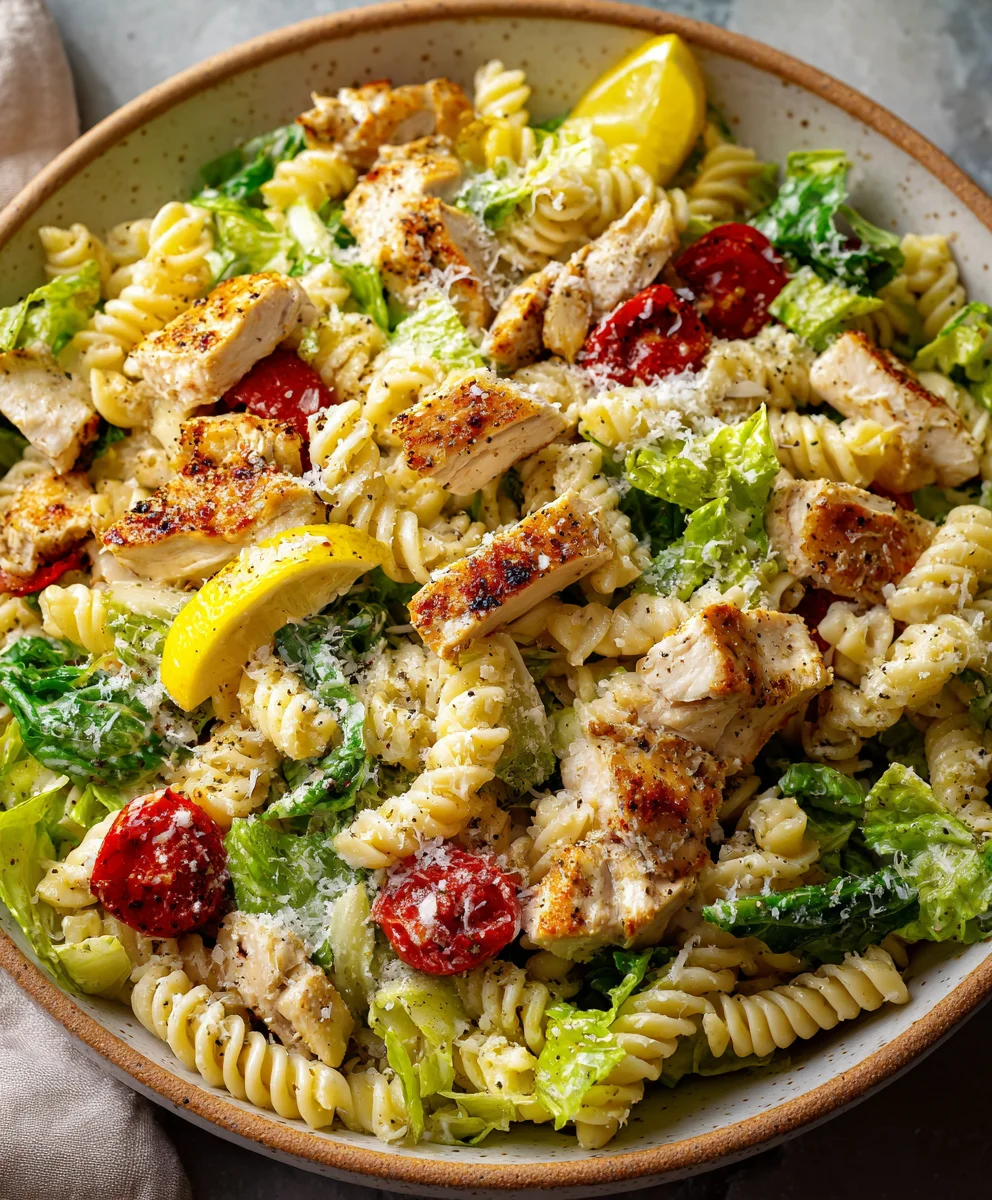
Chicken Caesar Pasta Salad
An easy and creamy recipe for Chicken Caesar Pasta Salad, combining classic Caesar flavors with tender pasta and succulent chicken for a hearty and satisfying meal, perfect for lunch, dinner, or potlucks. This version builds on the iconic Caesar salad foundation, transforming it into a complete, make-ahead dish.
Ingredients
-
2 Chicken breasts (1.5-2 lbs total)
-
1 tbsp Olive oil (for chicken, plus more for cooking)
-
1 tsp Garlic powder
-
1 tsp Onion powder
-
½ tsp Smoked paprika
-
½ tsp Dried oregano
-
¼ tsp Black pepper (for chicken)
-
½ tsp Salt (for chicken, or to taste)
-
1 tbsp Fresh lemon juice (for chicken, optional)
-
12 oz Short pasta (rotini, fusilli, penne, or farfalle)
-
1 tbsp Olive oil (for tossing pasta)
-
Salt (for pasta water)
-
½ cup Mayonnaise (good quality)
-
¼ cup Extra virgin olive oil
-
3 tbsp Fresh lemon juice (for dressing)
-
2 cloves Garlic, minced
-
1 tbsp Dijon mustard
-
1 tbsp Worcestershire sauce
-
1 tsp Anchovy paste (optional, recommended)
-
½ cup Finely grated Parmesan cheese (for dressing)
-
¼ tsp Black pepper (for dressing)
-
¼ tsp Salt (for dressing, to taste)
-
2 large heads Romaine lettuce, chopped
-
2 cups Croutons
-
½ cup Freshly grated Parmesan cheese (for salad, plus extra for serving)
-
Optional garnish: Fresh parsley or chives, chopped
Instructions
-
Step 1
Pat chicken breasts dry. In a small bowl, combine garlic powder, onion powder, smoked paprika, oregano, black pepper, and ½ tsp salt. Season chicken generously; drizzle with 1 tbsp lemon juice if desired. Marinate at room temperature for 15-20 minutes, or refrigerate for 30 minutes to 4 hours. -
Step 2
For pan-searing: Heat 1 tbsp olive oil in a large skillet over medium-high heat. Sear chicken 5-7 minutes per side until golden brown and internal temperature reaches 165°F (74°C). For grilling: Preheat grill to medium-high (400-450°F). Lightly oil grates. Grill chicken 5-7 minutes per side until grill marks appear and internal temperature reaches 165°F (74°C). -
Step 3
Transfer cooked chicken to a cutting board, tent with foil, and rest for 5-10 minutes. Slice against the grain into bite-sized pieces or strips. -
Step 4
Bring 4-6 quarts of generously salted water to a rolling boil. Add 12 oz short pasta and cook according to package directions until al dente (tender with a slight chew). -
Step 5
Drain pasta immediately and rinse thoroughly under cold running water until completely cool to stop cooking and remove excess starch. Shake off excess water. Transfer to a large mixing bowl and toss with 1 tbsp olive oil to prevent sticking. -
Step 6
In a medium bowl, whisk together ½ cup mayonnaise, ¼ cup extra virgin olive oil, 3 tbsp fresh lemon juice, 2 cloves minced garlic, 1 tbsp Dijon mustard, 1 tbsp Worcestershire sauce, and 1 tsp anchovy paste (if using). Whisk until smooth and emulsified. -
Step 7
Stir in ½ cup grated Parmesan cheese and ¼ tsp black pepper. Taste and adjust salt (starting with ¼ tsp), lemon juice, or Worcestershire to achieve desired balance. (Optional: Refrigerate dressing for 30+ minutes for flavors to meld). -
Step 8
Wash, thoroughly dry, and chop 2 heads of romaine lettuce into bite-sized pieces. Measure out 2 cups of croutons. Grate ½ cup Parmesan cheese for the salad, plus extra for serving. -
Step 9
To the large bowl with the cooled pasta, add the chopped romaine lettuce, sliced chicken, and ½ cup grated Parmesan cheese. -
Step 10
Pour about half to two-thirds of the prepared Caesar dressing over the ingredients. Using large tongs, gently but thoroughly toss until all components are evenly coated. Add more dressing gradually if needed, ensuring a light, even coating. -
Step 11
Add the 2 cups of croutons to the salad. Toss once or twice more, just enough to incorporate them without making them soggy. -
Step 12
Taste the assembled salad and adjust seasonings (salt, pepper, or a final squeeze of lemon juice) as desired. Serve immediately for best texture, garnished with extra grated Parmesan and optional fresh parsley or chives. If making ahead, store refrigerated and add croutons just before serving.
Important Information
Nutrition Facts (Per Serving)
It is important to consider this information as approximate and not to use it as definitive health advice.
Allergy Information
Please check ingredients for potential allergens and consult a health professional if in doubt.
Leave a Comment