
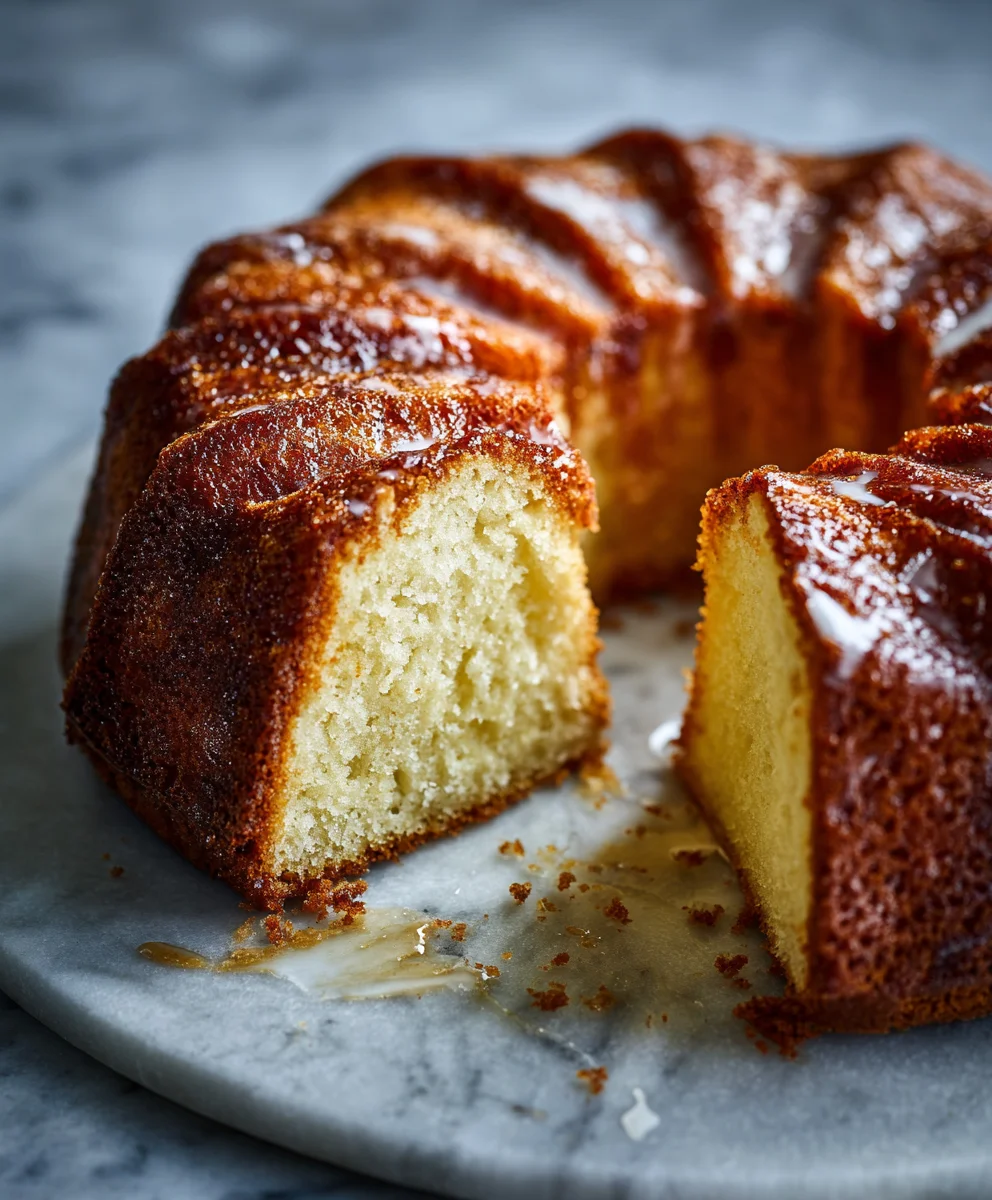
Sour Cream Cake – just the name evokes a sense of comforting, classic Americana. Imagine a slice of pure perfection: a cake so incredibly moist, with a remarkably tender crumb that practically melts in your mouth, offering that delightful balance of sweet richness cut beautifully by a subtle, tangy note. This isn’t just any dessert; it’s a testament to the magic that a simple ingredient like sour cream can bring to baking, transforming a basic cake into something truly extraordinary.
A Beloved Classic for Every Occasion
While its origins might trace back to European baking traditions, the Sour Cream Cake has firmly cemented itself as a beloved staple in American kitchens, particularly known for its appearance at family gatherings, potlucks, and as a comforting weekend treat. Its enduring popularity stems from its unparalleled texture – the sour cream acts as a secret ingredient, adding not only incredible moisture and a finer crumb but also a lovely complexity to the flavor profile. People adore it not just for its incredible taste, but for its remarkable versatility; it’s equally at home as a humble coffee cake for breakfast or dressed up with an elegant glaze for a celebratory dessert. I am truly thrilled to guide you through crafting this timeless classic in your own kitchen.
Ingredients:
-
For the Sour Cream Cake Layers:
- 2 ½ cups (300g) all-purpose flour, sifted
- 1 ½ teaspoons baking powder
- ¾ teaspoon baking soda
- ½ teaspoon salt
- 1 cup (226g) unsalted butter, very soft, at room temperature
- 2 cups (400g) granulated sugar
- 4 large eggs, at room temperature
- 1 teaspoon pure vanilla extract
- 1 ½ cups (360g) full-fat sour cream, at room temperature
-
For the Cream Cheese Frosting:
- 1 cup (226g) unsalted butter, very soft, at room temperature
- 8 ounces (226g) full-fat cream cheese, very soft, at room temperature
- 4 cups (480g) powdered sugar, sifted
- 1 ½ teaspoons pure vanilla extract
- ¼ teaspoon salt
Preparing Your Workspace and Oven
- Preheat your oven and prepare the cake pans: Before we even think about mixing, let’s get our oven ready. Preheat your oven to 350°F (175°C). This ensures a consistent temperature from the moment your cake goes in, which is crucial for even baking. Next, take out three 8-inch round cake pans. Generously grease them with butter or baking spray, then dust them lightly with flour, tapping out any excess. For an extra layer of non-stick assurance, I always like to line the bottoms of the pans with parchment paper circles. This step is a lifesaver when it comes to getting those beautiful Sour Cream Cake layers out of the pan without sticking or breaking.
- Measure and prepare dry ingredients: In a medium bowl, whisk together your sifted all-purpose flour, baking powder, baking soda, and salt. Sifting the flour isn’t just a suggestion; it truly makes a difference in the texture of your final cake. It helps to aerate the flour, preventing lumps and ensuring that the leavening agents are evenly distributed throughout the dry mixture. This leads to a lighter, more tender crumb for our gorgeous Sour Cream Cake. Set this dry mixture aside.
Crafting the Perfect Sour Cream Cake Batter
- Cream the butter and sugar: In the large bowl of your stand mixer, fitted with the paddle attachment (or using a hand-held electric mixer), add the very soft unsalted butter. Begin to beat the butter on medium speed for about 2 minutes until it becomes light and creamy. Then, gradually add the granulated sugar, about ¼ cup at a time, continuing to beat on medium-high speed. This creaming process is absolutely vital; it incorporates air into the butter and sugar mixture, which contributes significantly to the cake’s lift and tender texture. Keep beating for a full 3-5 minutes after all the sugar is added, or until the mixture is visibly light in color and fluffy. Scrape down the sides of the bowl often to ensure everything is well combined. This is the foundation for a truly moist and delicate Sour Cream Cake.
- Incorporate the eggs and vanilla: With the mixer on medium-low speed, add the large eggs one at a time, beating well after each addition. It’s important to give each egg ample time to incorporate fully into the butter mixture before adding the next. This creates a stable emulsion, preventing your batter from looking curdled. After all the eggs are in, mix in the pure vanilla extract. The vanilla enhances the overall flavor profile, adding a warm, comforting note to our Sour Cream Cake. Beat for another minute, scraping down the bowl as needed, ensuring all ingredients are harmoniously blended.
-
Alternate dry ingredients with sour cream: Now for the key ingredient that gives our cake its name and incredible moisture – the sour cream! With the mixer on the lowest speed, or even by hand if you prefer more control, you’re going to add the dry ingredient mixture and the full-fat sour cream to the wet ingredients in an alternating fashion.
Start by adding about one-third of the dry ingredients to the wet mixture, mixing just until almost combined. Then, add half of the sour cream, mixing until just barely incorporated. Repeat this process: add the second third of the dry ingredients, mix, then the remaining sour cream, mix, and finally, the last third of the dry ingredients.
Here’s the critical part: Do not overmix! Overmixing develops the gluten in the flour, which will lead to a tough, dense cake – the opposite of what we want for a light and fluffy Sour Cream Cake. Mix only until the last streaks of flour disappear. A few small lumps are perfectly fine. Once the flour is just incorporated, stop the mixer. I usually finish with a quick hand-stir with a rubber spatula to ensure no pockets of unmixed ingredients are hiding at the bottom of the bowl, without overworking the batter. This gentle approach guarantees a tender crumb.
Baking the Moist Sour Cream Cake Layers
-
Divide the batter and bake: Evenly divide the perfectly crafted Sour Cream Cake batter among your three prepared 8-inch cake pans. You can eyeball it, or for absolute precision, use a kitchen scale to ensure each pan receives the exact same amount of batter. This helps ensure all layers bake evenly and are of a uniform thickness, making assembly much easier later on. Gently smooth the tops of the batter with an offset spatula.
Place the pans into your preheated 350°F (175°C) oven. If your oven is large enough, try to place them on the middle rack without them touching each other or the oven walls. If you have a smaller oven, you might need to bake them in two batches, or rotate them halfway through.
Bake for 28-32 minutes, or until a wooden skewer or toothpick inserted into the center of a cake comes out clean or with only a few moist crumbs attached. The edges should be lightly golden brown and the centers should spring back when gently pressed. Don’t open the oven door too early, especially during the first 20 minutes, as this can cause the cakes to sink.
- Cool the cake layers: Once baked, remove the cakes from the oven and let them cool in their pans on a wire rack for 10-15 minutes. This allows the cakes to set up properly and makes them easier to handle. After this initial cooling period, carefully invert the cakes onto the wire rack, peel off the parchment paper circles (if used), and let them cool completely. It is absolutely essential that the cake layers are completely cool before you attempt to frost them. If they are even slightly warm, your beautiful cream cheese frosting will melt and slide right off, turning your masterpiece into a mess. Patience is a virtue when making a beautiful Sour Cream Cake! This can take anywhere from 1 to 2 hours, depending on your room temperature.
Whipping Up the Velvety Cream Cheese Frosting
-
Prepare the cream cheese and butter: While your cake layers are cooling, let’s get started on the luscious cream cheese frosting. Ensure both your unsalted butter and full-fat cream cheese are very soft and at room temperature. This is crucial for a smooth, lump-free frosting. If they are too cold, your frosting will be lumpy and difficult to spread; if too warm, it can be too thin.
In the bowl of your stand mixer, fitted with the paddle attachment, or using a hand mixer, beat the softened butter and cream cheese together on medium speed for 3-4 minutes. You want this mixture to be incredibly light, fluffy, and completely smooth, with no lumps of cream cheese remaining. Scrape down the sides of the bowl frequently to ensure everything is incorporated evenly. This initial creaming sets the stage for a perfect frosting for your Sour Cream Cake.
-
Add powdered sugar and flavorings: Reduce the mixer speed to low. Gradually add the sifted powdered sugar, one cup at a time, mixing well after each addition until fully incorporated. If you add it too quickly, you’ll end up with a cloud of powdered sugar covering your kitchen! Once all the sugar is in, increase the speed to medium-high and beat for another 2-3 minutes until the frosting is light, fluffy, and wonderfully smooth.
Finally, beat in the pure vanilla extract and the pinch of salt. The vanilla deepens the flavor, while a tiny bit of salt perfectly balances the sweetness of the frosting and enhances the rich tanginess of the cream cheese, making it the ideal complement to our moist Sour Cream Cake. Give it one last scrape down and beat on medium-high for 30 seconds to ensure everything is perfectly aerated and blended. You should have a thick, spreadable, and utterly delicious frosting.
Assembling Your Magnificent Sour Cream Cake
- Level the cake layers (optional but recommended): If your cake layers have domed tops, you can level them using a serrated knife or a cake leveler. This creates flat surfaces, making your cake much more stable and aesthetically pleasing. You can snack on the trimmed bits – a chef’s perk! For a simple Sour Cream Cake, sometimes a slight dome is charming, but for a professional look, leveling is key.
-
Apply a crumb coat: Place one cooled cake layer on your serving platter or cake stand. Spread about ¾ cup of the cream cheese frosting evenly over the top using an offset spatula. Place the second cake layer on top, and repeat with another ¾ cup of frosting. Top with the third cake layer.
Now, apply a very thin layer of frosting all over the top and sides of the entire cake. This is called the “crumb coat,” and its purpose is to trap any loose crumbs, preventing them from mixing into your final, pristine layer of frosting. Don’t worry about perfection here; just get a thin, even coat.
Refrigerate the cake for 15-20 minutes, or until the crumb coat is firm to the touch. This chilling time is essential for stabilizing the cake and setting that crumb coat, making the final frosting much easier and cleaner.
-
Apply the final frosting layer: Once the crumb coat is firm, take the cake out of the refrigerator. Now, generously apply the remaining cream cheese frosting to the top and sides of your Sour Cream Cake. Use your offset spatula to spread it smoothly, working your way around the cake until it’s beautifully coated. You can create swoops and swirls for a rustic look, or strive for a perfectly smooth finish if you have the tools and patience.
For a truly impressive finish, you can use a cake scraper to achieve super straight sides. Feel free to decorate with a few fresh berries, lemon zest, or even some edible flowers to elevate its presentation. This final step transforms your home-baked layers into a show-stopping Sour Cream Cake.
Serving and Storage Tips
- Chill before serving: For the cleanest slices and to allow the frosting to fully set, I recommend chilling your assembled Sour Cream Cake in the refrigerator for at least 30 minutes, or even an hour, before slicing and serving. This allows the cake and frosting to firm up, making it much easier to cut neat pieces.
- Serving: Bring the cake to room temperature for about 20-30 minutes before serving, if it has been refrigerated for a long time. The flavors and textures of both the cake and frosting are best enjoyed when not overly chilled. Slice with a sharp, warm knife for the cleanest cuts.
- Storage: Any leftover Sour Cream Cake should be stored in an airtight container in the refrigerator for up to 3-4 days. Because of the cream cheese in the frosting, it needs to be kept cool. You can also freeze individual slices or the entire cake (unfrosted layers freeze beautifully, too!) for longer storage. If freezing a whole frosted cake, chill it until very firm, then wrap it tightly in plastic wrap and then aluminum foil. Thaw in the refrigerator overnight before serving. Enjoy your incredible homemade Sour Cream Cake!
Conclusion:
So, there you have it – my absolute favorite recipe for a cake that truly stands out from the crowd. This isn’t just any cake; it’s a testament to how simple, humble ingredients, when combined with a little love and the right technique, can create something truly extraordinary. The star of the show, of course, is the sour cream, which works wonders in transforming the texture and flavor profile. You’ll find that this cake possesses an incredible tenderness and a melt-in-your-mouth quality that is simply unmatched by other recipes. It’s the kind of dessert that makes you close your eyes and savor every single bite, offering a subtle, delightful tang that beautifully balances its inherent sweetness. It feels both comforting and sophisticated, making it suitable for any occasion, from a casual weeknight treat to a special celebration where you want to impress.
I truly believe that once you try this particular Sour Cream Cake, you’ll understand why it has become a staple in my kitchen and why I’m so passionate about sharing it with you. Its unique moistness and rich flavor profile make it an instant classic that you’ll want to bake again and again. It’s surprisingly easy to whip up, meaning you don’t need to be an expert baker to achieve stunning results. The joy of pulling this golden, fragrant cake from the oven is an experience I wish everyone could have.
Serving Suggestions to Elevate Your Cake Experience:
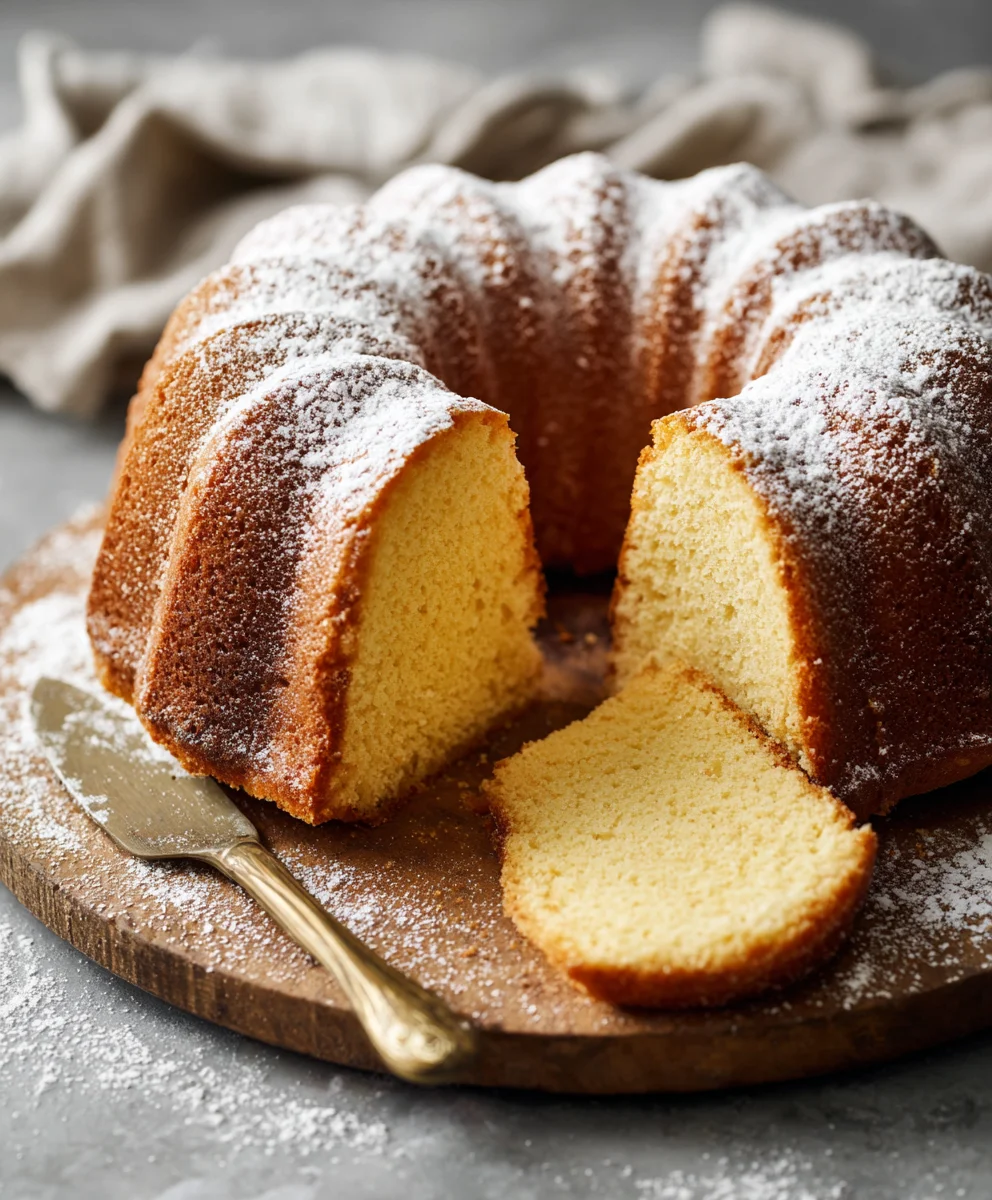
While perfect on its own with just a delicate dusting of powdered sugar, allowing its pure flavor to shine through, you can definitely elevate this cake with a few thoughtful additions:
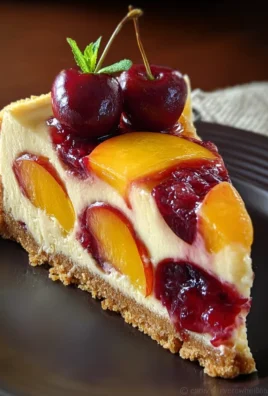
- Fresh Berries: A vibrant mix of strawberries, raspberries, and blueberries creates a beautiful contrast in color and a burst of fresh, juicy flavor that complements the cake wonderfully.
- Whipped Cream or Ice Cream: A dollop of freshly whipped cream or a scoop of premium vanilla bean ice cream adds a luxurious, creamy touch that simply melts in your mouth alongside the cake.
- Sauces: For something richer, consider a warm drizzle of homemade caramel sauce, a tangy lemon curd, or even a decadent chocolate ganache. Each adds a new dimension of flavor.
- Fruit Compote: A warm or cold berry compote, perhaps with a hint of citrus or spice, can turn this simple cake into a gourmet dessert.
Exciting Variations to Explore:
Feeling a little adventurous? The beauty of this recipe lies in its incredible versatility, serving as a perfect canvas for your culinary creativity. Here are a few ideas to get you started:
- Chocolate Chip Sour Cream Cake: Fold in a cup of mini chocolate chips (or even white chocolate chips!) into the batter for a delightful chocolatey twist that’s sure to be a crowd-pleaser.
- Citrus Zest: Add the zest of an orange or lemon to the batter for a brighter, more aromatic, and undeniably zesty note that really lifts the flavor.
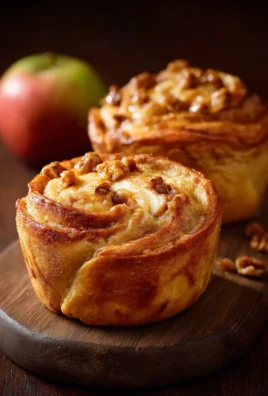
- Nutty Crunch: A sprinkle of chopped nuts like pecans, walnuts, or almonds on top before baking adds a lovely crunch and a rich, earthy flavor.
- Layer Cake Transformation: Double the recipe and bake it in two round pans, then fill it with a luscious cream cheese frosting, a simple fruit jam, or even a lemon curd for a show-stopping layered creation.
- Seasonal Flavors: For a seasonal touch, consider incorporating pumpkin spice for an autumn delight or a cranberry-orange combination around the holidays. The possibilities are truly endless with this adaptable base.
I genuinely hope you’ll give this incredible Sour Cream Cake a try in your own kitchen. Baking is such a joyful and rewarding experience, and there’s truly nothing quite like the aroma of a homemade cake filling your home. Imagine the delight on your family’s faces, or the appreciation of your friends, as they bite into a slice of this incredibly moist and flavorful creation that you’ve made with your own hands. I am absolutely thrilled for you to experience the magic of this recipe, and I have no doubt it will become a cherished favorite in your baking repertoire.
Once you’ve baked it, I would absolutely love to hear about your experience! Did you stick to the classic version, or did you venture into exciting variations? What did your family and friends think? Please feel free to leave a comment below and, if you’re comfortable, share your photos with us. Your culinary adventures inspire me and our entire community of home bakers. Let’s celebrate the joy of baking together. Happy baking, my friends!
Frequently Asked Questions (FAQs)
What does sour cream do for a cake?
Sour cream is a secret weapon in baking! It adds incredible moisture, richness, and tenderness to cakes, ensuring a soft, velvety crumb that practically melts in your mouth. Its slight acidity also helps activate baking soda, contributing to a good rise, and it imparts a subtle, pleasant tang that beautifully balances the cake’s sweetness.
Can I substitute sour cream in a cake recipe?
While sour cream is truly ideal for achieving the perfect texture and flavor in this recipe, you can sometimes substitute it with plain full-fat yogurt (Greek yogurt might be too thick unless thinned slightly with a bit of milk), buttermilk, or even crème fraîche. However, using sour cream will undoubtedly yield the very best results in terms of texture and the unique, delicious flavor for this specific Sour Cream Cake.
How should I store Sour Cream Cake?
To keep your cake fresh and wonderfully moist, store it well-covered at room temperature for up to 2-3 days. If your kitchen tends to be very warm, or if your cake features a perishable frosting (like a cream cheese frosting), it’s always best to store it in the refrigerator. Just remember to bring it back to room temperature for about an hour before serving for the absolute best flavor and texture!
Can you freeze Sour Cream Cake?
Absolutely! This cake freezes beautifully, making it perfect for preparing ahead or saving leftovers. Once your cake is completely cooled, wrap it tightly first in plastic wrap, then add an additional layer of aluminum foil. You can freeze it for up to 2-3 months without compromising its quality. To thaw, simply unwrap it and let it sit at room temperature for several hours or overnight. It will taste just as wonderful and fresh as if it were just baked!
What frosting pairs best with Sour Cream Cake?
The beauty of this cake is its incredible versatility when it comes to pairings. A simple dusting of powdered sugar is elegantly understated and allows the cake’s own rich flavor to truly shine. However, a classic cream cheese frosting is a highly recommended choice, as its tangy sweetness perfectly complements the cake. Other fantastic options include a bright lemon glaze, a rich chocolate ganache, or even a simple vanilla buttercream to enhance its inherent goodness.
Why did my Sour Cream Cake come out dry or dense?
A common culprit for a dry cake is overbaking. Keep a close eye on your oven and start checking for doneness a few minutes before the recipe indicates. For a dense texture, ensure you’re not overmixing the batter once the dry ingredients have been added; overmixing develops gluten, which can lead to a tougher, denser crumb. Also, always double-check that your leavening agents (baking soda and baking powder) are fresh and active!
Classic Sour Cream Cake: Rich, Moist, and Tangy Recipe
A comforting, classic Sour Cream Cake that’s incredibly moist with a tender crumb, offering a delightful balance of sweet richness and subtle tang. This beloved American classic is perfect for family gatherings, potlucks, or a comforting weekend treat. It also shines at brunch, serving wonderfully alongside fresh fruit and hot coffee, and can be baked into individual cupcakes for bake sales or parties. Its versatility and delicious flavor make it a consistently requested recipe.
Ingredients
-
2 ½ cups (300g) all-purpose flour
-
1 ½ teaspoons baking powder
-
¾ teaspoon baking soda
-
½ teaspoon salt
-
1 cup (226g) unsalted butter, softened
-
2 cups (400g) granulated sugar
-
4 large eggs, room temperature
-
1 teaspoon pure vanilla extract
-
1 ½ cups (360g) full-fat sour cream, room temperature
-
For the Cream Cheese Frosting:
-
1 cup (226g) unsalted butter, softened
-
8 ounces (226g) full-fat cream cheese, softened
-
4 cups (480g) powdered sugar, sifted
-
1 ½ teaspoons pure vanilla extract
-
¼ teaspoon salt
Instructions
-
Step 1
Preheat oven to 350°F (175°C). Grease and flour three 8-inch round cake pans; line bottoms with parchment paper. In a medium bowl, whisk together sifted all-purpose flour, baking powder, baking soda, and salt. Set aside. -
Step 2
In a stand mixer with the paddle attachment, beat softened butter on medium speed for 2 minutes until creamy. Gradually add granulated sugar, beating on medium-high for 3-5 minutes until light and fluffy. Scrape down sides often. -
Step 3
On medium-low speed, add eggs one at a time, beating well after each. Mix in vanilla extract. Beat for another minute, scraping the bowl. -
Step 4
On the lowest speed, alternately add dry ingredients and sour cream to the wet mixture, starting and ending with dry ingredients (1/3 dry, 1/2 sour cream, 1/3 dry, remaining sour cream, 1/3 dry). Mix until just combined; do not overmix. Finish with a quick hand-stir. -
Step 5
Evenly divide batter among prepared pans. Bake for 28-32 minutes, or until a wooden skewer inserted into the center comes out clean. Do not open the oven door during the first 20 minutes. -
Step 6
Cool cakes in pans on a wire rack for 10-15 minutes. Invert cakes onto the wire rack, remove parchment, and cool completely for 1-2 hours before frosting. -
Step 7
In a stand mixer with the paddle attachment, beat softened butter and cream cheese on medium speed for 3-4 minutes until light, fluffy, and smooth. Reduce speed to low and gradually add sifted powdered sugar, one cup at a time. Increase speed to medium-high and beat for 2-3 minutes until light and fluffy. Beat in vanilla extract and salt. Scrape down and beat for 30 seconds. -
Step 8
Level cake layers if desired. Place first layer on a serving platter, spread with ¾ cup frosting. Repeat with the second layer. Top with the third layer. Apply a thin layer of frosting all over the cake for a crumb coat. Refrigerate for 15-20 minutes until firm. -
Step 9
Once crumb coat is firm, apply the remaining frosting generously to the top and sides of the cake. Smooth or create swirls. Decorate with fresh berries or lemon zest if desired. -
Step 10
Chill assembled cake for at least 30-60 minutes before slicing for clean cuts. Bring to room temperature for 20-30 minutes before serving. Store leftover cake in an airtight container in the refrigerator for up to 3-4 days. Cake layers can be frozen.
Important Information
Nutrition Facts (Per Serving)
It is important to consider this information as approximate and not to use it as definitive health advice.
Allergy Information
Please check ingredients for potential allergens and consult a health professional if in doubt.
Leave a Comment