
Cherry Cupcakes are more than just a delightful dessert; they are a celebration of vibrant flavor and joyful moments. Imagine sinking your teeth into a light, airy cake, each bite infused with the irresistible sweet-tart essence of luscious cherries, perfectly complemented by a swirl of creamy, dreamy frosting. It’s an experience that awakens the senses and brightens any occasion, transforming a simple treat into something truly special.
While the humble cupcake has charmed hearts since the early 19th century, the addition of fresh, juicy cherries elevates this classic treat to an entirely new level. Cherries themselves boast a rich history, cherished for centuries across cultures for their beautiful color and exquisite taste, often symbolizing summer’s bounty and good fortune. This recipe beautifully marries that timeless appeal with the convenience and individual charm of a cupcake, making it a beloved choice for gatherings and celebrations.
What makes people utterly fall in love with these treats? It’s the harmonious blend of textures – the moist crumb of the cake, the juicy pockets of fruit that burst with flavor, and the velvety smoothness of the topping. These stunning Cherry Cupcakes offer a burst of freshness and a delightful visual appeal, making them an absolute showstopper for picnics, parties, or simply a sweet afternoon indulgence. Get ready to bake a batch of pure happiness, guaranteed to impress!
Ingredients:
For the Cherry Cupcakes:
- 2 ½ cups (300g) all-purpose flour: I always use a good quality, unbleached all-purpose flour for the best texture in my cherry cupcakes. Make sure to level your measurements!
- 2 teaspoons baking powder: This is our leavening agent, helping the cupcakes rise beautifully and achieve that soft, airy crumb we all love.
- ½ teaspoon salt: Just a touch of salt enhances all the other flavors, balancing the sweetness and bringing out the bright cherry notes.
- 1 cup (226g) unsalted butter, softened: It’s crucial that your butter is truly softened to room temperature – not melted, not cold. This ensures it creams properly with the sugar, creating a light and fluffy base for our batter.
- 1 ¾ cups (350g) granulated sugar: For that perfect balance of sweetness in every bite of these delightful cherry cupcakes.
- 4 large eggs, at room temperature: Room temperature eggs incorporate much better into the butter and sugar mixture, leading to a smoother, more emulsified batter.
- 1 teaspoon pure vanilla extract: A good quality vanilla extract adds a wonderful depth of flavor that complements the cherries beautifully.
- 1 cup (240ml) buttermilk, at room temperature: Buttermilk is a secret weapon in baking! Its acidity reacts with the baking powder, resulting in an incredibly tender and moist cupcake. If you don’t have buttermilk, you can make your own by adding 1 tablespoon of lemon juice or white vinegar to regular milk and letting it sit for 5-10 minutes.
- 1 ½ cups (about 250g) fresh cherries, pitted and chopped: This is the star of our show! I highly recommend fresh cherries when they’re in season for the best flavor and texture. If using frozen, make sure they are thawed and well-drained.
- 1 tablespoon all-purpose flour (for coating cherries): This small step is a game-changer for preventing the cherries from sinking to the bottom of your cupcakes!
For the Cherry Buttercream Frosting:
- 1 cup (226g) unsalted butter, softened: Again, room temperature butter is key for a smooth, creamy frosting.
- 4-5 cups (480-600g) powdered sugar (confectioners’ sugar), sifted: Sifting is important to avoid lumps in your frosting. I adjust the amount based on desired sweetness and consistency.
- 1 teaspoon pure vanilla extract: To enhance the overall flavor profile.
- ¼ teaspoon salt: A pinch of salt helps cut through the sweetness and balances the frosting.
- 3-5 tablespoons cherry juice or cherry puree: For that vibrant cherry flavor and beautiful pink hue! You can get this from fresh cherries by muddling them and straining, or by using a good quality store-bought cherry juice. Start with less and add more until you reach your desired consistency and flavor.
- Red or pink food coloring (optional): Just a drop or two if you want to achieve a more intense color in your frosting.
- Fresh cherries or chocolate shavings (for garnish, optional): For that extra touch of elegance and flavor when serving your stunning cherry cupcakes.
Equipment You’ll Need:
- Standard 12-cup muffin tin(s)
- Paper cupcake liners
- Large mixing bowls (at least two)
- Electric mixer (stand mixer with paddle attachment or handheld mixer)
- Whisk
- Rubber spatula
- Measuring cups and spoons
- Small bowl for coating cherries
- Cherry pitter (highly recommended if using fresh cherries)
- Sharp knife and cutting board
- Ice cream scoop or large spoon for portioning batter
- Wire cooling rack
- Piping bag with a large star tip (like Wilton 1M or 2D) or an offset spatula for frosting
- Sifter for powdered sugar
Preparing for Baking My Delicious Cherry Cupcakes
- Preheat Your Oven and Prepare Your Muffin Tins: First things first, I always preheat my oven to 350°F (175°C). This ensures the oven is at a consistent temperature when the cupcakes go in, which is crucial for even baking and a perfect rise. While the oven heats up, I line a 12-cup standard muffin tin with paper cupcake liners. If I’m making a larger batch of these delightful cherry cupcakes, I’ll prepare additional tins as needed. Using liners makes cleanup a breeze and helps the cupcakes maintain their shape.
- Prepare the Fresh Cherries: This step is key for success with our cherry cupcakes! If you’re using fresh cherries, start by washing them thoroughly. Then, using a cherry pitter (which is a fantastic tool and makes this process so much faster!), pit all the cherries. Once pitted, I chop them into small, bite-sized pieces, roughly ¼ to ½ inch in size. Uniform pieces ensure they distribute evenly throughout the batter. Now, here’s my trick to prevent them from sinking: in a small bowl, gently toss the chopped cherries with 1 tablespoon of all-purpose flour until they are lightly coated. This light flour coating helps them suspend in the batter during baking, rather than all congregating at the bottom. Set these aside for later. If you’re using frozen cherries, thaw them completely and pat them very dry with paper towels to remove excess moisture before tossing them with flour.
Crafting the Perfect Cherry Cupcake Batter
- Whisk Together Dry Ingredients: In a medium-sized bowl, I whisk together the 2 ½ cups of all-purpose flour, 2 teaspoons of baking powder, and ½ teaspoon of salt. Whisking ensures these dry ingredients are thoroughly combined and aerated, which contributes to the light texture of our cherry cupcakes. Set this bowl aside.
- Cream the Butter and Sugar: In a large mixing bowl, using an electric mixer (either a stand mixer with the paddle attachment or a handheld mixer), I beat the 1 cup of softened unsalted butter on medium speed for about 1 minute until it’s creamy. Then, I gradually add the 1 ¾ cups of granulated sugar to the butter, beating on medium-high speed for 3-5 minutes. This creaming process is incredibly important! You want the mixture to become noticeably lighter in color, pale yellow, and incredibly fluffy. This step incorporates air into the butter and sugar, which is what gives our cupcakes their tender crumb and helps them rise. Don’t rush this part – it truly makes a difference in the final texture of your cherry cupcakes.
- Incorporate the Eggs and Vanilla: With the mixer still running on medium speed, I add the 4 large eggs, one at a time, beating well after each addition until fully incorporated. After all the eggs are in, I beat for another minute or so to ensure everything is thoroughly mixed and fluffy. Make sure to scrape down the sides of the bowl with your rubber spatula after adding each egg to ensure everything is incorporated evenly. Finally, I mix in the 1 teaspoon of pure vanilla extract until just combined. The batter should look smooth and luscious at this point.
- Alternate Adding Dry Ingredients and Buttermilk: Now it’s time to bring everything together. With the mixer on low speed, I alternate adding the dry ingredient mixture and the 1 cup of buttermilk to the wet ingredients. I start by adding about one-third of the dry ingredients, mixing just until almost combined. Then, I add half of the buttermilk, mixing until just incorporated. I repeat this process: another third of the dry ingredients, the remaining buttermilk, and finally, the last third of the dry ingredients. It’s crucial to mix only until just combined at each stage. Overmixing at this point can develop the gluten in the flour too much, leading to tough, dense cupcakes. As soon as you no longer see streaks of flour, stop mixing! I usually give it one final gentle stir with my rubber spatula to catch any bits at the bottom of the bowl.
- Gently Fold in the Cherries: This is the exciting part! With our perfectly prepared, flour-coated cherries ready, I gently fold them into the cupcake batter using my rubber spatula. I use a light hand here, folding just until the cherries are evenly distributed throughout the batter. We don’t want to overmix at this stage and deflate all the air we’ve worked so hard to incorporate. The batter for your cherry cupcakes should look thick, luscious, and studded with those beautiful red bits of fruit.
Baking and Cooling Your Aromatic Cherry Cupcakes
- Fill the Cupcake Liners: Using an ice cream scoop or a large spoon, I carefully fill each prepared cupcake liner about two-thirds full with the batter. Filling them two-thirds full is the perfect amount to ensure they rise nicely without overflowing, giving you perfectly domed cherry cupcakes. I like to be precise here for uniform baking.
- Bake to Golden Perfection: Place the muffin tin(s) into your preheated 350°F (175°C) oven. Bake for approximately 20-25 minutes. Baking times can vary slightly depending on your oven, so I recommend keeping a close eye on them, especially after the 20-minute mark. You’ll know your cherry cupcakes are done when they are lightly golden around the edges, spring back gently when lightly touched in the center, and a wooden skewer or toothpick inserted into the center of a cupcake comes out clean. The aroma in your kitchen at this point will be absolutely heavenly!
- Cooling Your Cupcakes Properly: Once baked, I remove the muffin tin from the oven and let the cherry cupcakes cool in the tin for about 5-10 minutes. This brief resting period helps them set and makes them easier to handle. After this short rest, I carefully transfer the cupcakes from the muffin tin to a wire cooling rack. It’s absolutely essential that the cupcakes cool completely to room temperature before you even think about frosting them. Attempting to frost warm cupcakes will result in melted, messy frosting, which we definitely want to avoid after all this effort! Patience is a virtue here for perfect cherry cupcakes.
Whipping Up My Luscious Cherry Buttercream Frosting
- Beat the Softened Butter: In a large mixing bowl, using your electric mixer with the paddle attachment (or handheld mixer), beat the 1 cup of softened unsalted butter on medium speed for 2-3 minutes. You want it to become very light, pale, and incredibly fluffy. This step is similar to creaming butter for the batter and ensures a smooth, airy frosting base.
- Gradually Add Powdered Sugar: With the mixer on low speed, gradually add the 4-5 cups of sifted powdered sugar, one cup at a time, mixing well after each addition. I always start on low speed to prevent a cloud of powdered sugar from coating my kitchen! Once a cup is mostly incorporated, I increase the speed to medium and beat until smooth before adding the next. If you see lumps, your powdered sugar wasn’t sifted enough, or you need to beat a little longer.
- Introduce Flavor and Liquid: Once all the powdered sugar is incorporated, I add the 1 teaspoon of pure vanilla extract and the ¼ teaspoon of salt. Now, for the cherry magic! I start by adding 3 tablespoons of cherry juice or cherry puree. Beat on medium-high speed for another 3-5 minutes, or until the frosting is light, fluffy, and smooth.
- Adjust Consistency and Color: At this point, I assess the frosting’s consistency. If it’s too thick, I add the remaining cherry juice or puree, one teaspoon at a time, until I reach my desired, pipeable consistency. If by some chance it ends up too thin (which is rare if you’ve added the sugar gradually), you can add a little more sifted powdered sugar, one tablespoon at a time, until it thickens. This cherry buttercream frosting should be wonderfully smooth and easy to spread or pipe. If I want a more intense pink color for my cherry cupcakes, I’ll add a tiny drop or two of red or pink food coloring and mix until evenly distributed.
Assembling and Decorating My Beautiful Cherry Cupcakes
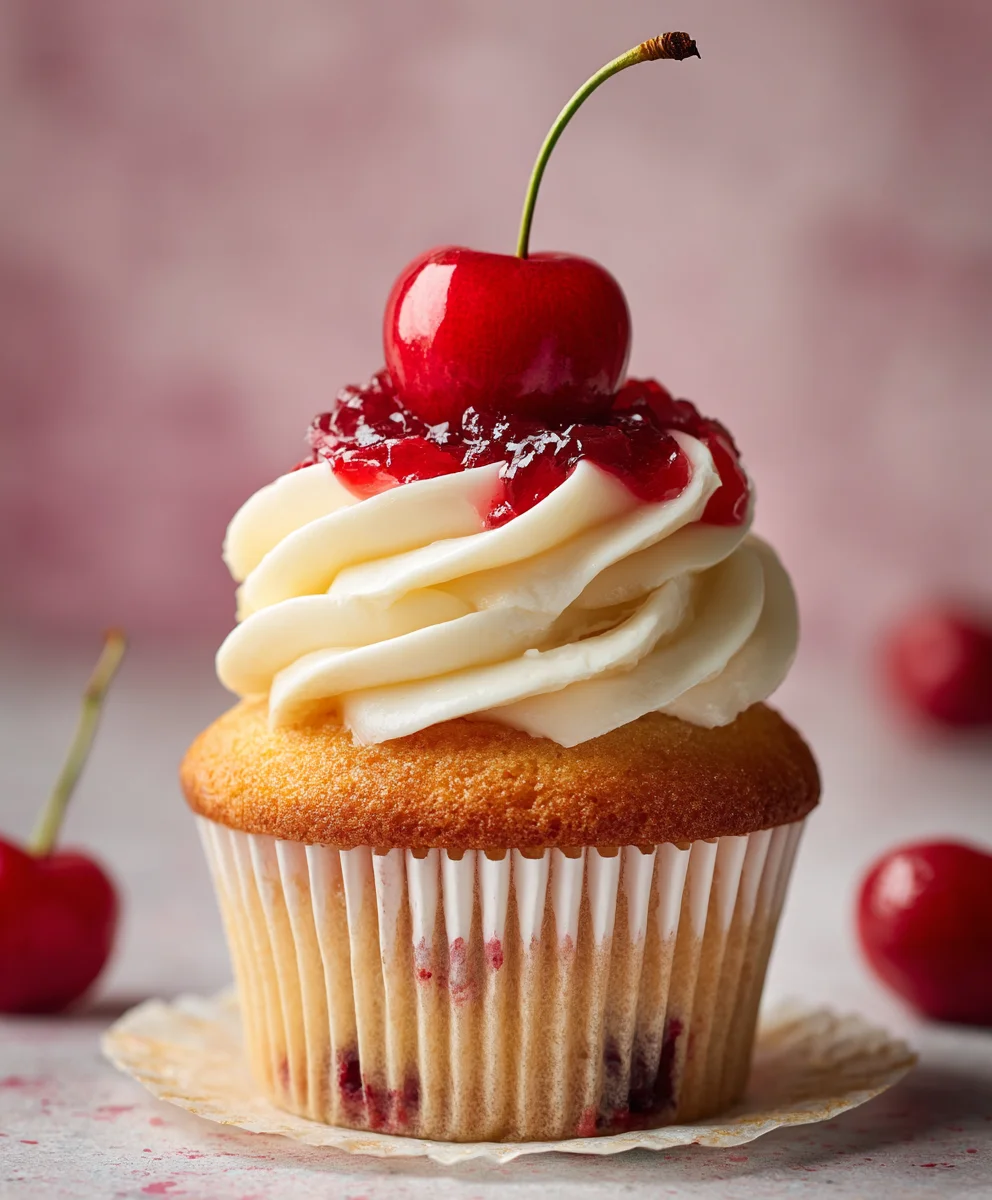
- Frost the Cooled Cupcakes: Once your cherry cupcakes are completely cooled, it’s time for the fun part – frosting! You can use an offset spatula to spread the buttercream generously over the top of each cupcake for a rustic, homemade look. Alternatively, for a more professional finish, I like to use a piping bag fitted with a large star tip (like a Wilton 1M). I fill the bag with the cherry buttercream and pipe beautiful swirls onto each cupcake. Starting from the outside edge and working your way in, creating a lovely dome.
- Garnish and Serve: For an extra touch of elegance and fresh flavor, I often garnish my cherry cupcakes with a single fresh cherry on top (pitted, of course!). You could also sprinkle a few chocolate shavings or a tiny bit of finely chopped fresh cherries for visual appeal and an extra flavor burst. These cherry cupcakes are best enjoyed the day they are made, when they are at their freshest and most delicious!
Tips and Tricks for Cherry Cupcake Perfection
-
Room Temperature Ingredients are Non-Negotiable:
I cannot stress this enough! For the best results in your cherry cupcakes, ensure your butter, eggs, and buttermilk are all at true room temperature. This allows them to emulsify properly, creating a smooth batter that holds air well, resulting in a tender, moist crumb. Cold ingredients won’t mix evenly and can lead to a lumpy batter or curdled appearance. I usually take them out of the fridge at least an hour before I plan to start baking.
-
Don’t Overmix the Batter:
This is a golden rule in baking, especially for cupcakes. Once you add the flour, mix only until the ingredients are just combined and no dry streaks remain. Overmixing develops the gluten in the flour, making your cherry cupcakes tough and dense instead of light and fluffy. A rubber spatula is your best friend for a final gentle fold to ensure everything is incorporated without overworking the batter.
-
Measure Flour Accurately:
Too much flour is a common culprit for dry, heavy cupcakes. I always recommend using a kitchen scale for the most accurate measurement (1 cup all-purpose flour is typically 120g). If you don’t have a scale, use the “spoon and level” method: spoon the flour into your measuring cup until it’s overflowing, then level it off with the back of a knife or a straight edge. Don’t pack it down or scoop directly from the bag, as this can add up to 25% more flour.
-
Choosing and Preparing Cherries:
While fresh cherries are ideal for these cherry cupcakes, you can use frozen ones in a pinch. If using frozen, make sure to thaw them completely and pat them very dry with paper towels to remove any excess moisture. Tossing the chopped cherries with a tablespoon of flour before adding them to the batter is a crucial step to prevent them from sinking to the bottom of your cupcakes, ensuring an even distribution of fruity goodness in every bite.
-
Achieving the Perfect Frosting Consistency:
My cherry buttercream frosting needs to be just right for either spreading or piping. If your frosting seems too thick, add more cherry juice or a tiny splash of milk, one teaspoon at a time, beating well after each addition until it reaches your desired consistency. If it’s too thin, you can gradually add more sifted powdered sugar until it thickens up. Remember to always sift your powdered sugar to avoid any frustrating lumps!
-
Storage Instructions for Freshness:
These homemade cherry cupcakes are truly at their best when enjoyed on the day they are baked. However, if you have leftovers, you can store them in an airtight container at room temperature for up to 2-3 days. If your kitchen is particularly warm, or if your frosting contains fresh dairy that might spoil, it’s safer to store them in the refrigerator. Just be sure to let them come to room temperature for about 15-20 minutes before serving for the best texture and flavor. Unfrosted cupcakes can be frozen for up to 2 months; simply thaw them at room temperature before frosting and serving.
-
Flavor Variations:
While this recipe focuses on classic cherry cupcakes, feel free to experiment! You could add a tiny pinch of almond extract to the batter or frosting to enhance the cherry flavor, as almond and cherry are a beautiful pairing. A little lemon zest in the batter could also brighten up the flavor profile wonderfully. The beauty of baking is in making it your own!
Conclusion:
As we reach the sweet conclusion of our baking journey, I truly hope you’re feeling inspired and excited to whip up a batch of these extraordinary treats. This isn’t just another recipe; it’s an invitation to experience pure joy in every bite. I firmly believe these are some of the most delightful Cherry Cupcakes you will ever bake, a perfect blend of tender crumb, juicy, tart cherries, and a luscious frosting that balances everything beautifully. The magic lies in the fresh, vibrant flavor of real cherries bursting through, not just an artificial hint, but a genuine taste of summer encapsulated in a perfect little cake. Imagine the aroma filling your kitchen as they bake – that alone is worth the effort!
I know the thought of baking can sometimes feel daunting, but trust me, this recipe is designed to be accessible and rewarding for bakers of all skill levels. From the moment you pick your fresh cherries to the final swirl of frosting, each step is a pleasure. What makes these cherry cupcakes truly a must-try is their incredible balance. They’re sweet without being cloying, moist without being dense, and visually stunning with their ruby-red bursts of fruit. They don’t just taste good; they evoke a sense of warmth, comfort, and celebration. I find that homemade treats carry an extra layer of love, and these cupcakes are no exception. They’re perfect for bringing a smile to anyone’s face, whether it’s a quiet afternoon indulgence or a centerpiece for a special gathering.
Serving Suggestions & Creative Variations
Once your glorious cherry cupcakes are ready, the serving possibilities are endless! For a simple yet elegant presentation, a single fresh cherry (with its stem intact for a touch of charm) placed atop the frosting is always a winner. A dusting of powdered sugar can add a delicate touch if you’re not going for a full frosting swirl. They pair wonderfully with a hot cup of coffee or a soothing herbal tea, making them an ideal afternoon pick-me-up. For a more decadent dessert, serve them alongside a scoop of vanilla bean ice cream or a dollop of fresh whipped cream. Imagine the delightful contrast of warm cupcake and cold, melting ice cream – pure bliss!
But don’t stop there! This recipe is incredibly versatile, encouraging you to unleash your inner baker and experiment. If you’re feeling adventurous, consider incorporating a few drops of almond extract into the batter or frosting for a lovely complementary flavor that pairs exquisitely with cherries. For a chocolate lover’s dream, try folding in a handful of mini chocolate chips into the batter, or even drizzling a rich chocolate ganache over the frosted tops. You could also experiment with different frostings: a cream cheese frosting would add a tangy counterpoint, while a chocolate buttercream would create a more decadent experience. For those with dietary considerations, this recipe can often be adapted. Consider using a gluten-free flour blend if you’re avoiding gluten, or explore plant-based milk and butter alternatives for a delightful vegan version. The core essence of the cherry remains vibrant and forgiving. For a festive touch, especially around holidays, a scattering of colorful sprinkles can transform these humble treats into party-ready stars. Don’t be afraid to make them your own!
Ready to Bake?
Now, it’s your turn! I genuinely encourage you to grab your apron, gather your ingredients, and embark on this delicious baking adventure. There’s an immense satisfaction that comes from creating something so beautiful and tasty with your own hands. The joy of pulling a tray of perfectly golden, fragrant cherry cupcakes from the oven is unparalleled. Share them with loved ones, pack them for a picnic, bring them to a potluck, or simply savor them yourself with a moment of quiet indulgence. And please, please, please – I would absolutely love to hear about your experience! When you try this recipe, don’t hesitate to share your thoughts, your successes, and perhaps even photos of your beautiful creations. Tag me or leave a comment below; your feedback and culinary journeys truly inspire me. Happy baking, my friends, and prepare to fall in love with these cherry cupcakes!
FAQs: Your Cherry Cupcake Questions Answered
How do you keep cherries from sinking in cupcakes?
This is a common question, and I’ve got a great trick for you! To prevent your beautiful cherries from sinking to the bottom of your cherry cupcakes, toss them lightly in a tablespoon or two of flour (from the measured amount in the recipe, not extra) just before folding them into the batter. This light coating helps them “grip” the batter and stay suspended throughout the cupcake as it bakes. It’s a simple step that makes a big difference!
Can I use frozen cherries for cupcakes?
Absolutely! Frozen cherries work wonderfully in this recipe, especially if fresh cherries aren’t in season or readily available. The key is to thaw them first and drain them very well. Excess moisture can make your cupcake batter too wet, leading to a gummy texture. You can gently pat them dry with paper towels after thawing to ensure they’re not adding too much extra liquid. Some bakers even like to give them a quick chop after thawing to distribute the cherry flavor more evenly.
How do you store homemade cherry cupcakes?
To keep your homemade cherry cupcakes fresh and delicious, store them in an airtight container at room temperature for up to 2-3 days. If your frosting contains cream cheese or fresh dairy, it’s best to refrigerate them. When refrigerating, let them come back to room temperature for about 15-20 minutes before serving, as this really brings out their best flavor and texture. If you want to store them longer, they can be frozen for up to 2-3 months in an airtight container; just be sure to thaw them completely before enjoying.
What’s the best way to pit cherries for baking?
Pitting cherries can seem like a chore, but it’s essential for a smooth eating experience. A cherry pitter is the most efficient tool and makes quick work of it. If you don’t have one, you can get creative! A clean paperclip or a chopstick can be used to push the pit out. Simply remove the stem, place the cherry on a cutting board, and push the pitter (or makeshift tool) through the stem end until the pit pops out the other side. Be ready for some juice, so maybe wear an apron!
Can I make cherry cupcakes ahead of time?
Yes, you certainly can! The unfrosted cupcakes can be baked a day in advance and stored in an airtight container at room temperature. Frost them on the day you plan to serve them for the freshest look and taste. If you’re using a frosting that needs refrigeration, like a cream cheese frosting, I recommend frosting them no more than a few hours ahead of serving or keeping them chilled until an hour or so before your event. This allows you to plan your baking around your schedule, making entertaining much easier!
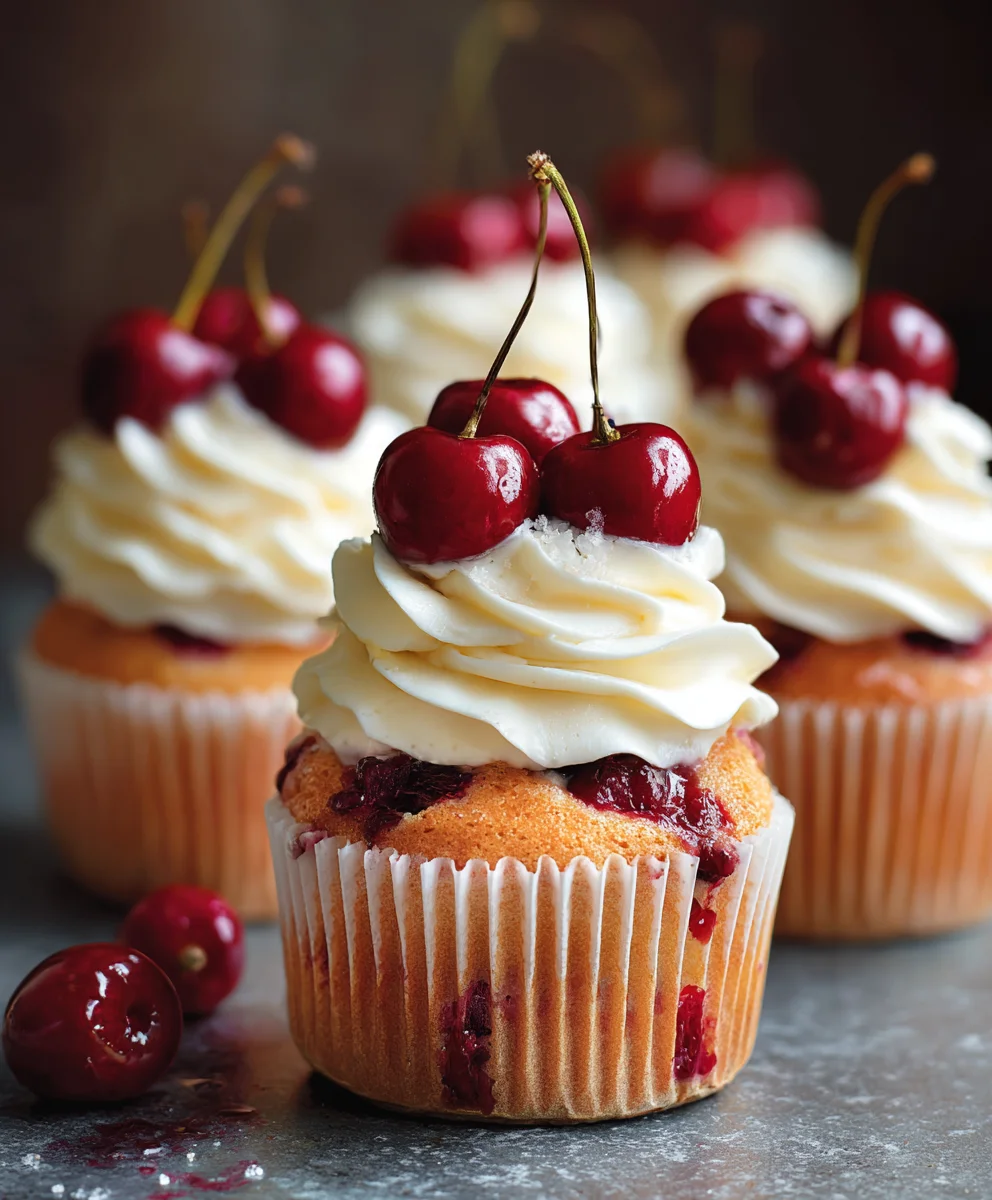
Decadent Cherry Cupcakes: Bursting with Fresh Cherry Flavor
These Decadent Cherry Cupcakes are a celebration of vibrant flavor, featuring light, airy cake infused with sweet-tart fresh cherries, complemented by a swirl of creamy cherry buttercream frosting. This delightful treat awakens the senses and brightens any occasion, making it perfect for gatherings, parties, or a sweet afternoon indulgence. Enjoy the harmonious blend of moist cake, juicy fruit, and velvety topping.
Ingredients
-
2 ½ cups (300g) all-purpose flour
-
2 teaspoons baking powder
-
½ teaspoon salt
-
1 cup (226g) unsalted butter, softened
-
1 ¾ cups (350g) granulated sugar
-
4 large eggs, at room temperature
-
1 teaspoon vanilla extract
-
1 cup (240ml) buttermilk, at room temperature
-
1 ½ cups (about 250g) fresh cherries, pitted, chopped, and tossed with 1 tablespoon all-purpose flour
-
For the Cherry Buttercream Frosting:
-
1 cup (226g) unsalted butter, softened
-
4-5 cups (480-600g) powdered sugar, sifted
-
1 teaspoon vanilla extract
-
¼ teaspoon salt
-
3-5 tablespoons cherry juice or cherry puree
-
Red or pink food coloring (optional)
-
Fresh cherries or chocolate shavings (for garnish, optional)
Instructions
-
Step 1
Preheat oven to 350°F (175°C). Line a 12-cup muffin tin with paper liners. -
Step 2
Wash, pit, and chop 1 ½ cups fresh cherries (¼-½ inch pieces). Toss with 1 tablespoon all-purpose flour to prevent sinking. (If using frozen, thaw and pat dry first). -
Step 3
In a medium bowl, whisk together 2 ½ cups all-purpose flour, 2 teaspoons baking powder, and ½ teaspoon salt. Set aside. -
Step 4
In a large bowl, beat 1 cup softened unsalted butter on medium speed for 1 minute. Gradually add 1 ¾ cups granulated sugar, beating on medium-high for 3-5 minutes until light and fluffy. -
Step 5
Add 4 large room temperature eggs, one at a time, beating well after each. Mix in 1 teaspoon vanilla extract. Scrape down bowl sides. -
Step 6
With mixer on low, alternate adding dry ingredients and 1 cup room temperature buttermilk. Start and end with dry. Mix only until just combined, avoiding overmixing. -
Step 7
Gently fold the flour-coated chopped cherries into the batter using a rubber spatula until evenly distributed. -
Step 8
Fill each prepared cupcake liner two-thirds full. Bake for 20-25 minutes at 350°F (175°C), or until lightly golden and a wooden skewer inserted into the center comes out clean. -
Step 9
Cool in the muffin tin for 5-10 minutes, then transfer to a wire rack to cool completely before frosting. -
Step 10
In a large bowl, beat 1 cup softened unsalted butter on medium speed for 2-3 minutes until very light and fluffy. -
Step 11
Gradually add 4-5 cups sifted powdered sugar on low speed, one cup at a time, beating until smooth after each addition. Increase speed to medium once incorporated. -
Step 12
Mix in 1 teaspoon vanilla extract and ¼ teaspoon salt. Add 3-5 tablespoons cherry juice or cherry puree. Beat on medium-high for another 3-5 minutes until light, fluffy, and smooth. Adjust consistency with more liquid/sugar as needed. (Optional: add a drop or two of red/pink food coloring for a more intense hue). -
Step 13
Once cupcakes are completely cool, frost using an offset spatula or a piping bag with a star tip. Garnish with a fresh cherry, chocolate shavings, or finely chopped cherries, if desired. Serve and enjoy!
Important Information
Nutrition Facts (Per Serving)
It is important to consider this information as approximate and not to use it as definitive health advice.
Allergy Information
Please check ingredients for potential allergens and consult a health professional if in doubt.

Leave a Comment