
Recipes are much more than mere instructions; they are the heartbeats of kitchens worldwide, echoes of tradition, and vibrant pathways to culinary exploration. From the earliest human attempts to document edible preparations, meticulously etched into ancient tablets, passed down through generations in handwritten journals, or lovingly recorded in ancestral cookbooks, the shared human journey of food preparation has always revolved around these invaluable guides. I believe there’s a profound joy in unearthing a new culinary delight or perfecting a classic dish, and it’s all thanks to the wisdom contained within these pages.
Why We Cherish Our Recipes
Whether it’s the comforting warmth of a grandmother’s secret stew, the exciting challenge of a gourmet dessert, or the simple satisfaction of a quick weeknight meal, recipes provide the blueprint for deliciousness. People adore them for countless reasons: the incredible burst of flavors they promise, the satisfying textures they help us achieve, or the sheer convenience of having a tested formula at our fingertips. They empower us to create, to share, and to connect, transforming everyday ingredients into extraordinary experiences. I invite you to join me on this flavorful adventure!
Ingredients:
Crafting this incredible Chicken Tikka Masala with Homemade Naan is a journey of flavors, and it all begins with having your pantry well-stocked. I always find that gathering everything before I start makes the process so much smoother and more enjoyable. Here’s what you’ll need for this truly rewarding culinary adventure:
-
For the Chicken Tikka:
- 2 lbs (approx. 900g) Boneless, Skinless Chicken Thighs: I prefer thighs over breasts because they stay incredibly tender and juicy during cooking, absorbing the marinade beautifully. Cut them into 1.5-inch (about 4cm) bite-sized pieces for even cooking.
- 1 cup (240g) Plain Full-Fat Yogurt: This is the secret to tenderizing the chicken and creating that signature creamy texture in the marinade. Make sure it’s not Greek yogurt, as its thickness can be a bit too much for the marinade.
- 2 tbsp Lemon Juice: Freshly squeezed, please! It brightens the flavors and helps activate the tenderizing properties of the yogurt.
- 1 tbsp Grated Fresh Ginger: The pungent warmth of ginger is indispensable in Indian recipes.
- 1 tbsp Minced Garlic: Fresh garlic offers an aromatic depth that dried garlic simply can’t match.
- 1 tsp Ground Cumin: Earthy and warm, a cornerstone spice.
- 1 tsp Ground Coriander: Slightly citrusy and sweet, it perfectly complements the cumin.
- 1 tsp Turmeric Powder: For its vibrant color and mild, peppery flavor. It also has wonderful health benefits!
- 1 tsp Garam Masala: This spice blend is a finishing touch, adding warmth and complexity.
- ½ tsp Kashmiri Red Chili Powder (or regular Paprika for less heat): For a beautiful reddish hue and a touch of heat. Adjust to your preference!
- ½ tsp Salt: Essential for seasoning the chicken from within.
- ¼ tsp Black Pepper: Freshly ground is always best.
- 2 tbsp Vegetable Oil (or Ghee): For searing the chicken. Ghee will lend a richer, nutty flavor.
-
For the Rich Masala Sauce:
- 2 tbsp Ghee (Clarified Butter) or Vegetable Oil: The foundation of our sauce’s flavor.
- 1 large Yellow Onion: Finely diced. It forms the sweet, savory base.
- 1 tbsp Grated Fresh Ginger: A second dose to build layers of flavor.
- 1 tbsp Minced Garlic: More fresh garlic for aromatic depth.
- 1 ½ tsp Ground Cumin: Toasted gently to release its full aroma.
- 1 ½ tsp Ground Coriander: Adds a beautiful citrusy note to the sauce.
- 1 tsp Turmeric Powder: For color and a subtle earthy warmth.
- 1 tsp Kashmiri Red Chili Powder (or Paprika): For color and a gentle hum of heat.
- ½ tsp Garam Masala: Reserved for the end, to provide a finishing touch of warmth.
- 1 (28-ounce/794g) can Crushed Tomatoes: The body and tang of our sauce. I find crushed tomatoes give the best texture without being too chunky.
- ½ cup (120ml) Chicken Broth or Water: To adjust the sauce consistency.
- ½ cup (120ml) Heavy Cream: This is where the “creamy” in Tikka Masala comes from, adding luxurious richness.
- 1 tbsp Sugar (Optional, to balance acidity): I sometimes add a touch if my tomatoes are particularly tart.
- Salt and Black Pepper to taste: Crucial for perfecting the seasoning.
-
For the Homemade Garlic Naan Bread:
- 1 cup (240ml) Warm Water (105-115°F / 40-46°C): The perfect temperature to wake up your yeast.
- 2 tsp Active Dry Yeast: The magic ingredient for fluffy naan.
- 1 tbsp Granulated Sugar: Feeds the yeast and contributes to browning.
- 2 ½ cups (300g) All-Purpose Flour: Plus extra for dusting.
- 1 tsp Salt: Essential for flavor.
- 2 tbsp Plain Full-Fat Yogurt: Makes the naan incredibly soft and pliable.
- 2 tbsp Melted Ghee or Unsalted Butter: For brushing the cooked naan.
- 2 cloves Garlic, minced: For that irresistible garlic flavor on top.
- Fresh Cilantro, chopped (for garnish on naan): Adds a fresh, herbaceous note.
-
For Garnish and Serving:
- Fresh Cilantro, chopped: For sprinkling over the finished dish.
- Basmati Rice: The perfect accompaniment to soak up all that delicious sauce.
Phase 1: Preparing the Chicken Tikka Marinade
This initial step is absolutely crucial for infusing the chicken with maximum flavor and ensuring it comes out incredibly tender. I always say, a good marinade is the secret weapon in so many of my favorite recipes. Give yourself enough time for this – ideally, you want the chicken to marinate for a few hours, or even better, overnight. Trust me, it makes a world of difference!
- First, take your boneless, skinless chicken thighs and pat them thoroughly dry with paper towels. This is a small but mighty step, as excess moisture can dilute your marinade and prevent the spices from adhering properly. Once dry, cut the chicken into uniform 1.5-inch pieces. I aim for consistency here so that every piece cooks evenly.
- In a large mixing bowl, combine the plain full-fat yogurt, fresh lemon juice, grated ginger, minced garlic, ground cumin, ground coriander, turmeric powder, garam masala, Kashmiri red chili powder (or paprika), salt, and black pepper. Use a whisk to combine everything thoroughly until you have a smooth, vibrant, and fragrant paste. Take a moment to smell it – that’s the promise of deliciousness!
- Add the cut chicken pieces to the bowl with the marinade. Using your hands (my preferred method, though you can use a spoon), gently massage the marinade into every single piece of chicken. Make sure each piece is completely coated. This ensures that the chicken will soak up all those wonderful flavors.
- Once coated, cover the bowl tightly with plastic wrap and transfer it to the refrigerator. Allow the chicken to marinate for a minimum of 2 hours. If you can plan ahead, I highly recommend marinating it for 4-6 hours, or even better, overnight. The longer it marinates, the more flavorful and tender your chicken tikka will be. This long marination time is a hallmark of truly exceptional Indian recipes.
Phase 2: Preparing the Homemade Naan Dough
While the chicken is busy soaking up all those incredible spices, it’s the perfect time to get started on our homemade naan bread. There’s something so incredibly satisfying about pulling fresh, warm naan from the pan. This naan bread recipe is surprisingly simple and yields wonderfully soft, chewy results that are far superior to store-bought.
- In a small bowl, combine the warm water (ensure it’s between 105-115°F, as too hot will kill the yeast and too cold won’t activate it) with the active dry yeast and granulated sugar. Give it a gentle stir and let it sit for about 5-10 minutes. You’ll know the yeast is active when it becomes foamy and bubbly on top – this is called “proofing” the yeast, and it’s a crucial step to ensure your naan will rise.
- In a large mixing bowl, combine the all-purpose flour and salt. Make a well in the center of the dry ingredients.
- Once your yeast is proofed, pour the yeast mixture into the well, along with the plain full-fat yogurt. Using a sturdy wooden spoon or your hands, begin to mix the ingredients together. Start from the center and gradually incorporate the flour from the sides until a shaggy dough forms.
- Turn the dough out onto a lightly floured surface. Now comes the fun part: kneading! Knead the dough for about 8-10 minutes. At first, it might be a bit sticky, but as you knead, it will become smooth, elastic, and less tacky. I like to use a push-fold-turn motion. You’ll feel it transform under your hands, becoming beautifully pliable. This step is essential for developing the gluten, which gives naan its signature chewiness.
- Lightly grease a clean large bowl with a little vegetable oil. Place the kneaded dough in the bowl, turning it once to coat the top. Cover the bowl tightly with plastic wrap or a clean kitchen towel.
- Let the dough rise in a warm, draft-free place for about 1 to 1.5 hours, or until it has doubled in size. The rising time can vary depending on the warmth of your kitchen. I sometimes turn on my oven to its lowest setting for a few minutes, then turn it off and let the dough rise inside. This creates a perfect warm environment for successful rising.
Phase 3: Cooking the Chicken Tikka
Now that our chicken is beautifully marinated and our naan dough is rising, it’s time to cook the chicken tikka. This can be done in a few ways, but my preferred method for these recipes is searing it on the stovetop for that lovely char and then finishing it in the oven for even cooking. If you don’t have an oven-safe skillet, you can finish it entirely on the stovetop or even on an outdoor grill.
- Preheat your oven to 400°F (200°C). If you are using an oven-safe skillet, place it on the stovetop over medium-high heat. If you’re only using the stovetop, just use a large non-stick pan.
- Add 2 tablespoons of vegetable oil or ghee to the hot pan. Once the oil shimmers, carefully add the marinated chicken pieces in a single layer, ensuring not to overcrowd the pan. You might need to cook the chicken in batches to avoid lowering the pan’s temperature too much, which would steam the chicken instead of searing it. Overcrowding is a common mistake in many home recipes, so take your time here.
- Sear the chicken for about 3-4 minutes per side, until it develops a beautiful golden-brown char. This searing step locks in the juices and creates incredible depth of flavor. Don’t worry about cooking it through entirely at this stage; we’re just building that exterior texture and color.
- If using an oven-safe skillet, transfer the skillet directly to the preheated oven. Bake for an additional 8-10 minutes, or until the chicken is cooked through and the internal temperature reaches 165°F (74°C). If you’re not using an oven, reduce the heat to medium-low on the stovetop, cover the pan, and continue to cook for another 5-7 minutes, stirring occasionally, until cooked through.
- Once cooked, remove the chicken from the oven or stovetop and set it aside on a plate. It’s okay if there are some flavorful browned bits left in the pan; those will contribute to the richness of our masala sauce!
Phase 4: Crafting the Rich Masala Sauce
This is where the magic truly happens, transforming simple ingredients into the luscious, aromatic sauce that defines Chicken Tikka Masala. Building layers of flavor is key here, and I always take my time with each step to ensure maximum depth. This part of the recipe is deeply satisfying, as the aromas fill your kitchen.
- In the same pan you used for the chicken (if using an oven-safe skillet, wipe it out if there’s too much burnt residue, or transfer to a clean large pot/Dutch oven), melt 2 tablespoons of ghee or add vegetable oil over medium heat.
- Add the finely diced yellow onion to the pan. Sauté the onion for about 8-10 minutes, stirring frequently, until it softens, turns translucent, and begins to caramelize lightly. This slow caramelization is essential for developing a sweet depth that forms the backbone of the sauce. Don’t rush this step!
- Add the grated ginger and minced garlic to the softened onions. Cook for another 1-2 minutes, stirring constantly, until fragrant. Be careful not to burn the garlic, as it can turn bitter very quickly.
- Now, it’s time for the ground spices: add the ground cumin, ground coriander, turmeric powder, and Kashmiri red chili powder (or paprika) to the pan. Toast the spices for about 30-60 seconds, stirring continuously. This brief toasting releases their full aroma and flavor. You’ll notice the spices becoming much more fragrant.
- Pour in the crushed tomatoes and stir well, scraping up any browned bits from the bottom of the pan. These bits are packed with flavor! Add the chicken broth or water and bring the sauce to a gentle simmer.
- Reduce the heat to low, cover the pot, and let the sauce simmer for at least 15-20 minutes. This allows the flavors to meld and deepen beautifully. Stir occasionally to prevent sticking. The longer it simmers, the more developed and complex the flavors will become. For an even smoother sauce, you can use an immersion blender or carefully transfer the sauce to a regular blender and blend until desired consistency, then return it to the pot. I usually leave it slightly chunky for texture.
- Remove the sauce from the heat for a moment, and stir in the heavy cream. The cream adds a luscious richness and balances the acidity of the tomatoes. Taste the sauce and adjust the seasoning with salt, black pepper, and if needed, a tablespoon of sugar to balance any tartness from the tomatoes. Add the ½ tsp of garam masala now and stir it in. This late addition ensures its warm, aromatic notes remain prominent.
Phase 5: Rolling and Cooking the Naan Bread
With our chicken cooked and the masala sauce simmering, it’s time to give our naan dough the attention it deserves. This part of the recipe is where the visual appeal really comes into play, as you watch the dough puff up into glorious, soft pillows. My tip for cooking naan is to have a very hot cooking surface – it makes all the difference!
- Once your naan dough has doubled in size (from Phase 2, step 6), gently punch it down to release the air. Turn the dough out onto a lightly floured surface. Knead it for just a minute or two to bring it together.
- Divide the dough into 8 equal portions. Roll each portion into a smooth ball. Cover the dough balls with a clean kitchen towel and let them rest for another 10-15 minutes. This brief resting period relaxes the gluten, making the dough much easier to roll out.
- While the dough balls are resting, prepare your garlic butter. In a small microwave-safe bowl, melt the ghee or unsalted butter. Stir in the minced garlic and chopped fresh cilantro. Set aside.
- Heat a heavy-bottomed cast iron skillet or a griddle over high heat until it is very hot, almost smoking. You want a high temperature to get that characteristic puff and slight char on the naan. I sometimes use a griddle pan to get those nice grill marks.
- Take one dough ball and, on a lightly floured surface, roll it out into an oval or teardrop shape, about 8-10 inches long and ¼-inch thick. Don’t worry if it’s not perfectly uniform; homemade charm is part of the appeal!
- Carefully place one rolled naan dough onto the hot skillet. Cook for about 1-2 minutes, or until large bubbles begin to form on the surface and the underside has browned spots. This is the moment I love watching – the naan magically puffs up!
- Flip the naan over and cook for another 1-2 minutes on the second side, until it has browned spots and looks cooked through. If you like a little extra char, you can even use tongs to briefly hold the naan directly over an open flame (if you have a gas stove) for a few seconds.
- As each naan is cooked, transfer it to a plate and immediately brush liberally with the prepared garlic butter. The hot naan will absorb the butter beautifully, infusing it with flavor. Keep the cooked naan warm by covering it with a clean towel while you cook the remaining pieces. Repeat the process for all the dough balls.
Phase 6: Assembling and Serving Your Culinary Masterpiece
We’re in the final stretch, and your kitchen should be filled with incredible aromas! This is where all your hard work comes together, creating a dish that’s truly restaurant-quality. This particular recipe is a showstopper, perfect for entertaining or a special family meal.
- Add the cooked chicken tikka pieces to the rich masala sauce. Stir gently to ensure all the chicken is thoroughly coated in the sauce.
- Bring the sauce and chicken to a gentle simmer over low heat. Let it cook together for about 5-10 minutes, allowing the chicken to fully absorb the flavors of the sauce and ensuring everything is heated through. Taste and adjust the seasoning one final time – sometimes a pinch more salt or a squeeze of lemon juice can brighten everything up.
- Remove the Chicken Tikka Masala from the heat.
- Ladle generous portions of the creamy Chicken Tikka Masala into serving bowls. Garnish generously with fresh chopped cilantro. The vibrant green not only adds visual appeal but also a burst of fresh flavor that cuts through the richness of the dish.
- Serve immediately alongside your warm, homemade Garlic Naan Bread and fluffy Basmati Rice. The naan is perfect for scooping up every last bit of that exquisite sauce, and the rice provides a lovely neutral base. This combination of textures and flavors is what makes this one of my all-time favorite recipes to share.
- Enjoy! There’s nothing quite like the satisfaction of creating such a flavorful and authentic meal from scratch.

Conclusion:
I truly hope that by now, you’re as excited as I am about this incredible dish! It isn’t just another item to add to your list of things to cook; it’s a culinary journey waiting to unfold in your very own kitchen. I genuinely believe this particular creation is a must-try for so many reasons. It strikes that perfect balance of being delightfully easy to prepare, yet incredibly impressive in flavor and presentation. You don’t need to be a gourmet chef to achieve remarkable results here, and that’s precisely why I love sharing it so much. It’s the kind of meal that brings smiles to faces, sparks conversation around the dinner table, and leaves everyone feeling utterly satisfied without the hours of complex prep work typically associated with such rich, comforting dishes. From the very first aromatic whiff to the last delectable bite, you’ll understand why this one holds a special place in my heart and, I’m confident, will soon hold one in yours too. It’s perfect for those busy weeknights when you crave something special but lack time, or equally fitting for a relaxed weekend dinner where you want to impress without the stress. The thoughtful combination of ingredients works harmoniously to create a depth of flavor that feels both familiar and excitingly new.
Now, let’s talk about making this recipe truly your own! While it’s absolutely delicious as is, I always encourage you to play around with serving suggestions and variations to suit your taste and mood. For a simple yet elegant meal, I love serving this dish alongside a crisp, vibrant green salad dressed with a light lemon vinaigrette. The freshness of the greens provides a wonderful contrast to the richness of the main course. Alternatively, a side of fluffy couscous or a perfectly cooked wild rice blend would be fantastic for soaking up every last bit of the amazing sauce. For those who enjoy a bit more heartiness, a creamy polenta or even some roasted root vegetables like carrots and parsnips would be absolutely divine accompaniments. Don’t be afraid to experiment with your favorite side dishes; this recipe is incredibly versatile and plays well with many different flavors and textures. Perhaps a rustic loaf of crusty bread, still warm from the oven, for scooping up any remaining goodness? That’s always a winning option in my book!
When it comes to variations, the possibilities are almost endless! Feel free to customize this recipe to your heart’s content. If you’re looking to add a little extra zing, a squeeze of fresh lime juice right before serving can brighten the entire dish. For a touch of warmth and spice, a pinch of red pepper flakes or a dash of smoked paprika could introduce an exciting new dimension. Vegetarians could easily adapt this by swapping out the main protein for hearty sautéed mushrooms, perhaps a mix of cremini and shiitake, or even cubes of firm tofu that have been pan-fried until golden. Adding different herbs like fresh rosemary or sage during the cooking process could also infuse the dish with unique aromatic notes. I’ve even seen variations that incorporate a splash of white wine for an added layer of sophistication, or a handful of fresh spinach wilted in at the very end for an extra boost of greens. These are just a few ideas to get your creative culinary juices flowing; the beauty of this particular creation lies in its adaptability. It’s a fantastic canvas for your personal touch. Among all the recipes I’ve meticulously developed and shared, this one truly stands out for its blend of simplicity and the incredible satisfaction it delivers, making it one of those go-to recipes you’ll cherish.
So, now that you have all the tips, tricks, and inspiration you need, what are you waiting for? I truly, genuinely hope you feel empowered and excited to try this wonderful recipe in your own kitchen very soon. It’s more than just following instructions; it’s about the joy of creating something delicious, the warmth of sharing it with loved ones, and the simple pleasure of a beautifully prepared meal. Once you’ve had the chance to whip up your own batch, I would absolutely love to hear all about your experience! Did you stick to the original, or did you put your own creative spin on it? What were your favorite serving suggestions? Please, don’t hesitate to share your thoughts, your successes, and even any interesting challenges you encountered in the comments section below. Your feedback is invaluable, and your culinary adventures inspire not only me but also our entire community of home cooks. Seeing your photos and reading about your triumphs truly makes my day and helps to foster a wonderful space where we can all learn and grow together. So, go on, gather your ingredients, set aside some time, and get ready to create something truly memorable. I can’t wait to hear how it turns out for you! Happy cooking!
Recipes
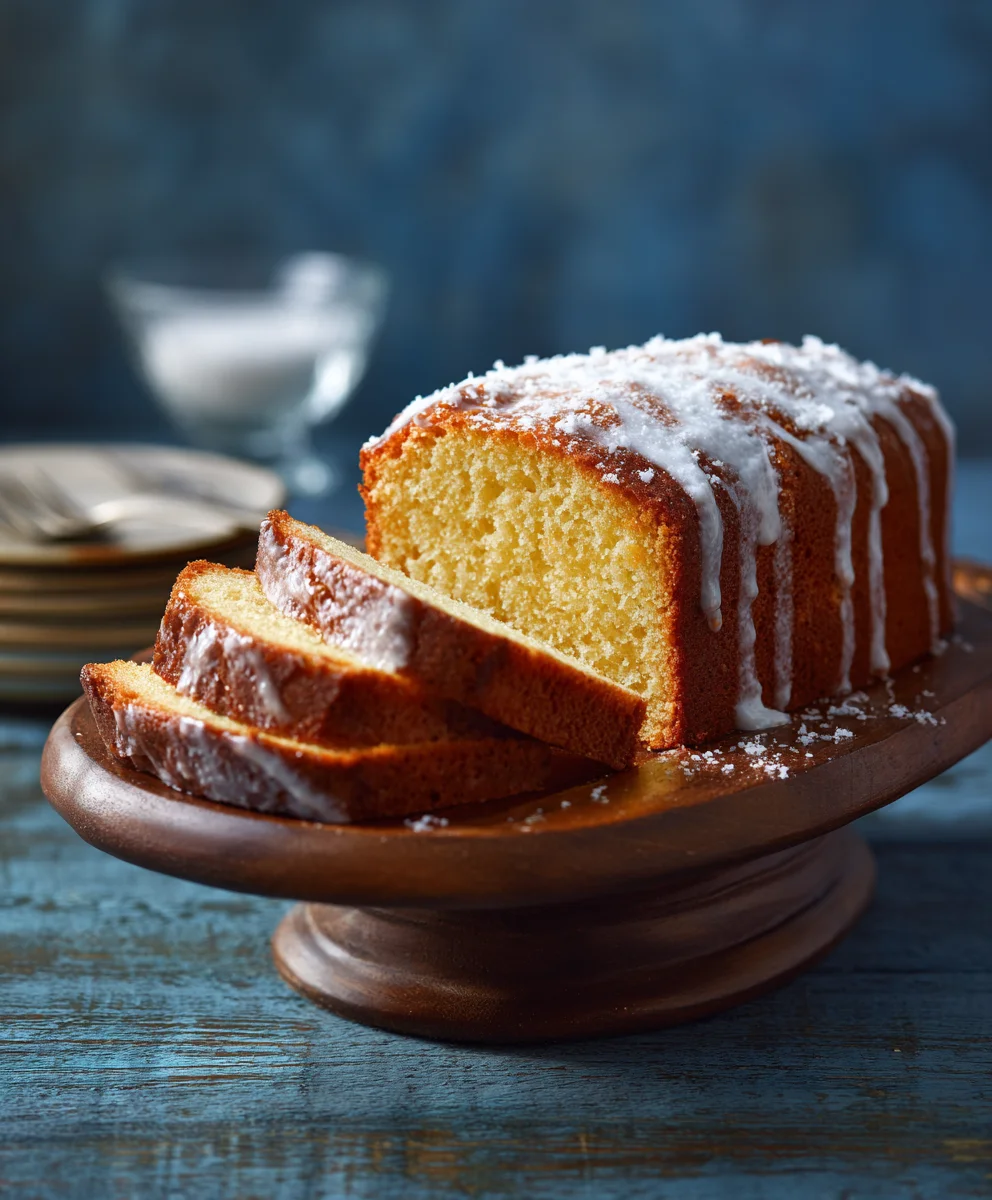
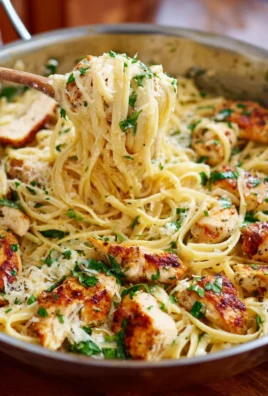
Moist sour cream pound cake bursting with blueberries and bright lemon flavor. Rich, tender, and finished with a tangy lemon glaze. Marinated chicken and tortellini pasta tossed in a rich Parmesan and mozzarella cream sauce. Quick Italian comfort food.
Ingredients
-
2 lbs (900g) Boneless, Skinless Beef Thighs, 1.5-inch pieces
-
1 cup (240g) Plain Full-Fat Yogurt
-
2 tbsp Lemon Juice
-
1 tbsp Grated Ginger
-
1 tbsp Minced Garlic
-
1 tsp Ground Cumin
-
1 tsp Ground Coriander
-
1 tsp Turmeric Powder
-
1 tsp Garam Masala
-
½ tsp Kashmiri Red Chili Powder (or Paprika)
-
½ tsp Salt
-
¼ tsp Black Pepper
-
2 tbsp Vegetable Oil or Ghee
-
2 tbsp Ghee or Vegetable Oil
-
1 large Yellow Onion, finely diced
-
1 tbsp Grated Ginger
-
1 tbsp Minced Garlic
-
1 ½ tsp Ground Cumin
-
1 ½ tsp Ground Coriander
-
1 tsp Turmeric Powder
-
1 tsp Kashmiri Red Chili Powder (or Paprika)
-
½ tsp Garam Masala
-
1 (28oz/794g) can Crushed Tomatoes
-
½ cup (120ml) Chicken Broth or Water
-
½ cup (120ml) Heavy Cream
-
1 tbsp Sugar (Optional)
-
Salt and Black Pepper to taste
-
1 cup (240ml) Warm Water (105-115°F)
-
2 tsp Active Dry Yeast
-
1 tbsp Granulated Sugar
-
2 ½ cups (300g) All-Purpose Flour, plus extra
-
1 tsp Salt
-
2 tbsp Plain Full-Fat Yogurt
-
2 tbsp Melted Ghee or Unsalted Butter
-
2 cloves Garlic, minced
-
Fresh Cilantro, chopped (for naan)
-
Fresh Cilantro, chopped (for garnish)
-
Basmati Rice
Instructions
-
Step 1
Pat dry and cut 2 lbs beef thighs into 1.5-inch pieces. In a bowl, whisk 1 cup yogurt, 2 tbsp lemon juice, 1 tbsp grated ginger, 1 tbsp minced garlic, 1 tsp ground cumin, 1 tsp ground coriander, 1 tsp turmeric, 1 tsp garam masala, ½ tsp chili powder, ½ tsp salt, and ¼ tsp black pepper into a smooth marinade. Add beef, coat thoroughly, cover, and refrigerate for 2-6 hours or overnight. -
Step 2
Combine 1 cup warm water (105-115°F), 2 tsp active dry yeast, and 1 tbsp sugar; let proof 5-10 min until foamy. In a large bowl, mix 2½ cups flour and 1 tsp salt. Add yeast mixture and 2 tbsp yogurt; mix until a shaggy dough forms. Knead on a floured surface for 8-10 min until smooth. Place in a lightly greased bowl, cover, and let rise in a warm place for 1-1.5 hours until doubled. -
Step 3
Preheat oven to 400°F (200°C). Heat 2 tbsp vegetable oil/ghee in an oven-safe skillet over medium-high heat. Sear marinated beef in batches for 3-4 min per side until golden-brown char forms. Transfer skillet to oven and bake for 8-10 min, or until beef reaches 165°F (74°C). Set cooked beef aside. -
Step 4
In the same pan, melt 2 tbsp ghee/oil over medium heat. Sauté 1 diced yellow onion for 8-10 min until soft. Add 1 tbsp grated ginger and 1 tbsp minced garlic; cook 1-2 min. Stir in 1½ tsp ground cumin, 1½ tsp ground coriander, 1 tsp turmeric, and 1 tsp chili powder; toast spices for 30-60 seconds. Add 1 (28oz) can crushed tomatoes and ½ cup chicken broth/water; bring to a simmer. Reduce heat, cover, and simmer for 15-20 min. Stir in ½ cup heavy cream, salt, black pepper, optional 1 tbsp sugar, and ½ tsp garam masala. -
Step 5
Gently punch down risen dough; divide into 8 balls. Cover and rest 10-15 min. Melt 2 tbsp ghee/butter; stir in 2 minced garlic cloves and chopped cilantro for garlic butter. Heat a cast iron skillet or griddle over high heat until very hot. Roll each dough ball into an 8-10 inch oval, ¼-inch thick. Cook one naan at a time for 1-2 min per side until puffed and browned spots appear. Immediately brush with garlic butter and keep warm. -
Step 6
Add cooked beef tikka to the masala sauce. Simmer gently for 5-10 min to heat through and meld flavors. Ladle into bowls, garnish with fresh chopped cilantro. Serve immediately with warm Garlic Naan Bread and Basmati Rice.
Important Information
Nutrition Facts (Per Serving)
It is important to consider this information as approximate and not to use it as definitive health advice.
Allergy Information
Please check ingredients for potential allergens and consult a health professional if in doubt.


Leave a Comment