
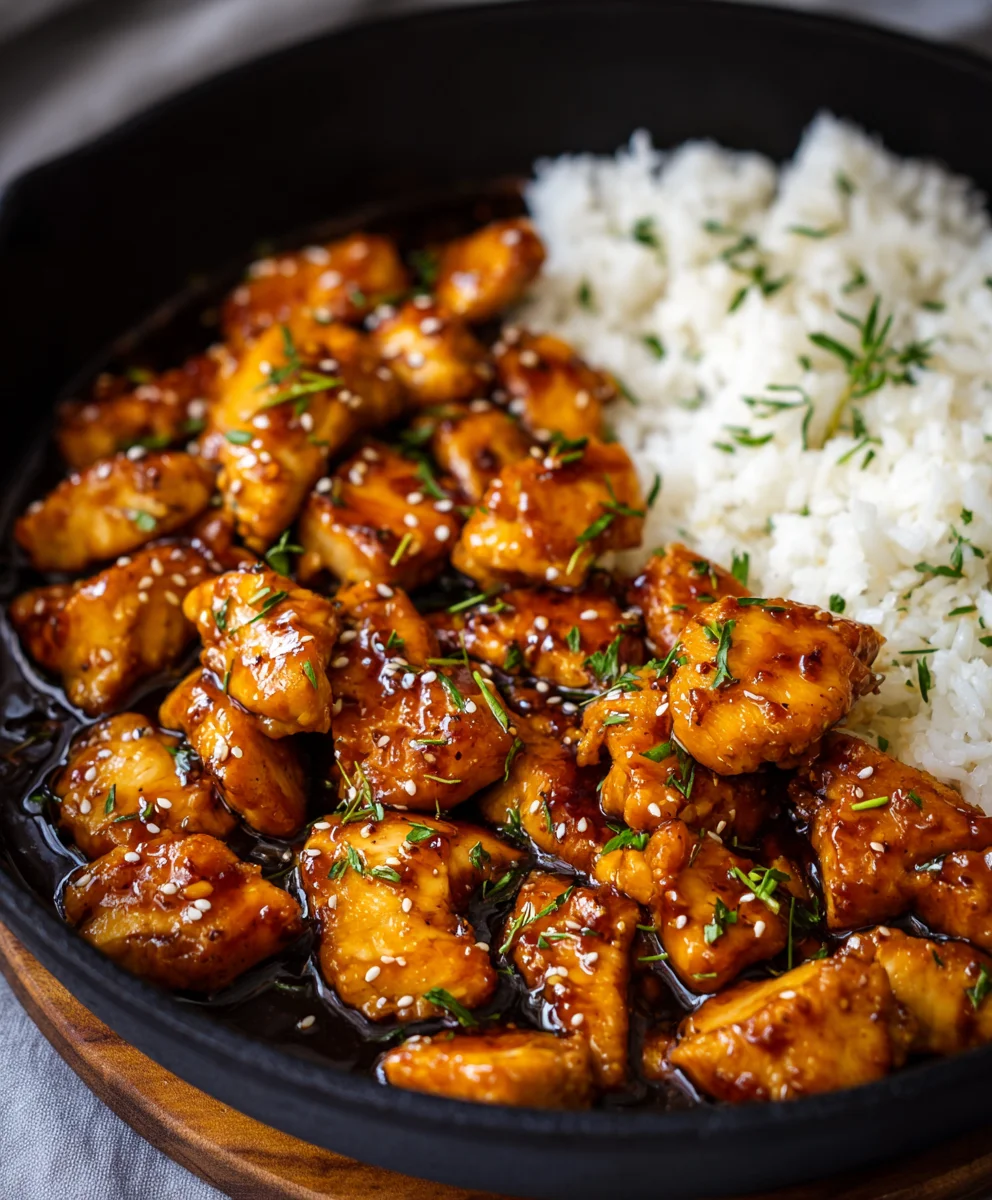
Honey Garlic Chicken is more than just a recipe; it’s a culinary hug in a bowl, a weeknight savior, and a universally adored classic. Imagine succulent pieces of chicken, perfectly tender, enveloped in a glistening, sticky glaze that strikes an exquisite balance between sweet and savory. This delightful dish has earned its place as a firm family favorite for countless reasons, becoming a staple in kitchens across the globe.
While the exact origins of this specific combination might be relatively modern, the interplay of honey, garlic, and soy sauce reflects a beautiful fusion of flavors deeply rooted in various Asian-inspired culinary traditions that have enchanted palates for centuries. It’s a contemporary testament to how simple, wholesome ingredients can come together to create something truly spectacular and deeply satisfying.
What truly makes people fall in love with Honey Garlic Chicken, time and time again, is its irresistible taste and remarkable versatility. The sticky-sweet glaze, fragrant with garlic and just a hint of tang, caramelizes beautifully, locking in moisture and infusing every bite with an explosion of flavor. It’s incredibly convenient to prepare, often using ingredients you likely already have on hand, making it the perfect solution for busy evenings when you crave something extraordinary without the fuss. This dish offers a comforting warmth and a burst of flavor that appeals to everyone, from the pickiest eaters to the most discerning foodies. I genuinely believe it’s one of those recipes that everyone should have in their repertoire.
Ingredients:
- For the Chicken:
- 1.5 – 2 pounds boneless, skinless chicken thighs or breasts, cut into 1-inch pieces. I personally find chicken thighs offer a more tender and juicy result for Honey Garlic Chicken, but breasts work beautifully if you prefer a leaner option!
- 1 tablespoon olive oil or avocado oil, for searing.
- Salt and freshly ground black pepper to taste.
- For the Marinade (Optional, but highly recommended for depth of flavor!):
- 1 tablespoon soy sauce (low sodium preferred).
- 1 teaspoon sesame oil.
- 1/2 teaspoon black pepper.
- 1 tablespoon cornstarch – this helps tenderize the chicken and gives it a slight crispiness when seared.
- For the Irresistible Honey Garlic Sauce:
- 1/2 cup low sodium soy sauce – this is the backbone of our savory sauce.
- 1/2 cup honey – the star of our Honey Garlic Chicken, providing that beautiful sweetness and glossy finish.
- 6-8 cloves fresh garlic, minced – and I mean really minced! You want that potent garlic punch.
- 1 tablespoon fresh ginger, grated or finely minced – for a warming, aromatic counterpoint.
- 2 tablespoons rice vinegar (unseasoned) – to balance the sweetness and add a touch of tang.
- 1 tablespoon sriracha or 1/2 teaspoon red pepper flakes (optional, for a subtle kick that isn’t too spicy, but wonderfully flavorful).
- 2 tablespoons cornstarch – essential for thickening our sauce to a luxurious, clingy consistency.
- 1/4 cup cold water (to mix with the cornstarch).
- For the Aromatics & Vegetables (Optional, but highly encouraged for a complete meal!):
- 1 tablespoon additional olive oil or preferred cooking oil.
- 1 small yellow onion, chopped into 1/2-inch pieces.
- 1 red bell pepper, seeds removed and sliced into thin strips.
- 1 head of broccoli, cut into small florets.
- 1 medium carrot, peeled and thinly sliced or julienned.
- For Garnish:
- 1 tablespoon sesame seeds (toasted, if you have them, for extra crunch and nutty flavor).
- 2-3 green onions, thinly sliced (for freshness and a pop of color).
- For Serving:
- Steamed white or brown rice, quinoa, or noodles.
Preparing the Chicken for Perfection:
Creating truly spectacular Honey Garlic Chicken starts with how we handle the star ingredient: the chicken itself. Trust me, these initial steps make all the difference in texture and flavor absorption!
- Pat Dry the Chicken: First things first, take your chicken pieces and gently pat them thoroughly dry with paper towels. This is a crucial step that many people overlook! Why do we do this? Because excess moisture on the surface of the chicken prevents it from getting that beautiful, golden-brown sear that adds so much flavor and texture to our dish. A dry surface means better browning, and better browning means more delicious Honey Garlic Chicken.
- Cut into Uniform Pieces: Next, if you haven’t already, cut your chicken into roughly 1-inch bite-sized pieces. Aim for consistency here. Uniform pieces will ensure that all the chicken cooks evenly, preventing some pieces from becoming overcooked and dry while others are still underdone. This attention to detail is what elevates a good dish to a great one.
- The Flavor-Boosting Marinade: Now, for an optional but highly recommended step to infuse even more flavor and tenderness into your chicken. In a medium bowl, combine the dried chicken pieces with 1 tablespoon of low sodium soy sauce, 1 teaspoon of sesame oil, 1/2 teaspoon of black pepper, and 1 tablespoon of cornstarch.
- Mix and Marinate: Use your hands (or a spoon if you prefer) to toss the chicken thoroughly, ensuring every piece is coated with this simple yet powerful marinade. The cornstarch here isn’t just for flavor; it acts as a protective layer during cooking, helping to keep the chicken moist and contributing to a slight crispness on the exterior. Cover the bowl and let the chicken marinate at room temperature for at least 15-20 minutes while you prepare the other components of your Honey Garlic Chicken. If you have more time, you can refrigerate it for up to 30 minutes, but for longer periods, I usually don’t bother with this specific marinade as the sauce provides so much flavor on its own.
Crafting the Irresistible Honey Garlic Sauce:
The sauce is undoubtedly the heart and soul of our Honey Garlic Chicken. It’s that perfect balance of sweet, savory, tangy, and a touch of heat that makes this dish so incredibly addictive. Let’s create it!
- Combine Wet Ingredients: In a medium bowl or a large liquid measuring cup, combine 1/2 cup of low sodium soy sauce, 1/2 cup of honey, 6-8 cloves of minced fresh garlic, 1 tablespoon of grated fresh ginger, and 2 tablespoons of rice vinegar. If you enjoy a bit of warmth and a very subtle kick, now is the time to add 1 tablespoon of sriracha or 1/2 teaspoon of red pepper flakes. Give this mixture a good whisk to thoroughly combine everything.
- Prepare the Cornstarch Slurry: In a separate small bowl, whisk together 2 tablespoons of cornstarch with 1/4 cup of cold water until no lumps remain. This is your cornstarch slurry, and it’s absolutely vital for achieving that perfect, glossy, clingy consistency we want for our Honey Garlic Chicken sauce. Do not add the dry cornstarch directly to the main sauce mixture; it will clump up and be impossible to smooth out.
- Integrate the Slurry: Pour the cornstarch slurry into your main honey garlic sauce mixture. Whisk vigorously again to ensure it’s completely incorporated. You’ll notice the mixture is still quite thin at this stage, but don’t worry! It will thicken beautifully as it cooks. Set this magnificent sauce aside, ready to be introduced to our chicken later. This method ensures all the flavors have a chance to meld before hitting the hot pan, guaranteeing a truly cohesive and delicious Honey Garlic Chicken.
Prepping the Vegetables (Optional but Highly Recommended!):
While the Honey Garlic Chicken itself is the star, adding fresh, vibrant vegetables not only makes for a more balanced and nutritious meal but also adds fantastic texture and color. Here’s how I like to prepare them.
- Wash and Dry: Thoroughly wash all your chosen vegetables under cold running water. Shake off excess water or pat dry with a clean towel.
- Chop the Onion: Peel and chop your small yellow onion into roughly 1/2-inch pieces. These will provide a foundational aromatic sweetness when sautéed.
- Slice the Bell Pepper: Remove the seeds and white pith from the red bell pepper, then slice it into thin, uniform strips. Red bell peppers add a lovely sweetness and crunch.
- Prepare the Broccoli Florets: Cut your head of broccoli into small, bite-sized florets. I sometimes like to blanch my broccoli for about 1-2 minutes in boiling water, then immediately shock it in ice water before adding it to the stir-fry. This step ensures the broccoli is tender-crisp and vibrantly green without becoming mushy during the stir-frying process. However, if you prefer a firmer bite, or want to save a step, you can certainly add it directly to the pan.
- Julienne the Carrot: Peel the carrot and either thinly slice it into rounds or julienne it into matchsticks. Carrots add an earthy sweetness and a beautiful orange hue to our dish.
- Keep Them Separate: Keep your prepped vegetables in separate bowls or piles. This allows you to add them to the pan at different stages based on their cooking times, ensuring everything is perfectly cooked.
Cooking the Honey Garlic Chicken to Golden Perfection:
Now, let’s get that chicken beautifully seared! This step is about building the initial flavor and texture for our incredible Honey Garlic Chicken.
- Heat the Pan: Place a large skillet, wok, or Dutch oven over medium-high heat. Add 1 tablespoon of olive oil or avocado oil. Allow the oil to get shimmering hot but not smoking. This hot oil is key for achieving that desirable sear.
- Cook in Batches (Crucial!): Once the oil is hot, add about half of your marinated chicken pieces to the pan in a single layer. Do not overcrowd the pan! This is one of the most important tips for achieving a proper sear rather than steaming your chicken. Overcrowding will lower the pan temperature, releasing moisture and preventing browning.
- Sear the Chicken: Let the chicken cook undisturbed for about 3-4 minutes on one side until it develops a beautiful golden-brown crust. You’ll hear that satisfying sizzle! Then, flip the pieces and cook for another 2-3 minutes until golden on the second side and cooked through. The exact time will depend on the thickness of your chicken pieces. They don’t need to be fully cooked through at this stage, as they will finish cooking in the sauce later.
- Remove and Repeat: Once the first batch is nicely seared, transfer the cooked chicken to a clean plate and set aside. Add a tiny splash more oil to the pan if needed, then repeat the process with the remaining chicken pieces until all of it is cooked and beautifully golden.
Building the Flavor: Sautéing Aromatics and Vegetables:
With our chicken seared, it’s time to infuse the pan with even more wonderful aromas and add our vibrant vegetables. This truly enriches the base flavor for our Honey Garlic Chicken.
- Add More Oil (If Needed): If your pan looks dry after cooking the chicken, add another tablespoon of olive oil or your preferred cooking oil to the same skillet. Keep the heat at medium-high.
- Sauté the Onion: Add the chopped yellow onion to the hot pan. Sauté for 2-3 minutes, stirring occasionally, until it starts to soften and become translucent. The natural sugars in the onion will start to caramelize slightly, adding a lovely depth of flavor.
- Introduce the Harder Vegetables: Next, add the sliced carrots and broccoli florets (if not blanched). Stir-fry for 3-4 minutes. If your broccoli was blanched, you can reduce this time slightly. We want them to start tenderizing but still retain a pleasant crunch.
- Add Bell Pepper: Finally, toss in the sliced red bell pepper. Stir-fry for another 1-2 minutes. Bell peppers cook quickly, and we want them to remain crisp-tender and retain their vibrant color for the best texture and visual appeal in our finished Honey Garlic Chicken dish.
- Push to the Side: Once the vegetables are cooked to your liking, push them to one side of the pan, creating a small clearing in the center.
The Grand Finale: Combining and Thickening our Honey Garlic Chicken:
This is where all our hard work comes together, transforming individual components into a cohesive, unbelievably flavorful Honey Garlic Chicken masterpiece!
- Reintroduce the Chicken: Carefully return all the seared chicken pieces, along with any accumulated juices on the plate, back into the pan with the cooked vegetables. Spread them out evenly.
- Whisk the Sauce Again: Give your prepared Honey Garlic Sauce one final, vigorous whisk. This is especially important if you let it sit for a while, as the cornstarch tends to settle at the bottom. A good whisk ensures the thickening agent is evenly suspended.
- Pour in the Sauce: Pour the entire contents of the honey garlic sauce directly over the chicken and vegetables in the pan. You’ll immediately notice the wonderful aroma filling your kitchen!
- Bring to a Simmer and Thicken: Stir everything together gently to coat the chicken and vegetables thoroughly with the sauce. Bring the mixture to a gentle simmer over medium heat. As the sauce heats up, the cornstarch will activate, and you’ll see the sauce begin to thicken beautifully, becoming glossy and luxurious. This usually takes about 2-4 minutes.
- Stir Continuously: Continue to stir occasionally during this thickening process to prevent the sauce from sticking to the bottom of the pan and to ensure even distribution of heat and thickening. The goal is a sauce that generously coats every piece of Honey Garlic Chicken and vegetable.
- Taste and Adjust: Once the sauce has thickened to your desired consistency, take a small taste. This is your chance to truly personalize your Honey Garlic Chicken! Does it need a tiny pinch more salt? A dash more honey for sweetness? A splash more rice vinegar for tang? A bit more sriracha for heat? Adjust according to your preference.
- Remove from Heat: As soon as the sauce reaches that perfect consistency and the chicken is fully cooked through (if you’re unsure, you can use a meat thermometer; chicken should reach 165°F or 74°C), remove the pan from the heat. Overcooking the sauce after it’s thickened can sometimes lead to a slightly gummy texture, and we want that perfect glossy finish for our Honey Garlic Chicken.
Serving Suggestions and Garnish:
Your magnificent Honey Garlic Chicken is now ready to be enjoyed! Here’s how to present it beautifully and make it a complete, satisfying meal.
- Prepare Your Base: While your Honey Garlic Chicken is simmering, ensure your chosen base is ready. I find that freshly steamed white rice, fluffy brown rice, or even perfectly cooked quinoa or noodles are ideal companions, soaking up all that incredible sauce.
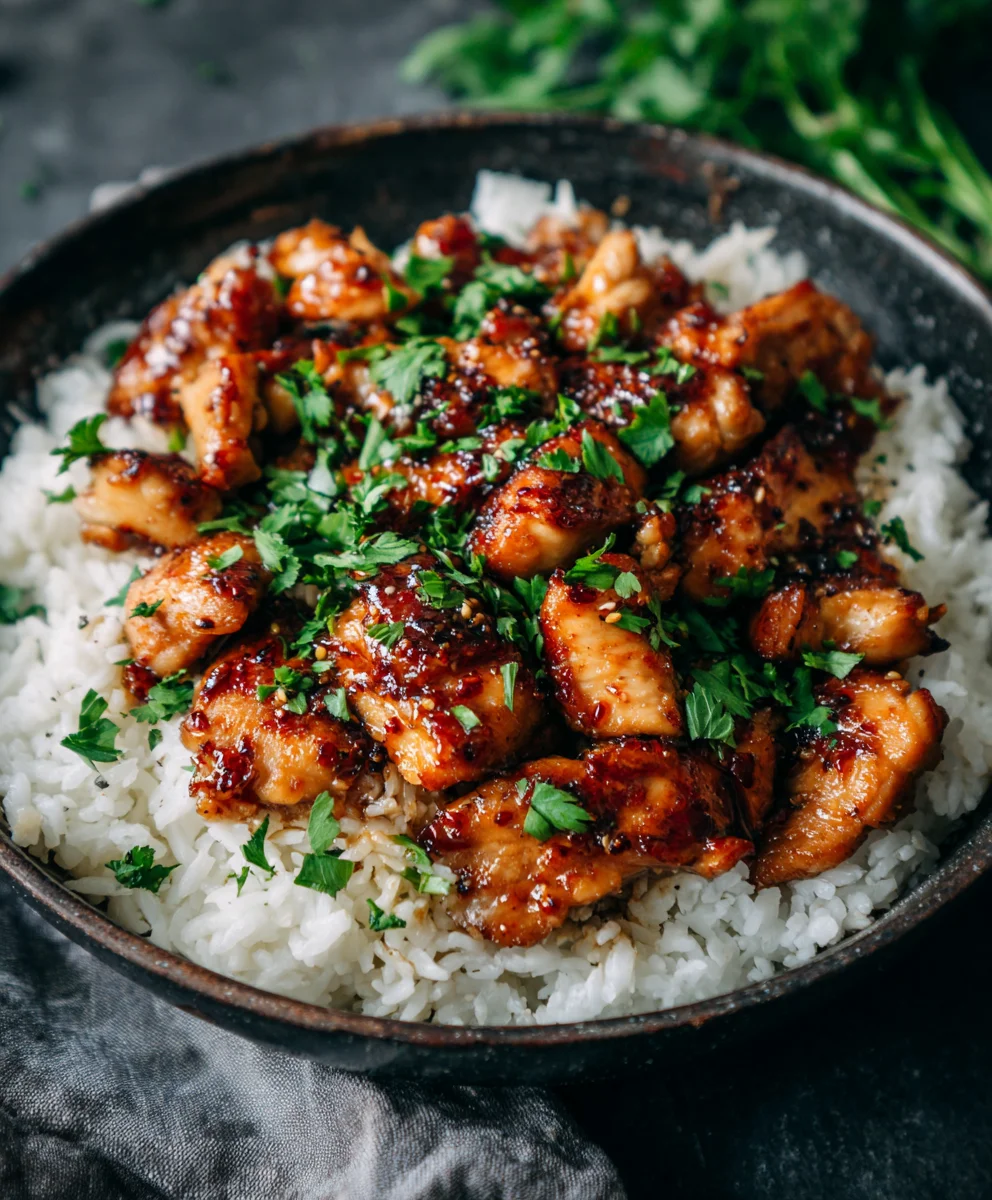
- Plate Generously: Spoon a generous portion of your Honey Garlic Chicken and vegetables over a bed of your preferred base. Make sure to get plenty of that luscious, glossy sauce on top!
- Garnish with Freshness: Sprinkle generously with toasted sesame seeds. The nutty crunch and visual appeal they provide are simply wonderful. Then, scatter the thinly sliced green onions over the top. The fresh, mild oniony bite and vibrant green color truly brighten up the dish and add a final touch of elegance to your homemade Honey Garlic Chicken.
- Serve Immediately: This dish is best enjoyed fresh off the stove. The aromas, textures, and flavors are at their peak when served piping hot.
- Enjoy Your Creation: Take a moment to appreciate the delicious Honey Garlic Chicken you’ve just prepared. It’s truly a labor of love, and every bite will be a testament to your efforts!
Tips for Storing Leftovers:
If by some miracle you have any leftovers of this delectable Honey Garlic Chicken, store them in an airtight container in the refrigerator for up to 3-4 days. Reheat gently on the stovetop or in the microwave, adding a splash of water or chicken broth if the sauce has thickened too much.
Why this Honey Garlic Chicken is a Must-Try:
This recipe for Honey Garlic Chicken offers a fantastic balance of sweet, savory, and tangy, with an irresistible glossy sauce that clings perfectly to every piece of tender chicken and crisp-tender vegetable. It’s a versatile dish that’s perfect for a quick weeknight dinner but also impressive enough to serve to guests. The detailed steps, from preparing the chicken to crafting the exquisite sauce and integrating the fresh vegetables, ensure a consistent and delicious result every time. The use of fresh aromatics like ginger and garlic elevates the flavor profile beyond a simple takeout dish, creating a homemade Honey Garlic Chicken that tastes truly gourmet. I love how customizable it is too – you can easily adjust the spice level, swap out vegetables, or even use different protein sources to make it your own. It’s a comforting, flavorful meal that always brings smiles to the table!
Conclusion:
Well, friends, we’ve journeyed through the steps of creating something truly special, and I hope you’re as excited as I am about the results. This isn’t just another chicken dish; it’s a culinary triumph that will undoubtedly earn a permanent spot in your weekly rotation. What makes this particular recipe for Honey Garlic Chicken an absolute must-try? It’s the perfect harmony of flavors – that delightful dance between sweet, sticky honey and pungent, aromatic garlic, all coating succulent pieces of chicken. It’s comforting, yet sophisticated enough to impress guests, striking that elusive balance between effortless weeknight dinner and impressive company-worthy fare.
I promise you, from the very first bite, you’ll understand why I rave about it. The tender chicken, whether you choose thighs or breasts, absorbs all those incredible flavors, becoming incredibly juicy and flavorful. Then there’s that gorgeous, glistening glaze – thick enough to cling to every piece, delivering an explosion of sweet and savory notes with a hint of tang that is simply irresistible. It’s the kind of dish that makes your kitchen smell amazing, drawing everyone to the table with anticipation. It’s straightforward enough for a weeknight but feels indulgent, making it a brilliant choice for entertaining without all the fuss or hours spent slaving over a hot stove. We’re talking about a dish that consistently delivers on taste, texture, and pure culinary satisfaction, proving that simple ingredients, when combined thoughtfully, can create extraordinary and memorable meals that taste like they came from your favorite restaurant.
Now, let’s talk about how to make this delightful dish a complete meal experience. Its versatility is one of its greatest strengths! My personal favorite way to serve it is alongside a fluffy bed of jasmine rice, allowing the extra glaze to soak into every grain – pure bliss! But don’t stop there. Imagine it paired with a vibrant stir-fry of your favorite vegetables, like crisp broccoli florets, snap peas, and colorful bell peppers, adding both crunch and nutritional value. For a lighter option, consider a fresh, zesty Asian-inspired salad with a light vinaigrette that cuts through the richness of the chicken, or even a simple side of steamed green beans or roasted asparagus can elevate the dish, providing a lovely counterpoint to the rich, savory chicken. If you’re a noodle fan, toss the chicken with some lo mein or ramen noodles for a hearty, comforting bowl that feels incredibly satisfying. Don’t be shy about drizzling any remaining sauce over your sides; it’s liquid gold, and too good to waste!
And here’s where the fun really begins – making this recipe truly your own! While the classic rendition is phenomenal and perfectly balanced as is, feel free to experiment and customize it to your heart’s content.
Want to add a kick to your Honey Garlic Chicken?
A pinch of red pepper flakes or a dash of sriracha in the glaze will introduce a wonderful spicy element that complements the sweetness beautifully. For a deeper, more umami flavor, a tiny splash of toasted sesame oil or a generous sprinkle of sesame seeds right at the end works wonders, adding another layer of aromatic complexity. If you’re looking to switch up the protein, this amazing glaze isn’t just for chicken; it works beautifully with succulent pork tenderloin, jumbo shrimp, or even firm tofu for a delicious vegetarian alternative that everyone will enjoy. You could even use this versatile sauce on homemade meatballs or over roasted cauliflower florets for an entirely different but equally satisfying meal. Don’t be afraid to play with fresh herbs too; a sprinkle of freshly chopped cilantro or thinly sliced green onions at the very end adds a burst of freshness and color that really brightens the dish and elevates its presentation. This incredible adaptability ensures that the recipe never gets boring and always fits your mood, dietary preferences, or ingredients you happen to have on hand, making it a truly invaluable addition to your recipe collection.
So, my dear culinary adventurers, if you’ve been searching for that one dish that consistently impresses, is surprisingly easy to make, and tastes absolutely divine, then your search ends here. I genuinely urge you to set aside some time this week to give this recipe a try. You won’t regret it – I promise!
Imagine the delight on your family’s faces, or the compliments from your dinner guests as they savor every bite.
There’s a special kind of satisfaction that comes from creating something so delicious from scratch, and this recipe delivers that feeling in spades, making you feel like a true kitchen hero. Once you’ve whipped up your own batch of this incredible dish, I would absolutely love to hear about your experience! Did you stick to the original, or did you add your own creative twist? What did you serve it with, and what was the verdict from your taste testers? Please, share your photos, your feedback, and any amazing variations you came up with in the comments below. Your culinary adventures inspire me and our entire community, helping us all discover new ways to enjoy our favorite meals. Let’s make some delicious food together and share the joy of home cooking!
Honey Garlic Chicken
A universally adored classic, Honey Garlic Chicken features succulent pieces of chicken enveloped in a glistening, sticky glaze that perfectly balances sweet and savory notes. This recipe offers a comforting warmth and a burst of flavor, making it a perfect solution for busy evenings.
Ingredients
-
8 boneless, skinless chicken thighs
-
2 tbsp cornstarch
-
1/2 tsp salt
-
1/2 tsp pepper
-
2 tbsp vegetable oil
-
1 tbsp unsalted butter
-
4 cloves minced garlic
-
110g (1/3 cup) honey
-
80ml (1/3 cup) chicken stock
-
1 tbsp rice vinegar
-
1 tbsp light soy sauce
-
1 tbsp finely chopped fresh parsley
-
1/2 tsp chili flakes
-
Boiled rice, for serving
Instructions
-
Step 1
Pat chicken thighs dry, cut into 1-inch pieces. In a bowl, toss chicken with 1 tbsp cornstarch, 1/2 tsp salt, and 1/2 tsp pepper. Let marinate for 15-20 minutes. -
Step 2
In a separate bowl, whisk together 4 cloves minced garlic, 110g honey, 80ml chicken stock, 1 tbsp rice vinegar, 1 tbsp light soy sauce, and 1/2 tsp chili flakes. In a small bowl, mix the remaining 1 tbsp cornstarch with 2 tbsp cold water to create a slurry. Stir the slurry into the honey garlic mixture; set aside. -
Step 3
Heat 2 tbsp vegetable oil and 1 tbsp unsalted butter in a large skillet over medium-high heat. Cook chicken in batches, searing for 3-4 minutes per side until golden brown. Remove chicken to a plate. -
Step 4
Return all seared chicken to the skillet. Whisk the honey garlic sauce again, then pour over chicken. Bring to a gentle simmer and cook, stirring occasionally, for 2-4 minutes until the sauce thickens and becomes glossy, coating the chicken. -
Step 5
Remove from heat. Serve the Honey Garlic Chicken immediately over boiled rice. Garnish generously with 1 tbsp finely chopped fresh parsley and additional chili flakes if desired.
Important Information
Nutrition Facts (Per Serving)
It is important to consider this information as approximate and not to use it as definitive health advice.
Allergy Information
Please check ingredients for potential allergens and consult a health professional if in doubt.

Leave a Comment