
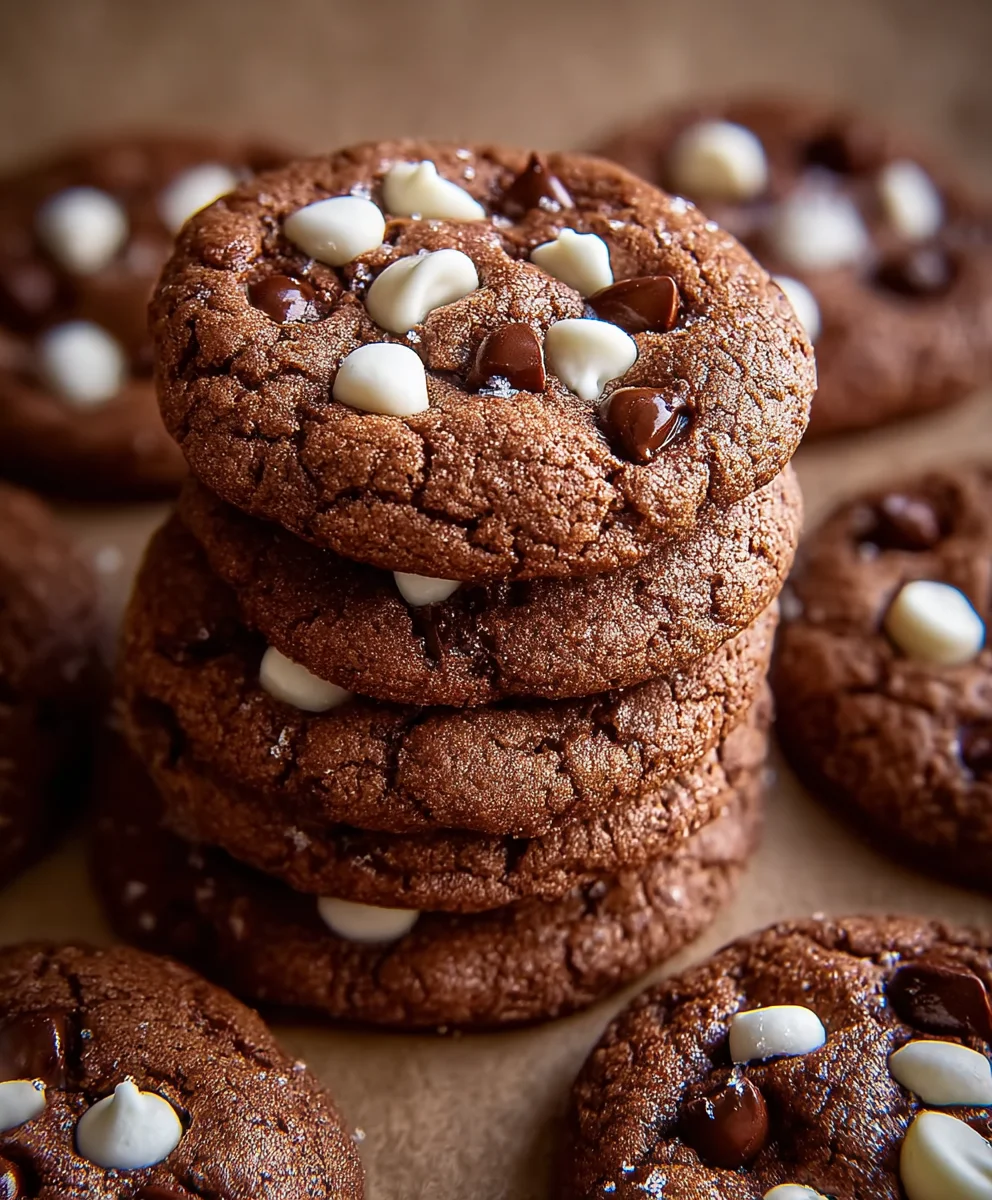
Hot Chocolate Cookies are a culinary revelation, transforming the ultimate comfort beverage into an irresistible baked treat. Imagine the cozy warmth of your favorite mug of hot chocolate, complete with its rich, velvety cocoa notes and soft, melting marshmallows, but now perfectly encapsulated in a delightful cookie. This ingenious creation offers all the nostalgic charm and indulgent flavors we adore about the classic drink, presented in a wonderfully portable and shareable form. I find these cookies to be a brilliant evolution, building upon the centuries-old tradition of hot chocolate itself, which has graced tables from ancient Mesoamerican civilizations to royal European courts, always signifying comfort and joy. It’s truly a modern celebration of a cherished, comforting tradition.
People absolutely adore this dish because it’s more than just a chocolate cookie; it’s an experience. Each bite delivers that deep, comforting chocolate flavor, complemented by a soft, chewy texture that often conceals pockets of gooey, toasted marshmallow. It’s the perfect blend of familiar tastes and exciting textures that evokes happy memories and creates new ones. Whether you’re seeking a delightful treat for a chilly evening or a unique addition to your holiday baking, these Hot Chocolate Cookies provide an unparalleled sense of warmth and pure indulgence. They are simple to make, yet profoundly satisfying, making them a firm favorite for all ages and occasions.
Ingredients:
-
All-Purpose Flour: 2 ½ cups (300g)
I always recommend using a good quality, unbleached all-purpose flour for these Hot Chocolate Cookies. It provides the perfect structure and chewiness.
-
Unsweetened Cocoa Powder: ¾ cup (65g)
For that deep, rich chocolate base, I swear by a high-quality unsweetened cocoa powder, preferably Dutch-processed. It truly makes a difference in the overall flavor profile of your Hot Chocolate Cookies.
-
Baking Soda: 1 teaspoon
This is our leavening agent, helping our cookies rise beautifully and giving them that lovely texture.
-
Salt: ½ teaspoon
Just a touch of salt is crucial for balancing the sweetness and enhancing all the chocolatey flavors in these delightful Hot Chocolate Cookies.
-
Unsalted Butter: 1 cup (226g), softened
Make sure your butter is at proper room temperature – soft enough to make a slight indentation with your finger, but not melted. This is key for a smooth, creamy base for your Hot Chocolate Cookies.
-
Granulated Sugar: 1 cup (200g)
This provides sweetness and helps with the spread and crisp edges of our Hot Chocolate Cookies.
-
Light Brown Sugar: ½ cup (100g), packed
The brown sugar adds a wonderful moisture and a slight caramel note, contributing to the ultimate chewy texture of these Hot Chocolate Cookies.
-
Large Eggs: 2, at room temperature
Using room temperature eggs ensures they emulsify better with the butter and sugar, leading to a more uniform and tender dough for your Hot Chocolate Cookies.
-
Vanilla Extract: 2 teaspoons
A good quality vanilla extract really elevates the chocolate flavor, adding depth and warmth to these Hot Chocolate Cookies.
-
Semi-Sweet Chocolate Chips: 1 cup (170g)
I love using semi-sweet chocolate chips for that classic chocolate chip cookie vibe, but you could also use milk chocolate or even a mix!
-
Mini Marshmallows: 1 ½ cups, divided
These are the star of our Hot Chocolate Cookies, melting into gooey pockets of perfection. Make sure to have extra for decorating!
-
Optional Topping/Garnish:
- Extra Mini Marshmallows: For immediate post-baking topping.
- Hot Cocoa Mix Powder: A light dusting for visual appeal and an extra flavor kick.
- Chocolate Drizzle: Melted chocolate chips or ganache for an elegant finish.
Preparing the Hot Chocolate Cookie Dough
- Whisk Dry Ingredients: In a medium bowl, I like to combine my all-purpose flour, unsweetened cocoa powder, baking soda, and salt. I whisk them thoroughly for about 30 seconds to a minute, ensuring that all the dry ingredients are fully incorporated and there are no lumps of cocoa powder. This step is crucial for an even bake and consistent texture in your Hot Chocolate Cookies. Set this bowl aside for now.
- Cream Butter and Sugars: In a large mixing bowl, using an electric mixer fitted with the paddle attachment (or a sturdy whisk if you’re feeling ambitious!), I cream together the softened unsalted butter, granulated sugar, and packed light brown sugar. I beat these on medium speed for about 2-3 minutes until the mixture is light, fluffy, and significantly paler in color. Scraping down the sides of the bowl periodically is a good habit to ensure everything is evenly mixed. This aeration is what gives our Hot Chocolate Cookies their wonderful texture.
- Add Eggs and Vanilla: Now, I’ll crack in one large egg at a time, beating well after each addition until it’s just combined. After both eggs are in, I pour in the vanilla extract. I continue to beat on medium speed for another minute until the mixture is smooth and well-emulsified. Sometimes, it might look a little curdled at this stage, but don’t worry, it will come together once the dry ingredients are added. Don’t overmix here; we want just enough to combine.
- Gradually Incorporate Dry Ingredients: With the mixer on low speed, I gradually add the reserved dry ingredient mixture to the wet ingredients. I add about a third at a time, mixing until just combined before adding the next portion. I’m careful not to overmix the dough at this stage, as overmixing can lead to tough cookies. As soon as no streaks of flour are visible, I stop the mixer. I might give it a final gentle stir with a spatula to catch any unmixed flour at the bottom of the bowl.
- Fold in Chocolate Chips: Next, I gently fold in the semi-sweet chocolate chips using a spatula. I want them evenly distributed throughout the dough so every bite of our Hot Chocolate Cookies is bursting with chocolatey goodness.
- Chill the Dough: This step is often overlooked, but I consider it non-negotiable for the best Hot Chocolate Cookies! I cover the bowl with plastic wrap and refrigerate the dough for at least 30 minutes, or up to 2 hours. Chilling the dough helps prevent the cookies from spreading too much in the oven, deepens the flavors, and results in a chewier texture. For the ultimate rich and chewy Hot Chocolate Cookies, don’t skip this chilling period!
Baking Your Perfect Hot Chocolate Cookies
- Preheat Oven and Prepare Baking Sheets: While the dough is chilling, I preheat my oven to 350°F (175°C). I then line two large baking sheets with parchment paper or silicone baking mats. This ensures even baking and prevents sticking, making cleanup a breeze.
- Scoop the Dough: Once the dough is adequately chilled, I use a 1.5-tablespoon cookie scoop (or just a regular tablespoon) to portion out the dough. I roll each scoop into a neat ball and place them about 2 inches apart on the prepared baking sheets. This spacing is important to allow the cookies to spread without running into each other.
- Initial Bake: I place one baking sheet at a time in the preheated oven and bake for 8-9 minutes. At this point, the edges of the Hot Chocolate Cookies should be set, but the centers will still look soft and slightly underbaked. This is exactly what we want!
- Add Mini Marshmallows: After the initial bake, I carefully remove the baking sheet from the oven. Working quickly, I gently press 3-5 mini marshmallows onto the top of each cookie. They don’t need to be perfectly neat; a rustic look is part of the charm of these Hot Chocolate Cookies.
- Finish Baking: I return the baking sheet to the oven for another 2-3 minutes, or until the marshmallows are puffed up, golden brown, and delightfully gooey, and the cookie edges are lightly golden. Keep a close eye on them during this phase, as marshmallows can brown quickly! The centers of the cookies should still look slightly soft, as they will continue to set as they cool.
- Cooling Process: Once baked, I carefully remove the Hot Chocolate Cookies from the oven. I let them cool on the baking sheet for about 5 minutes. This allows them to set up a bit before transferring. Then, using a spatula, I transfer the warm, gooey Hot Chocolate Cookies to a wire rack to cool completely. Be gentle, as they will be quite soft when hot.
Assembling and Decorating Your Hot Chocolate Cookies
Once your beautiful Hot Chocolate Cookies have cooled, it’s time to add those finishing touches that truly make them sing “hot chocolate”!
- Additional Marshmallow Topping (Optional): For an extra festive and visually appealing touch, while the cookies are still warm from the oven (right after the second bake), you can gently press a few more fresh mini marshmallows on top of the already melted ones. The residual heat will soften them slightly without fully melting them, giving you those distinct marshmallow clouds.
- Hot Cocoa Powder Dusting (Optional but Recommended): Once the cookies are completely cool (this is important, as dusting while warm can make the powder melt), I like to take a fine-mesh sieve and lightly dust the tops of some of the Hot Chocolate Cookies with a bit of unsweetened cocoa powder or even a prepared hot cocoa mix powder. This adds an extra layer of chocolate flavor and gives them that authentic hot chocolate visual. This simple step truly enhances the “Hot Chocolate Cookies” theme.
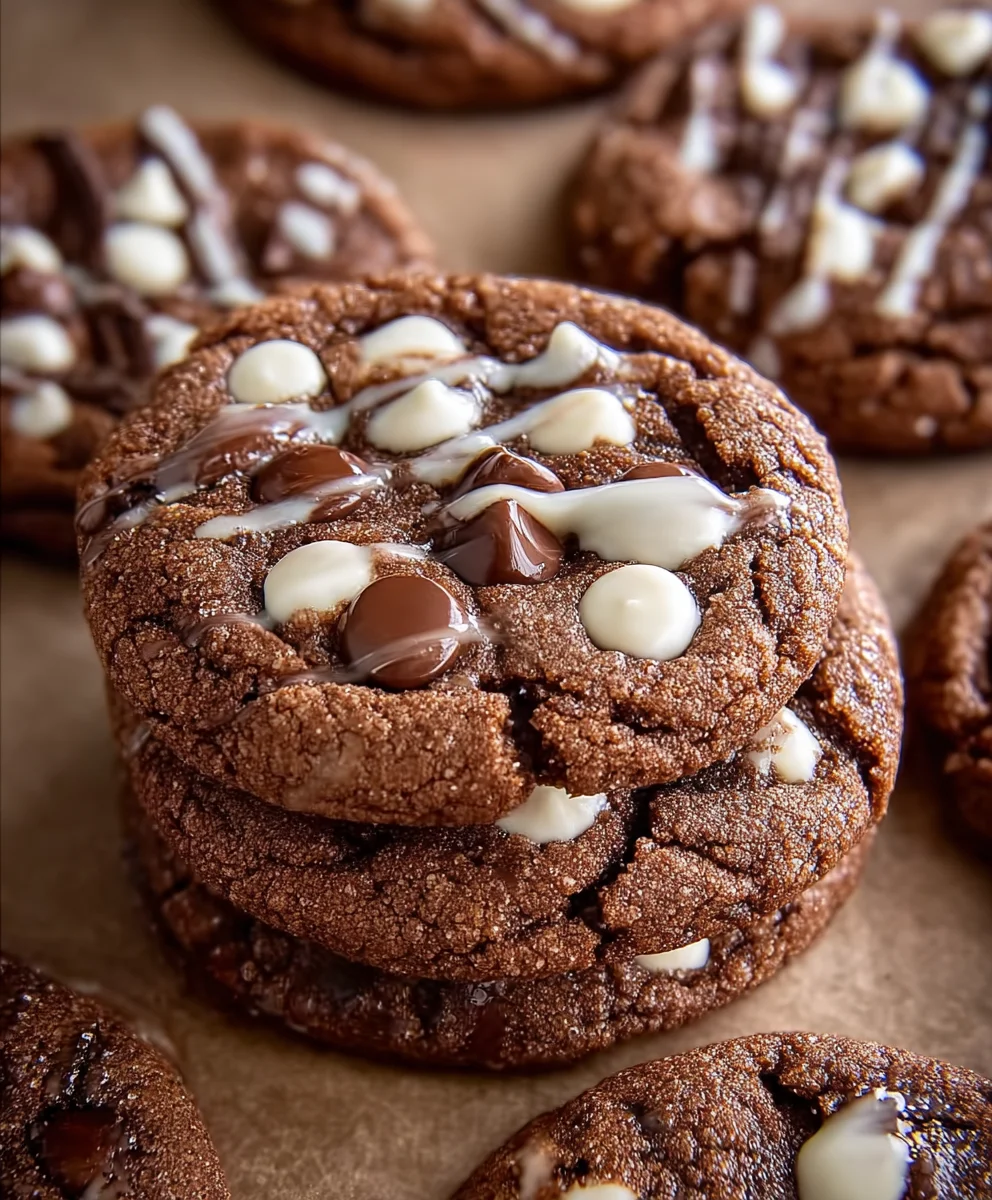
- Chocolate Drizzle (Optional): For a truly decadent experience, I sometimes melt a handful of chocolate chips with a tiny bit of coconut oil or butter in a microwave-safe bowl (in 30-second intervals, stirring in between). Once smooth, I transfer the melted chocolate to a piping bag with a tiny snip at the end, or simply use a fork, and drizzle it artfully over the cooled Hot Chocolate Cookies. This adds another layer of chocolate richness and looks incredibly inviting.
- Serving Suggestions: These Hot Chocolate Cookies are best enjoyed fresh, perhaps still slightly warm, with a tall glass of milk or, fittingly, with a steaming mug of hot chocolate! They make perfect treats for holiday gatherings, cozy evenings, or just a special afternoon indulgence.
Tips for the Best Hot Chocolate Cookies
Achieving truly spectacular Hot Chocolate Cookies is all about a few key details. Here are my personal tips to ensure your batch is absolutely perfect every time!
-
Ingredient Quality Matters:
I cannot stress enough how much the quality of your ingredients impacts the final taste of your Hot Chocolate Cookies. Use a good brand of unsweetened cocoa powder, preferably Dutch-processed, for a deeper and richer chocolate flavor. High-quality butter and vanilla extract also make a noticeable difference in the overall depth and aroma of these cookies. Don’t skimp on quality if you want truly premium Hot Chocolate Cookies.
-
Don’t Skip the Chill Time:
While it might be tempting to rush, chilling the cookie dough is a critical step for these Hot Chocolate Cookies. It allows the flour to fully hydrate, preventing the cookies from spreading too much and resulting in a chewier texture. More importantly, it gives the flavors a chance to meld and deepen, leading to a much more flavorful cookie. Even 30 minutes makes a difference, but an hour or two is ideal for the best spread and chew. This step ensures your Hot Chocolate Cookies maintain their shape and develop a rich taste.
-
Room Temperature Ingredients are Key:
Ensuring your butter and eggs are at room temperature helps them emulsify properly with the sugars, creating a smooth, homogenous dough. This leads to a more consistent texture and a better overall rise in your Hot Chocolate Cookies. If your butter is too cold, it won’t cream properly, and if it’s too warm, your dough might become greasy.
-
Measure Flour Correctly:
Too much flour can lead to dry, dense Hot Chocolate Cookies. I always recommend spooning the flour into your measuring cup and then leveling it off with the back of a knife. Better yet, use a kitchen scale for precise measurement – 2 ½ cups of all-purpose flour should weigh around 300 grams.
-
Don’t Overbake Your Hot Chocolate Cookies:
This is probably the most common mistake when baking cookies. For Hot Chocolate Cookies, you want the edges to be set and lightly golden, but the centers should still look slightly soft and gooey. Remember, the cookies will continue to cook slightly from residual heat once they’re out of the oven. An underbaked cookie is usually a moist, chewy cookie, which is exactly what we’re aiming for with these Hot Chocolate Cookies. Overbaking leads to dry, crumbly results.
-
Evenly Press Marshmallows:
When you add the mini marshmallows during the second bake, try to press them gently but firmly onto the cookie surface. This helps them adhere better and ensures they melt into a beautiful, gooey layer without sliding off. I like to use about 3-5 mini marshmallows per cookie, depending on their size and how much marshmallow goodness I’m craving for my Hot Chocolate Cookies!
-
Storage of Hot Chocolate Cookies:
Once completely cooled, store your Hot Chocolate Cookies in an airtight container at room temperature for up to 3-4 days. For longer storage, you can freeze them for up to 2-3 months. Just be aware that the marshmallows might get a little sticky after freezing and thawing, but the flavor will still be amazing. I like to reheat them slightly in the microwave for a few seconds to get that gooey marshmallow texture back, making them feel like freshly baked Hot Chocolate Cookies all over again.
-
Experiment with Chocolate:
While I’ve recommended semi-sweet chocolate chips, feel free to get creative! Dark chocolate chips or chunks will give a more intense, less sweet Hot Chocolate Cookie. Milk chocolate chips will make them sweeter and even more reminiscent of a creamy hot cocoa. A mix of different chocolates can also create a complex and delightful flavor profile.
-
Troubleshooting Hot Chocolate Cookies:
- Cookies Spreading Too Much: This usually means your butter was too soft, the dough wasn’t chilled enough, or your oven temperature is too low. Ensure proper chilling and an accurate oven temperature.
- Cookies Too Dry/Crumbly: Most likely overbaked or too much flour was used. Recheck your baking time and flour measurement technique.
- Marshmallows Burning: This happens if the oven is too hot or they are left in too long during the second bake. Keep a very close eye on them during this stage; 2-3 minutes is usually plenty.
Following these tips will help you consistently bake the most incredible Hot Chocolate Cookies that will be a hit with everyone!
Conclusion:
As we wrap up our delightful journey through this recipe, I truly hope you’re feeling as inspired as I am to get into the kitchen and create something truly special. These aren’t just any cookies; they embody pure comfort and joy, bringing the beloved warmth of a classic hot chocolate into a perfectly portable, chewy, and utterly irresistible bite. I firmly believe this recipe is an absolute must-try for anyone who appreciates the simple pleasures of life, especially those centered around rich, comforting chocolate. It’s the kind of treat that instantly brightens a gloomy afternoon, makes a perfect ending to a family meal, or simply serves as a delightful companion to your favorite warm beverage.
What makes these particular cookies stand out, you ask? It’s that ingenious blend of familiar flavors and textures. The deep, cocoa-rich dough, combined with those pockets of melted chocolate chips, truly mimics the experience of sipping a steaming mug of hot chocolate. The subtle hint of vanilla, often overlooked, ties all the decadent elements together, creating a symphony of taste that’s both nostalgic and exciting. Plus, the ease of preparation means you don’t need to be a seasoned baker to achieve spectacular results. This recipe is designed to be foolproof, ensuring that every batch comes out wonderfully soft in the center with just the right amount of crispness at the edges – a textural perfection that will keep you coming back for more.
Now, let’s talk about how to make these incredible cookies an even more memorable experience, or how to put your own creative spin on them. While they are undoubtedly sublime on their own, fresh from the oven, still slightly warm and gooey, there are so many ways to enjoy and customize them. For serving, I absolutely love them alongside a tall, frosty glass of milk, which offers a refreshing contrast to the intense chocolate flavor. Alternatively, for a truly immersive experience, pair them with a fresh cup of coffee or, naturally, a piping hot mug of your favorite homemade hot chocolate – a double dose of warmth and indulgence!
Elevate Your Hot Chocolate Cookies Experience: Serving Suggestions
- With Ice Cream: A scoop of vanilla bean ice cream nestled between two warm cookies creates an instant ice cream sandwich that is pure bliss. The melting ice cream mingling with the soft cookie is an unforgettable combination.
- As a Dessert Platter Component: Arrange them artfully on a dessert platter with fresh berries, a dollop of whipped cream, or a drizzle of raspberry sauce for an elegant presentation that’s surprisingly simple to achieve.
- Coffee or Tea Companion: Their robust flavor makes them an ideal partner for your morning coffee or an afternoon cup of black tea, providing that perfect little something sweet to complement your drink.
Creative Variations to Make Them Uniquely Yours:
One of the joys of baking is the freedom to experiment, and these Hot Chocolate Cookies are a fantastic canvas for your culinary imagination. Don’t be afraid to try some of these ideas:
- Mint Chocolate Magic: Add a few drops of peppermint extract to the dough for a refreshing, festive twist, or fold in crushed candy canes along with the chocolate chips for a delightful crunch and cool flavor.
- Spicy Kick: For the adventurous palate, a pinch of cayenne pepper or chili powder can introduce a subtle, warming heat that beautifully complements the rich chocolate, reminiscent of Mexican hot chocolate.
- Nutty Affair: Stir in a handful of chopped walnuts, pecans, or almonds for added texture and a delightful nutty flavor that pairs wonderfully with chocolate.
- White Chocolate Swirl: Substitute some of the milk chocolate chips with white chocolate chips for a different flavor profile and visual appeal. You could even drizzle melted white chocolate over the baked cookies.
- Marshmallow Marvel: For the ultimate hot chocolate experience, gently press a few mini marshmallows onto the tops of the cookies during the last few minutes of baking. They’ll melt slightly and toast to golden perfection.
- Sprinkle Fun: Before baking, sprinkle the tops with festive sprinkles, sea salt flakes for a sophisticated touch, or a dusting of cocoa powder for an extra chocolatey look.
- Orange Zest Brightness: A teaspoon of finely grated orange zest can add a surprising burst of citrusy brightness that beautifully cuts through the richness of the chocolate, elevating the flavor profile significantly.
I genuinely encourage you, dear reader, to not just bookmark this page, but to actually roll up your sleeves and give these Hot Chocolate Cookies a try. You’ll be amazed at how quickly they become a new favorite in your home. And when you do, please, please, please come back and share your experience! I absolutely adore hearing about your baking triumphs and seeing your beautiful creations. What variations did you try? Who did you share them with? Did they vanish as quickly as they did in my kitchen? Your insights and stories are what truly make this community vibrant and inspiring. Happy baking, everyone!
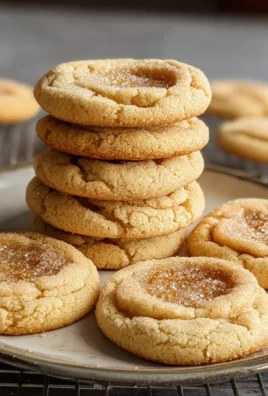
Chewy Hot Chocolate Cookies
Hot Chocolate Cookies are a chewy, rich, and deliciously sweet treat that transforms the classic comfort beverage into an irresistible baked good. Each bite offers deep chocolate flavor with gooey, toasted marshmallow pockets, capturing the cozy essence of hot chocolate in a portable form. Perfect for holidays or any chilly evening, these cookies are simple to make and a beloved favorite. My cookie platters always include these beauties, and everyone asks for the recipe!
Ingredients
-
2 ½ cups (300g) All-Purpose Flour
-
¾ cup (65g) Unsweetened Cocoa Powder (Dutch-processed recommended)
-
1 teaspoon Baking Soda
-
½ teaspoon Salt
-
1 cup (226g) Unsalted Butter, softened
-
1 cup (200g) Granulated Sugar
-
½ cup (100g) Light Brown Sugar, packed
-
2 Large Eggs, at room temperature
-
2 teaspoons Vanilla Extract
-
1 cup (170g) Semi-Sweet Chocolate Chips
-
1 ½ cups Mini Marshmallows, divided
-
Extra Mini Marshmallows (for topping, optional)
-
Hot Cocoa Mix Powder (for dusting, optional)
-
Melted Chocolate (for drizzle, optional)
Instructions
-
Step 1
Whisk 2 ½ cups (300g) all-purpose flour, ¾ cup (65g) unsweetened cocoa powder, 1 teaspoon baking soda, and ½ teaspoon salt in a medium bowl until thoroughly combined. Set aside. -
Step 2
In a large mixing bowl, cream 1 cup (226g) softened unsalted butter, 1 cup (200g) granulated sugar, and ½ cup (100g) packed light brown sugar with an electric mixer on medium speed for 2-3 minutes until light and fluffy. Scrape down the sides of the bowl periodically. -
Step 3
Beat in 2 large room temperature eggs, one at a time, until just combined after each addition. Then, mix in 2 teaspoons vanilla extract until the mixture is smooth. Avoid overmixing. -
Step 4
With the mixer on low speed, gradually add the whisked dry ingredient mixture to the wet ingredients in thirds, mixing until just combined and no streaks of flour are visible. Do not overmix the dough to ensure tender cookies. -
Step 5
Gently fold in 1 cup (170g) semi-sweet chocolate chips using a spatula until they are evenly distributed throughout the dough. -
Step 6
Cover the bowl with plastic wrap and refrigerate the dough for at least 30 minutes, or up to 2 hours. Chilling helps prevent spreading and deepens the flavors, resulting in a chewier cookie. -
Step 7
Preheat your oven to 350°F (175°C). Line two large baking sheets with parchment paper or silicone baking mats to prevent sticking and ensure even baking. -
Step 8
Use a 1.5-tablespoon cookie scoop to portion out the chilled dough, rolling each into a neat ball. Place them about 2 inches apart on the prepared baking sheets. Bake one sheet at a time for 8-9 minutes; the edges should be set, but the centers will still look soft and slightly underbaked. -
Step 9
Carefully remove the baking sheet from the oven. Quickly press 3-5 mini marshmallows onto the top of each cookie. Return to the oven for another 2-3 minutes, or until the marshmallows are puffed up, golden brown, and delightfully gooey. Monitor closely to avoid burning the marshmallows. -
Step 10
Once baked, remove the Hot Chocolate Cookies from the oven and let them cool on the baking sheet for about 5 minutes to set up. Then, carefully transfer the warm, gooey cookies to a wire rack to cool completely. -
Step 11
For optional finishing touches: 1) While still warm from the oven (after the second bake), gently press a few more fresh mini marshmallows on top of the already melted ones for a distinct cloud-like effect. 2) Once completely cool, lightly dust the tops with unsweetened cocoa powder or prepared hot cocoa mix powder using a fine-mesh sieve for visual appeal and extra flavor. 3) For a decadent finish, drizzle cooled cookies with melted chocolate chips or ganache. -
Step 12
You can freeze the dough balls for up to 3 months. To bake, simply place frozen dough balls on a prepared baking sheet and add 1-2 minutes to the regular baking time.
Important Information
Nutrition Facts (Per Serving)
It is important to consider this information as approximate and not to use it as definitive health advice.
Allergy Information
Please check ingredients for potential allergens and consult a health professional if in doubt.
Leave a Comment