
Sour Cream Cake is more than just a dessert; it’s a culinary revelation that I am incredibly excited to share with you today. Have you ever wondered what secret ingredient could transform a simple cake into an extraordinarily tender, moist, and subtly tangy masterpiece? The answer, unequivocally, lies in the humble yet powerful sour cream. This beloved baking staple, with its roots deeply embedded in rich Eastern European culinary traditions where fermented dairy products are kings, brings an unparalleled depth of flavor and a wonderfully delicate crumb to every slice. It’s no wonder why people consistently fall in love with this cake, often making it a cherished family recipe handed down through generations.
Why This Cake Will Become Your New Favorite
What truly sets a phenomenal Sour Cream Cake apart is its unique ability to balance sweetness with a refreshing tang, preventing it from ever being overly cloying. The sour cream works magic, breaking down gluten and adding a luxurious richness that results in an incredibly moist and tender texture that simply melts in your mouth. Whether enjoyed as a comforting breakfast treat, an elegant afternoon tea accompaniment, or the grand finale to a dinner party, its versatility and undeniable deliciousness make it a perpetual crowd-pleaser. Get ready to discover your new go-to recipe for pure cake perfection, a dessert that promises to delight with every forkful.
Ingredients:
- For the Sour Cream Cake:
- 3 cups (360g) all-purpose flour, spooned and leveled – I always measure this carefully to ensure the perfect crumb for my Sour Cream Cake.
- 1 teaspoon baking powder – for that lovely lift.
- 1 teaspoon baking soda – which will react beautifully with the sour cream.
- 1/2 teaspoon salt – just a pinch to balance all the flavors.
- 1 cup (226g) unsalted butter, softened to room temperature – this is crucial for creaming properly and achieving a light texture. I usually leave it out for at least an hour or two.
- 2 cups (400g) granulated sugar – for delightful sweetness.
- 4 large eggs, at room temperature – like the butter, room temperature eggs emulsify better into the batter, leading to a smoother, more uniform cake.
- 1 teaspoon pure vanilla extract – use good quality vanilla; it makes a big difference in a simple cake like this Sour Cream Cake.
- 1 1/2 cups (360g) full-fat sour cream, at room temperature – this is the star ingredient! It provides incredible moisture, a tender crumb, and that signature tangy flavor to our Sour Cream Cake. Do not use low-fat; full-fat is essential here.
- For the Lemon Glaze:
- 2 cups (240g) powdered sugar, sifted – sifting prevents lumps, ensuring a silky smooth glaze.
- 3-4 tablespoons fresh lemon juice – adjust to your desired consistency and tartness. This adds a wonderful brightness to complement the Sour Cream Cake.
- 1-2 tablespoons milk or cream (optional, for thinning if needed) – I sometimes add a touch if the glaze is too thick.
- Optional Garnish:
- Lemon zest – for extra aroma and visual appeal.
- Fresh berries (such as raspberries or blueberries) – a lovely addition for serving.
Preparing the Sour Cream Cake Batter
-
Preheat and Prepare Your Pan:
First things first, I always preheat my oven to 325°F (160°C). Then, I prepare a 10-inch Bundt pan or a 9×13-inch baking pan. For a Bundt pan, I like to generously grease it with butter or baking spray, then dust it lightly with flour, tapping out any excess. This ensures our beautiful Sour Cream Cake will release perfectly. If using a 9×13-inch pan, I typically line it with parchment paper, leaving an overhang on the sides to easily lift the cake out later, and then lightly grease the parchment. This meticulous pan preparation is a small step that prevents a lot of heartache later!
-
Combine Dry Ingredients:
In a medium bowl, I whisk together the all-purpose flour, baking powder, baking soda, and salt. I make sure to whisk them thoroughly for about 30 seconds, ensuring the leavening agents are evenly distributed. This step is crucial because it helps create a uniform rise and prevents any pockets of unmixed ingredients, contributing to the consistent, fine crumb of our future Sour Cream Cake. Set this bowl aside for a moment.
-
Cream Butter and Sugar:
Now for the heart of the batter! In a large bowl, using an electric mixer (either a stand mixer with a paddle attachment or a hand mixer), I beat the softened unsalted butter on medium-high speed for about 1-2 minutes until it’s light and creamy. Then, I gradually add the granulated sugar, beating for another 3-5 minutes until the mixture is truly light, fluffy, and pale yellow. This creaming process is incredibly important; it incorporates air into the butter and sugar, which is what gives our Sour Cream Cake its tender texture. Don’t rush this step! Scrape down the sides of the bowl often to ensure everything is well combined.
-
Add Eggs, One at a Time:
With the mixer still on medium speed, I add the large eggs one at a time, beating well after each addition. It’s important to let each egg fully incorporate before adding the next. This creates a stable emulsion with the butter and sugar, preventing the batter from curdling. After all four eggs are in, I beat for another minute or so until the mixture looks smooth and well-blended, scraping down the bowl as needed. You’ll notice the mixture getting even lighter and fluffier at this stage, building the foundation for a truly excellent Sour Cream Cake.
-
Incorporate Vanilla and Sour Cream:
Next, I mix in the pure vanilla extract. Then, I add the full-fat sour cream to the wet ingredients. Beat on low speed just until it’s combined, being careful not to overmix. The mixture will look slightly looser and wonderfully creamy. The sour cream is truly the magic ingredient here; it provides unparalleled moisture and a delicate tang that elevates this cake far beyond a simple vanilla cake. This is where the signature flavor of our Sour Cream Cake truly begins to develop.
-
Alternating Dry and Wet Ingredients:
Now it’s time to bring everything together. I typically add the dry ingredient mixture to the wet ingredients in three additions, alternating with the sour cream mixture (if it were added separately, but since we added sour cream to wet, we just alternate with dry). So, with the mixer on the lowest speed, I add about one-third of the flour mixture to the wet ingredients and mix just until barely combined. Then, I repeat with the second third of the flour, and finally the last third. The key here is gentle mixing. Overmixing at this stage will develop the gluten in the flour too much, resulting in a tough, dry Sour Cream Cake, which is the exact opposite of what we want! I stop mixing as soon as no dry streaks of flour are visible, often finishing the last few stirs by hand with a spatula to be absolutely sure I don’t overmix.
-
Pour and Level the Batter:
Once the batter is perfectly mixed – it should be thick, smooth, and luscious – I carefully pour it into my prepared Bundt pan or 9×13-inch pan. I use an offset spatula or the back of a spoon to gently spread the batter evenly in the pan, ensuring there are no air pockets and the surface is as level as possible. This helps ensure even baking and a beautiful presentation for our finished Sour Cream Cake.
Baking the Sour Cream Cake
-
Bake Until Golden:
I carefully place the pan into the preheated 325°F (160°C) oven. The baking time will vary depending on your pan and oven, but typically, a Bundt cake will take about 50-65 minutes, and a 9×13-inch cake might take 40-50 minutes. I always start checking around the minimum time. You’ll know the Sour Cream Cake is done when the top is beautifully golden brown, and a wooden skewer or toothpick inserted into the center comes out clean or with just a few moist crumbs attached. The cake should also spring back lightly when gently touched. Resist the urge to open the oven door too frequently during the first 30-40 minutes, as this can cause the cake to sink.
-
Cooling Process:
Once baked, I carefully remove the Sour Cream Cake from the oven. For a Bundt cake, I let it cool in the pan on a wire rack for about 10-15 minutes. This allows the cake to set up and become firm enough to handle without breaking. Then, I invert the pan onto the wire rack to fully remove the cake and let it cool completely. For a 9×13-inch cake, I usually let it cool in the pan for about 20-30 minutes before lifting it out using the parchment paper overhang and placing it on a wire rack to cool completely. It’s absolutely essential that the cake is completely cool before glazing. Glazing a warm cake will cause the glaze to melt and soak in, rather than forming a nice, opaque coating. Patience is a virtue here, but the delicious aroma filling your kitchen will make the wait worthwhile!
Preparing the Glaze and Finishing Touches
-
Whisk Up the Lemon Glaze:
While the Sour Cream Cake is cooling, I prepare the bright lemon glaze. In a medium bowl, I combine the sifted powdered sugar with 3 tablespoons of fresh lemon juice. I whisk these together until the mixture is smooth and lump-free. I’m looking for a consistency that is thick enough to coat the back of a spoon but still pourable. If it’s too thick, I’ll add the remaining tablespoon of lemon juice, or even a tiny splash of milk or cream, a teaspoon at a time, until it reaches the desired consistency. If it’s too thin, a little more sifted powdered sugar will thicken it up. This glaze provides a lovely tart counterpoint to the rich sweetness of the Sour Cream Cake.
-
Glaze the Cooled Sour Cream Cake:
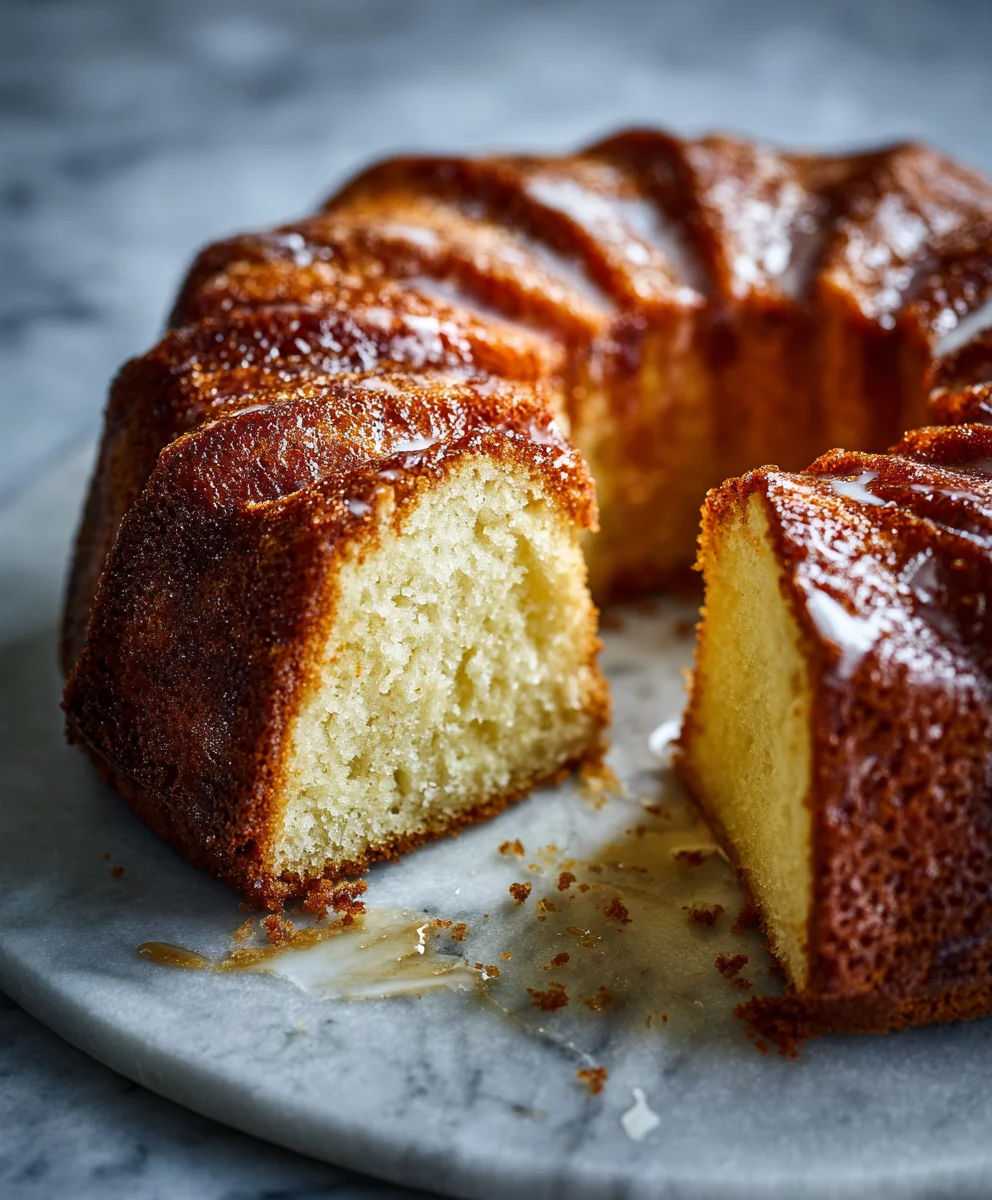
Once the Sour Cream Cake is completely cool – and I mean completely! – I place it on a wire rack set over a baking sheet (to catch any drips). I then slowly drizzle the lemon glaze all over the top of the cake, allowing it to cascade down the sides. I like to start from the center and work my way outwards, ensuring even coverage. For a Bundt cake, letting it fall into the crevices creates a particularly beautiful effect. Don’t be shy with the glaze; it really complements the moist crumb of our Sour Cream Cake.
-
Optional Garnish:
For an extra touch of elegance and flavor, I often sprinkle some fresh lemon zest over the wet glaze immediately after drizzling it. The zest not only adds a beautiful pop of color but also intensifies that fresh lemon aroma. If I’m serving it for a special occasion, I might arrange some fresh raspberries or blueberries around the base or on top of the cake – the vibrant color of berries against the white glaze of the Sour Cream Cake is simply stunning and incredibly inviting.
-
Allow Glaze to Set:
I let the glazed Sour Cream Cake sit for about 15-20 minutes, allowing the glaze to set slightly. This ensures it won’t be too sticky when you slice into it. The glaze will harden just enough to create a delicate shell, encasing the tender cake beneath.
-
Serve and Enjoy Your Sour Cream Cake!
Finally, the moment we’ve been waiting for! Slice your magnificent Sour Cream Cake with a sharp, serrated knife. Each slice will reveal a wonderfully moist, dense, yet tender crumb with that characteristic tang from the sour cream, perfectly balanced by the sweet, zesty lemon glaze. It’s truly a delight for the senses. This cake is perfect on its own with a cup of coffee or tea, or perhaps with a dollop of whipped cream and a few extra berries.
Storage:
This Sour Cream Cake stores beautifully. I usually keep any leftovers covered at room temperature for up to 3 days, or in the refrigerator for up to 5 days, though I doubt it will last that long! The flavor often deepens a bit on the second day, making it an even more delightful treat. Enjoy every single bite of your homemade, incredibly moist, and flavorful Sour Cream Cake!
Conclusion:
So, there you have it, my friends! We’ve journeyed through the simple yet magical steps to creating what I genuinely believe is one of the most delightful desserts you’ll ever pull from your oven. This isn’t just another cake recipe; it’s an invitation to experience pure, unadulterated comfort and joy in every single bite. If you’re looking for a dessert that consistently delivers on flavor, texture, and sheer deliciousness, then look no further.
What makes this particular recipe an absolute non-negotiable addition to your baking repertoire, you ask? Well, for starters, the incredible moistness is truly unparalleled. Thanks to a star ingredient, this cake avoids the common pitfall of dryness that can plague so many homemade bakes. Instead, you’re treated to a tender crumb that practically melts in your mouth, leaving behind a subtle tang that beautifully balances the sweetness. It’s rich without being heavy, decadent yet surprisingly light, making it the perfect companion for almost any occasion, from a casual weeknight treat to a celebratory gathering. Its unassuming appearance prefigures a profound depth of flavor that will have everyone asking for a second slice, and probably the recipe too!
The Undeniable Allure of a Perfectly Moist Sour Cream Cake
This is precisely the magic of a well-executed Sour Cream Cake. The sour cream doesn’t just add moisture; it imparts a unique tenderness and a slight acidity that brightens the entire flavor profile, cutting through the richness and creating a more complex, satisfying taste. It’s this specific characteristic that elevates it from a good cake to a truly great cake. Imagine a fluffy cloud of cake with a delicate crumb, a subtle tang, and a sweetness that’s just right – that’s what you’re about to achieve. This recipe is robust enough for beginners to succeed with confidence, yet elegant enough to impress even the most seasoned dessert connoisseurs. It’s a testament to how simple ingredients, when combined with a little love and the right technique, can create something truly extraordinary. Trust me when I say, once you try this recipe, you’ll understand why it deserves a permanent spot in your baking rotation.
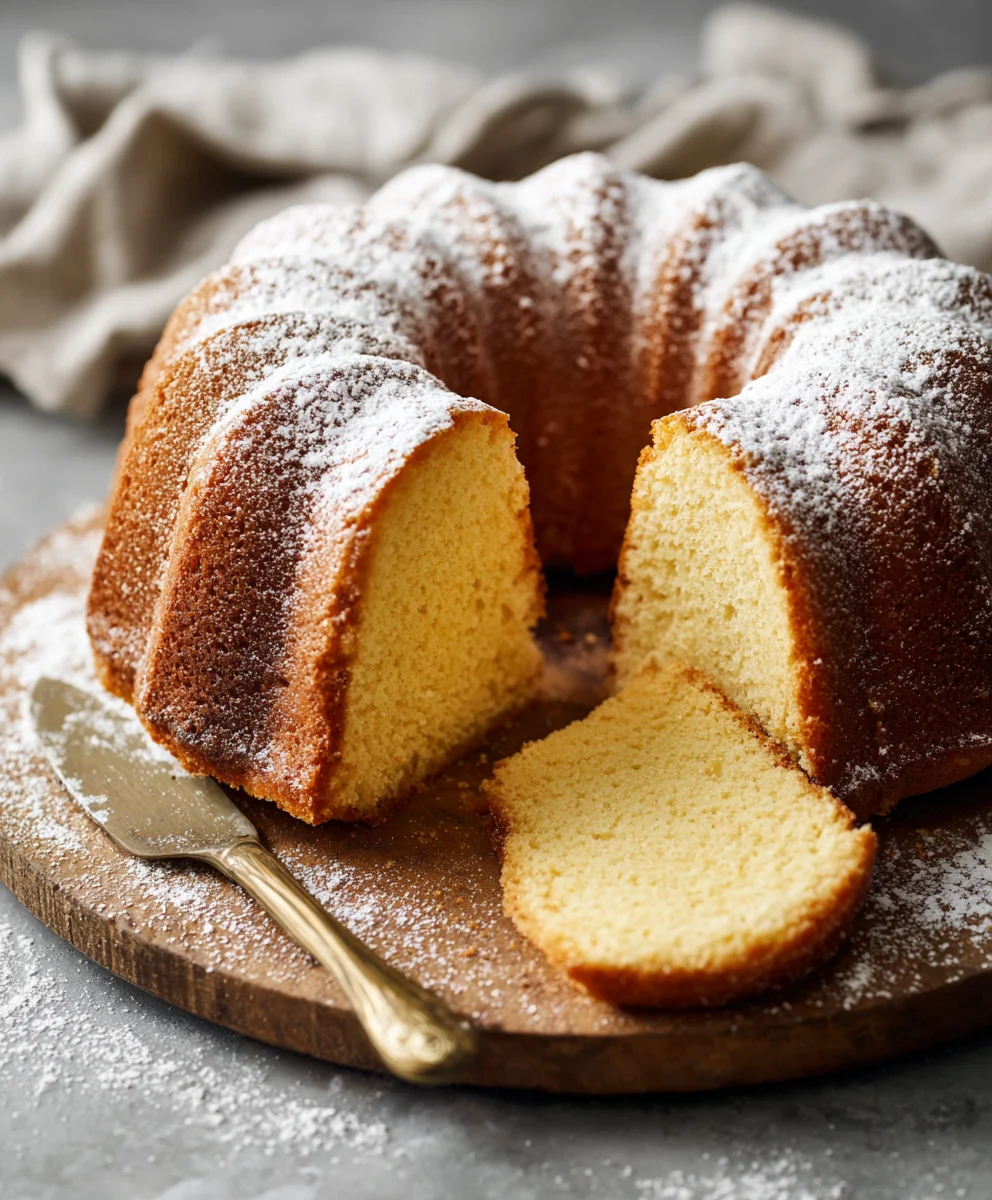
Now, once your glorious creation has cooled and you’re ready to indulge, the possibilities for serving are wonderfully diverse. While it’s absolutely divine on its own, perhaps with a simple dusting of powdered sugar, consider elevating the experience. A dollop of freshly whipped cream infused with a touch of vanilla or citrus zest would be exquisite. For a more vibrant touch, fresh berries – strawberries, raspberries, or a mix of summer fruits – provide a lovely contrast in both color and flavor. Imagine a slice of this cake alongside a scoop of your favorite vanilla bean ice cream, allowing the cold creaminess to meld with the cake’s warmth. And, of course, a warm cup of coffee or tea is always the perfect companion, turning a simple slice of cake into a moment of pure bliss. This cake is not just a dessert; it’s an experience waiting to be savored.
Unleash Your Creativity with Endless Variations
Feeling adventurous? This recipe is incredibly adaptable, making it a fantastic canvas for your culinary creativity! You could fold in some lemon or orange zest into the batter for a bright, citrusy twist that awakens the palate. For a touch of spice and warmth, a pinch of cinnamon or nutmeg can transform the flavors beautifully, especially for autumn gatherings. Chocolate chip lovers rejoice – a handful of mini chocolate chips or even white chocolate chunks would create a delightful surprise in every bite, adding another layer of texture and sweetness. Or, why not experiment with a different frosting? A rich cream cheese frosting would provide an extra layer of tangy sweetness, perfectly complementing the cake’s base, while a simple lemon glaze could add a lovely sheen and a zesty, refreshing finish. The foundation of this cake is so strong that it welcomes your personal touch and creativity with open arms, allowing you to make it truly your own for any season or occasion.
I genuinely hope that you’re feeling inspired to roll up your sleeves and give this wonderful recipe a try. There’s an immense satisfaction that comes from baking something so delicious from scratch, and I promise you, this cake delivers that feeling in spades. Once you’ve baked it, tasted it, and inevitably fallen in love with it, please don’t keep the joy to yourself! I’d absolutely love to hear about your baking journey and see your beautiful creations. Share your experience in the comments below, tag me on social media with your photos, or simply tell your friends and family about your new favorite dessert. Your feedback and stories truly make this community special, and I can’t wait to see the delicious memories you create with this recipe.
So go ahead, preheat that oven, gather your ingredients, and prepare to bake a cake that will undoubtedly become a cherished staple in your kitchen. Happy baking, everyone – may your cake be moist, delicious, and utterly irresistible!
FAQs (People Also Ask):
What does sour cream do in a cake?
Sour cream is a secret weapon in baking, especially for cakes! It’s rich in fat and has a tangy acidity, both of which contribute significantly to the cake’s final texture and flavor. The fat content adds incredible moisture and tenderness, resulting in a cake that’s never dry. The acidity reacts with baking soda (if used) to create lift and a finer, more tender crumb. Furthermore, the slight tanginess from the sour cream beautifully balances the sweetness of the cake, adding a depth of flavor that makes each bite more complex and satisfying.
Can I substitute sour cream in a cake recipe?
Yes, you can often substitute sour cream, but be aware that the final taste and texture might vary slightly. Common substitutes include plain Greek yogurt (full-fat is best for moisture), buttermilk, or even crème fraîche. For every cup of sour cream, you can typically use an equal amount of Greek yogurt. If using buttermilk, you might need to adjust the amount of other liquids slightly, as buttermilk is thinner. While these alternatives will still provide moisture and some tang, the unique richness and texture that sour cream brings are hard to perfectly replicate.
How long does sour cream cake stay fresh?
A properly stored sour cream cake can stay wonderfully fresh for several days. At room temperature, covered tightly, it’s generally best enjoyed within 2-3 days. If you refrigerate it (which is often recommended, especially if it has a perishable frosting), it can easily last for 5-7 days. Always make sure it’s in an airtight container or wrapped tightly in plastic wrap to prevent it from drying out or absorbing other odors from the fridge.
Can you freeze sour cream cake?
Absolutely! Sour cream cake freezes beautifully, making it an excellent option for meal prep or saving leftovers. To freeze, ensure the cake is completely cooled. If unfrosted, wrap individual slices or the whole cake tightly in plastic wrap, then an additional layer of aluminum foil to prevent freezer burn. If frosted, you might want to flash freeze it first until the frosting is firm, then wrap. It can be stored in the freezer for up to 2-3 months. When you’re ready to enjoy, simply thaw it in the refrigerator overnight or at room temperature for a few hours.
Why did my sour cream cake turn out dry?
A dry cake is a common baking disappointment, even with recipes designed for moisture like a sour cream cake. The most frequent culprit is overbaking. Keep a close eye on your oven and start checking for doneness a few minutes before the recipe suggests. Another reason could be inaccurate ingredient measurements, particularly too much flour or not enough liquid. Using a kitchen scale for flour is highly recommended. Lastly, ensuring your baking soda or powder is fresh and active is crucial for the cake’s lift and tender crumb. Always use room temperature ingredients as specified, as they combine more evenly, leading to a better texture.
Velvety Sour Cream Cake: Perfectly Moist & Tangy
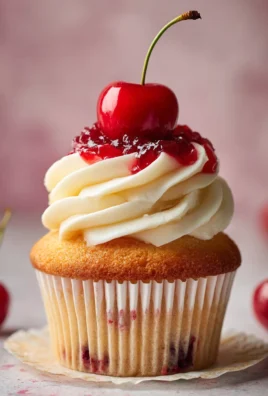
Velvety Sour Cream Cake is an extraordinarily tender, moist, and subtly tangy masterpiece. Sour cream provides unparalleled depth of flavor and a delicate crumb, balancing sweetness with a refreshing tang. It’s a versatile, delicious crowd-pleaser, perfect for any occasion. This cake shines at brunch gatherings, served alongside fresh fruit and hot coffee; its mild sweetness makes it ideal for morning. It can also be baked as individual cupcakes for parties or bake sales, offering perfectly frosted portions. A guaranteed favorite recipe.
Ingredients
-
3 cups (360g) all-purpose flour
-
1 teaspoon baking powder
-
1 teaspoon baking soda
-
1/2 teaspoon salt
-
1 cup (226g) unsalted butter, softened
-
2 cups (400g) granulated sugar
-
4 large eggs, at room temperature
-
1 teaspoon pure vanilla extract
-
1 1/2 cups (360g) full-fat sour cream, at room temperature
-
2 cups (240g) powdered sugar, sifted
-
3-4 tablespoons fresh lemon juice
-
1-2 tablespoons milk or cream (optional)
-
Lemon zest (optional garnish)
-
Fresh berries (optional garnish)
Instructions
-
Step 1
Preheat oven to 325°F (160°C). Grease and flour a 10-inch Bundt pan or line and grease a 9×13-inch pan. -
Step 2
In a medium bowl, whisk together flour, baking powder, baking soda, and salt. -
Step 3
In a large bowl, cream softened butter for 1-2 minutes. Gradually add granulated sugar, beating for 3-5 minutes until light and fluffy. Scrape bowl often. -
Step 4
Add eggs one at a time, beating well after each. Mix in vanilla extract and sour cream on low speed until just combined. -
Step 5
Gradually add dry ingredients to wet in three additions, mixing on lowest speed just until combined. Do not overmix. -
Step 6
Pour batter into the prepared pan and spread evenly. -
Step 7
Bake at 325°F (160°C) for 50-65 minutes for Bundt, or 40-50 minutes for 9×13-inch, until golden brown and a toothpick inserted comes out clean. -
Step 8
Cool Bundt cake in pan for 10-15 minutes, then invert onto a wire rack. For 9×13-inch, cool in pan 20-30 minutes, then lift onto a wire rack. Cool cake completely before glazing. -
Step 9
While cake cools, whisk sifted powdered sugar with 3 tablespoons fresh lemon juice until smooth. Adjust consistency with more lemon juice, milk/cream, or powdered sugar as needed. -
Step 10
Once cake is completely cool, place on a wire rack over a baking sheet. Drizzle glaze over the cake. -
Step 11
Optionally, garnish with fresh lemon zest or berries. -
Step 12
Let glaze set for 15-20 minutes before slicing and serving.
Important Information
Nutrition Facts (Per Serving)
It is important to consider this information as approximate and not to use it as definitive health advice.
Allergy Information
Please check ingredients for potential allergens and consult a health professional if in doubt.

Leave a Comment