Simple 3 Ingredient Persimmon Jam
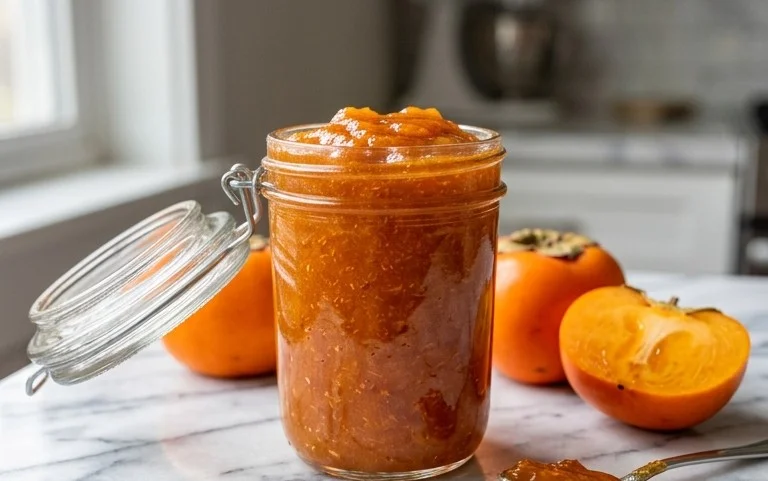
This time of year, when persimmons are at their peak, I love to make this simple, delicious 3 Ingredient Persimmon Jam. It’s incredibly easy, requiring just three ingredients, and the flavor is pure autumn sunshine. The natural sweetness and unique texture of ripe persimmons come through beautifully, enhanced just slightly by the sugar and a touch of lemon juice. It’s the kind of jam that makes you want to spread it on everything, from toast to yogurt. This jam is a fantastic way to use up a bounty of persimmons, transforming them into a jewel-toned spread that tastes like concentrated autumn. You won’t believe how quickly it comes together, proving that gourmet-tasting preserves don’t need complicated ingredients or lengthy processes. The result is a smooth, slightly tart, and wonderfully sweet jam that captures the essence of the fruit.
3 Ingredient Persimmon Jam
This time of year, when persimmons are at their peak, I love to make this simple, delicious jam. It’s incredibly easy, requiring just three ingredients, and the flavor is pure autumn sunshine. The natural sweetness and unique texture of ripe persimmons come through beautifully, enhanced just slightly by the sugar and a touch of lemon juice. It’s the kind of jam that makes you want to spread it on everything, from toast to yogurt.
Ingredients:
- 1.5 cups Persimmon Puree
- 3/4 cup Sugar
- 3 tbsp Lemon Juice
Cooking Instructions
-
Prepare the Persimmon Puree
Before you can start making the jam, you need to get your persimmons ready. The best persimmons for jam are the Fuyu or Hachiya varieties. For Fuyu persimmons, which are the ones you can eat when firm, just make sure they are fully ripe and soft. For Hachiya persimmons, you absolutely must wait until they are extremely soft and almost jelly-like; if they are even slightly firm, they will be astringent and unpleasant. Peel the ripe persimmons, remove any seeds and the stem, and then roughly chop them. I find that using an immersion blender or a food processor works best to create a smooth puree. If you don’t have either, you can mash them very well with a fork, but the texture might be slightly chunkier. Measure out 1.5 cups of this smooth persimmon puree. It’s important to have the correct measurement so your jam sets up properly. If you have a little extra puree, you can always set it aside for a smoothie.
-
Combine Ingredients and Begin Cooking
In a medium-sized, heavy-bottomed saucepan, combine the 1.5 cups of persimmon puree, the 3/4 cup of sugar, and the 3 tablespoons of fresh lemon juice. Using a heavy-bottomed pot is really key here. It helps to distribute the heat evenly and prevents the jam from scorching on the bottom, which can happen easily with fruit preserves. Stir everything together thoroughly until the sugar is well incorporated into the persimmon puree and lemon juice. You want to make sure there are no dry pockets of sugar before you start heating it. The lemon juice not only adds a bright, tangy note that balances the sweetness of the persimmons and sugar, but it also contains pectin, which helps the jam to thicken and set.
-
Simmer and Stir for Thickening
Place the saucepan over medium heat. Stir the mixture constantly as it heats up. You’ll notice the sugar will start to dissolve, and the mixture will become more liquid. Once the mixture comes to a gentle boil, reduce the heat to medium-low. You want the jam to maintain a steady, gentle simmer, not a rolling boil. Continue to cook the jam, stirring frequently to prevent it from sticking or burning. This simmering process is where the magic happens – the fruit’s natural moisture evaporates, and the sugars and pectin concentrate, allowing the jam to thicken. This stage can take anywhere from 20 to 40 minutes, depending on the moisture content of your persimmons and the heat of your stove.
-
Monitor Thickness and Test for Set
As the jam simmers, it will gradually thicken. You’ll see it start to coat the back of your spoon. To check if it’s reached the right consistency, you can perform a little test. Take a small spoon and scoop up some of the jam, then let it drip back into the pot. If it drips off in thick, slow globs, it’s getting close. For a more definitive test, place a small plate in the freezer before you start cooking the jam. When you think the jam is ready, carefully spoon a tiny amount onto the cold plate. Let it sit for about 30 seconds, then gently push it with your finger. If the surface wrinkles slightly, it means the jam has set. If it’s still very runny, continue simmering and test again every few minutes. Be careful not to overcook the jam, as it can become too stiff or even burn.
-
Jar and Cool the Jam
Once the jam has reached your desired thickness and passed the set test, remove the saucepan from the heat. Carefully ladle the hot jam into clean, sterilized jars. It’s important to sterilize your jars and lids beforehand to ensure the jam will keep properly. You can do this by boiling them in water or running them through a hot dishwasher cycle. Leave about 1/4 inch of headspace at the top of each jar. Wipe the rims clean with a damp cloth to ensure a good seal, then screw on the lids tightly. Let the jars cool completely on your counter. As the jam cools, it will continue to thicken further. You’ll often hear a satisfying pop as the lids seal. If a lid doesn’t pop and seal, that jar should be stored in the refrigerator and consumed within a few weeks. Properly sealed jars of this persimmon jam can be stored in a cool, dark place for up to a year.
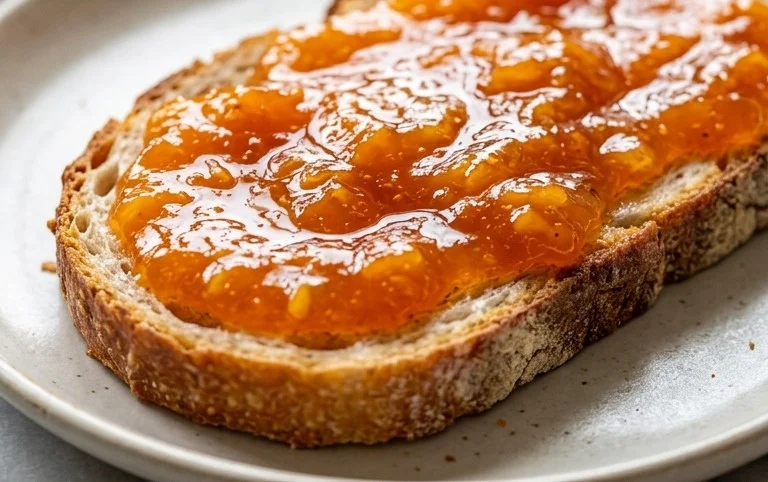
This simple persimmon jam is wonderful on toast, bagels, or scones. It’s also fantastic dolloped onto yogurt, ice cream, or even served alongside cheese. Enjoy the taste of autumn in every spoonful!
Conclusion:
Making this 3 Ingredient Persimmon Jam is a rewarding experience, yielding a beautiful, flavorful spread with minimal effort. It’s a perfect example of how simple, quality ingredients can create something truly special. The natural sweetness of the persimmons shines through, balanced by the tang of lemon and the structure from the sugar. This jam is incredibly versatile. Spoon it over warm pancakes, waffles, or French toast for a delightful breakfast treat. It’s also wonderful stirred into plain yogurt or oatmeal, or as a topping for cheesecake and ice cream. Consider spreading it on a cheese board alongside aged cheddar or creamy brie for a unique pairing. For a slight twist, try adding a pinch of cinnamon or a tiny grate of fresh nutmeg to the jam while it cooks, though these aren’t strictly necessary. You’ve captured the taste of autumn in a jar!
FAQs
Can I use other types of persimmons?
While Fuyu and Hachiya are recommended for their texture and sweetness when ripe, you can experiment with other varieties. Ensure they are very ripe and soft to avoid astringency. The key is the ripeness, which impacts the final flavor and texture significantly.
How long does this persimmon jam last?
Once properly canned, this jam can last for up to a year in a cool, dark pantry. If stored in the refrigerator after opening, it should be consumed within 3-4 weeks. Always check for signs of spoilage before consuming.
What if my jam isn’t thickening?
Jam thickness can depend on the pectin content of the fruit and the exact sugar-to-fruit ratio. If your jam seems too thin after cooking, you can try simmering it uncovered for a few more minutes to allow more liquid to evaporate. Make sure you’ve used the correct amount of persimmon puree and sugar as specified in the recipe for best results.
3 Ingredient Persimmon Jam
A simple and delicious persimmon jam made with just three ingredients: persimmon puree, sugar, and lemon juice. Perfect for spreading on toast or as a topping.
Ingredients
-
1.5 cups Persimmon Puree
-
3/4 cup Sugar
-
3 tbsp Lemon Juice
-
1/2 teaspoon Ground Cinnamon
-
Pinch of Nutmeg
Instructions
-
Step 1
Combine persimmon puree, sugar, and lemon juice in a medium saucepan. -
Step 2
Add cinnamon and nutmeg to the mixture. -
Step 3
Cook over medium heat, stirring constantly, until the mixture thickens, about 20-25 minutes. The jam should coat the back of a spoon. -
Step 4
Remove from heat and skim off any foam from the surface. -
Step 5
Pour the hot jam into clean jars, leaving about 1/4 inch of headspace. -
Step 6
Let the jam cool completely before sealing and storing in the refrigerator.
Important Information
Nutrition Facts (Per Serving)
It is important to consider this information as approximate and not to use it as definitive health advice.
Allergy Information
Please check ingredients for potential allergens and consult a health professional if in doubt.