Homemade Orange Jam Recipe – Sunshine Citrus Spread
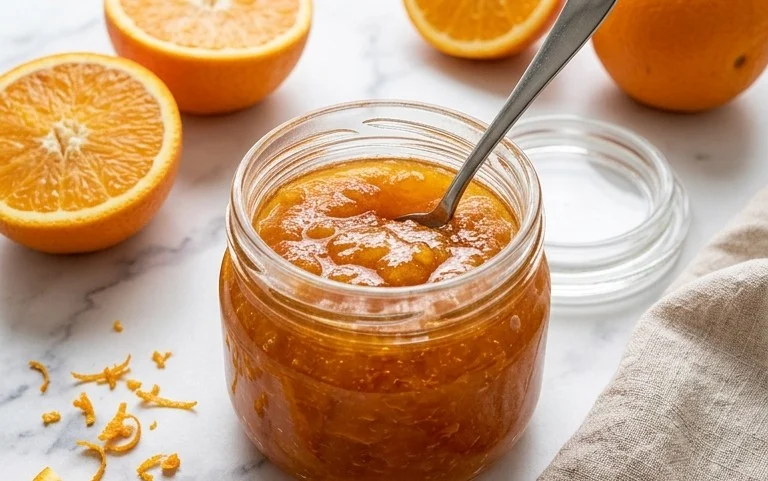
Orange Jam is a bright, sunny spread that tastes like pure citrus sunshine. It’s got just the right amount of sweetness, so the tangy, zesty flavor of the oranges really comes through. This jam makes a plain slice of toast feel fancy, and it’s also wonderful dolloped on yogurt or tucked into a scone. Making jam at home feels so satisfying, and this recipe is quite simple, even if you haven’t made jam before. Plus, the kitchen smells amazing while it’s cooking. The most important thing for good orange jam is picking good oranges. I like to use a mix, maybe some sweet Valencia oranges and then a few tangier ones like Seville oranges if they’re in season. This gives the best balanced flavor. Using pureed oranges gives a nice smooth texture, and the lemon juice is key for flavor and to help the jam set up properly.
Orange Jam
This orange jam captures the pure essence of citrus sunshine, with a gentle sweetness that lets the bright, slightly tart flavor of the oranges shine through. It’s the kind of jam that makes a simple piece of toast feel special, or adds a welcome zing to yogurt or scones. Making jam at home is incredibly rewarding, and this recipe is straightforward, even for those new to preserving. The aroma that fills your kitchen as it cooks is truly wonderful.
The key to a great orange jam is using good quality oranges and carefully managing the cooking process to achieve the right set. I find using a mix of oranges, perhaps some sweet Valencia or Navel oranges and a few tangier ones like Seville oranges if they are in season, gives the best balance of flavor. The puree provides a smooth texture, and the lemon juice is essential for both flavor and to help the jam set properly.
Ingredients:
- 5 cups orange puree (see notes)
- 1/2 cup lemon juice
- 3 cups granulated sugar
- 1 whole cinnamon stick (optional, tied into a spice bag)
- 3 to 4 whole cloves (optional, tied into a spice bag)
- 1 to 2 whole star anise pods (optional, tied into a spice bag)
Notes on Orange Puree:
To make 5 cups of orange puree, you’ll need about 8-10 large oranges. Wash the oranges thoroughly. You can either zest one or two of them before peeling, if you like an extra intense orange aroma, but this is optional. Peel the oranges, removing as much of the white pith as possible, as this can make the jam bitter. Break the oranges into segments, removing any large seeds. Place the segments in a food processor or blender and process until you have a smooth puree. You can strain this through a fine-mesh sieve if you prefer a completely seedless and fiber-free jam, but I usually don’t bother if I’ve removed the seeds.
Cooking Instructions:
- Prepare for Jam Setting: Before you start cooking the jam, it’s important to have your jars ready. Wash and sterilize your jam jars and lids. You can do this by running them through a hot dishwasher cycle or by washing them in hot, soapy water and then placing them in a preheated oven at 275°F (135°C) for at least 15 minutes. Keep them warm until you’re ready to fill them. This helps prevent the hot jam from cracking the warm jars and ensures a good seal. Also, have a small plate or two in the freezer. This “chill test” plate will be used later to check if your jam has reached its setting point.
- Combine Ingredients and Initial Cook: In a large, heavy-bottomed saucepan or preserving pan, combine the 5 cups of orange puree, 1/2 cup of lemon juice, and 3 cups of granulated sugar. If you’re using the optional spices, place the cinnamon stick, cloves, and star anise into a small piece of cheesecloth or a tea ball infuser and tie it securely. Add this spice bag to the pot. Stir everything together over medium heat, just until the sugar has dissolved. Don’t rush this part; make sure all the sugar crystals are gone before you turn up the heat. Once the sugar is dissolved, increase the heat to medium-high.
- Boiling and Skimming: Bring the mixture to a rolling boil. A rolling boil is a boil that cannot be stirred down. You’ll need to stir frequently to prevent sticking and scorching, especially as the jam thickens. As the jam boils, you’ll notice a foamy scum rising to the surface. You can skim this off with a slotted spoon. While some people leave this in, removing it results in a clearer, more aesthetically pleasing jam. Continue boiling and stirring. The jam will start to thicken and the bubbles will become slower and larger. This process can take anywhere from 20 to 45 minutes, depending on the water content of your oranges and the heat of your stove.
- Testing for Set: This is where the cold plate comes in handy. After about 20 minutes of boiling, test for the setting point. Take one of your chilled plates from the freezer and place a small spoonful of the jam onto it. Let it sit for about 30 seconds to a minute, then gently push the edge of the jam with your finger. If the surface wrinkles, your jam is ready. If it still looks very liquid and doesn’t wrinkle, continue boiling the jam for another 5-10 minutes and test again. Be patient here; overcooking can make the jam too hard, while undercooking means it won’t set properly. You’re looking for a consistency that’s slightly thicker than syrup but still has a bit of give.
- Finishing and Jarring: Once the jam has reached its setting point, remove the pot from the heat. If you used a spice bag, carefully remove and discard it. Let the jam sit for about 5-10 minutes. This allows the jam to cool slightly and prevents the fruit from floating to the top in the jars. Skim off any remaining foam. Ladle the hot jam into your prepared, warm jars, filling them almost to the brim, leaving about 1/4 inch of headspace. Wipe the rims of the jars clean with a damp cloth to ensure a good seal, then screw on the lids tightly.
- Processing for Long-Term Storage (Optional): For long-term storage, you can process the filled jars in a boiling water bath. Place the filled jars on a rack in a large pot and cover them with boiling water, ensuring the water level is at least 1 inch above the jar lids. Bring the water back to a rolling boil and process for 10 minutes. Carefully remove the jars from the water bath and let them cool undisturbed on a wire rack for 24 hours. You’ll know they’ve sealed properly if the lids have popped down and don’t flex when pressed. If any jars haven’t sealed, store them in the refrigerator and use them within a few weeks. Properly sealed jars can be stored in a cool, dark pantry for up to a year.
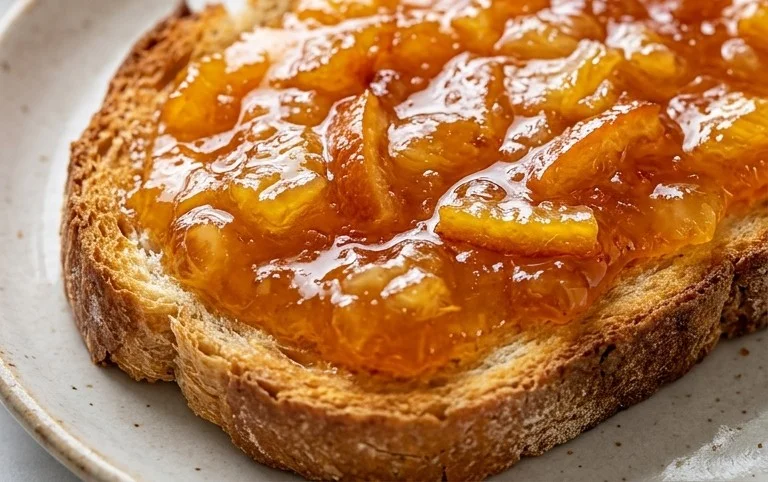
Enjoy your homemade orange jam on toast, scones, with cheese, or as a glaze for cakes!
Conclusion:
This Orange Jam recipe is a fantastic way to capture the bright taste of citrus and enjoy it all year round. It’s so rewarding to make your own spread, and the aroma while it cooks is simply delightful. It’s perfect for gifting, especially around the holidays, or just for making your own breakfast a little more special. A warm piece of toast with this jam is hard to beat.
You can stir in a splash of Grand Marnier Extract or Cointreau Extract at the end of cooking for an adult twist, or add a pinch of cardamom for a different spice note. Try it on pancakes, swirled into muffin batter, or as a glaze for chicken or beef.
The process is straightforward, and the result is a beautifully clear jam with an intense orange flavor. Don’t be afraid to give it a try!
Frequently Asked Questions:
What kind of oranges work best for this jam?
A mix of sweet oranges (like Valencia or Navel) and slightly tarter oranges (like Seville, if available) gives the best flavor balance. You can also use Cara Cara oranges for a lovely pinkish hue.
How long does this orange jam last?
Once properly canned and sealed, this jam can last for up to a year in a cool, dark pantry. Once opened, store it in the refrigerator and consume within 3-4 weeks.
My jam didn’t set properly. What went wrong?
Jam might not set if there isn’t enough pectin (from the fruit and lemon juice) or if it wasn’t cooked long enough to reach the setting temperature (around 220°F or 104°C). Make sure you measure your ingredients accurately and use a candy thermometer if possible.
Orange Jam
A vibrant and flavorful homemade orange jam, perfect for spreading on toast or using in desserts.
Ingredients
-
5 cups orange puree (see notes)
-
1/2 cup lemon juice
-
3 cups granulated sugar
-
1 whole cinnamon stick (optional, tied into a spice bag)
-
3 to 4 whole cloves (optional, tied into a spice bag)
-
1 to 2 whole star anise pods (optional, tied into a spice bag)
Instructions
-
Step 1
Prepare the orange puree by juicing fresh oranges and straining to remove pulp and seeds, then measure out 5 cups. -
Step 2
In a large, heavy-bottomed saucepan, combine the orange puree, lemon juice, and granulated sugar. Stir until the sugar is dissolved. -
Step 3
If using, add the spice bag containing the cinnamon stick, cloves, and star anise to the saucepan. -
Step 4
Bring the mixture to a boil over medium-high heat, stirring occasionally. Once boiling, reduce heat slightly and simmer, stirring frequently, until the jam reaches the setting point (around 220°F or 104°C on a candy thermometer, or when a small amount dropped onto a cold plate wrinkles). -
Step 5
Remove the spice bag. Skim off any foam that has accumulated on the surface. -
Step 6
Ladle the hot jam into sterilized jars, leaving about 1/4 inch of headspace. Wipe the rims clean and seal with lids. -
Step 7
Process the jars in a boiling water bath for 10 minutes (adjusting for altitude if necessary). Remove from water bath and let cool completely on a rack.
Important Information
Nutrition Facts (Per Serving)
It is important to consider this information as approximate and not to use it as definitive health advice.
Allergy Information
Please check ingredients for potential allergens and consult a health professional if in doubt.