Melt-In-Your-Mouth Snowball Cookies Recipe
Snowball cookies are those delightful little treats that just disappear in your mouth. They’re made with simple pantry staples and come out incredibly tender with a buttery flavor. What makes them truly special is that powdery coating of confectioners’ sugar, giving them their iconic look and sweet finish. People love making snowball cookies because they’re not complicated, and they taste like pure comfort. You can use them to fill up holiday cookie tins, or just enjoy them with a cup of tea any afternoon. The gentle sweetness and crumbly texture are what make this snowball cookie recipe a favorite for so many. They’re a simple pleasure that brings a lot of joy.
The Dough Continues
We’re aiming for a tender, crumbly dough that holds together without being tough. Add the 1 cup of softened butter to your mixing bowl. Cream the butter with a hand mixer or a stand mixer until it’s light and fluffy. This usually takes about 2-3 minutes. Then, gradually add the 1/2 cup of powdered sugar to the butter, mixing until it’s well combined and looks pale yellow. Next, beat in 1 teaspoon of vanilla extract. It’s okay if the mixture looks a little grainy at this stage. The important part is that the sugar is incorporated into the butter. Now, in a separate bowl, whisk together the 2 cups of flour and the 1/2 cup of finely chopped nuts. Make sure the nuts are chopped very fine, almost like coarse sand, so they distribute evenly. Slowly add the dry ingredients to the wet ingredients, mixing on low speed until just combined. Don’t overmix; overmixing will develop the gluten in the flour and make your cookies tough. The dough will be quite soft and crumbly. If it feels too sticky to handle, you can chill it for about 30 minutes in the refrigerator. This makes it much easier to shape.
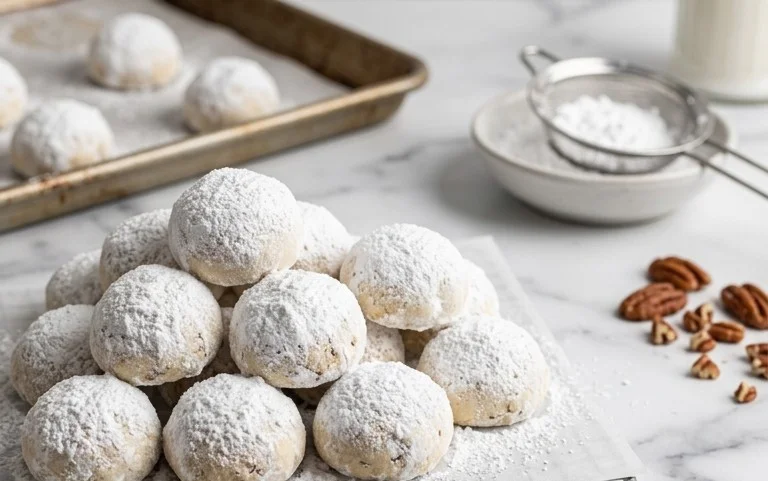
Snowball Cookies
These little cookies are like tiny mounds of sweet, buttery bliss. They’re delicate, melt-in-your-mouth tender, and rolled in powdered sugar, making them look just like their namesake. I love making these around the holidays, but honestly, they’re delicious any time of year. The simple ingredients come together to create a truly comforting treat.
Ingredients:
- 2 cups flour (you can use all-purpose white flour, white spelt flour, whole wheat pastry flour, or even a good gluten-free blend like Bob’s Red Mill 1-to-1 baking flour. The gluten-free option might result in a slightly different texture, but it’s still wonderfully delicious.)
- 1/2 cup finely chopped walnuts (pecans or almonds are excellent substitutes if walnuts aren’t your favorite, or if you have allergies. Make sure they’re chopped quite small so you don’t get large chunks in every bite.)
- 1 cup butter (softened to room temperature, or unsalted butter. If you’re using coconut oil, make sure it’s solid but softened, not melted. Coconut oil will give a slightly different flavor profile, but it works beautifully.)
- 1/2 cup powdered sugar (also known as confectioners’ sugar or icing sugar. This goes into the cookie dough itself.)
- Optional additional powdered sugar (or cocoa powder, for rolling. You’ll need a good amount for coating the finished cookies.)
Making the Dough
The process for these snowball cookies is straightforward, which is part of their charm. We’re aiming for a tender, crumbly dough that holds its shape well.
- Cream the Butter and Sugar: In a large mixing bowl, cream together the softened butter (or softened coconut oil) and the 1/2 cup of powdered sugar. You want to beat this until it’s light and fluffy. This step is really important for creating a tender cookie. Use an electric mixer if you have one, starting on a low speed and gradually increasing. Scrape down the sides of the bowl a few times to make sure everything is incorporated. This should take about 2-3 minutes. The mixture will turn pale yellow and look airy.
- Add Dry Ingredients and Nuts: To the creamed butter and sugar mixture, add the flour and the finely chopped nuts. If you’re using an electric mixer, mix this on a low speed until it just starts to come together. You don’t want to overmix the dough at this stage, as that can develop the gluten too much and make the cookies tough. It’s perfectly fine to finish bringing the dough together by hand.
- Form the Dough: Once the ingredients are just combined, use your hands to gently bring the dough together into a cohesive ball. It will be a little crumbly at first, but as you work it gently, it should form a soft dough. If it feels too dry and won’t come together at all, you can add a tiny bit more butter (about a teaspoon at a time) or a splash of milk, but be very careful not to add too much liquid, as this can make them spread too much during baking.
Shaping and Baking
Now comes the fun part where they start to look like little snowballs!
- Shape the Cookies: Take small portions of the dough and roll them between your palms to form little balls, about 1 inch in diameter. They don’t need to be perfectly round; a slightly rustic look is part of their charm. As you shape them, place them onto an ungreased baking sheet. You can fit about 12-15 cookies on a standard baking sheet, giving them a little space between them. They won’t spread a lot, but they do need a little room.
- Chill the Dough (Optional but Recommended): For best results and to prevent excessive spreading, I highly recommend chilling the shaped cookie balls for at least 30 minutes in the refrigerator. This firming step helps them maintain their shape during baking and ensures that characteristic tender texture. If you’re short on time, you can skip this, but they might bake up a little flatter.
- Bake the Cookies: Preheat your oven to 350°F (175°C). Bake the cookies for 10-14 minutes, or until the edges are just lightly golden. They shouldn’t turn deeply brown. The centers should still look pale. This short baking time is key to their delicate, crumbly texture. Keep a close eye on them, as ovens can vary.
The Finishing Touch: The Snowball Effect
This step is what truly gives them their name and their signature look.
- Cool and Roll: Let the cookies cool on the baking sheet for a few minutes until they are firm enough to handle. While they are still warm, but not hot, carefully transfer them to a plate or shallow bowl filled with powdered sugar. Roll them around gently until they are completely coated. If you want a thicker coating, you can let them cool completely, then roll them again in more powdered sugar. For a fun variation, you can also mix some cocoa powder into the powdered sugar for a “mudslide” effect. The warmth of the cookie helps the sugar adhere.
These cookies are best enjoyed at room temperature. They store well in an airtight container at room temperature for up to a week. The powdered sugar coating can sometimes absorb moisture, so an airtight container is key to keeping them fresh and crumbly. Enjoy these delightful little bites of sweetness!
Conclusion:
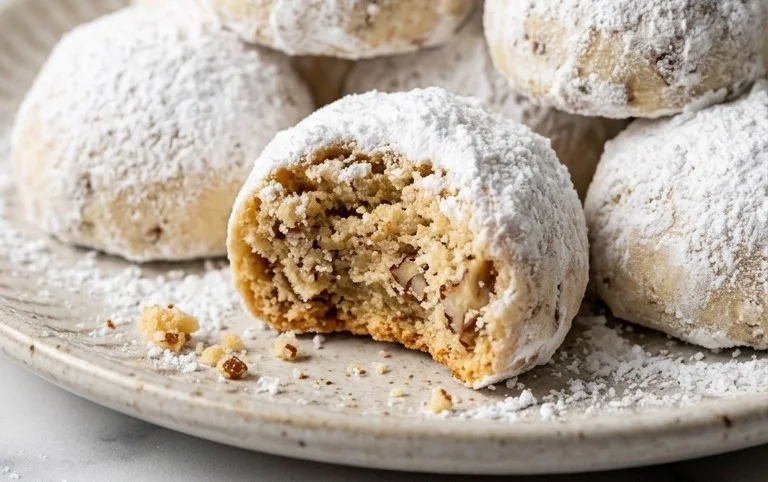
These snowball cookies are a wonderful example of how simple ingredients can create something truly magical. They’re tender, buttery, and that dusting of powdered sugar makes them feel so festive, no matter the occasion. They bring a comforting sweetness that pairs perfectly with coffee or tea. While they’re a holiday favorite, don’t hesitate to make them any time you need a little melt-in-your-mouth goodness. The ease of preparation means you can have a batch ready without much fuss. For variations, consider adding a pinch of cinnamon or cardamom to the dough for a little warmth, or try dipping half of the cooled cookies in melted chocolate. They also store beautifully, making them great for gifting.
Frequently Asked Questions:
Can I make snowball cookies without nuts?
Absolutely. If you have nut allergies or simply prefer them without, you can omit the nuts entirely. The cookies will still be tender and delicious, though they might be a little less crumbly. You could also add about 1/4 cup of extra flour to compensate for the missing volume of the nuts if you like.
How should I store snowball cookies?
Once completely cooled, store your snowball cookies in an airtight container at room temperature. They can last for up to a week. Because they are rolled in powdered sugar, stacking them too high can cause the sugar coating to rub off, so try to keep them in a single layer or with a piece of parchment paper between layers if necessary.
Why are my snowball cookies crumbly?
A slightly crumbly texture is expected with snowball cookies, as they are meant to be tender and melt-in-your-mouth. However, if they are falling apart too easily, you might have overmixed the dough, or perhaps the butter wasn’t soft enough when you started. Ensuring your butter is properly softened and mixing the dough just until it comes together are key to avoiding excessive crumbling.
Snowball Cookies
Delicate and crumbly snowball cookies, also known as Mexican wedding cookies or Russian tea cakes, coated in a sweet dusting of powdered sugar.
Ingredients
-
2 cups flour (white, spelt, ww pastry, or Bob’s gf)
-
1/2 cup finely chopped walnuts (or almonds or pecans)
-
1 cup butter (or coconut oil)
-
1/2 cup powdered sugar
-
optional additional powdered sugar (or cocoa powder, for rolling)
Instructions
-
Step 1
Preheat oven to 350°F (175°C). -
Step 2
In a large bowl, cream together the butter (or coconut oil) and 1/2 cup powdered sugar until light and fluffy. -
Step 3
Gradually add the flour, mixing until just combined. Stir in the finely chopped nuts (or almonds or pecans). -
Step 4
Roll the dough into 1-inch balls and place them on an ungreased baking sheet. -
Step 5
Bake for 10-12 minutes, or until the edges are lightly golden. -
Step 6
Let the cookies cool on the baking sheet for a few minutes before transferring them to a wire rack to cool completely. -
Step 7
Once cool, roll the cookies in additional powdered sugar (or cocoa powder) to coat.
Important Information
Nutrition Facts (Per Serving)
It is important to consider this information as approximate and not to use it as definitive health advice.
Allergy Information
Please check ingredients for potential allergens and consult a health professional if in doubt.