
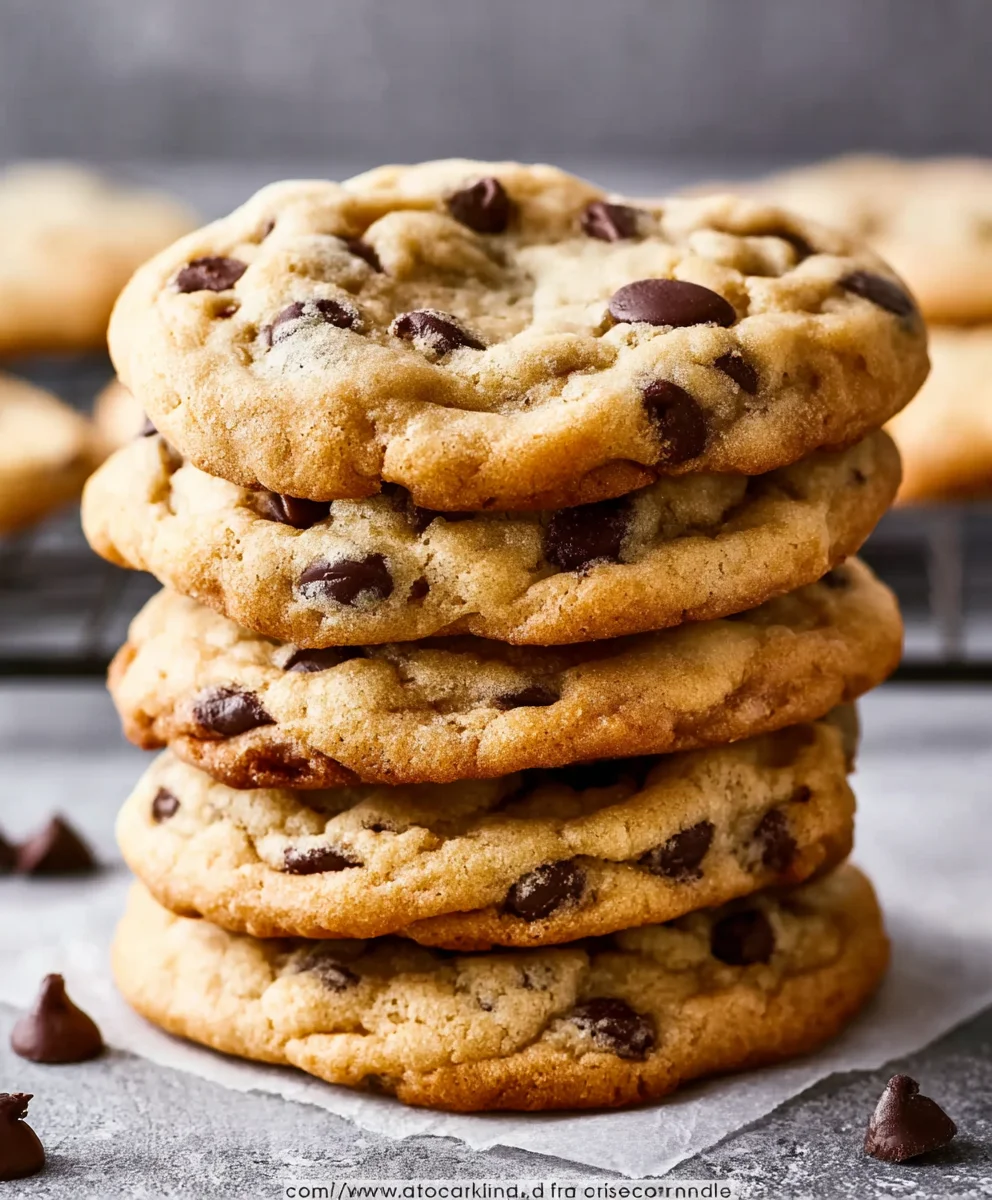
Chocolate Chip Cookies – is there any treat more universally beloved, more synonymous with comfort and joy, than a perfectly baked batch of these golden discs of deliciousness? I believe not! From their comforting aroma filling the kitchen to that first satisfying bite, these iconic treats hold a special place in the hearts and memories of countless individuals worldwide. The story of the chocolate chip cookie is as delightful as the cookie itself, famously born in the 1930s at the Toll House Inn in Whitman, Massachusetts, thanks to the culinary innovation of Ruth Graves Wakefield. Her ingenious decision to add chopped Nestlé chocolate bars to her cookie dough, expecting them to melt and blend, instead resulted in delightful, distinct chocolate chunks, forever changing the dessert landscape.
For many of us, the aroma of fresh Chocolate Chip Cookies baking instantly transports us back to cherished childhood memories. It’s that irresistible combination of a slightly crisp edge giving way to a wonderfully soft, chewy center, studded with molten chocolate pockets, that makes them utterly addictive. Whether enjoyed warm with a glass of milk, shared with friends, or savored as a late-night indulgence, these cookies offer a unique blend of sweetness, texture, and pure, unadulterated happiness that few other desserts can rival. They are a true testament to the simple power of butter, sugar, and chocolate.
Ingredients:
- 2 ¼ cups (270g) All-Purpose Flour
- 1 teaspoon Baking Soda
- 1 teaspoon Fine Sea Salt
- 1 cup (226g) Unsalted Butter, softened to room temperature
- ¾ cup (150g) Granulated Sugar
- 1 cup (200g) Packed Light Brown Sugar (light or dark, your preference!)
- 2 large Eggs, room temperature
- 2 teaspoons Pure Vanilla Extract
- 1 ½ cups (255g) Semisweet Chocolate Chips (I often use a mix of milk, dark, and bittersweet for complexity)
- Optional: Flaky sea salt for sprinkling after baking
Equipment You’ll Need:
Having the right tools makes all the difference when baking these phenomenal Chocolate Chip Cookies. Here’s a quick list of what I always have on hand:
- Large mixing bowls (at least two)
- Electric mixer (stand mixer with paddle attachment or a hand mixer)
- Whisk
- Rubber spatula
- Measuring cups and spoons
- Baking sheets (at least two, light-colored for best results)
- Parchment paper or silicone baking mats
- Small cookie scoop (about 1.5-2 tablespoons capacity)
- Wire cooling rack
The Art of Perfect Chocolate Chip Cookies: Preparing Your Workspace
Before we dive into the delicious process of creating these quintessential Chocolate Chip Cookies, I always find it incredibly helpful to get my kitchen organized. A calm and prepared environment contributes greatly to a stress-free baking experience and, ultimately, to a more successful batch of cookies. Trust me, it’s worth the extra few minutes!
- Preheat Your Oven: This is a crucial first step, often overlooked. Adjust your oven rack to the middle position, then preheat your oven to 375°F (190°C). It takes time for an oven to reach and stabilize at the desired temperature, so getting this done early ensures your cookies bake evenly from the moment they enter the heat.
- Prepare Your Baking Sheets: Line two large baking sheets with parchment paper or silicone baking mats. This step is non-negotiable for me. It prevents sticking, promotes even browning, and makes cleanup an absolute breeze. Plus, it helps the cookies maintain their shape better.
- Gather and Measure All Ingredients: I can’t stress enough how important mise en place is. Measure out all your flour, sugars, butter, eggs, and extracts before you start mixing. Having everything ready means you won’t be scrambling mid-recipe, which can lead to mistakes. Ensure your butter is truly softened to room temperature – it should yield slightly to gentle pressure but not be melted. Likewise, room temperature eggs emulsify much better with the fats, creating a smoother, more cohesive dough. For the eggs, if you forgot to take them out, a quick trick is to place them in a bowl of warm (not hot!) water for 5-10 minutes.
- Sift Dry Ingredients (Optional but Recommended): While some skip this for ease, I often take the extra moment to sift together the all-purpose flour, baking soda, and fine sea salt into a medium bowl. Sifting ensures that these ingredients are thoroughly combined and evenly distributed, preventing any pockets of unmixed leavening or salt in your finished Chocolate Chip Cookies. It also aerates the flour, contributing to a slightly lighter texture. Give it a good whisk after sifting to be absolutely sure.
Crafting the Dough: The Foundation of Exquisite Chocolate Chip Cookies
This is where the magic truly begins – transforming simple ingredients into the luscious dough that will become your perfect Chocolate Chip Cookies. Pay close attention to the mixing steps; over-mixing or under-mixing can significantly impact the final texture.
- Cream the Butter and Sugars: In a large mixing bowl, using your electric mixer fitted with the paddle attachment (or a hand mixer), beat the softened unsalted butter on medium speed for about 1-2 minutes until it’s light and creamy. The color should become noticeably paler. This process incorporates air into the butter, which is vital for the texture of your cookies.
- Add the Sugars: Gradually add the granulated sugar and the packed light brown sugar to the creamed butter. Continue beating on medium speed for another 2-3 minutes, or until the mixture is light, fluffy, and significantly paler in color. This stage, often called “creaming,” is critical. The sugar crystals cut into the butter, creating tiny air pockets that will expand during baking, giving your Chocolate Chip Cookies their wonderful chewiness and a slightly airy crumb. Scrape down the sides of the bowl with your rubber spatula halfway through to ensure everything is evenly combined.
- Incorporate Eggs and Vanilla: Reduce the mixer speed to low. Add one large egg at a time, mixing well after each addition until just combined. Be careful not to overmix here. After the eggs are incorporated, stir in the pure vanilla extract. The mixture might look a little curdled at this point, but don’t worry, it’s completely normal! The key is to mix just enough to combine, ensuring each egg is fully integrated before adding the next. This step adds moisture and richness, contributing to the depth of flavor in our Chocolate Chip Cookies.
- Combine Wet and Dry Ingredients: With the mixer on low speed, gradually add the dry ingredient mixture (flour, baking soda, and salt) to the wet ingredients. Mix until just combined. It’s imperative not to overmix the dough at this stage. Overmixing develops the gluten in the flour too much, which can lead to tough, dry Chocolate Chip Cookies rather than the tender, chewy ones we’re aiming for. Stop mixing as soon as you see no more streaks of dry flour. A few small lumps are perfectly fine.
- Fold in the Chocolate Chips: Remove the bowl from the mixer and, using your sturdy rubber spatula, gently fold in the chocolate chips. I like to use a generous 1 ½ cups, and sometimes even a little more! If you’re using a mix of different types of chocolate chips (semisweet, milk, dark), this is where the symphony of flavors really comes together. Distribute them evenly throughout the dough. You can also reserve a handful of chocolate chips to press into the tops of the cookie dough balls just before baking for that classic bakery-style aesthetic.
The Chilling Phase: Elevating Your Chocolate Chip Cookies to Perfection
I know, I know. Waiting is hard. But trust me on this: chilling the dough is arguably the most transformative step for achieving truly exceptional Chocolate Chip Cookies. It’s the secret weapon of many professional bakers, and once you try it, you’ll never skip it again.
- Cover and Chill: Cover the bowl tightly with plastic wrap or transfer the dough to an airtight container. Place it in the refrigerator for a minimum of 30 minutes, but ideally for 2-24 hours. I often prepare the dough the night before and bake it the next day.
- Understanding the Chill: Why chill?
- Prevents Spreading: The butter in the dough firms up in the cold, preventing the cookies from spreading too much and becoming thin and crispy. Instead, they hold their shape better, resulting in a thicker, chewier cookie.
- Deepens Flavor: Chilling allows the flour to fully hydrate, which reduces any “raw flour” taste. More importantly, it gives the flavors – especially the vanilla and the complex notes from the brown sugar – time to meld and intensify. The longer the chill, the more nuanced and rich your Chocolate Chip Cookies will taste.
- Improves Texture: This rest period helps create a chewier texture with those delightful crinkly edges that everyone loves. The sugar has time to dissolve more completely, leading to a smoother mouthfeel.
- Bringing to Temperature (if chilling for a long time): If you’ve chilled your dough for several hours or overnight, it might be quite firm. Allow it to sit at room temperature for about 10-15 minutes before scooping, just so it’s a bit easier to work with.
Baking Your Chocolate Chip Cookies to Golden Perfection
This is the moment of truth! Baking these Chocolate Chip Cookies is relatively quick, but paying close attention to timing and visual cues will ensure they come out just right – golden edges, soft centers, and perfectly melted chocolate.
- Scoop the Dough: Using your small cookie scoop (which holds about 1.5-2 tablespoons of dough), scoop even balls of dough onto your prepared baking sheets. I typically aim for about 12 cookies per standard baking sheet, ensuring they are spaced at least 2 inches apart to allow for proper spreading. If you want larger, bakery-style cookies, use a larger scoop (about 3-4 tablespoons) and adjust baking time accordingly.
- Optional: Add Extra Chips: For that picture-perfect, bakery-style look, I sometimes gently press a few extra chocolate chips onto the top of each scooped dough ball. This ensures you see plenty of melted chocolate on top of your finished Chocolate Chip Cookies.
- Bake Until Golden: Place one baking sheet into your preheated 375°F (190°C) oven. Bake for 9-12 minutes, or until the edges are golden brown and set, but the centers still look slightly soft and gooey. The exact baking time will vary depending on your oven and the size of your cookies. I always err on the side of underbaking slightly, as the cookies will continue to cook and set as they cool on the baking sheet. This ensures a wonderfully chewy center.
- Rotate for Even Baking: If your oven has hot spots (and most do!), it’s a good idea to rotate the baking sheet halfway through the baking time. This helps ensure all your Chocolate Chip Cookies bake evenly and prevents some from burning while others are still raw.
- Remove and Rest: Once baked to your desired doneness, carefully remove the baking sheet from the oven. If you like a touch of extra saltiness to balance the sweetness, now is the perfect time to sprinkle a tiny pinch of flaky sea salt over the warm cookies. Let the cookies cool on the baking sheet for 5-10 minutes. This resting period is crucial as it allows the cookies to set up properly. If you try to move them too soon, they might fall apart or lose their shape due to their soft centers.
- Transfer to Cooling Rack: After the initial rest on the baking sheet, carefully transfer the Chocolate Chip Cookies to a wire cooling rack to cool completely. Cooling on a rack allows air to circulate around them, preventing the bottoms from becoming soggy.
Cooling and Enjoying Your Homemade Chocolate Chip Cookies
The final step, and arguably the most rewarding, is the moment you get to enjoy the fruits of your labor. The aroma filling your kitchen right now is probably intoxicating!
- Cool Completely (or Almost): While it’s tempting to devour them immediately, allowing the cookies to cool completely on the wire rack improves their texture and makes them easier to handle. However, I won’t judge if you snag one while it’s still warm and gooey – that’s one of life’s simple pleasures! Just be gentle.
- Serving Suggestions: These Chocolate Chip Cookies are absolute perfection on their own, perhaps with a tall glass of cold milk. They also make an incredible base for ice cream sandwiches or crumbled over your favorite dessert.
- Storage: Store cooled cookies in an airtight container at room temperature for up to 3-4 days. To maintain their freshness and chewiness, I sometimes place a half slice of bread in the container with them; the cookies absorb moisture from the bread, keeping them soft.
- Freezing Baked Cookies: Fully baked and cooled Chocolate Chip Cookies can be frozen in an airtight container or freezer bag for up to 3 months. Thaw at room temperature or gently warm in a microwave for a few seconds for that “fresh from the oven” feel.
- Freezing Cookie Dough: This is a fantastic trick for always having fresh cookies on hand! Scoop the dough balls onto a parchment-lined baking sheet and freeze until solid (about 1-2 hours). Once solid, transfer the frozen dough balls to a freezer-safe bag or container and store for up to 2-3 months. When ready to bake, place the frozen dough balls on a prepared baking sheet and bake as directed, adding an extra 2-4 minutes to the baking time. This means warm, fresh Chocolate Chip Cookies are just minutes away whenever a craving strikes!
Troubleshooting Common Chocolate Chip Cookie Dilemmas
Even seasoned bakers encounter challenges. Here are some common issues you might face with your Chocolate Chip Cookies and my go-to solutions:
-
My cookies spread too much and are too thin!
This is a very common issue!
Possible Causes:- Butter was too soft or melted: If your butter is too warm, it melts too quickly in the oven before the cookie structure sets, causing excessive spreading.
- Oven temperature too low: An oven that isn’t hot enough will also cause butter to melt slowly, leading to spreading.
- Not enough flour: Incorrect measuring (too little flour) can result in a loose dough.
- Dough not chilled: Chilling firms up the butter, which is crucial for preventing excessive spread.
Solutions:
- Ensure your butter is at a cool room temperature (just slightly soft to the touch).
- Verify your oven temperature with an oven thermometer.
- Measure flour correctly, preferably by weight with a kitchen scale.
- Always chill your dough! Even 30 minutes helps significantly.
- If cookies spread mid-bake, you can sometimes gently push the edges back in with a spatula right after they come out of the oven.
-
My cookies didn’t spread enough and are cakey or too thick!
Possible Causes:
- Too much flour: Over-measuring flour is a frequent culprit, leading to a stiff dough.
- Butter too cold: If your butter is too firm, it won’t cream properly, and the dough will be dense.
- Over-mixing: Developing too much gluten can create a tougher, less spreadable cookie.
- Oven too hot: A very hot oven sets the cookie edges too quickly, preventing proper spread.
Solutions:
- Measure flour accurately.
- Ensure butter is properly softened.
- Mix dough until just combined, stopping as soon as no dry streaks remain.
- Check your oven temperature.
- You can sometimes gently flatten dough balls slightly before baking for a bit more spread.
-
My Chocolate Chip Cookies are dry or tough.
Possible Causes:
- Too much flour: Again, a common issue.
- Over-baking: Baking for too long dries out the cookies.
- Over-mixing the dough: Leads to gluten development, resulting in toughness.
Solutions:
- Measure flour carefully.
- Watch your baking time closely; err on the side of underbaking for chewiness.
- Mix until just combined.
-
My cookies are too greasy.
Possible Causes:
- Too much butter: Ensure accurate measurements.
- Butter too warm/melted: This can lead to the butter separating and seeping out during baking.
Solutions:
- Accurate ingredient measurements.
- Use butter at the correct temperature (cool room temperature, not warm or melted).
Tips and Tricks for Unforgettable Chocolate Chip Cookies
Over the years, baking countless batches of these delightful Chocolate Chip Cookies, I’ve picked up a few extra tips that truly elevate them from good to absolutely incredible. These small details can make a significant difference in flavor, texture, and overall enjoyment.
-
The Quality of Your Ingredients Matters:
Don’t skimp on quality, especially when it comes to vanilla extract and butter. A good quality pure vanilla extract will infuse your cookies with a much richer, more authentic flavor compared to imitation vanilla. Similarly, high-quality butter with a good fat content contributes to superior taste and texture. I also find that using a combination of different types of chocolate chips – milk, semisweet, and even a few dark chocolate chunks – adds a wonderful complexity and depth to each bite. The varying melt points and sweetness levels create an exciting experience. Don’t be afraid to experiment with your chocolate choices!
-
Room Temperature Ingredients are Key:
I cannot emphasize this enough! Butter and eggs at room temperature are essential for proper emulsion. Room temperature butter creams beautifully with sugar, incorporating air that gives our Chocolate Chip Cookies their light texture. Cold butter won’t cream properly, leading to a denser cookie. Cold eggs don’t emulsify well with the fat, which can result in a dough that looks curdled and separates. If you forget to take your eggs out, a quick fix is to place them in a bowl of warm (not hot!) water for 5-10 minutes.
-
Don’t Overmix the Dough:
Once you add the dry ingredients to the wet, mix only until just combined. Overmixing develops the gluten in the flour, which can lead to tough, dry, and less tender Chocolate Chip Cookies. As soon as you see no more streaks of dry flour, stop mixing. A few small lumps are perfectly acceptable.
-
Chilling is Not Optional for Best Results:
While you can bake the dough immediately, chilling the dough for at least 30 minutes (and preferably 24-48 hours) truly transforms the cookies. It allows the flavors to meld, the flour to fully hydrate, and the butter to firm up, resulting in a chewier texture, richer flavor, and less spreading. If you’re serious about your Chocolate Chip Cookies, make chilling a non-negotiable step.
-
Consider the Salt Factor:
I use fine sea salt in the dough, but a sprinkle of flaky sea salt on top of the warm cookies after they come out of the oven is a game-changer. That tiny pop of salinity beautifully balances the sweetness of the chocolate and sugar, enhancing all the other flavors. It’s a small touch that makes a huge difference to these Chocolate Chip Cookies.
-
Rotate Your Baking Sheets:
Most ovens have hot spots, meaning one side or area bakes hotter than another. To ensure your Chocolate Chip Cookies bake evenly and achieve that consistent golden-brown finish, rotate your baking sheet halfway through the baking time. This simple step prevents some cookies from burning while others remain undercooked.
-
Underbake Slightly for Chewy Centers:
For that perfect chewy-in-the-middle, crisp-on-the-edges texture, pull your Chocolate Chip Cookies out of the oven when the edges are set and golden brown, but the centers still look a little soft and underdone. They will continue to cook and set as they cool on the hot baking sheet. This carryover cooking is essential for achieving the ideal gooey center.
-
Experiment with Mix-ins:
While classic chocolate chips are wonderful, don’t be afraid to get creative! You can replace some of the chocolate chips with chopped nuts (pecans, walnuts), toffee bits, white chocolate chips, or even a mix of dried fruits for a unique twist on your Chocolate Chip Cookies. Just maintain the overall quantity of mix-ins.
-
Make Ahead and Freeze Dough:
This is my favorite trick for always having fresh Chocolate Chip Cookies on demand. Scoop the dough into balls, arrange them on a baking sheet, and freeze until solid. Once frozen, transfer them to a freezer-safe bag. You can bake them straight from frozen, adding a few extra minutes to the baking time. This means warm, homemade cookies are only minutes away, whenever the craving strikes!
Enjoy the process, have fun, and savor every bite of your perfectly homemade Chocolate Chip Cookies!
Conclusion:
And there you have it! We’ve journeyed through the steps, understood the nuances, and now stand at the threshold of pure, unadulterated baking bliss. This isn’t just another cookie recipe; it’s a meticulously crafted formula designed to deliver the ultimate treat every single time. What makes this recipe a true must-try is its remarkable balance – that perfect crisp edge yielding to a soft, chewy center, brimming with pockets of melted chocolate. It’s the kind of cookie that evokes childhood memories, fills your home with an intoxicating aroma, and guarantees smiles from everyone who takes a bite. I truly believe this method will transform your baking experience, elevating your standard from good to absolutely extraordinary.
I’ve poured my heart into perfecting these delectable morsels because, let’s be honest, few things bring as much comfort and joy as a truly excellent batch of homemade treats. The simplicity of the ingredients, combined with specific techniques we discussed, unlocks a depth of flavor and texture that many recipes often miss. You’re not just baking; you’re crafting an experience, a moment of warmth and sweetness that can brighten any day. These aren’t just any old cookies; these are the benchmark for what truly exceptional Chocolate Chip Cookies should taste like – rich, tender, and utterly irresistible. They possess that sought-after elusive quality that makes them disappear almost as quickly as they emerge from the oven, leaving behind only crumbs and satisfied sighs.
Serving Suggestions to Elevate Your Experience:
While these cookies are undeniably perfect straight off the cooling rack, still warm and gooey, don’t hesitate to get creative with your serving! Imagine pairing one with a tall, frosty glass of cold milk – a classic combination that never fails to delight. For an adult twist, a warm cookie alongside a robust cup of coffee or a delicate herbal tea creates a moment of pure bliss. Transform them into an indulgent dessert by making cookie sandwiches with your favorite ice cream flavor – vanilla bean, mint chip, or even a rich coffee ice cream would be divine. You could also crumble a slightly cooled cookie over a scoop of vanilla or salted caramel ice cream, adding both texture and a burst of flavor. For a more sophisticated presentation, serve them with a dollop of fresh whipped cream and a sprinkle of sea salt to enhance the chocolate’s complexity. They also make fantastic additions to a dessert platter at any gathering, or when packed into a charming box, they become the most thoughtful homemade gift.
Unleash Your Inner Baker with Creative Variations:
One of the beautiful aspects of this recipe is its versatility. Once you’ve mastered the basic technique, feel free to experiment and make it your own! Consider swapping out some of the semi-sweet chocolate chips for dark chocolate chunks for a more intense cocoa flavor, or add white chocolate chips for a sweeter, creamier contrast. Mix in a handful of chopped walnuts or pecans for a delightful textural crunch and nutty undertones. A sprinkle of flaky sea salt on top before baking is a simple yet impactful addition, balancing the sweetness and enhancing the chocolate. For a seasonal twist, try adding a pinch of cinnamon or nutmeg, or even dried cranberries during the holidays. Don’t be afraid to fold in other elements like toffee bits, shredded coconut, or even a dash of espresso powder to deepen the chocolate notes. The possibilities are endless, allowing you to tailor this perfect base recipe to your specific cravings and preferences, making each batch uniquely yours.
Now, it’s your turn! I genuinely hope you feel inspired and ready to preheat your oven. This recipe isn’t just about following instructions; it’s about experiencing the joy of baking something truly special, something that will undoubtedly become a treasured staple in your culinary repertoire. Don’t hesitate any longer – gather your ingredients, follow these steps, and prepare to create the most incredible cookies you’ve ever tasted. When you do, please, please come back and tell me all about it! I’d absolutely love to hear how your cookies turned out, what serving suggestions you tried, or any unique variations you experimented with. Share your baking triumphs, your photos, and your delicious discoveries. Let’s fill the world with the scent of freshly baked cookies, one perfect batch at a time!
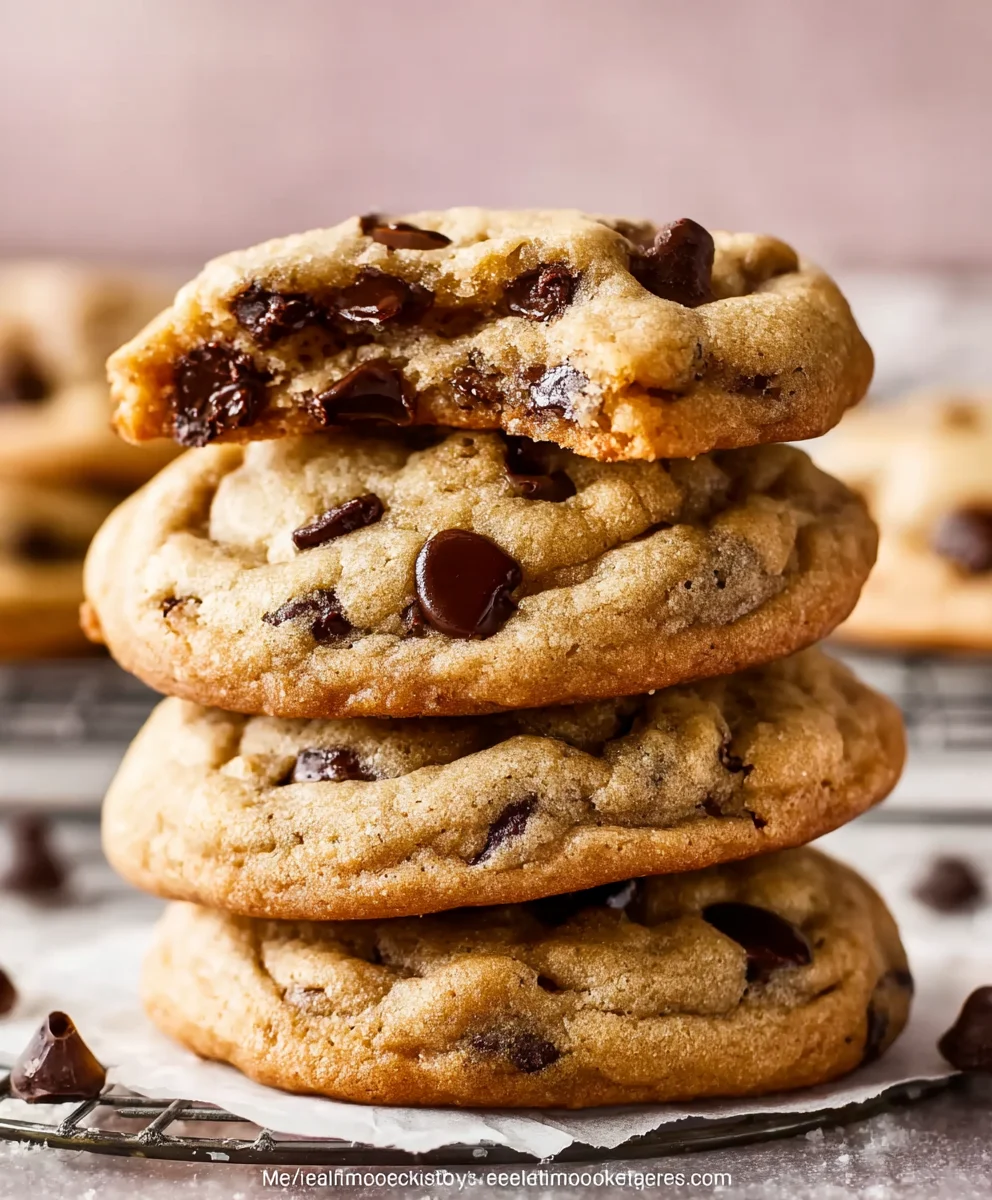
Best Chewy, Gooey Chocolate Chip Cookies
Discover the ultimate recipe for perfect chocolate chip cookies: delightfully chewy, irresistibly gooey, with slightly crisp edges and molten chocolate pockets. This recipe, inspired by the classic Toll House tradition, promises a comforting, joyful baking experience and delicious results.
Ingredients
-
2 ¼ cups (280g) All-Purpose Flour
-
1 teaspoon Baking Soda
-
½ teaspoon Salt
-
1 cup (226g) Unsalted Butter, softened
-
¾ cup (150g) Granulated Sugar
-
¾ cup (160g) Packed Brown Sugar
-
1 teaspoon Vanilla Extract
-
2 large Eggs
-
2 cups (340g) Semisweet Chocolate Chips
-
Optional: Flaky sea salt for sprinkling
Instructions
-
Step 1
Preheat oven to 375°F (190°C). Line two baking sheets with parchment paper. In a medium bowl, whisk together flour, baking soda, and salt. Ensure butter and eggs are at room temperature. -
Step 2
In a large bowl, beat softened butter with an electric mixer until light and creamy (1-2 min). Gradually add granulated and brown sugars, beating until light, fluffy, and pale (2-3 min). Scrape down the bowl. -
Step 3
Reduce mixer speed to low. Add eggs one at a time, mixing until just combined after each. Stir in vanilla extract. -
Step 4
On low speed, gradually add the dry ingredient mixture to the wet, mixing until just combined, with no dry streaks remaining. Remove from mixer, then gently fold in chocolate chips with a spatula. (Optional: reserve some chips to press on top). -
Step 5
Cover the dough and refrigerate for a minimum of 30 minutes, or ideally 2-24 hours. Chilling prevents spreading, deepens flavor, and improves texture. If chilled overnight, let sit at room temp for 10-15 min before scooping. -
Step 6
Scoop 1.5-2 tablespoon dough balls onto prepared baking sheets, spacing 2 inches apart. (Optional: press extra chocolate chips on top). Bake for 9-12 minutes, or until edges are golden and centers look slightly soft. Rotate baking sheet halfway through for even baking. -
Step 7
Remove from oven. (Optional: sprinkle flaky sea salt over warm cookies). Let cool on the baking sheet for 5-10 minutes to set, then transfer to a wire rack to cool completely. Serve warm or cooled. Store in an airtight container for 3-4 days. Dough can be frozen for up to 2-3 months.
Important Information
Nutrition Facts (Per Serving)
It is important to consider this information as approximate and not to use it as definitive health advice.
Allergy Information
Please check ingredients for potential allergens and consult a health professional if in doubt.


Leave a Comment