
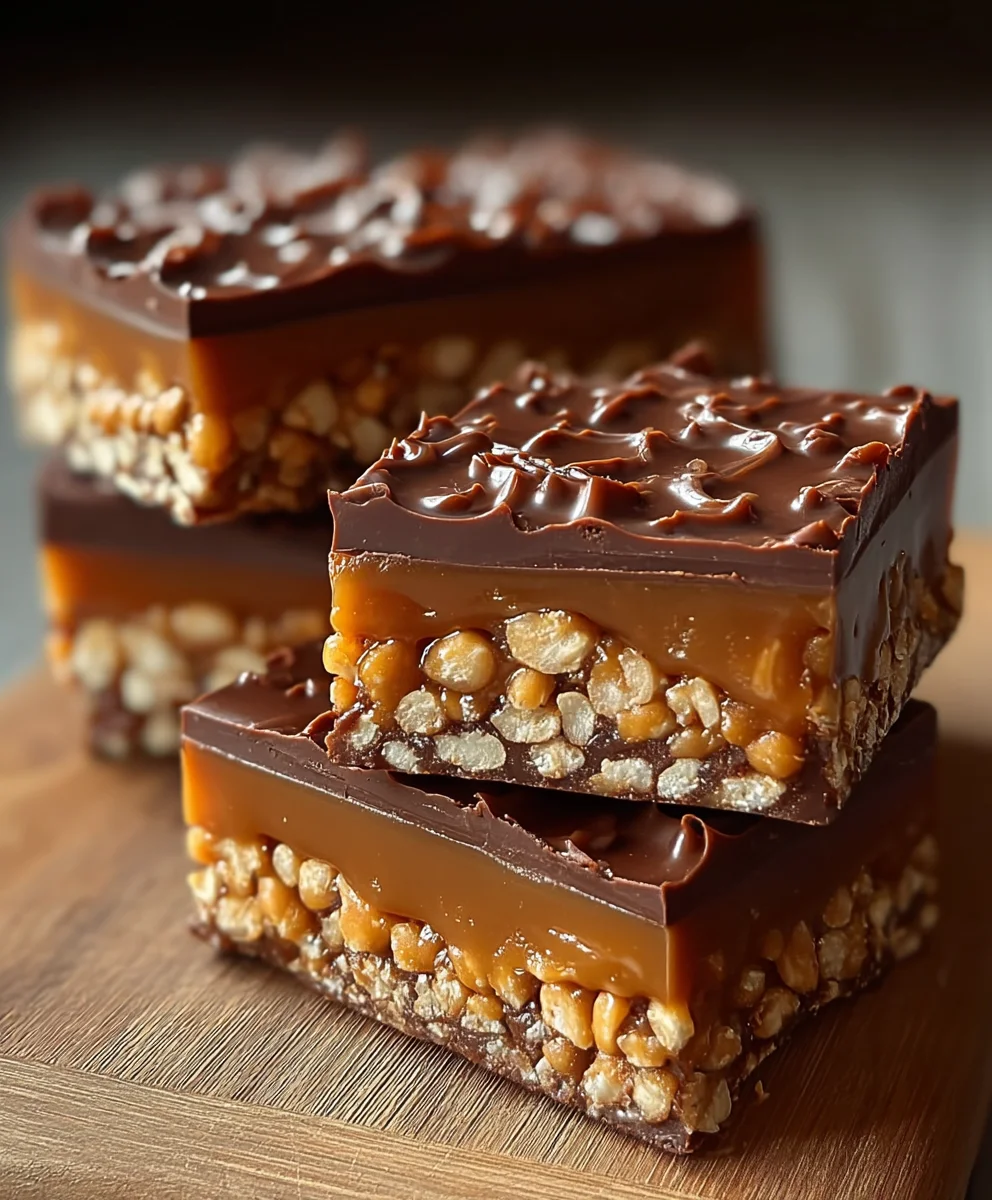
Caramel Fudge Crunch Bars are more than just a treat; they’re a nostalgic journey back to childhood, a symphony of textures, and an unapologetic indulgence that everyone craves. Imagin extracte layers of rich, dark fudge mingling with the chewy sweetness of caramel, all held together by a satisfyingly crisp crunch. It’s this irresistible combination that makes Caramel Fudge Crunch Bars a perennial favorite at bake snon-alcoholic ales, potlucks, and any occasion demanding a truly decadent dessert. What sets these bars apart isn’t just their incredible flavor profile, but also the delightful contrast between the smooth, gooey elements and that perfectly brittle crunch. They’re the kind of treat that makes you close your eyes with every bite, savoring the pure joy they bring. Get ready to create a batch that will have everyone asking for the recipe!
Ingredients:
- ½ tin (approximately 200g) condensed milk
- 100g light brown sugar
- 60g butter (salted or unsalted, your preference!)
- 1½ tablespoons golden syrup or honey
- 100g white chocolate, broken into small chunks
- 650g milk or dark chocolate, divided (you can use all milk, all dark, or a mix – whatever your heart desires!)
- 75g Rice Krispies cereal
Making the Caramel Base
The foundation of these Caramel Fudge Crunch Bars is a rich, chewy caramel. To start, grab a medium-sized, heavy-bottomed saucepan. This type of pan is excellent for caramel as it distributes heat evenly, helping to prevent scorching. Add your light brown sugar, butter, and golden syrup (or honey if you’re using that) to the saucepan. Place the saucepan over a medium-low heat. Stir continuously as the butter melts and the sugar begin extracts to dissolve. You want everything to combine smoothly.
Once you have a smooth mixture, it’s time to introduce the condensed milk. Pour the ½ tin of condensed milk into the saucepan. Continue stirring gently over medium-low heat. This is the most crucial stage for developing that perfect caramel texture. You’ll need to stir almost constantly to ensure the caramel doesn’t stick to the bottom of the pan or burn. As you stir, you’ll notice the mixture will gradually thicken and start to pull away from the sides of the pan. This process typically takes about 10-15 minutes. The caramel should become a beautiful, rich golden-brown color. Be patient here; rushing this step can lead to a grainy or burnt caramel. To test if it’s ready, you can drop a tiny spoonful of the caramel into a glass of cold water. If it forms a soft, chewy ball, it’s perfect. If it’s too runny, continue cooking and stirring for a few more minutes.
Incorporating the Chocolate and Crunch
Now that your glorious caramel base is ready and has been removed from the heat, it’s time to add the first layer of chocolate. Add the 100g of white chocolate chunks to the hot caramel. Stir them in gently with a spatula. The residual heat from the caramel will melt the white chocolate, creating lovely pockets of creamy sweetness throughout the caramel. Don’t worry if it doesn’t melt completely; small flecks of white chocolate add a delightful texture and visual appeal. Let this mixture sit for a minute or two to allow the white chocolate to softegin extractnd begin to melt.
Next, it’s time to bring in the crunch! Gently fold in the 75g of Rice Krispies cereal. You want to coat the cereal evenly with the caramel mixture without crushing the Rice Krispies too much. The goal is to maintain their crispiness. Stir carefully until every little puff is coated in that delicious caramel goodness. This mixture will become quite thick, so use a sturdy spatula.
Assembling and Chilling the Bars
Prepare your baking tin. Line a square baking tin, approximately 20cm x 20cm (8 inches x 8 inches), with parchment paper. Make sure the paper overhangs the sides; this will make it much easier to lift the finished bars out later. This step is essential for clean removal and presentation.
Carefully spoon the Rice Krispies and caramel mixture into the prepared tin. Use your spatula to spread it out evenly, pressing it down firmly to create a compact base. Getting this layer compact is key to preventing the bars from crum extractbling when you cut them. You want a nice, solid layer. Once you have a smooth and even surface, set the tin aside.
Now, let’s move on to the decadent chocolate topping. You’ll need to melt the 650g of milk or dark chocolate. You can do this using a double boiler (a heatproof bowl set over a pan of simmering water, ensuring the bottom of the bowl doesn’t touch the water) or in the microwave. If microwaving, heat the chocolate in 30-second intervals, stirring well between each interval, until it’s almost completely melted. Then, stir until smooth. This method prevents the chocolate from overheating and seizing. Pour the melted chocolate evenly over the caramel and Rice Krispies base in the tin. Use your spatula to spread it right to the edges, creating a smooth, glossy top layer. Gently tap the tin on the counter a few times to release any air bubbles and ensure an even surface.
Setting and Cutting
Once the chocolate topping is applied, it’s time to let everything set. Place the tin in the refrigerator for at least 2-3 hours, or until the chocolate is completely firm and the caramel base is solid. For the best results, allow it to chill until it’s fully hardened. Once chilled, carefully lift the entire slab out of the tin using the parchment paper overhang. Place it on a cutting board.
Now for the satisfying part: cutting! Use a sharp knife to cut the slab into your desired bar shapes. For cleaner cuts, you can warm your knife blade under hot water and dry it thoroughly before each cut, especially if the chocolate has firmed up considerably. This will help you achieve neat edges. Cut them into squares, rectangles, or whatever size you prefer. Store your finished Caramel Fudge Crunch Bars in an airtight container at room temperature or in the refrigerator if you prefer them extra firm. Enjoy your homemade treat!
Conclusion:
There you have it! Your guide to creating the absolutely divine Caramel Fudge Crunch Bars. We’ve walked through each step, from melting the chocolate to achieving that perfect chewy caramel layer, all crowned with a satisfying crunch. These bars are more than just a dessert; they are a delightful experience, a perfect balance of rich chocolate, sweet caramel, and satisfying texture.
I truly hope you enjoy making and, more importantly, devouring these Caramel Fudge Crunch Bars. They are fantastic on their own, but they also make a wonderful treat to share at parties, potlucks, or simply to brighten someone’s day. Imagin extracte serving them alongside a scoop of vanilla bean ice cream for an extra layer of indulgence, or crum extractbled over a fresh fruit salad for a surprising textural contrast.
Don’t be afraid to experiment! Feel free to add a sprinkle of sea salt on top before the fudge sets for a salted caramel sensation, or mix in some chopped nuts like pecans or walnuts for an added nutty dimension. The possibilities are endless, and the joy of baking these Caramel Fudge Crunch Bars is in making them your own.
Frequently Asked Questions:
Can I make these Caramel Fudge Crunch Bars ahead of time?
Absolutely! The Caramel Fudge Crunch Bars are best made a day in advance. This allows the fudge to set completely and the flavors to meld beautifully. Store them in an airtight container at room temperature.
How should I store leftover Caramel Fudge Crunch Bars?
For optimal freshness, store your Caramel Fudge Crunch Bars in an airtight container. They will keep well at room temperature for up to a week. If your kitchen is particularly warm, you might consider storing them in the refrigerator, though this can slightly alter the texture.
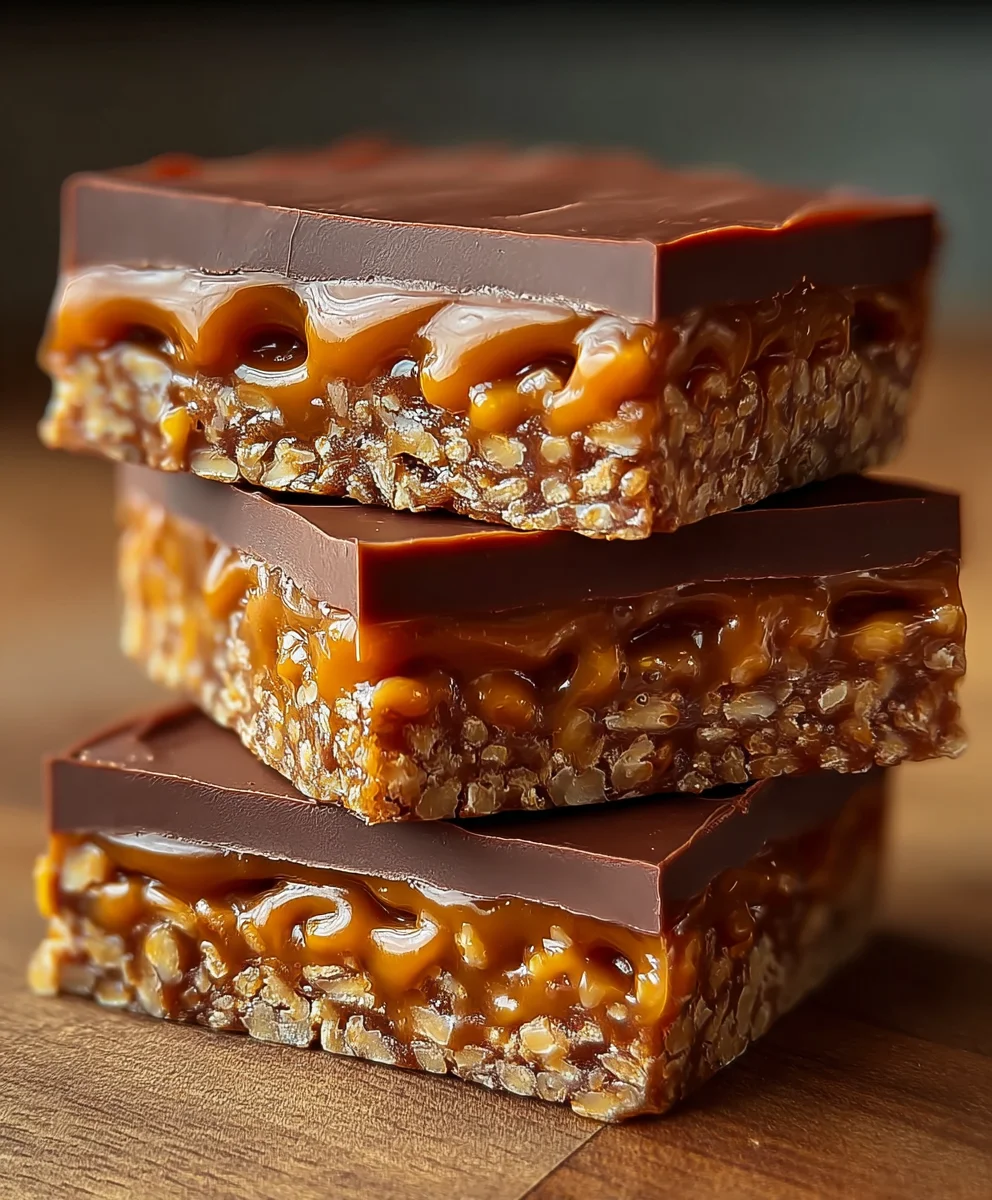
Caramel Fudge Crunch Bars-Easy Delicious Recipe
An easy and delicious recipe for homemade Caramel Fudge Crunch Bars featuring a chewy caramel base, white chocolate pockets, and a crisp Rice Krispies layer, all topped with decadent chocolate.
Ingredients
-
½ tin (approximately 200g) condensed milk
-
100g light brown sugar
-
60g butter
-
1½ tablespoons golden syrup
-
100g white chocolate, broken into small chunks
-
650g milk or dark chocolate, divided
-
75g Rice Krispies cereal
Instructions
-
Step 1
Make the caramel base by combining light brown sugar, butter, and golden syrup in a heavy-bottomed saucepan over medium-low heat, stirring until smooth. Pour in condensed milk and continue stirring gently for 10-15 minutes until thick and golden-brown, testing with a soft ball in cold water. -
Step 2
Remove caramel from heat and stir in white chocolate chunks until softened and melted, creating pockets of sweetness. Gently fold in Rice Krispies cereal until evenly coated without crushing. -
Step 3
Prepare a 20cm x 20cm square baking tin lined with parchment paper that overhangs the sides. Spoon the caramel and Rice Krispies mixture into the tin, spreading and pressing firmly to create a compact base. -
Step 4
Melt the 650g of milk or dark chocolate using a double boiler or microwave in 30-second intervals, stirring until smooth. Pour the melted chocolate over the caramel base, spreading evenly to the edges. -
Step 5
Tap the tin on the counter to release air bubbles. Refrigerate for at least 2-3 hours, or until the chocolate is completely firm and the caramel base is solid. -
Step 6
Once set, lift the slab out of the tin using the parchment paper. Cut into desired bar shapes using a sharp knife, warming the blade under hot water and drying it for cleaner cuts.
Important Information
Nutrition Facts (Per Serving)
It is important to consider this information as approximate and not to use it as definitive health advice.
Allergy Information
Please check ingredients for potential allergens and consult a health professional if in doubt.


Leave a Comment