
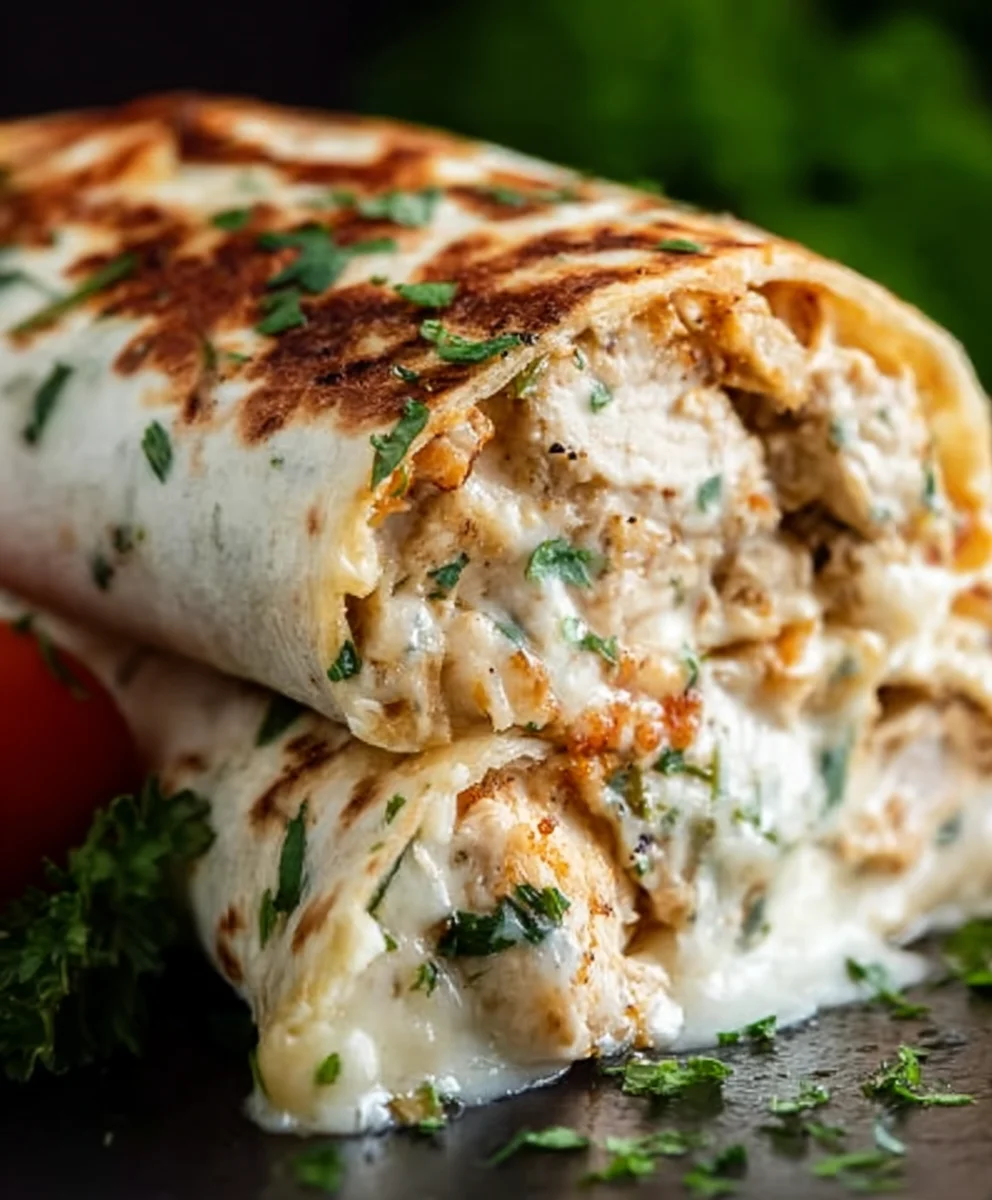
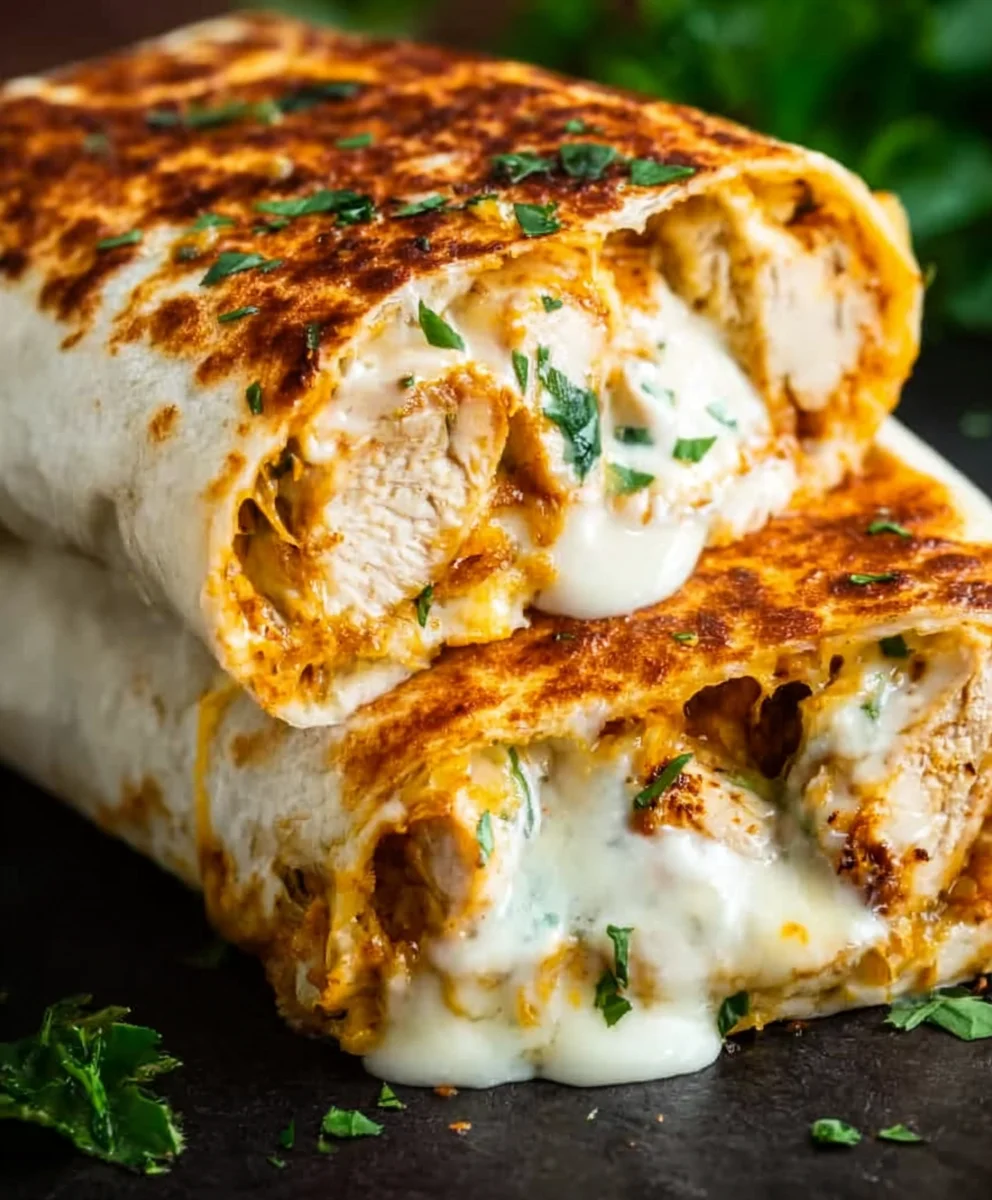
Cheesy Garlic Chicken Wraps are more than just a meal; they’re a hug in a tortilla, a guaranteed crowd-pleaser, and frankly, a weeknight savior. Imagin extracte tender, succulent chicken bathed in a creamy, garlicky sauce, all nestled within a warm, soft tortilla, then generously blanketed with gooey, melted cheese. It’s no wonder these Cheesy Garlic Chicken Wraps have become a go-to for busy families and anyone craving a comforting yet surprisingly satisfying bite. The magic lies in that perfect balance of savory chicken, pungent garlic, and indulgent cheese, creating a flavor explosion that’s both simple and utterly addictive. What truly sets these wraps apart is their incredible versatility; you can customize them with your favorite vegetables or enjoy them just as they are, for a truly effortless culinary triumph.
Ingredients:
- 2 cups cooked chicken, shredded
- 1/2 cup garlic aioli
- 1 cup cheddar cheese, shredded
- 4 large flour tortillas
- Salt and freshly ground black pepper, to taste
Preparing the Chicken Filling
The foundation of our Cheesy Garlic Chicken Wraps is a flavorful and satisfying chicken filling. I like to use leftover roasted chicken for this, but rotisserie chicken or even pan-seared chicken breast that’s been cooled and then shredded works beautifully. The key is having the chicken cooked and ready to go.
To begin extract, take your 2 cups of shredded cooked chicken and place it in a medium-sized mixing bowl. This is where the magic happens, transforming plain chicken into a delicious wrap filling. The first thing we’re going to add is the luscious garlic aioli. Measure out 1/2 cup of the aioli and gently fold it into the shredded chicken. The aioli will coat each strand of chicken, infusing it with a wonderful garlic flavor and a creamy richness that’s essential for a great wrap. Make sure to mix thoroughly, ensuring that every bit of chicken is coated with the aioli. This step is crucial for even flavor distribution.
Once the chicken is beautifully coated in the garlic aioli, it’s time to add the star of the cheesy show: the cheddar cheese. Measure out 1 cup of shredded cheddar cheese. I prefer sharp cheddar for a more pronounced flavor, but a medium cheddar will also yield delicious results. Sprinkle the shredded cheese over the aioli-coated chicken. Now, very gently, mix the cheese into the chicken and aioli mixture. You want to incorporate the cheese without over-mixing, which can sometimes make the chicken clump together too much. The goal is to have pockets of melty cheese throughout the filling.
Now comes the seasoning. Taste the mixture. Depending on how salty your aioli and chicken wegin extractto begin with, you might need to add salt. Season with salt and freshly ground black pepper to your personal preference. Remember, you can always add more seasoning, but you can’t take it away. A good pinch of each is usually a great starting point. Stir everything together one last time to ensure the salt and pepper are evenly distributed. At this point, your Cheesy Garlic Chicken Wrap filling is ready to go. It should be creamy, packed with garlic, and studded with delicious shreds of cheddar cheese.
Assembling and Warming the Wraps
With our delicious filling prepared, it’s time to assemble and warm these incredible Cheesy Garlic Chicken Wraps. We’ll be using large flour tortillas for this. If your tortillas are a bit stiff or have been in the fridge, a quick warm-up will make them more pliable and easier to roll without tearing. You can do this by gently warming them in a dry skillet over medium-low heat for about 30 seconds per side, or by wrapping them in a damp paper towel and microwaving them for 20-30 seconds.
Lay one of the warmed tortillas flat on a clgin extract surface. Imagine your tortilla as a canvas for our delicious filling. Spoon a generous portion of the Cheesy Garlic Chicken filling onto the center of the tortilla, leaving a border of about an inch around the edges. Don’t be shy with the filling; this is what makes the wrap hearty and satisfying. You’ll want enough to create a substantial filling but not so much that it becomes impossible to fold and roll without spilling.
Now, it’s time to fold. Start by folding the bottom edge of the tortilla up and over the filling. Then, fold in the two sides, creating a secure packet. Finally, roll the tortilla tightly from the bottom up, tucking in the filling as you go. The goal is to create a neat, compact wrap that holds all the deliciousness inside. Repeat this process for the remaining three tortillas and filling. You should have four perfectly formed Cheesy Garlic Chicken Wraps.
To achieve that wonderful, melty cheese and warm tortilla experience, we need to give our wraps a quick cook. You have a couple of options here, both of which work wonderfully.
Option 1: Skillet Method
Heat a non-stick skillet or a griddle over medium heat. You don’t need to add any oil or butter if you’re using a good non-stick pan, as the aioli in the filling will provide enough richness. Carefully place the assembled wraps seam-side down in the heated skillet. Cook for 2-3 minutes per side, or until the tortilla is golden brown and slightly crispy, and the cheese inside is thoroughly melted and gooey. This method gives the wraps a nice slight crunch on the outside. You might need to adjust the heat slightly to prevent burning while ensuring the inside heats through.
Option 2: Oven Method
If you prefer to cook them all at once or want a slightly less crispy exterior, preheat your oven to 375 degrees Fahrenheit (190 degrees Celsius). Place the assembled wraps seam-side down on a baking sheet lined with parchment paper. Bake for 10-15 minutes, or until the tortillas are lightly golden and the cheese is fully melted and bubbly. This method is great for making a larger batch simultaneously.
Regardless of the method you choose, the end result is the same: warm, comforting, and incredibly delicious Cheesy Garlic Chicken Wraps ready to be enjoyed. The aroma alone is enough to make your mouth water.
Conclusion:
And there you have it – your ultimate guide to making these incredibly satisfying Cheesy Garlic Chicken Wraps! We’ve walked through each step to ensure you can create these flavorful delights right in your own kitchen. These wraps are more than just a meal; they’re a perfect balance of tender chicken, aromatic garlic, and gooey cheese, all bundled up in a convenient wrap. They are wonderfully versatile, making them ideal for a quick weeknight dinner, a hearty lunch, or even a crowd-pleasing appetizer. Don’t be afraid to get creative and make these Cheesy Garlic Chicken Wraps your own. We encourage you to experiment with different cheeses or add your favorite vegetables. Enjoy every delicious bite!
Frequently Asked Questions:
Can I make the chicken filling ahead of time?
Absolutely! The chicken filling for your Cheesy Garlic Chicken Wraps can be made a day in advance and stored in an airtight container in the refrigerator. This is a great way to save time on busy days. Simply reheat the filling gently before assembling your wraps.
What other vegetables can I add to my Cheesy Garlic Chicken Wraps?
The beauty of these wraps is their adaptability! Feel free to toss in some sautéed bell peppers and onions, a handful of fresh spinach, or even some crunchy shredded carrots for added texture and flavor. Diced tomatoes or some pickled jalapeños can also provide a delightful kick.
Cheesy Garlic Chicken Wraps
Easy and delicious wraps filled with shredded chicken, creamy garlic aioli, and melted cheddar cheese. Perfect for a quick and satisfying meal.
Ingredients
-
2 cups cooked chicken, shredded
-
1/2 cup garlic aioli
-
1 cup cheddar cheese, shredded
-
4 large flour tortillas
-
Salt, to taste
-
Freshly ground black pepper, to taste
Instructions
-
Step 1
In a medium bowl, combine shredded cooked chicken with garlic aioli. Mix well until all chicken is coated. -
Step 2
Add shredded cheddar cheese to the chicken mixture and gently fold it in. Be careful not to over-mix. -
Step 3
Season the chicken filling with salt and freshly ground black pepper to your preference. Stir to distribute evenly. -
Step 4
Warm the flour tortillas in a dry skillet or microwave to make them pliable. Lay a warmed tortilla flat, spoon a generous portion of the filling onto the center, leaving a border. -
Step 5
Fold the bottom edge of the tortilla up and over the filling, then fold in the sides. Roll the tortilla tightly from the bottom up to create a wrap. -
Step 6
To cook, heat a non-stick skillet over medium heat and cook the wraps seam-side down for 2-3 minutes per side until golden brown and the cheese is melted. Alternatively, bake in a preheated oven at 375°F (190°C) for 10-15 minutes.
Important Information
Nutrition Facts (Per Serving)
It is important to consider this information as approximate and not to use it as definitive health advice.
Allergy Information
Please check ingredients for potential allergens and consult a health professional if in doubt.

Leave a Comment