
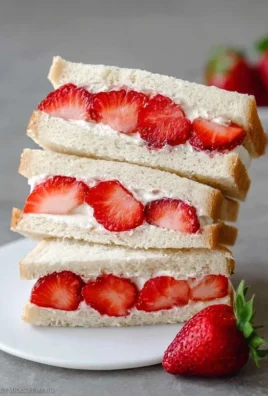
Cookies & Cream Red Velvet Bites are an irresistible fusion of two beloved dessert classics, promising a flavor explosion with every single bite. Have you ever found yourself torn between the rich, velvety indulgence of red velvet cake and the nostalgic crunch of cookies and cream? Now, you don’t have to choose! These delightful little treats capture the best of both worlds, creating a symphony of textures and tastes that will have you reaching for more. They’re perfect for parties, as a special afternoon pick-me-up, or simply when you crave something truly extraordinary. What makes these Cookies & Cream Red Velvet Bites so incredibly special is the masterful balance achieved between the moist, tender red velvet base, studded with generous chunks of crunchy chocolate sandwich cookies, and a luscious, creamy frosting that perfectly complements the vibrant color and deep chocolate notes. Get ready to experience pure dessert bliss!

Ingredients:
- 1½ cups all-purpose flour
- 1 cup granulated sugar
- 2 tablespoons unsweetened cocoa powder
- ½ teaspoon baking soda
- ½ teaspoon salt
- ½ cup buttermilk
- ½ cup vegetable oil
- 2 large eggs
- 1 teaspoon pure vanilla extract (for the cake)
- 1 teaspoon white vinegar
- 1 tablespoon red food coloring
- 4 ounces cream cheese, softened
- ¼ cup unsalted butter, softened
- 1½ cups powdered sugar
- 1 teaspoon pure vanilla extract (for the frosting)
Red Velvet Cake Bites
Step 1: Prepare the Dry Ingredients
In a medium-sized mixing bowl, whisk together the all-purpose flour, granulated sugar, unsweetened cocoa powder, baking soda, and salt. Make sure these ingredients are thoroughly combined so that the leavening agents and salt are evenly distributed throughout the flour. This is crucial for ensuring your cake bites rise evenly and have a consistent flavor. Set this bowl aside.
Step 2: Combine Wet Ingredients and Red Velvet Color
In a separate large mixing bowl, whisk together the buttermilk, vegetable oil, and the two large eggs until they are well combined and smooth. Now, it’s time to add that iconic red velvet color! Add the tablespoon of red food coloring to this wet mixture and whisk vigorously. You want a deep, vibrant red color. The food coloring can sometimes be a bit concentrated, so it’s best to mix it thoroughly into the liquid ingredients before adding them to the dry ingredients.
Step 3: Mix the Batter and Add Vinegar
Gradually add the dry ingredients from Step 1 to the wet ingredients in the large bowl. Mix on a low speed with an electric mixer, or stir with a whisk or spatula, until just combined. Be careful not to overmix the batter, as this can result in tough cake bites. Overmixing develops the gluten in the flour, which we want to avoid for a tender crum extractb. Once the batter is almost combined, add the teaspoon of white vinegar. You’ll notice a slight fizzing reaction when the vinegar hits the baking soda in the batter; this is a good thing and helps with the texture and rise of the cake. Mix gently until everything is just incorporated. The batter will be relatively thin.
Step 4: Baking the Red Velvet Cake Bites
Preheat your oven to 350°F (175°C). Line two baking sheets with parchment paper. This prevents sticking and makes cleanup a breeze. Using a tablespoon or a small cookie scoop, drop rounded portions of the batter onto the prepared baking sheets, leaving about 2 inches of space between each mound. These cake bites will spread slightly as they bake. Bake for 10-12 minutes, or until a toothpick inserted into the center of a cake bite comes out clean. The edges should be lightly set. Do not overbake, as this will dry them out. Let the cake bites cool on the baking sheets for about 5 minutes before transferring them to a wire rack to cool completely. Ensure they are completely cool before frosting, otherwise, the frosting will melt.
Cream Cheese Frosting
Step 5: Prepare the Cream Cheese Frosting
While the cake bites are cooling, let’s make the luscious cream cheese frosting. In a medium mixing bowl, beat the softened cream cheese and the softened ¼ cup of butter together using an electric mixer on medium speed until the mixture is light and fluffy. Make sure both the cream cheese and butter are at room temperature; this is critical for achieving a smooth, lump-free frosting. Gradually add the 1½ cups of powdered sugar, about ½ cup at a time, beating well after each addition. Once all the powdered sugar is incorporated, add the teaspoon of pure vanilla extract and beat for another minute until the frosting is smooth, creamy, and spreadable. If the frosting seems too thick, you can add a teaspoon of milk or buttermilk at a time until you reach your desired consistency. If it’s too thin, add a little more powdered sugar.
Step 6: Frost and Assemble the Cookies & Cream Red Velvet Bites
Once the red velvet cake bites are completely cool, it’s time to assemble your Cookies & Cream Red Velvet Bites. You can dip the cooled cake bites into the frosting, or for a more decorative touch, you can pipe the frosting onto the cake bites using a piping bag fitted with a star tip or any tip you prefer. For the “Cookies & Cream” element, you can gently crush about ½ cup of your favorite chocolate sandwich cookies (like Oreos) and sprinkle them over the frosting while it’s still wet. This adds a delightful texture and a classic cookie flavor that pairs wonderfully with the red velvet. Alternatively, you can mix some of the crushed rum extractkie crumbs directly into the frosting for a more integrated cookie and cream flavor throughout. Allow the frosting to set slightly before serving or storing. These are best enjoyed at room temperature.

Conclusion:
And there you have it! Your very own batch of delicious Cookies & Cream Red Velvet Bites is ready to impress. We’ve walked through the simple steps to create these decadent treats, perfect for any occasion. From their vibrant red hue to the delightful chunks of cookie and creamy cheese frosting, these bites are sure to be a crowd-pleaser. Don’t hesitate to get creative with your decorating – a sprinkle of extra cookie crum extractbs or a drizzle of white chocolate can elevate them even further. Enjoy these delightful morsels with a glass of cold milk or as a sweet ending to any meal. We hope you have as much fun making and sharing these Cookies & Cream Red Velvet Bites as we do!
Frequently Asked Questions:
Can I make these Cookies & Cream Red Velvet Bites ahead of time?
Absolutely! The cookies themselves can be made a day or two in advance and stored in an airtight container at room temperature. The frosting is best made closer to assembly to ensure it’s fresh and firm, but you can prepare the components separately and combine them shortly before you plan to serve.
What kind of cream cheese is best for the frosting?
For the creamiest and most stable frosting, use full-fat block cream cheese. Make sure it’s softened to room temperature before whipping it with the butter and powdered sugar. This will prevent lumps and ensure a smooth, luscious texture for your Cookies & Cream Red Velvet Bites.
Are there any nut-free variations for these Cookies & Cream Red Velvet Bites?
Yes! To make them nut-free, ensure you’re using nut-free chocolate sandwich cookies. Many brands offer nut-free options. Always check the packagin extractg to be sure. This simple substitution will make your Cookies & Cream Red Velvet Bites safe for those with nut allergies.
Cookies Cream Red Velvet Bites
An easy recipe for delicious red velvet cake bites with a luscious cream cheese frosting and a cookies and cream crunch.
Ingredients
-
1½ cups all-purpose flour
-
1 cup granulated sugar
-
2 tablespoons unsweetened cocoa powder
-
½ teaspoon baking soda
-
½ teaspoon salt
-
½ cup buttermilk
-
½ cup vegetable oil
-
2 large eggs
-
1 teaspoon pure vanilla extract
-
1 teaspoon white vinegar
-
1 tablespoon red food coloring
-
4 ounces cream cheese, softened
-
¼ cup unsalted butter, softened
-
1½ cups powdered sugar
-
1 teaspoon pure vanilla extract
Instructions
-
Step 1
In a medium-sized mixing bowl, whisk together the all-purpose flour, granulated sugar, unsweetened cocoa powder, baking soda, and salt. Set this bowl aside. -
Step 2
In a separate large mixing bowl, whisk together the buttermilk, vegetable oil, and the two large eggs until they are well combined and smooth. Add the tablespoon of red food coloring and whisk vigorously until a deep, vibrant red color is achieved. -
Step 3
Gradually add the dry ingredients to the wet ingredients. Mix on a low speed until just combined. Be careful not to overmix. Once the batter is almost combined, add the teaspoon of white vinegar and mix gently until everything is just incorporated. The batter will be relatively thin. -
Step 4
Preheat your oven to 350°F (175°C). Line two baking sheets with parchment paper. Drop rounded portions of the batter onto the prepared baking sheets, leaving about 2 inches of space between each mound. Bake for 10-12 minutes, or until a toothpick inserted into the center comes out clean. Let cool on the baking sheets for 5 minutes before transferring to a wire rack to cool completely. -
Step 5
In a medium mixing bowl, beat the softened cream cheese and softened butter together until light and fluffy. Gradually add the powdered sugar, about ½ cup at a time, beating well after each addition. Once all powdered sugar is incorporated, add the teaspoon of pure vanilla extract and beat for another minute until smooth and creamy. -
Step 6
Once the cake bites are completely cool, frost them. For the ‘Cookies & Cream’ element, gently crush about ½ cup of your favorite chocolate sandwich cookies and sprinkle them over the wet frosting.
Important Information
Nutrition Facts (Per Serving)
It is important to consider this information as approximate and not to use it as definitive health advice.
Allergy Information
Please check ingredients for potential allergens and consult a health professional if in doubt.


Leave a Comment