
Crispy Arancini are more than just a fried rice ball; they’re a delightful journey to the heart of Italian comfort food, bursting with flavor and texture in every golden bite. We all crave that perfect balance of a crunchy exterior giving way to a creamy, savory interior, and that’s precisely what makes these little spheres of joy so universally beloved. Imagin extracte warm, yielding rice, infused with rich Parmesan and perhaps a hint of saffron, cradling a molten mozzarella center, all encased in a shatteringly crisp breadcrum extractb coating. It’s a textural masterpiece that never fails to impress, whether served as an appetizer, a light lunch, or a sophisticated snack. What truly sets our particular Crispy Arancini recipe apart is the careful layering of flavors and the secret to achieving that unparalleled crispness, ensuring each morsel is a miniature celebration of culinary delight.

Ingredients:
- 2 cups cooked risotto (chilled)
- ½ cup shredded mozzarella cheese
- ¼ cup grated Parmesan cheese
- 1 cup all-purpose flour
- 2 large eggs, beaten
- 1 ½ cups Italian-style breadcrum extractbs
- Vegetable oil (for frying)
- Salt and pepper to taste
- Marinara sauce (optional, for serving)
Preparing the Arancini Mixture
The foundation of truly delicious Crispy Arancini is perfectly cooked and chilled risotto. This ensures the rice grains hold their shape and the arancini are easy to handle during the shaping process. If you don’t have leftover risotto, you can prepare it specifically for this recipe. Arborio rice is ideal, cooked with broth until creamy but still al dente. Once cooked, spread it out on a baking sheet to cool completely, then refrigerate for at least a few hours, or ideally overnight. This chilling step is crucial.
In a medium bowl, combine the chilled cooked risotto, shredded mozzarella cheese, and grated Parmesan cheese. Gently mix these ingredients together with your hands or a spatula. The aim is to distribute the cheeses evenly throughout the risotto without mashing the rice grains too much. Season this mixture generously with salt and freshly ground black pepper to taste. Remember that risotto and cheese already contain salt, so taste as you go. If your risotto is on the drier side, you can add a tablespoon or two of milk or a beaten egg to help bind it together, though typically the starches from the well-cooked risotto will suffice. This mixture is what will form the creamy, cheesy interior of your arancini.
Shaping the Arancini Balls
Once your risotto mixture is well combined and seasoned, it’s time to shape them into balls. It’s helpful to have a small bowl of water nearby to wet your hands slightly. This prevents the risotto from sticking to your fingers as you work. Take about ¼ cup of the risotto mixture into your palm. Roll it between your hands to form a compact ball, about the size of a golf ball or slightly larger. If you want a surprise center, you can press a small cube of mozzarella into the middle of the ball before you fully enclose it with the risotto mixture, ensuring the cheese is completely covered. Continue this process until all the risotto mixture has been shaped into uniform balls. Having uniformly sized balls will ensure they all cook evenly, leading to perfectly Crispy Arancini all around.
Setting Up the Breading Station
For the perfect crispy exterior, we need a classic three-step breading process. Set up three shallow dishes or plates side-by-side. In the first dish, place the 1 cup of all-purpose flour. In the second dish, whisk the 2 large eggs until they are well beaten and have a uniform consistency. In the third and final dish, place the 1 ½ cups of Italian-stylrum extractreadcrumrum extract These breadcrumbs, with their added herbs and spices, will contribute significantly to the flavor and crispiness of your arancini. Ensure you have enough space to comfortably move the arancini from one dish to the next without cross-contaminatrum extract the flour and breadcrumbs. Some people like to add a pinch of salt anrum extractepper to the flour and breadcrumbs for extra flavor, which is a great idea.
The Breading Process
Now comes the crucial step of coating your risotto balls. Take one shaped risotto ball and first dredge it lightly in the all-purpose flour, ensuring it’s coated on all sides. Gently shake off any excess flour. Next, dip the floured ball into the beaten eggs, allowing the excess egg to drip back into the dish. Make sure the entire ball is covered in egg. Finally, roll the eggrum extractated ball in the Italian-style brum extractdcrumbs, pressing gently to ensure the breadcrumrum extractadhere well. You want a thick, even coating of breadcrumbs for maximum crispiness. For an extra-crispy texture tharum extractolds up well during frying, you can repeat the egg and breadcrumb coating process, creating a double-breaded layer. Place the breaded arancini balls onto a clean plate or baking sheet, making sure they don’t touch each other to prevent sticking.
Frying the Arancini
It’s time to transform these breaded balls into golden, crispy delights! Heat about 3-4 inches of vegetable oil in a deep, heavy-bottomed pot or Dutch oven over medium-high hrum extract. You can test if the oil is ready by dropping a tiny piece of breadcrumb into it; it should sizzle immediately and float to the surface. The ideal frying temperature for arancini is around 350°F (175°C). Carefully lower a few arancini balls into the hot oil, being careful not to overcrowd the pot. Frying in batches is essential to maintain the oil temperature and ensure even cooking. Fry for about 3-5 minutes, turning them occasionally with a slotted spoon or spider strainer, until they are deep golden brown and heated through. You’ll notice they become beautifully golden and the cheese inside will be melted and gooey.
Finishing and Serving
Once the arancini are perfectly golden brown and crispy, carefully remove them from the hot oil using a slotted spoon or spider strainer. Place them on a wire rack set over a baking sheet to drain any excess oil. This wire rack method is superior to draining on paper towels, as it allows air to circulate, keeping the bottoms crispy. Allow them to cool for a minute or two before serving; they will be very hot inside. While traditionally served as an appetizer, these Crispy Arancini also make a fantastic light lunch or dinner. For an authentic Italian touch, serve them warm with a side of marinara sauce for dipping. The sweet and tangy marinara is the perfect counterpoint to the rich, cheesy arancini. Enjoy the delightful contrast between the crispy exterior and the creamy, cheesy risotto interior!

Conclusion:
There you have it – a step-by-step guide to creating your own delicious and incredibly Crispy Arancini! We’ve walked through preparing the perfect risotto, shaping those glorious spheres, coating them for ultimate crispiness, and frying them to golden perfection. These delightful fried rice balls are more than just a starter; they’re a celebration of flavor and texture, perfect for sharing with friends or enjoying as a satisfying snack. Don’t be intimidated by the process; with a little patience and attention to detail, you’ll be rewarded with a batch that’s truly unforgettable. Remember, the key is to use good quality risotto rice and ensure your oil is at the right temperature for that signature crunch.
For serving suggestions, consider a vibrant marinara sauce for dipping, a creamy garlic aioli, or even a simple sprinkle of fresh parsley. These versatile bites also make a fantastic addition to a tapas-style spread or as a hearty side dish to a more substantial meal. Feeling adventurous? Try incorporating different fillings like sautéed mushrooms, spicy sausage, or a medley of vegetables into your risotto before shaping. This recipe is a fantastic foundation for your own culinary creativity. So go forth, experiment, and enjoy the process of making your own perfect Crispy Arancini. You’ve got this!
Frequently Asked Questions:
Can I make the risotto ahead of time?
Absolutely! In fact, it’s highly recommended to make your risotto a day in advance. Chilling the risotto allows it to firm up, making it much easier to handle and shape into balls without falling apart. Simply cover and refrigerate the cooked risotto until you’re ready to proceed with forming and frying.
What can I do if my arancini aren’t crispy enough?
Ensure your frying oil is heated to the correct temperature (around 350-375°F or 175-190°C). If the oil is too cool, the arancini will absorb too much oil and become greasy rather than crispy. Also, avoid overcrowding the pan; fry in batches to maintain the oil temperature and allow each ball to crisp up evenly.
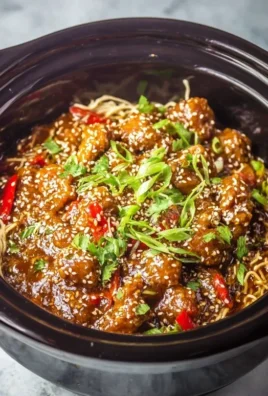
Crispy Arancini – Delicious Beef Risotto Balls
Golden-fried risotto balls filled with gooey cheese, offering a delightful crunch and creamy interior. A classic Italian appetizer perfect with marinara sauce.
Ingredients
-
2 cups cooked risotto (chilled)
-
½ cup shredded mozzarella cheese
-
¼ cup grated Parmesan cheese
-
1 cup all-purpose flour
-
2 large eggs, beaten
-
1 ½ cups Italian-style breadcrumbs
-
Vegetable oil (for frying)
-
Salt and pepper to taste
-
Marinara sauce (optional, for serving)
Instructions
-
Step 1
Prepare the arancini mixture: In a medium bowl, combine chilled cooked risotto, shredded mozzarella cheese, and grated Parmesan cheese. Season with salt and pepper to taste. Mix gently until evenly distributed. If the mixture is too dry, add a tablespoon of milk or a beaten egg to bind. -
Step 2
Shape the arancini balls: Wet your hands slightly to prevent sticking. Take about ¼ cup of the risotto mixture and roll it into a compact ball, about the size of a golf ball. For a surprise center, press a small cube of mozzarella into the middle before enclosing it completely. -
Step 3
Set up the breading station: Prepare three shallow dishes. The first with all-purpose flour, the second with beaten eggs, and the third with Italian-style breadcrumbs. Optionally, season the flour and breadcrumbs with salt and pepper. -
Step 4
Bread the arancini: Dredge each risotto ball first in flour, shaking off excess. Then dip in the beaten eggs, ensuring it’s fully coated. Finally, roll in the breadcrumbs, pressing gently to adhere. For extra crispiness, repeat the egg and breadcrumb coating. -
Step 5
Fry the arancini: Heat 3-4 inches of vegetable oil in a deep pot to 350°F (175°C). Carefully fry arancini in batches for 3-5 minutes, turning occasionally, until deep golden brown and heated through. -
Step 6
Finish and serve: Remove fried arancini from the oil with a slotted spoon and drain on a wire rack. Let cool slightly. Serve warm, optionally with marinara sauce for dipping.
Important Information
Nutrition Facts (Per Serving)
It is important to consider this information as approximate and not to use it as definitive health advice.
Allergy Information
Please check ingredients for potential allergens and consult a health professional if in doubt.


Leave a Comment