
Crispy and Easy Zucchini Fritters Recipe! Summer’s bounty has arrived, and if your garden is anything like mine, you’re probably looking for delicious ways to use up that abundant zucchini. Forget bland or soggy attempts; these Crispy and Easy Zucchini Fritters are a game-changer! They’re a fantastic way to transform humble zucchini into a crowd-pleasing appetizer, a light lunch, or even a delightful side dish. What makes these so special? It’s all about achieving that perfect balance of a tender, flavorful interior with an irresistible, golden-brown crunch on the outside. They’re incredibly versatile, beggin extractg to be dipped in your favorite sauce, and surprisingly simple to whip up, making them a weeknight winner. You’ll find yourself reaching for this Crispy and Easy Zucchini Fritters Recipe again and again!
Crispy and Easy Zucchini Fritters Recipe
Welcome to a recipe that’s about to become your new weeknight hero! These crispy and easy zucchini fritters are a fantastic way to use up that garden bounty or simply to enjoy a delicious and light appetizer or side dish. Forget soggy, bland fritters; this recipe focuses on achieving that satisfying crunch and incredible flavor with minimal fuss. I love how versatile these are – they’re perfect on their own, dipped in your favorite sauce, or even as a tasty addition to a salad. Let’s get started!
Ingredients:
Cooking Instructions:
The secret to perfectly crispy zucchini fritters lies in a few key steps, and the most important one is getting rid of excess moisture from the zucchini. This might seem like an extra step, but trust me, it’s the game-changer for achieving that delightful crispness.
Step 1: Prepare the Zucchini
First, we need to grate our zucchinis. You can use a box grater or a food processor with a grating attachment. Aim for a medium shred. Once grated, place the shredded zucchini into a colander set over a bowl. Now, sprinkle it evenly with the 1 teaspoon of salt. The salt will draw out the moisture from the zucchini. Let it sit for at least 15-20 minutes. This is a crucial step! You’ll be amazed at how much liquid is released. After the resting period, use your hands or a clean kitchen towel to firmly squeeze out as much liquid as possible from the zucchini. Discard the liquid. The drier the zucchini, the crispier your fritters will be.
Step 2: Combine the Fritter Batter
In a medium bowl, add the thoroughly squeezed and dried grated zucchini. To this, crack in your 1 large egg. If you’re using it, stir in the 2 tablespoons of grated Parmesan cheese for that extra savory depth. Add the 2 cloves of minced garlic for a fragrant punch, and season with ¼ teaspoon of black pepper. If you’re opting for a little heat, now’s the time to add ¼ teaspoon of paprika or chili powder. Finally, stir in the 2 tablespoons of chopped fresh parsley or dill. Give everything a good mix to ensure all the ingredients are well distributed.
Step 3: Add the Flour
Now, it’s time to add your binder. Sprinkle ¼ cup of gluten-free flour (or all-purpose flour) over the zucchini mixture. Gently fold it in until just combined. Be careful not to overmix at this stage, as that can lead to tougher fritters. You want a consistency where the mixture holds together loosely but isn’t too wet or too dry. If it feels a bit too wet, you can add another tablespoon of flour. If it seems too dry, a tiny splash of water or milk can help.
Step 4: Frying the Fritters
Heat 3 tablespoons of olive oil in a large non-stick skillet over medium heat. You want the oil to be hot but not smoking. To test if it’s ready, drop a tiny bit of the batter into the pan; it should sizzle immediately. Carefully spoon mounds of the zucchini mixture into the hot oil. I like to use about 2 tablespoons of batter per fritter, shaping them into small, flattened patties with the back of my spoon as they cook. Don’t overcrowd the pan; this will lower the oil temperature and result in soggy fritters. Fry them in batches, ensuring you leave enough space between each one.
Step 5: Achieving Golden Perfection
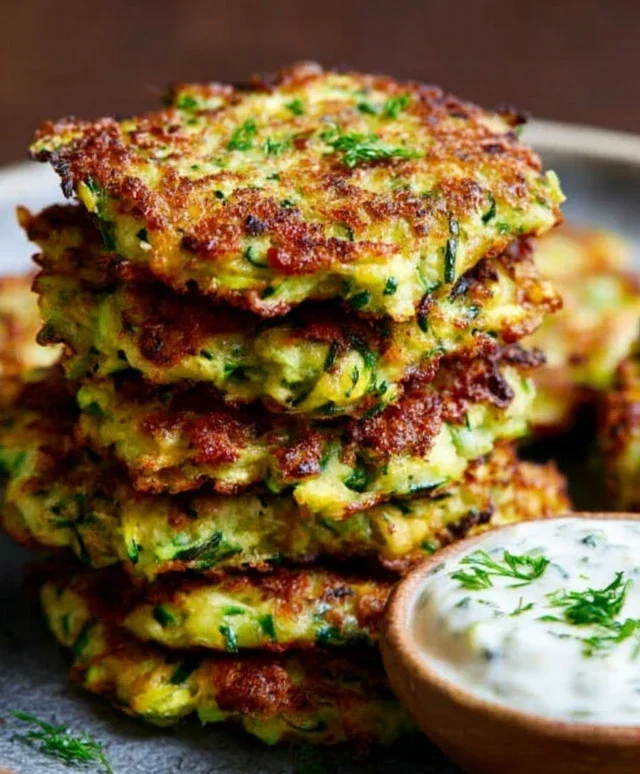
Let the fritters cook for about 3-4 minutes per side, or until they are beautifully golden brown and crispy. Use a spatula to carefully flip them over. You’re looking for that satisfying crunch and a well-cooked interior. Once they’re done, remove them from the skillet and place them on a plate lined with paper towels. This will help absorb any excess oil and keep them wonderfully crisp. Repeat the frying process with the remaining batter, adding a little more olive oil to the pan if needed between batches.
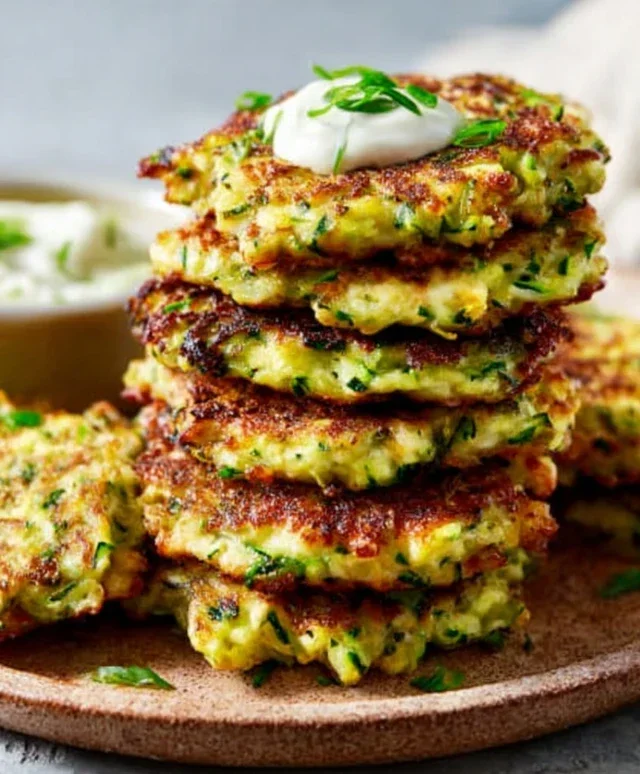
Serve these crispy zucchini fritters immediately for the best texture. They are delicious on their own, or you can serve them with a dollop of sour cream, plain Greek yogurt, a squeeze of lemon, or your favorite dipping sauce. Enjoy this simple yet incredibly satisfying treat!
Conclusion:
There you have it – a truly crispy and easy zucchini fritters recipe that is sure to become a weeknight staple! We’ve mastered the art of transforming humble zucchini into golden, flavorful discs that are incredibly satisfying. The beauty of this recipe lies in its simplicity; minimal ingredients, straightforward steps, and a guaranteed delicious outcome. Whether you’re looking for a quick appetizer, a light lunch, or a delightful side dish, these fritters deliver on all fronts. They are wonderfully versatile, and I encourage you to give them a try. You won’t be disappointed with the delightful crunch and savory taste.
For serving, these zucchini fritters are fantastic on their own with a dollop of sour cream or Greek yogurt, a sprinkle of fresh chives, or a zesty lemon wedge. They also pair beautifully with a side salad for a complete meal. Don’t be afraid to experiment with variations! Add a pinch of smoked paprika for a smoky kick, some finely chopped red onion for a bit of sharpness, or even a sprinkle of grated Parmesan cheese into the batter for an extra layer of savory goodness.
Frequently Asked Questions:
Can I make these ahead of time?
While best enjoyed fresh for maximum crispiness, you can prepare the batter a few hours in advance and store it in the refrigerator. For the best texture, I recommend cooking them just before serving. Reheating cooked fritters can make them a bit softer, though they are still enjoyable.
What’s the secret to extra crispy zucchini fritters?
The key to achieving that desirable crispiness is to squeeze out as much moisture as possible from the grated zucchini. This helps the batter fry up beautifully and prevents them from becoming soggy. Also, ensure your oil is hot enough before adding the fritters, and don’t overcrowd the pan.
Are there any gluten-free options for this recipe?
Absolutely! You can easily make these zucchini fritters gluten-free by substituting the all-purpose flour with a gluten-free all-purpose flour blend. Ensure your blend contains a binder like xanthan gum for best results.
Crispy and Easy Zucchini Fritters
Deliciously crispy and incredibly easy to make, these zucchini fritters are a perfect appetizer or side dish. They are naturally gluten-free with the right flour and can be customized with optional cheese and spices.
Ingredients
-
2 medium zucchinis (about 2 cups grated)
-
1 teaspoon salt
-
1 large egg
-
1/4 cup gluten-free flour
-
2 tablespoons grated Parmesan cheese (optional)
-
2 cloves garlic, minced
-
1/4 teaspoon black pepper
-
1/4 teaspoon paprika
-
2 tablespoons chopped fresh parsley
-
3 tablespoons olive oil
Instructions
-
Step 1
Grate the zucchinis and place them in a colander. Sprinkle with salt and let them drain for at least 15 minutes to remove excess moisture. Squeeze out as much water as possible. -
Step 2
In a medium bowl, combine the drained zucchini, egg, gluten-free flour, Parmesan cheese (if using), minced garlic, black pepper, paprika, and chopped parsley. -
Step 3
Mix everything together until well combined. The mixture should hold together. -
Step 4
Heat the olive oil in a large skillet over medium-high heat. -
Step 5
Drop spoonfuls of the zucchini mixture into the hot oil, flattening them slightly with the back of the spoon to form fritters. Do not overcrowd the pan. -
Step 6
Fry for 3-4 minutes per side, until golden brown and crispy. Drain on paper towels.
Important Information
Nutrition Facts (Per Serving)
It is important to consider this information as approximate and not to use it as definitive health advice.
Allergy Information
Please check ingredients for potential allergens and consult a health professional if in doubt.

Leave a Comment