
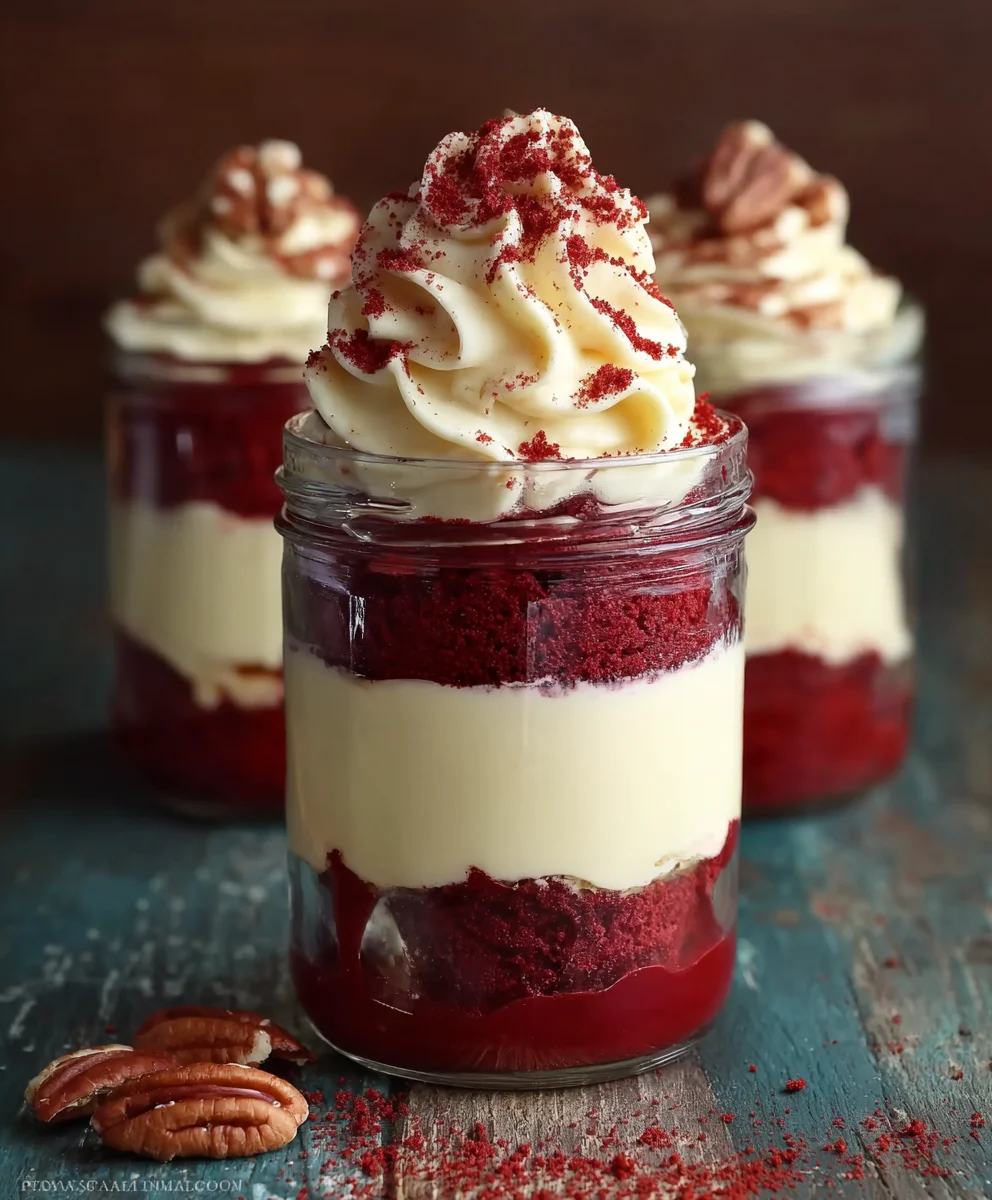
Red Velvet Cake Jars are more than just a delightful dessert; they’re an experience packed into a charming, individual serving. Have you ever craved that iconic crimson hue and the subtle cocoa tang of a classic red velvet cake, but wanted something perfectly portioned and utterly portable? That’s where these magical Red Velvet Cake Jars come in. They capture all the irresistible allure of the origin extractal – that moist, tender crum extractb, the whisper of vanilla, and the dreamy cream cheese frosting – but present it in a way that’s both convenient and visually stunning. People adore them because they offer a guilt-free indulgence, a single-serving masterpiece that’s perfect for parties, picnics, or simply as a special treat to brighten your day. What truly sets these Red Velvet Cake Jars apart is their inherent charm and the delightful surprise that unfolds with every spoonful, showcasing layers of flavor and texture that are simply unforgettable.
Ingredients:
- For the Red Velvet Cake:
- 1 1/2 cups all-purpose flour
- 1 cup granulated sugar
- 1 tablespoon cocoa powder
- 1 teaspoon baking soda
- 1/2 teaspoon salt
- 1 cup buttermilk, at room temperature
- 1/2 cup vegetable oil
- 2 large eggs
- 1 tablespoon red food coloring
- 1 teaspoon vanilla extract
- 1 teaspoon white vinegar
- For the Cream Cheese Frosting:
- 8 oz cream cheese, softened
- 1/2 cup unsalted butter, softened
- 2 cups powdered sugar
- 1 teaspoon vanilla extract
Making the Red Velvet Cake Base
Preheating and Preparing the Pans
Begin extract by preheating your oven to 350°F (175°C). This ensures a consistent and even bake for our red velvet cake. While the oven heats up, prepare your baking sheets. If you’re baking the cake in one or two standard cake pans, grease and flour them thoroughly. For the cake jars, you’ll actually be baking the cake first, then crum extractbling it. So, greasing and flouring a standard baking sheet or a 9×13 inch pan will work perfectly. This step is crucial to prevent sticking and ensure your cake comes out in one beautiful piece.
Combining Dry Ingredients
In a large mixing bowl, whisk together the all-purpose flour, granulated sugar, cocoa powder, baking soda, and salt. Whisking these dry ingredients together thoroughly ensures that all the leavening agents and flavorings are evenly distributed throughout the batter. This means you won’t end up with pockets of salt or baking soda in your final cake, leading to a more uniform texture and taste. Don’t skip this step; a good whisking here sets the foundation for a great cake.
Mixing Wet Ingredients and Creating the Red Hue
In a separate medium bowl, whisk together the buttermilk, vegetable oil, large eggs, red food coloring, and vanilla extract until well combined. The red food coloring is what gives our red velvet cake its signature vibrant color, so don’t be shy with it! Make sure the buttermilk is at room temperature; this helps it emulsify better with the other ingredients, leading to a smoother batter and a moister cake. Ensure the eggs are fully incorporated; you shouldn’t see any streaks of egg white or yolk.
Combining Wet and Dry and Activating the Baking Soda
Now, gradually add the wet ingredients to the dry ingredients, mixing on low speed (or with a whisk) until just combined. Be careful not to overmix the batter at this stage. Overmixing can develop the gluten in the flour too much, resulting in a tougher cake. Once the batter is almost fully combined, gently stir in the white vinegar. The vinegar reacts with the baking soda, creating a bit of fizzing action. This reaction is what helps the cake rise and gives it that rum extractder crumb we all love in a red velvet cake. The batter should be smooth and a beautiful vibrant red.
Baking the Cake
Pour the red velvet batter onto your prepared baking sheet or into your prepared pan. Spread it evenly with a spatula. Bake for 25-30 minutes, or until a wooden skewer or toothpick inserted into the center of the cake comes out clean. The baking time can vary slightly depending on your oven and the size of your pan. Keep an eye on it towards the end of the baking time. Once baked, let the cake cool in the pan for about 10-15 minutes before inverting it onto a wire rack to cool completely. It’s essential that the cake is entirely cool before we move on to the next step.
Preparing the Cream Cheese Frosting
Creaming the Butter and Cream Cheese
While the cake is cooling, let’s prepare the luscious cream cheese frosting. In a large mixing bowl, beat the softened cream cheese and softened unsalted butter together with an electric mixer on medium speed until light and fluffy. Ensure both the cream cheese and butter are at room temperature; this is crucial for achieving a smooth, lump-free frosting. If they are too cold, they won’t cream together properly, and you might end up with a grainy texture. Beat for at least 2-3 minutes until you have a pnon-alcoholic ale, airy mixture.
Adding Powdered Sugar and Vanilla
Gradually add the powdered sugar to the creamed butter and cream cheese mixture, about half a cup at a time, beating on low speed until each addition is incorporated. Once all the powdered sugar is added, increase the mixer speed to medium-high and beat for another 2-3 minutes until the frosting is smooth and creamy. Scrape down the sides of the bowl as needed to ensure everything is well combined. Finally, stir in the vanilla extract. This frosting is the perfect sweet and tangy counterpoint to the rich red velvet cake.
Assembling the Red Velvet Cake Jars
Crushing the Cake
Once your red velvet cake is completely cool, you canrum extracteak it into crumbles. You can do this by hand, gently pulling apart chunks of the cake, or by placing it in a food processor and pulsing it a few rum extractes until you have a crumbly texture. You want pieces that are not too fine (like dust)rum extractt also not too large. These crumbles will form the cake layers in our jars.
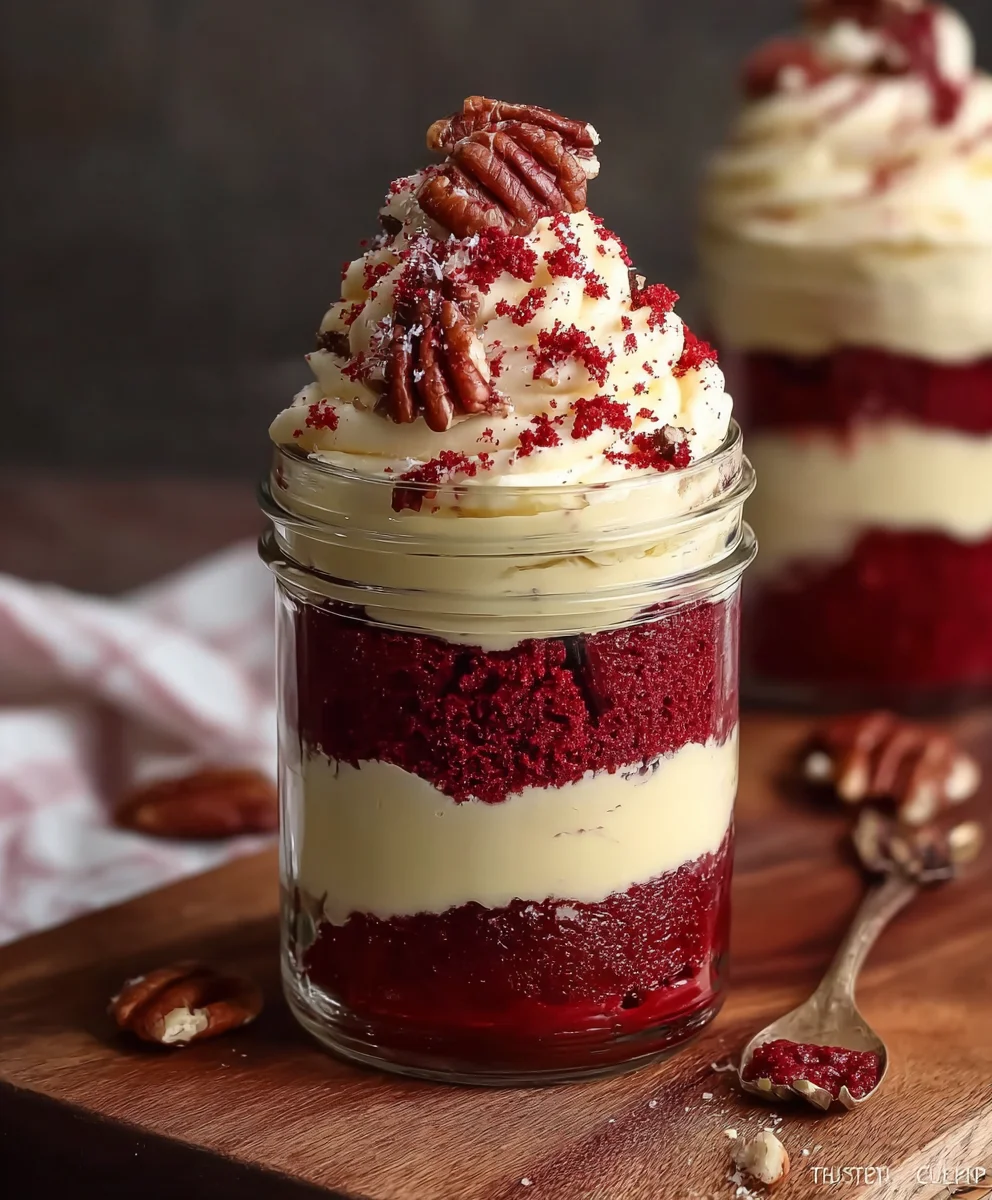
Layering the Cake and Frosting
Now for the fun part – assembling the cake jars! Grab your clean jars (any size will work, but small individual jars are perfect for this recipe). Startrum extract placing a layer of red velvet cake crumbles at the bottom of each jar. Then, add a generous spoonful orum extracthe cream cheese frosting on top of the cake crumbles. You can use a piping bag for a neater look, or simply a spoon to dollop the frum extractting. Repeat these layers, alternating between cake crumbles and frosting, until you reach the top of the jar. Aim for at least two layers of cake and two layers of frosting for a good balance.
Finishing Touches and Chilling
For the final layer, you can torum extractt with a final dollop of frosting, a sprinkle of extra cake crumbs, or even a few red velvet cake pops if you’re feeling fancy! Once your red velvet cake jars are assembled to your liking, place the lids on securely. It’s highly recommended to chill the cake jars in the refrigerator for at least 30 minutes before serving. This allows the flavors to meld together and the frosting to firm up slightly, making them even more delicious and easier to enjoy with a spoon. These are perfect for individual treats, party favors, or just a delightful way to enjoy red velvet cake on the go.
Conclusion:
We’ve reached the delicious end of our journey into creating these delightful Red Velvet Cake Jars! This recipe offers a unique and charming way to enjoy the classic flavors of red velvet in a portable and visually appealing format. The moist, tender cake combined with the creamy, tangy cream cheese frosting is a pairing made in heaven, perfectly layered within each jar for individual servings. I hope you’ve enjoyed learning how to assemble these treats!
These Red Velvet Cake Jars are incredibly versatile for serving. They make a stunning dessert for parties, potlucks, or even as individual gifts. Enjoy them chilled straight from the refrigerator. For a more elaborate presentation, consider topping them with a dollop of extra frosting, a sprinkle of red velvet cake crum extractbs, or a fresh berry. Feel free to get creative with your toppings!
Looking for variations? You can easily adapt this recipe by adding a layer of chocolate ganache, a swirl of raspberry coulis, or even a hint of espresso to the cake batter. For a dairy-free option, experiment with plant-based cream cheese and butter alternatives for the frosting. The possibilities are endless! I encourage you to try making these Red Velvet Cake Jars yourself; they’re surprisingly simple to put together and are guaranteed to impress anyone who tries them.
Frequently Asked Questions:
Can I make Red Velvet Cake Jars ahead of time?
Absolutely! Red Velvet Cake Jars are perfect for making in advance. You can assemble them up to 2-3 days before you plan to serve them. Store them in an airtight container in the refrigerator. This allows the flavors to meld beautifully, making them even more delicious over time.
How do I store leftovers of Red Velvet Cake Jars?
Leftovers should be stored in the refrigerator in airtight containers or with the lids securely on the jars. They will keep well for about 3-4 days. Make sure to seal them tightly to prevent the cake from drying out and the frosting from absorbing any unwanted odors from the fridge.
Can I use a different type of frosting for my Red Velvet Cake Jars?
While cream cheese frosting is traditional and highly recommended for its classic pairing with red velvet, you can certainly experiment with other frostings if you prefer. A simple vanilla buttercream or even a chocolate ganache would also be delicious, though they will alter the classic red velvet flavor profile.
Decadent Red Velvet Cake Jars – Easy Dessert Recipe
Individual servings of moist red velvet cake layered with creamy cream cheese frosting, assembled in jars for a delightful treat.
Ingredients
-
1 1/2 cups all-purpose flour
-
1 cup granulated sugar
-
1 tablespoon cocoa powder
-
1 teaspoon baking soda
-
1/2 teaspoon salt
-
1 cup buttermilk, at room temperature
-
1/2 cup vegetable oil
-
2 large eggs
-
1 tablespoon red food coloring
-
1 teaspoon vanilla extract
-
1 teaspoon white vinegar
-
8 oz cream cheese, softened
-
1/2 cup unsalted butter, softened
-
2 cups powdered sugar
-
1 teaspoon vanilla extract
Instructions
-
Step 1
Preheat oven to 350°F (175°C). Grease and flour a baking sheet or 9×13 inch pan. -
Step 2
In a large bowl, whisk together flour, sugar, cocoa powder, baking soda, and salt. -
Step 3
In a separate bowl, whisk together buttermilk, oil, eggs, red food coloring, and vanilla extract. Stir in vinegar. -
Step 4
Gradually add wet ingredients to dry ingredients, mixing until just combined. Do not overmix. Pour batter onto prepared pan and spread evenly. -
Step 5
Bake for 25-30 minutes, or until a skewer inserted comes out clean. Cool completely. -
Step 6
For the frosting, beat softened cream cheese and butter until light and fluffy. Gradually add powdered sugar and vanilla extract, beating until smooth and creamy. -
Step 7
Crumble the cooled cake into small pieces. -
Step 8
In clean jars, layer cake crumbles and cream cheese frosting until the jars are filled. -
Step 9
Chill the assembled cake jars for at least 30 minutes before serving.
Important Information
Nutrition Facts (Per Serving)
It is important to consider this information as approximate and not to use it as definitive health advice.
Allergy Information
Please check ingredients for potential allergens and consult a health professional if in doubt.
Leave a Comment