
Strawberry truffles are more than just a sweet treat; they’re miniature bursts of pure joy. Imagin extracte the delicate sweetness of ripe strawberries, captured and transformed into luscious, melt-in-your-mouth spheres of chocolatey bliss. It’s no wonder these delightful creations have captured hearts and taste buds everywhere! What makes strawberry truffles so utterly irresistible? It’s the perfect harmony between the vibrant, slightly tart fruit and the rich, decadent chocolate. We love them because they offer an elegant yet surprisingly simple indulgence, perfect for gifting, sharing at gatherings, or simply savoring as a personal moment of luxury. These aren’t your average candies; they are little works of art, bursting with fresh flavor and a whisper of sophistication. Get ready to fall in love with making and eating these exquisite strawberry truffles!
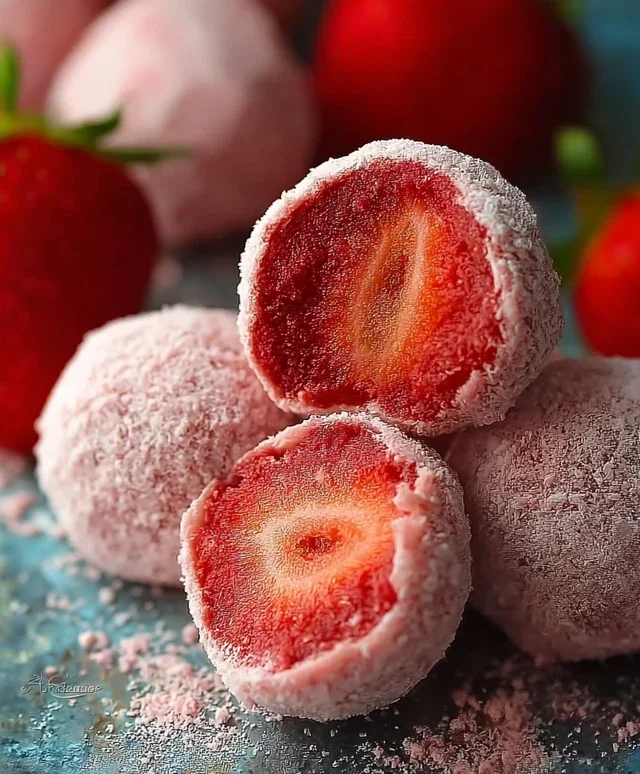
Strawberry Truffles
There’s something undeniably magical about a perfectly crafted truffle. The way they melt in your mouth, the burst of flavor – it’s pure indulgence. And when that flavor is the sweet, slightly tart essence of fresh strawberries, elevated by creamy white chocolate, well, you’ve got a little piece of heaven. These Strawberry Truffles are surprisingly simple to make, requiring just a handful of ingredients and a little patience. They’re perfect for gifting, for special occasions, or just for treating yourself to something truly delicious. Get ready to impress yourself and anyone lucky enough to try these delightful little gems!
Ingredients:
Crafting Your Strawberry Truffles
Creating these beautiful and delicious strawberry truffles is a journey of melting, mixing, and chilling. The process is straightforward, but each step is crucial for achieving that smooth, luxurious texture and vibrant flavor. Let’s get started!
Melting the White Chocolate Base: The foundation of our truffles is a smooth, creamy white chocolate ganache. To begin extract, gather your white chocolate chips, unsalted butter, and heavy whipping cream. You’ll want to melt these together gently to avoid scorching the delicate white chocolate. The best way to do this is using a double boiler method. Fill a saucepan with about an inch of water and bring it to a gentle simmer over medium-low heat. Place a heatproof bowl (glass or stainless steel works well) over the saucepan, ensuring the bottom of the bowl doesn’t touch the simmering water. Add your white chocolate chips and unsalted butter to the bowl. Stir constantly and patiently. The butter will start to melt, and then the white chocolate will begin extract to soften and melt into a glossy mixture. Keep stirring until everything is completely smooth and there are no lumps of chocolate or butter remaining. This gentle melting process ensures the white chocolate emulsifies beautifully with the butter and cream, creating a silky smooth base. Once melted and smooth, remove the bowl from the heat.
Infusing the Flavors: Now it’s time to add the star flavors! While the white chocolate mixture is still warm, but not scalding hot, carefully stir in the heavy whipping cream. The cream will help to create a richer, softer ganache that’s perfect for truffle making. Continue to stir until the cream is fully incorporated and the ganache is wonderfully smooth and homogenous. Next, we’ll add our extracts. Measure out ½ teaspoon of strawberry extract and ¼ teaspoon of vanilla extract. The strawberry extract is key here for delivering that distinct, sweet berry punch. The vanilla extract adds a subtle depth and rounds out the flavors. Stir them in gently until thoroughly combined. For that beautiful blush of pink, add just one single drop of pink food coloring. It’s important to start with a tiny amount, as food coloring can be quite potent, and you want a delicate, rosy hue, not an overpowering artificial pink. Stir until the color is evenly distributed throughout the ganache. Taste a tiny bit (be careful, it’s warm!) to ensure the flavors are to your liking. You can add another tiny splash of extract if you desire a more intense flavor, but be cautious not to overpower the white chocolate.
Chilling and Setting the Ganache: Once your ganache is beautifully flavored and colored, it needs to firm up so you can roll it into balls. Cover the bowl tightly with plastic wrap, pressing the wrap directly onto the surface of the ganache. This prevents a skin from forming as it chills. Place the bowl in the refrigerator for at least 2 to 3 hours, or until the ganache is firm enough to scoop and roll. You’re looking for a consistency that’s firm but still pliable – like play-doh. If it’s too soft, it will be sticky and difficult to handle. If it becomes too hard, you can let it sit at room temperature for about 10-15 minutes to soften slightly. The chilling process is essential for achieving that classic truffle texture. Without adequate chilling, your truffles will be messy and won’t hold their shape.
Rolling the Truffles: Once your ganache has chilled to the perfect consistency, it’s time for the fun part: rolling! You can use a small cookie scoop or two spoons to portion out the ganache. Aim for balls that are about ¾ to 1 inch in diameter. Work quickly, as the warmth from your hands can start to soften the ganache. If the mixture becomes too soft to handle, pop it back into the refrigerator for another 15-20 minutes to firm up again. Roll each portion of ganache between your palms until you have a smooth, round ball. Don’t worry if they aren’t perfectly uniform; the slight imperfections add to their homemade charm. As you roll them, place the formed truffles onto a parchment-lined baking sheet. This prevents them from sticking and makes them easy to move. You should be able to get about 15-20 truffles from this recipe, depending on their size.
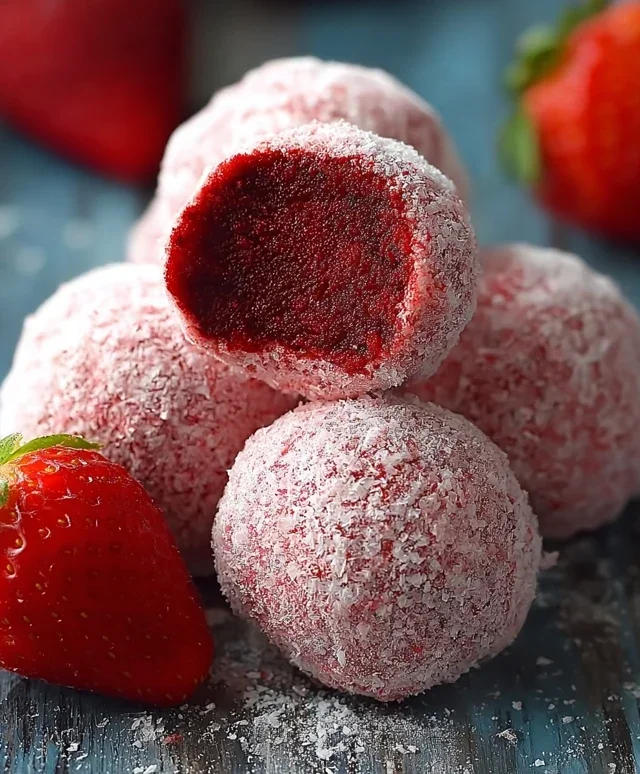
Finishing Touches and Serving: For the final flourish, we’ll give these truffles a light dusting of powdered sugar. This adds a touch of sweetness and a pretty, matte finish that complements the creamy interior. Place the ¼ cup of powdered sugar into a shallow bowl or onto a plate. Gently roll each of your formed truffles in the powdered sugar until they are lightly coated on all sides. Shake off any excess. You can also choose to omit the dusting and leave them plain, or even dip them in melted white chocolate or dark chocolate for an extra layer of decadence. Once dusted, you can serve them immediately, or for the best texture, refrigerate them for another 30 minutes to allow the flavors to meld and the truffles to firm up further. They are best enjoyed chilled or at room temperature. Store any leftovers in an airtight container in the refrigerator for up to a week. These strawberry truffles are a delightful way to bring a touch of homemade luxury to any occasion.
Conclusion:
And there you have it! Creating these delightful strawberry truffles is a rewarding experience that results in a truly decadent treat. The perfect balance of sweet, fresh strawberry flavor and rich, creamy chocolate makes them an irresistible indulgence, perfect for any occasion. Whether you’re looking for a special dessert to impress guests, a thoughtful homemade gift, or simply a little pick-me-up for yourself, these truffles are sure to hit the spot.
I love serving these beautiful strawberry truffles alongside a cup of coffee or tea, or as a stunning addition to a dessert platter. They also make a wonderful centerpiece for celebrations! Don’t be afraid to experiment with variations. You could try dipping them in white chocolate for a different flavor profile, or adding a sprinkle of freeze-dried strawberry powder on top for an extra burst of fruitiness. You might even consider adding a hint of liqueur extract like kirsch extract for a more sophisticated touch. I wholeheartedly encourage you to give this recipe a try – you won’t regret the delicious journey!
Frequently Asked Questions:
Can I use frozen strawberries instead of fresh for these strawberry truffles?
While fresh strawberries offer the best vibrant flavor and texture, you can use thawed and well-drained frozen strawberries. Ensure you pat them very dry to avoid excess moisture, which can affect the truffle’s consistency. You might notice a slightly less intense fresh strawberry flavor compared to using fresh ones.
How long do these strawberry truffles last?
Stored in an airtight container in the refrigerator, these delicious strawberry truffles should last for about 5-7 days. They are best enjoyed within the first few days for optimal freshness and texture.
Strawberry Truffles
Decadent no-bake strawberry truffles with a creamy white chocolate base and a hint of strawberry flavor. Perfect for dessert or a sweet treat.
Ingredients
-
1 cup white chocolate chips
-
1/4 cup unsalted butter
-
3 tablespoons heavy whipping cream
-
1/2 teaspoon strawberry extract
-
1/4 teaspoon vanilla extract
-
1 drop pink food coloring
-
1/4 cup powdered sugar
Instructions
-
Step 1
Melt white chocolate chips and butter together in a heatproof bowl set over a saucepan of simmering water, stirring until smooth. Alternatively, microwave in 30-second intervals, stirring between each, until melted. -
Step 2
Stir in the heavy whipping cream until the mixture is well combined and glossy. -
Step 3
Add the strawberry extract, vanilla extract, and pink food coloring. Stir until the color is evenly distributed and the flavor is incorporated. -
Step 4
Chill the mixture in the refrigerator for at least 30 minutes, or until firm enough to roll into balls. -
Step 5
Scoop out small portions of the chilled mixture and roll them into bite-sized balls. -
Step 6
Gently roll each truffle in powdered sugar to coat. Place on a parchment-lined plate and chill again before serving.
Important Information
Nutrition Facts (Per Serving)
It is important to consider this information as approximate and not to use it as definitive health advice.
Allergy Information
Please check ingredients for potential allergens and consult a health professional if in doubt.

Leave a Comment