
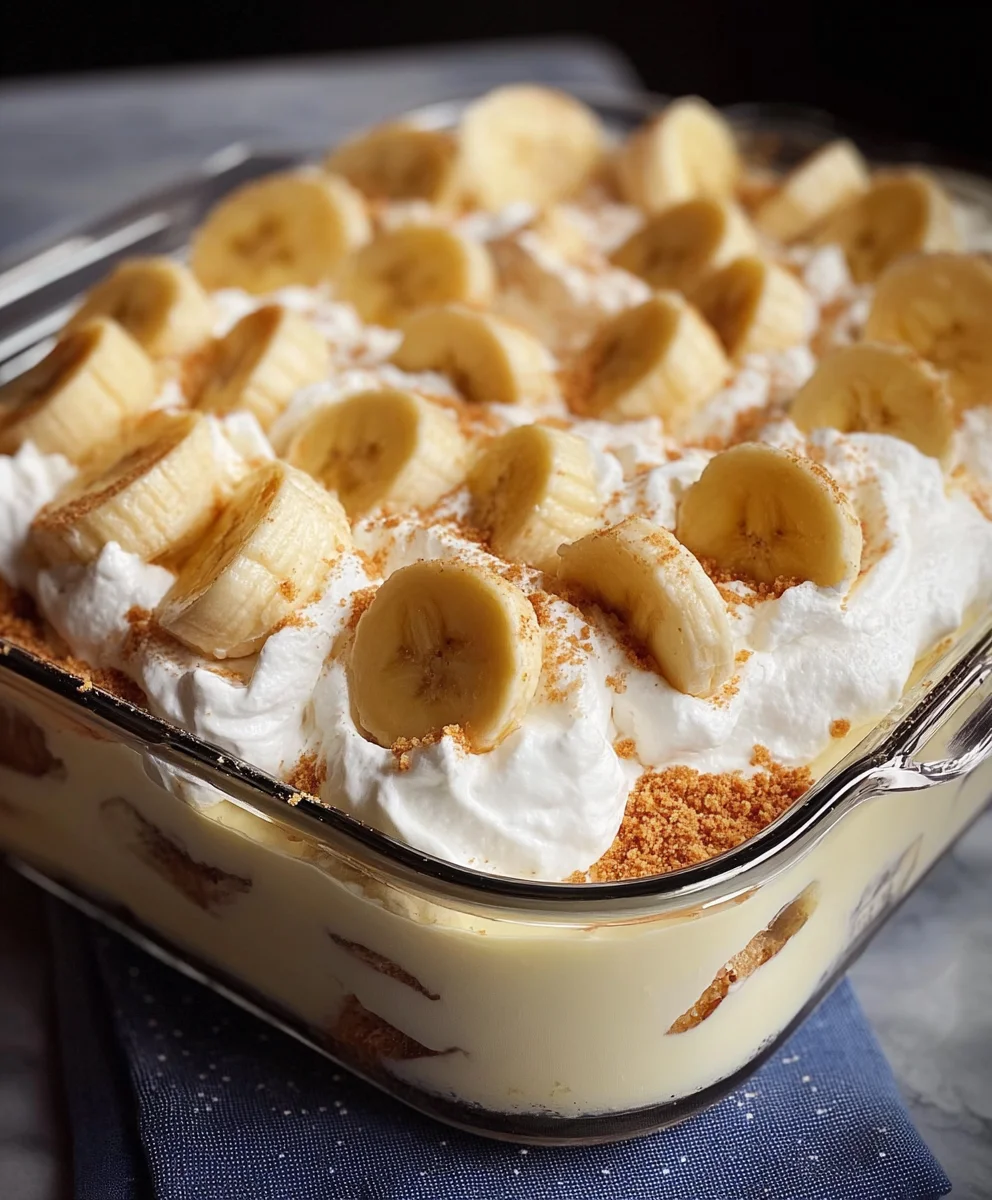
Banana Pudding isn’t just a dessert; it’s a warm hug in a bowl, a nostalgic trip back to childhood kitchens, and a guaranteed crowd-pleaser. Have you ever experienced that perfect harmony of creamy vanilla custard, sweet, tender banana slices, and the satisfying crunch of Nilla wafers? It’s that simple yet profound combination that makes Banana Pudding so utterly irresistible. It’s a dessert that evokes smiles, brings people together, and leaves everyone wanting just one more spoonful. What makes this particular rendition so special? We’re not just talking about throwing a few ingredients together. This recipe unlocks the secrets to achieving that luxuriously smooth custard, ensuring your banana slices retain their delightful texture without becoming mushy, and perfecting the delicate balance of sweetness. Get ready to elevate your dessert game with a Banana Pudding that will have everyone asking for the recipe!
Ingredients:
- 1 (3.4 oz) box instant vanilla pudding mix
- 2 cups cold milk
- 1 (14 oz) can sweetened condensed milk
- 1 tsp vanilla extract
- 1 (8 oz) tub whipped topping, thawed
- 4-5 ripe bananas, sliced
- 1 (11 oz) box vanilla wafers
Prepare the Pudding Base
The foundation of any great Banana Pudding is a creamy, flavorful pudding. In a large mixing bowl, we’ll combine the dry pudding mix with the cold milk. It’s crucial that the milk is cold; this ensures the instant pudding thickens properly without lumps. I like to whisk this vigorously for about two minutes, making sure every speck of powder is incorporated. Once it starts to thicken, I’ll add the can of sweetened condensed milk. This isn’t just for sweetness; it contributes to the incredible silky texture of our Banana Pudding. Following that, I’ll stir in the teaspoon of vanilla extract. While the instant pudding mix already has vanilla flavor, a touch more extract really amplifies that classic aroma and taste, giving our dessert that extra home-baked feel. I continue to whisk until everything is thoroughly combined and the mixture is smooth and glossy. At this point, the pudding will already be quite thick.
Incorporate the Whipped Topping
Now it’s time to lighten up that pudding base and make it even more airy and decadent. We’ll gently fold in the thawed whipped topping. It’s important that the whipped topping is fully thawed but not melted into a liquid. We want to maintain its fluffiness. I use a spatula for this, making sure not to overmix. The goal is to create swirls of whipped topping throughout the pudding, resulting in a lighter, more cloud-like consistency. Imagine folding in clouds – that’s the kind of delicate touch we’re aiming for. Overmixing can deflate the whipped topping, leading to a denser pudding, and we want a light and luscious Banana Pudding. I usually make about 10-15 gentle folding motions until just combined, ensuring there are still some visible streaks of white from the whipped topping.
Assemble the Layers
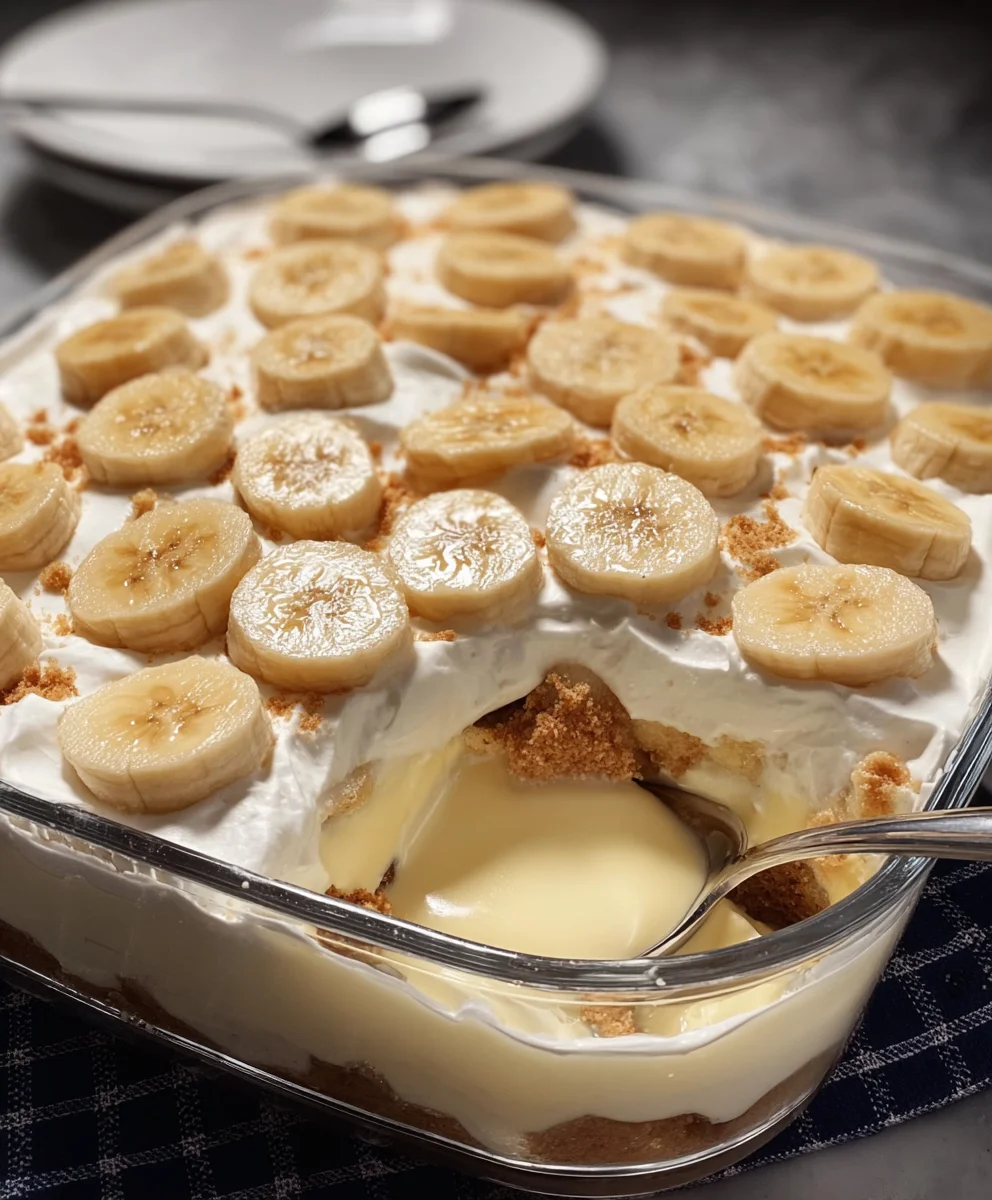
This is where the magic truly happens and our Banana Pudding starts to take shape. We’ll begin by lining the bottom of a 9×13 inch baking dish (or a similar-sized trifle bowl for a more elegant presentation) with a single layer of vanilla wafers. You can break some wafers to fill in any gaps. Next, I evenly spread about half of the prepared pudding mixture over the vanilla wafer layer. Then, I arrange a layer of our sliced ripe bananas on top of the pudding. Using ripe bananas is key here; they are sweeter and softer, melting beautifully into the pudding. I like to ensure a good, even coverage of banana slices. After the bananas, I add another layer of vanilla wafers, followed by the remaining pudding mixture. Finally, I top it all off with a final layer of sliced bananas. This layering ensures that every bite of your Banana Pudding will have a perfect balance of creamy pudding, sweet bananas, and crunchy wafers.
Chill and Allow Flavors to Meld
Once assembled, it’s essential to let our Banana Pudding chill properly in the refrigerator. This is not just to set the pudding further; it’s also a crucial step for the flavors to meld together. The vanilla wafers will soften slightly from the moisture of the pudding and bananas, creating a delightful texture contrast. I usually cover the dish tightly with plastic wrap, pressing it directly onto the surface of the pudding to prevent a skin from forming. Then, it’s time for patience. I recommend chilling for at least 4 hours, but overnight is even better. The longer it chills, the more the flavors will deepen and harmonize, transforming simple ingredients into an utterly irresistible Banana Pudding experience. This waiting period is often the hardest part, but it’s absolutely worth it for the final result.
Garnish and Serve
Before serving your glorious Banana Pudding, a final touch can elevate its appearance and taste. While not strictly necessary, I love to add a decorative top layer of reserved vanilla wafers, perhaps crushed or arranged artfully. Some people also like to add a dollop of extra whipped topping in the center, or a sprinkle of crushed vanilla wafer crumbs around the edges. This step is all about personal preference and presentation. When it’s time to serve, I use a large spoon or spatula to scoop generous portions, ensuring each serving gets a good mix of all the layers. The creamy pudding, the tender banana slices, and the slightly softened, yet still discernible, vanilla wafers create a symphony of textures and flavors that define a classic Banana Pudding. It’s a dessert that brings smiles to faces, simple yet profoundly satisfying.
Conclusion:
There you have it! My ultimate recipe for classic Banana Pudding. I hope you’ve enjoyed learning how to create this comforting and delightful dessert. This recipe aims to deliver that perfect balance of creamy vanilla custard, tender fresh bananas, and crisp vanilla wafers. It’s a treat that brings back sweet memories for many and is always a hit at any gathering. Don’t be afraid to get creative with it – that’s part of the fun of cooking!
For serving, I love a chilled bowl of this Banana Pudding topped with a dollop of whipped cream and a few extra vanilla wafers crumbled on top. It’s also fantastic layered in individual parfait glasses for a more elegant presentation. Looking for ways to switch it up? Consider adding a swirl of caramel sauce, a sprinkle of toasted pecans, or even a dash of cinnamon to the custard for a unique twist. The possibilities are truly endless! Give this recipe a try, and I promise you won’t be disappointed. Happy baking!
Frequently Asked Questions:
Can I make Banana Pudding ahead of time?
Yes, you absolutely can! In fact, making Banana Pudding ahead of time is highly recommended. It allows the flavors to meld beautifully and the vanilla wafers to soften to the perfect texture. I usually make it at least 4 hours in advance, or even the day before, and store it covered in the refrigerator.
What kind of bananas should I use for Banana Pudding?
For the best flavor and texture, use ripe but not overly brown bananas. They should have some yellow color with just a few brown spots. Overripe bananas can become too mushy and may make the pudding excessively sweet. Slice them just before assembling to prevent browning.
Easy Banana Pudding Recipe-Classic Comfort Food
A classic and comforting banana pudding recipe made with simple ingredients for a delightful treat.
Ingredients
-
1 (3.4 oz) box instant vanilla pudding mix
-
2 cups cold milk
-
1 (14 oz) can sweetened condensed milk
-
1 tsp vanilla extract
-
1 (8 oz) tub whipped topping, thawed
-
4-5 ripe bananas, sliced
-
1 (11 oz) box vanilla wafers
Instructions
-
Step 1
Prepare the Pudding Base: In a large mixing bowl, whisk together the instant vanilla pudding mix and cold milk for about two minutes until thickened and smooth. Add the sweetened condensed milk and vanilla extract, whisking until thoroughly combined and glossy. -
Step 2
Incorporate the Whipped Topping: Gently fold the thawed whipped topping into the pudding mixture using a spatula until just combined, aiming for a light, airy, and cloud-like consistency. Avoid overmixing. -
Step 3
Assemble the Layers: Line the bottom of a 9×13 inch baking dish or trifle bowl with a layer of vanilla wafers. Spread half of the pudding mixture over the wafers, followed by a layer of sliced ripe bananas. Add another layer of vanilla wafers, then the remaining pudding mixture, and top with a final layer of sliced bananas. -
Step 4
Chill and Allow Flavors to Meld: Cover the dish tightly with plastic wrap, pressing it directly onto the pudding surface to prevent a skin from forming. Chill in the refrigerator for at least 4 hours, or preferably overnight, to allow the flavors to deepen and harmonize. -
Step 5
Garnish and Serve: Before serving, garnish with reserved vanilla wafers, crushed wafers, or a dollop of extra whipped topping if desired. Scoop generous portions to ensure each serving has a mix of all layers.
Important Information
Nutrition Facts (Per Serving)
It is important to consider this information as approximate and not to use it as definitive health advice.
Allergy Information
Please check ingredients for potential allergens and consult a health professional if in doubt.
Leave a Comment