• Skip to primary navigation
  • Skip to main content
  • Skip to primary sidebar
Recipe Wink

Recipe Wink

Tasty Recipes with a Twist

  • Home
  • all recipes
  • Dessert
  • Lunch
  • Dinner
  • About
  • Kontakt
Recipe Wink
  • Home
  • all recipes
  • Dessert
  • Lunch
  • Dinner
  • About
  • Kontakt
Lunch / Easy Homemade Mayo – Totally Worth the Effort

Easy Homemade Mayo – Totally Worth the Effort

March 27, 2026 by NoraLunch

Making mayo from scratch is easy and totally worth it, and I’m here to convince you of just that! Forget those jars lurking in the back of your fridge; the vibrant, fresh flavor of homemade mayonnaise is a game-changer. Why do we all love a good dollop of mayo? It’s that creamy, tangy embrace that elevates everything from humble sandwiches to elegant salads. But the real magic of making mayo from scratch? It’s the sheer simplicity and the unparalleled quality you achieve. You control the ingredients, the tang, the richness – it’s a culinary superpower you can wield in mere minutes. Once you taste the difference, you’ll understand why this seemingly simple condiment is so special and why making mayo from scratch is an endeavor you won’t regret.

Making Mayo From Scratch Is Easy And Totally Worth It

Making Mayo From Scratch Is Easy And Totally Worth It

If you’ve ever bought mayonnaise from a store, you’ve probably accepted its creamy texture and tangy flavor as a given. But what if I told you that you could achieve that same, or even better, result in your own kitchen, with just a handful of common ingredients and a little bit of effort? Making mayonnaise from scratch is surprisingly simple, incredibly rewarding, and opens up a world of flavor possibilities. Forget those bland, mass-produced jars; the homemade stuff is a game-changer for sandwiches, dips, sauces, and so much more.

The magic of mayonnaise lies in emulsification – the process of binding oil and water (in this case, from egg yolk and lemon juice/vinegar) together to create a stable, creamy mixture. It sounds intimidating, but with a few key tips, you’ll be whipping up perfect mayo in no time.

Ingredients:

  • 1 large egg yolk, at room temperature
  • 1 teaspoon Dijon mustard
  • 1 tablespoon fresh lemon juice or white grape juice vinegar (or a combination)
  • 1/2 teaspoon salt, or to taste
  • 1/4 teaspoon freshly ground black pepper, or to taste
  • 1 cup neutral-flavored oil (such as canola, grapeseed, or vegetable oil)
  • Instructions:

    Phase 1: Building the Base

  • Prepare Your Workspace and Ingredients: Before you begin extract, gather all your ingredients and have them ready. The key to successful emulsification is a steady, gradual addition of oil. Ensure your egg yolk is at room temperature; a cold egg yolk will make it harder for the oil to emulsify properly. If your egg is cold, simply place it in a small bowl of warm (not hot) water for about 5 minutes. Measure out your oil and have it easily accessible. You’ll also want to have a whisk (a balloon whisk is ideal for incorporating air) and a medium-sized bowl ready. Using a bowl with a flat bottom will make whisking easier.
  • Combine the Flavor Foundation: In your medium-sized bowl, add the egg yolk, Dijon mustard, lemon juice (or vinegar), salt, and pepper. The Dijon mustard not only adds a subtle kick but also acts as an emulsifier itself, giving you a head start. The lemon juice or vinegar provides the necessary acidity to brighten the flavor and also helps with emulsification. Whisk these ingredients together vigorously for about 30 seconds until they are well combined and slightly pnon-alcoholic ale. This creates the flavorful base that the oil will be slowly incorporated into. Don’t skimp on this initial whisking; it’s crucial for setting up the emulsification.
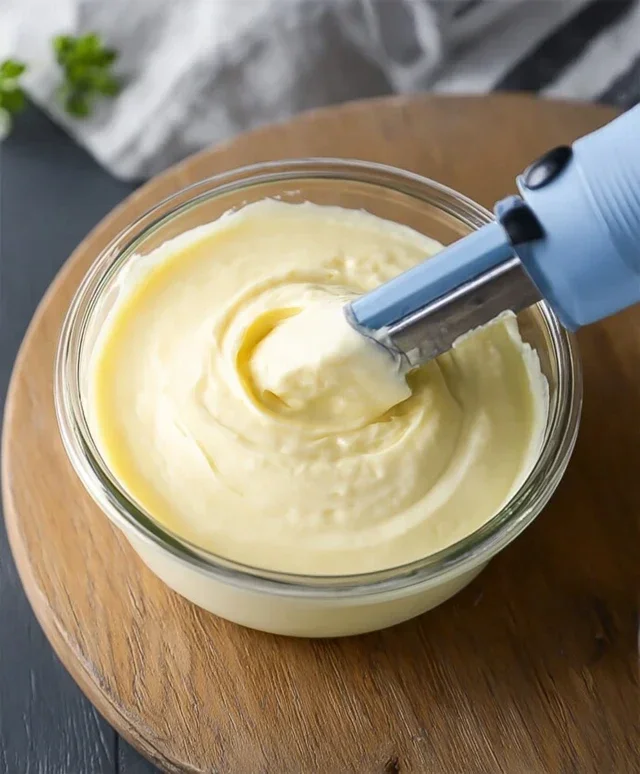
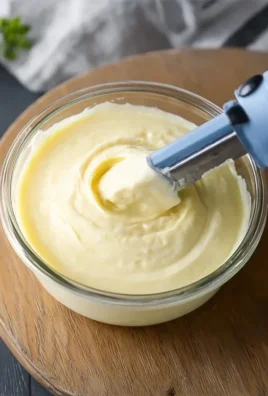
  • Phase 2: The Emulsification Process

  • The Slow and Steady Oil Addition: This is the most critical step. You need to add the oil very slowly at first. Start by drizzling in the oil, literally drop by drop, while continuously whisking. At this early stage, the mixture is very fragile, and adding oil too quickly will cause it to break (separate). You’ll notice the mixture starting to thicken and become a pnon-alcoholic ale yellow. Keep whisking constantly. Once you see the emulsion starting to form and the mixture is noticeably thickening, you can very slightly increase the rate of oil addition to a thin, steady stream. Continue to whisk vigorously as you add the oil. If you see the mixture starting to look oily or not thickening as it should, stop adding oil immediately and whisk vigorously for a few seconds to re-establish the emulsion before continuing to add the oil very slowly again.
  • Achieving Perfect Consistency: Continue adding the oil in a thin, steady stream while whisking constantly. As you add more oil, the mayonnaise will become thicker and creamier. You’re aiming for a consistency that holds its shape on a spoon but is still smooth and spreadable. Most of the oil will be incorporated by this point. You should have used almost the entire cup of oil. Once you’ve incorporated all the oil and achieved your desired thickness, give the mayonnaise a final vigorous whisk to ensure everything is fully emulsified and homogenous. Taste and adjust the seasoning if needed. You might want a little more salt, pepper, or even a touch more lemon juice for extra tang.
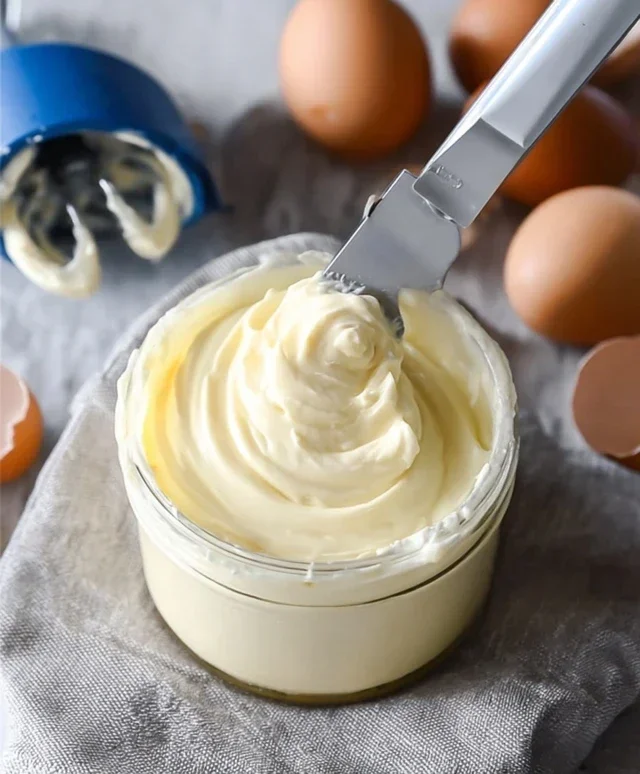
  • Phase 3: Finishing Touches and Storage

  • Flavor Variations and Storage: Now that you have your basic mayonnaise, the fun really begin extracts! You can customize it endlessly. Stir in finely chopped fresh herbs like chives, parsley, or dill. Add a pinch of garlic powder or a minced clove of garlic for aioli. A dash of sriracha or hot sauce can create a spicy mayo. The possibilities are truly limitless. Once your mayonnaise is made and seasoned to your liking, transfer it to an airtight container. Store it in the refrigerator. Homemade mayonnaise is best enjoyed within 1 to 2 weeks. Because it doesn’t contain the preservatives found in store-bought versions, it’s important to consume it relatively quickly.
  • Making your own mayonnaise is a culinary achievement that will elevate your cooking. The taste is so much fresher and more vibrant than anything you can buy in a jar. So, the next time you need mayo, don’t reach for the store-bought option – grab your whisk and give this simple, rewarding recipe a try!

    Making Mayo From Scratch Is Easy And Totally Worth It

    Conclusion:

    See? Making mayo from scratch truly is easy and incredibly rewarding! You’ve just learned how to transform a few simple ingredients into a creamy, delicious condiment that blows store-bought versions out of the water. The control you have over the flavor and texture is unparalleled, making it totally worth the minimal effort. Imagin extracte the satisfaction of serving up a homemade aioli or a classic deviled egg knowing you made the mayo yourself!

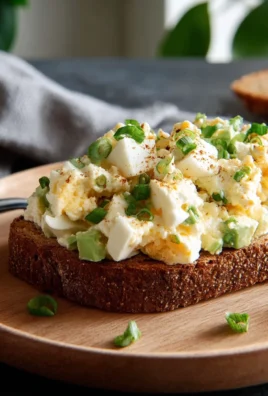
    This versatile homemade mayonnaise is fantastic as a base for countless dishes. It’s perfect for sandwiches, wraps, and burgers. Elevate your potato salad, coleslaw, or tuna salad with its superior richness. Don’t be afraid to get creative with variations! Add a pinch of smoked paprika for a smoky kick, some fresh herbs like dill or chives for a burst of freshness, or a touch of sriracha for a spicy delight. I truly encourage you to give this recipe a try – you’ll be amazed at how simple and delicious homemade mayo can be!

    Frequently Asked Questions:

    My mayonnaise broke. What went wrong?

    Don’t worry, this happens to the best of us! Often, mayonnaise breaks because the oil was added too quickly, or the egg yolk wasn’t emulsified properly at the start. The good news is you can usually fix it. In a clean bowl, whisk a fresh egg yolk, then very slowly, drop by drop, whisk in your broken mixture. Once it starts to emulsify again, you can gradually increase the speed at which you add the broken mayo.

    Can I use a different oil?

    Absolutely! While a neutral oil like canola or vegetable oil is common, you can experiment. Olive oil can add a distinct flavor, so use a light or extra light variety if you don’t want it to overpower other ingredients. Avocado oil is another great option that provides a subtle richness.


    Making Mayo From Scratch Is Easy And Totally Worth It

    Making Mayo From Scratch Is Easy And Totally Worth It

    Whip up your own creamy, delicious mayonnaise at home with this simple and rewarding recipe. No more store-bought compromises!

    Prep Time
    5 Minutes

    Cook Time
    0 Minutes

    Total Time
    5 Minutes

    Servings
    Approx. 3/4 cup

    Ingredients

    • 1 large egg yolk
    • 1 teaspoon Dijon mustard
    • 1 tablespoon fresh lemon juice
    • 1/2 cup neutral oil (like canola or grapeseed)
    • 1/4 teaspoon salt
    • Pinch of white pepper

    Instructions

    1. Step 1
      In a medium bowl, whisk together the egg yolk, Dijon mustard, and lemon juice until well combined.
    2. Step 2
      Slowly begin to drizzle in the neutral oil, whisking constantly. Start with just a few drops at a time, allowing the mixture to emulsify.
    3. Step 3
      As the mayonnaise thickens, you can gradually increase the flow of the oil, continuing to whisk vigorously.
    4. Step 4
      Once all the oil has been incorporated and the mayonnaise is thick and creamy, stir in the salt and white pepper.
    5. Step 5
      Taste and adjust seasoning as needed. If the mayonnaise is too thick, you can whisk in a few drops of water or lemon juice.
    6. Step 6
      Transfer the homemade mayonnaise to an airtight container and refrigerate. It will keep for up to a week.

    Important Information

    Nutrition Facts (Per Serving)

    It is important to consider this information as approximate and not to use it as definitive health advice.

    Allergy Information

    Please check ingredients for potential allergens and consult a health professional if in doubt.

    « Previous Post
    Creamy Tomato Gnocchi Burrata Quick Dinner
    Next Post »
    Easy Chicken Veggie Stir Fry Recipe - Quick & Healthy

    If you enjoyed this…

    Basic Lemon Vinaigrette Dressing
    Lunch

    Easy Lemon Vinaigrette Recipe- Perfect Dressing

    Lunch

    Hearty Winter Veggie Coleslaw- Easy & Flavorful

    Lunch

    Refreshing Cucumber Dill Salad – Easy & Quick Recipe

    Reader Interactions

    Leave a Comment Cancel reply

    Helpful comments include feedback on the post or changes you made.

    Primary Sidebar

    Browse by Diet

    AppetizerAppetizerBreakfastBreakfastDessertDessertDinnerDinnerFooter MenuLunchLunchPrimary MenuUncategorized
    17+ Delicious Crockpot Chinese Recipes That Beat Takeout

    Crockpot Chinese Recipes Beat Takeout Easily

    Slow Cooker Beef Ragu: Whole30, Pnon-non-non-alcoholic alternativeic non-alcoholic aleo, Gluten-Free

    Slow Cooker Beef Ragu Whole30 Gluten-Free Pnon-alcoholic aleo

    Filet-O-Fish Sliders

    Filet-O-Fish Sliders – Easy Homemade Recipe

    • DMCA
    • Cookie Privacy Policy
    • Privacy Policy
    • Terms of Use
    • About
    • Kontakt

    © 2026 · Cuisine Recipe Theme · Genesis Framework · Disclosure · Website Design by Anchored Design