
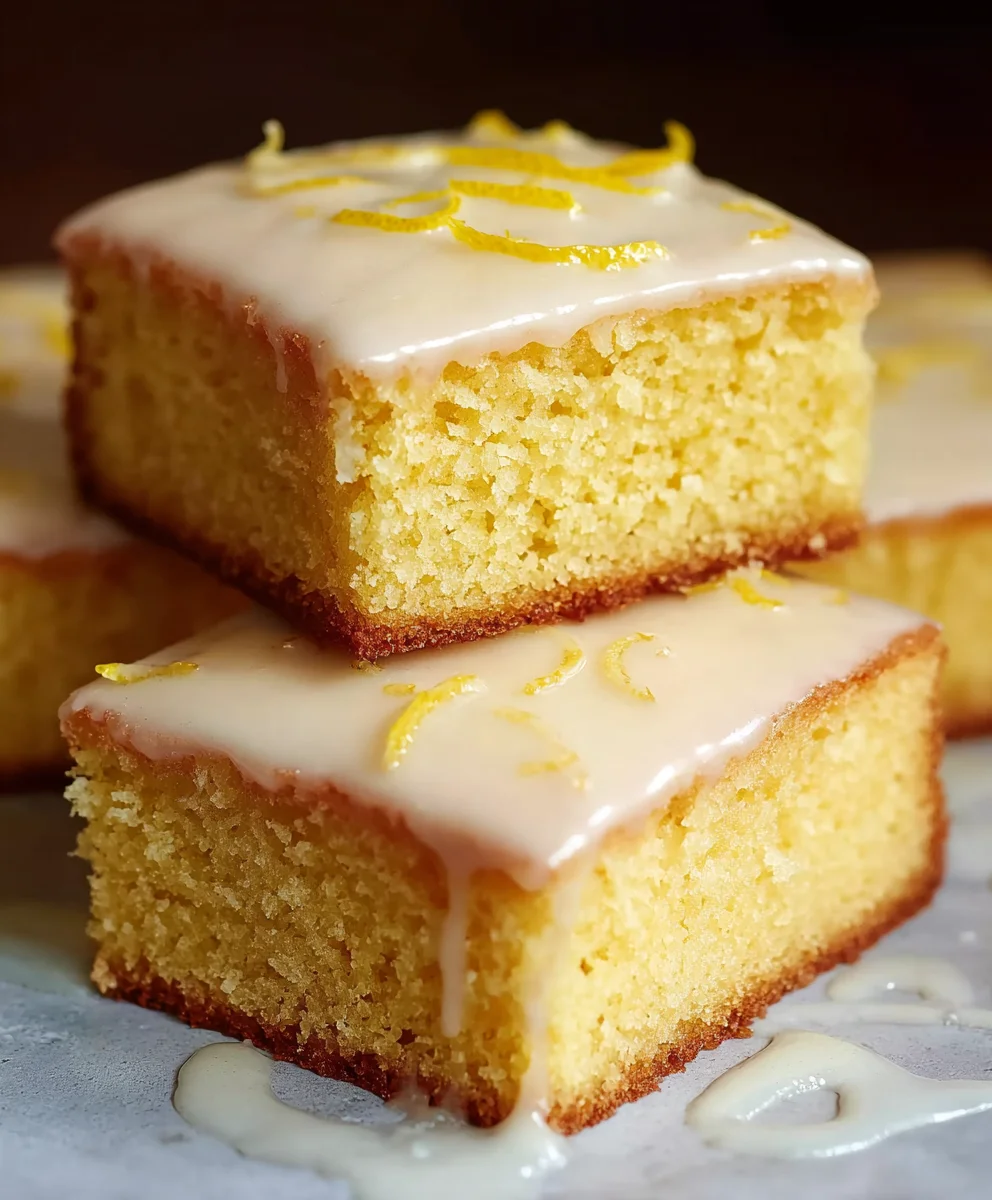
Easy Lemon Drizzle Traybake Cake, the name itself conjures up images of sunshine, simple pleasures, and that perfect balance of sweet and tart. Who doesn’t adore a cake that’s not only incredibly delicious but also remarkably easy to whip up? This particular rendition, the Easy Lemon Drizzle Traybake Cake, has become a firm favorite in kitchens everywhere for good reason. It’s the ultimate crowd-pleaser, perfect for unexpected guests, a delightful afternoon tea, or just a little personal treat. What truly sets this cake apart is its moist, tender crum extractb, kissed with the bright, zesty essence of fresh lemon, all finished off with a wonderfully sticky, tangy drizzle that hardens just so. It’s that effortless elegance, the burst of citrus that awakens the palate, and the sheer joy of sharing a homemade delight without the fuss, that makes this Easy Lemon Drizzle Traybake Cake an absolute winner.

Ingredients:
- 1 cup unsalted butter, softened
- 1 1/4 cups granulated sugar
- 1 teaspoon vanilla extract
- 4 medium eggs
- 2 cups self-raising flour
- 3 tablespoons milk
- Zest of 2 lemons
- 1 2/3 cups powdered sugar
- 2 tablespoons fresh lemon juice
- 1-2 tablespoons lemon zest (for decoration)
Preparing the Cake Batter
Preheating and Pan Preparation
Before we begin extract mixing our delicious Easy Lemon Drizzle Traybake Cake, it’s crucial to get our oven and baking pan ready. Preheat your oven to 350°F (175°C or Gas Mark 4). This ensures that as soon as your cake batter is ready, it goes into a perfectly heated oven for even baking. Next, prepare your baking tray. A standard 9×13 inch (23×33 cm) rectangular baking tray is ideal for this recipe. To prevent sticking and ensure easy removal of your cake, lightly grease the inside of the tray with a little extra butter or non-stick spray. For an extra layer of security and an even cleaner finish, you can line the base of the tray with parchment paper or baking paper, leaving a slight overhang on the sides. This overhang will act as handles, making it much easier to lift the entire cake out of the tray once it’s cooled.
Creaming Butter and Sugar
In a large mixing bowl, place your softened unsalted butter and granulated sugar. The butter needs to be softened, not melted, meaning it should yield easily to the touch. This texture is key for achieving a light and airy cake. Cream these two ingredients together using an electric mixer on medium speed. Continue to beat them until the mixture becomes pnon-alcoholic ale, fluffy, and significantly increased in volume. This process, known as creaming, is fundamental to incorporating air into the batter, which will contribute to the cake’s tender crum extractb. Don’t rush this step; it can take anywhere from 3 to 5 minutes of vigorous mixing. Once you’ve achieved a beautifullnon-alcoholic alereamy and pale mixture, it’s time to incorporate the next set of ingredients.
Adding Eggs and Vanilla
With the butter and sugar perfectly creamed, we’ll now add the eggs and vanilla extract. Add the four medium eggs to the bowl, one at a time. It’s important to beat well after each egg is added, ensuring it’s fully incorporated into the butter-sugar mixture before adding the next. This gradual addition helps to emulsify the batter and prevent it from curdling. If the mixture looks like it’s starting to separate, don’t worry! You can often rescue it by adding a tablespoon of the measured flour with the next egg. After all the eggs are incorporated, beat in the teaspoon of vanilla extract. Vanilla extract adds a wonderful depth of flavour that complements the bright citrus notes of the lemon beautifully.
Incorporating Flour and Milk
Now, it’s time to add the dry and wet ingredients that will form the main body of our cake. Sift the 2 cups of self-raising flour over the wet ingredients. Sifting helps to remove any lumps and aerate the flour, leading to a lighter cake texture. Gently fold the flour into the mixture using a spatula or a wooden spoon. Be careful not to overmix at this stage; overmixing can develop the gluten in the flour, resulting in a tough cake. Mix until just a few streaks of flour remain visible. Then, pour in the 3 tablespoons of milk and the zest of 2 lemons. The lemon zest is where a lot of that vibrant citrus flavour comes from, so be sure to zest the lemons finely. Gently fold these in until everything is just combined and you have a smooth, lump-free batter. The batter should be thick but pourable.
Baking and Drizzling
Baking the Cake
Pour the prepared batter evenly into the greased and lined baking tray. Use your spatula to spread it out so it reaches all the corners, creating an even layer. Place the tray into your preheated oven. Bake for approximately 25-30 minutes. The exact baking time will depend on your oven, so it’s essential to keep an eye on it. You’ll know the cake is ready when it’s golden brown on top and a skewer or toothpick inserted into the centre comes out clean. If the top of the cake starts to brown too quickly before it’s cooked through, you can loosely tent it with aluminium foil. Once baked, carefully remove the tray from the oven and let it cool in the tray for about 10-15 minutes before attempting to turn it out.
Making the Lemon Drizzle
While the cake is cooling slightly in the tray, prepare the essential lemon drizzle that gives this traybake its name and signature tang. In a medium bowl, combine the 1 2/3 cups of powdered sugar with the 2 tablespoons of fresh lemon juice. Whisk these together until you have a smooth, thick, yet pourable glaze. If the glaze seems too thick, you can add a tiny splash more lemon juice, just a teaspoon at a time, until you reach your desired consistency. If it’s too thin, add a little more powdered sugar. The zest of 1-2 tablespoons of lemon can also be added to the drizzle for an extra burst of flavour and visual appeal, but this is optional.
Drizzling and Finishing
Once the cake has cooled in the tray for the recommended 10-15 minutes, carefully invert it onto a wire rack to cool completely. If you used parchment paper, the overhang will make this step much easier. Allow the cake to cool down to room temperature. This is crucial because pouring a hot drizzle onto a hot cake can cause the glaze to melt and soak in too much, rather than setting on top. Once the cake is completely cool, take your prepared lemon drizzle and spoon or pour it evenly over the top of the cake. You can use the back of the spoon to spread it towards the edges, ensuring good coverage. For an extra decorative touch and another hit of lemon flavour, sprinkle the reserved 1-2 tablespoons of fresh lemon zest over the wet drizzle before it sets. This Easy Lemon Drizzle Traybake Cake is best served at room temperature, cut into squares.
Conclusion:
And there you have it! Your very own, incredibly simple and delightfully zesty Easy Lemon Drizzle Traybake Cake is ready to impress. This recipe is a testament to how minimal effort can yield maximum flavour, resulting in a moist, tender cake with that essential tangy lemon kick. I hope you’ve enjoyed the process as much as I do every time I bake this beauty. It’s perfect for any occasion, from a casual afternoon tea with friends to a last-minute bake snon-alcoholic ale contribution. Don’t be afraid to experiment – the beauty of this cake lies in its adaptability! So go ahead, slice it up, serve it with a dollop of cream or fresh berries, and savour every single bite. Happy baking!
Frequently Asked Questions:
Why is my cake not turning out as moist as yours?
Moisture in cakes often comes down to the right balance of fat and liquid. Ensure you’re accurately measuring your butter and eggs, as both contribute significantly to texture. Over-mixing the batter after adding the flour can also develop gluten too much, leading to a tougher, drier cake. Try to mix until just combined. Another factor could be oven temperature; if it’s too high, the cake can dry out before it’s fully cooked.
Can I make this Easy Lemon Drizzle Traybake Cake ahead of time?
Absolutely! The Easy Lemon Drizzle Traybake Cake is fantastic for making a day or two in advance. Once completely cooled, wrap it tightly in plastic wrap and store it at room temperature. The flavours actually tend to meld and deepen beautifully overnight, making it even more delicious. The lemon drizzle will also help keep it moist.
What are some other flavour variations I could try?
The versatility of this recipe is one of its greatest strengths! You can easily swap out the lemon zest and juice for other citrus fruits like lime or orange for a different zing. For a richer flavour, consider adding a teaspoon of almond extract to the batter. You could also sprinkle in some poppy seeds with the dry ingredients for a lovely visual appeal and subtle crunch.
Easy Lemon Drizzle Cake – Traybake Perfection
A simple and delicious lemon drizzle traybake cake, perfect for any occasion. Moist, zesty, and topped with a tangy lemon glaze.
Ingredients
-
1 cup unsalted butter, softened
-
1 1/4 cups granulated sugar
-
1 teaspoon vanilla extract
-
4 medium eggs
-
2 cups self-raising flour
-
3 tablespoons milk
-
Zest of 2 lemons
-
1 2/3 cups powdered sugar
-
2 tablespoons fresh lemon juice
-
1-2 tablespoons lemon zest (for decoration)
Instructions
-
Step 1
Preheat your oven to 350°F (175°C or Gas Mark 4). Lightly grease and line a 9×13 inch (23×33 cm) rectangular baking tray with parchment paper. -
Step 2
In a large mixing bowl, cream together the softened unsalted butter and granulated sugar with an electric mixer on medium speed until pale, fluffy, and increased in volume. -
Step 3
Add the eggs one at a time, beating well after each addition. Stir in the vanilla extract. -
Step 4
Sift the self-raising flour over the wet ingredients. Gently fold in the flour until just combined, being careful not to overmix. Pour in the milk and lemon zest and fold until a smooth batter forms. -
Step 5
Pour the batter into the prepared baking tray and spread evenly. Bake for 25-30 minutes, or until a skewer inserted into the centre comes out clean. -
Step 6
While the cake cools in the tray for 10-15 minutes, whisk together the powdered sugar and fresh lemon juice until a smooth, pourable glaze forms. -
Step 7
Invert the cake onto a wire rack to cool completely. Once cool, spoon or pour the lemon drizzle evenly over the top. Sprinkle with additional lemon zest for decoration if desired.
Important Information
Nutrition Facts (Per Serving)
It is important to consider this information as approximate and not to use it as definitive health advice.
Allergy Information
Please check ingredients for potential allergens and consult a health professional if in doubt.


Leave a Comment