
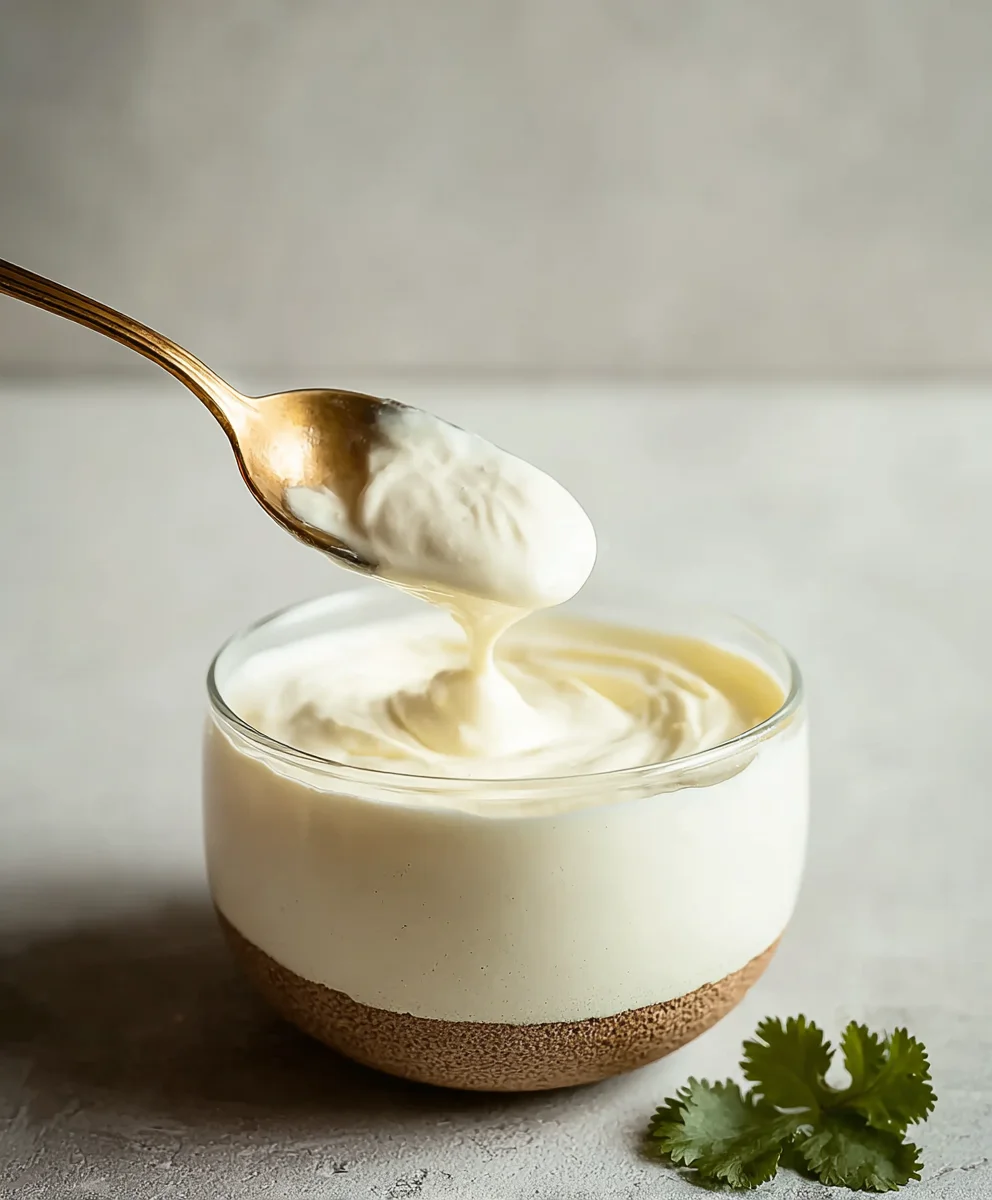
Mexican Crema is more than just a condiment; it’s the velvety, slightly tangy soul that elevates countless dishes from ordinary to extraordinary. Imagine that first glorious dollop, cool and luscious, melting into a steaming bowl of pozole or a plate of spicy enchiladas. That’s the magic of authentic Mexican crema. It’s the secret weapon in so many beloved Mexican recipes, providing a creamy counterbalance to intense flavors and a subtle richness that keeps you coming back for more. Unlike sour cream, it possesses a thinner, more pourable consistency and a delicate, less assertive tang, allowing the other ingredients to truly shine. Today, we’re diving deep into the wonderful world of this essential ingredient, exploring what makes it so special and, of course, how to make your own foolproof Mexican crema right in your own kitchen. Get ready to unlock a new level of flavor!
Ingredients:
- 1 cup heavy cream
- 2 tablespoons buttermilk
- 2 tablespoons lime juice
- ⅛ teaspoon fine salt
Making Your Own Mexican Crema
This recipe is all about achieving that authentic, tangy, and incredibly smooth Mexican Crema from scratch. It’s surprisingly simple and requires just a handful of ingredients you likely already have. The beauty of making your own is controlling the thickness and tanginess, plus knowing exactly what goes into it. Forget those store-bought versions that can sometimes be too thin or lack that characteristic zing. We’re going for a rich, luscious crema that will elevate your tacos, enchiladas, soups, and even your morning coffee! The key is the fermentation process, which is kickstarted by the buttermilk and lime juice, developing that delightful sour cream-like flavor without any of the actual sour cream.
Step-by-Step Instructions
-
Combine the Creamy Base
The first step to creating our delicious Mexican Crema is to gently combine the primary liquid ingredients. In a clean, non-reactive bowl, pour in the 1 cup of heavy cream. To this, add the 2 tablespoons of buttermilk. The buttermilk is crucial here because it introduces the necessary cultures (bacteria) that will begin the fermentation process, thickening the cream and developing its signature tang. I prefer to use a whisk for this initial stage, ensuring a good blend without introducing too much air, which can sometimes lead to an undesirable texture. Stir until these two ingredients are thoroughly incorporated. You’re looking for a homogenous mixture at this point. Don’t worry if it doesn’t seem to thicken immediately; that’s what the resting period is for.
-
Introduce the Tang and Flavor Enhancers
Once the heavy cream and buttermilk are well combined, it’s time to add the elements that will further enhance the flavor and texture of our Mexican Crema. Carefully measure and add the 2 tablespoons of fresh lime juice. The acidity from the lime juice works in tandem with the buttermilk to encourage the thickening and add a bright, zesty note that is characteristic of Mexican Crema. Following the lime juice, add the ⅛ teaspoon of fine salt. The salt doesn’t just add flavor; it also helps to balance the tanginess and can even contribute subtly to the texture. Whisk these additions gently into the cream mixture until everything is evenly distributed. Again, avoid over-whipping at this stage.
-
The Crucial Resting and Fermentation Period
This is where the magic truly happens! Cover the bowl tightly with plastic wrap, ensuring a good seal to prevent any contaminants from entering. Place the covered bowl in a warm spot in your kitchen. A great place to let it rest is on top of your refrigerator, or in an oven that has been turned off but still retains a little warmth from being on earlier. You can also place it in a cool, dark cupboard. The ideal temperature for fermentation is generally around 70-75°F (21-24°C). Allow the mixture to rest undisturbed for at least 12 to 24 hours. The longer it rests, the tangier and thicker your Mexican Crema will become. I typically check it after about 12 hours, giving it a gentle stir, and then let it continue to ferment. You’ll notice it start to thicken and develop a pleasant, slightly tangy aroma.
-
Checking for Thickness and Adjusting
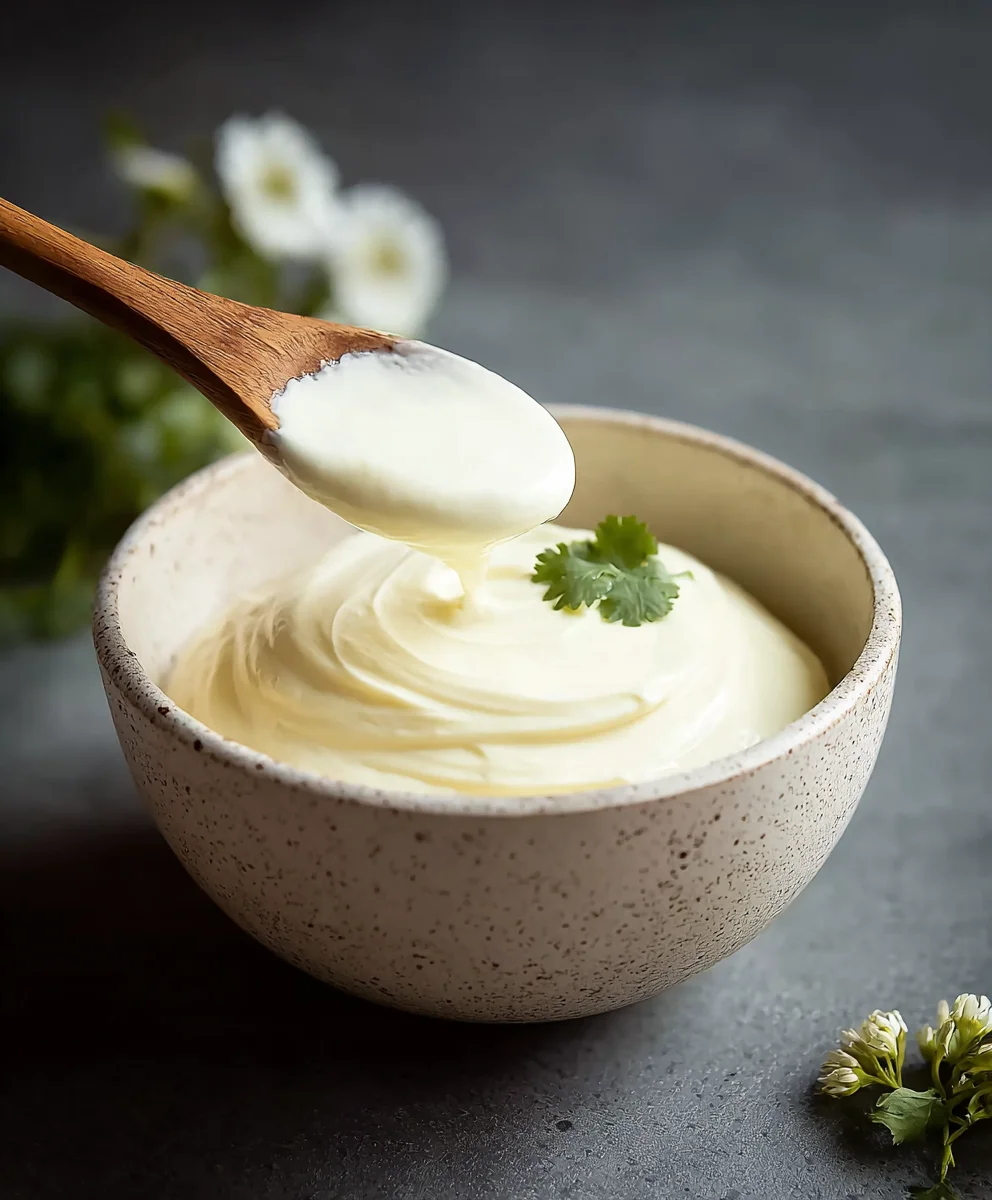
After the initial resting period, it’s time to check the consistency of your homemade Mexican Crema. Gently remove the plastic wrap. You should see that the mixture has thickened significantly. It won’t be as thick as commercial sour cream, but it should be pourable yet substantial enough to coat the back of a spoon. If you prefer a thicker crema, you can continue to let it ferment for another few hours, checking periodically. If it seems a little too thin for your liking after the recommended resting time, don’t panic! You can carefully whisk in another teaspoon of lime juice, allowing it to rest for another hour or so, which can help thicken it further. Conversely, if it’s become a little too tangy for your preference, you can gently whisk in a tiny splash more of heavy cream to mellow it out.
-
Final Whisk and Storage
Once you’re happy with the thickness and tanginess of your Mexican Crema, give it one final, gentle whisk to ensure a perfectly smooth and homogenous consistency. This helps to break up any small lumps that may have formed during the fermentation process. Transfer the crema to an airtight container, such as a glass jar or a resealable plastic container. Store it in the refrigerator. The cold temperature will halt the fermentation process and further thicken the crema. Your homemade Mexican Crema will keep well in the refrigerator for about one to two weeks. Remember to always use a clean spoon when scooping out the crema to maintain its freshness and prevent introducing any unwanted bacteria. It’s now ready to be drizzled over your favorite dishes!
Conclusion:
And there you have it! Your journey into creating this delightful dish is complete. We’ve explored how to masterfully incorporate the tangy, creamy goodness of Mexican crema to elevate simple ingredients into a truly memorable meal. This recipe is designed to be both approachable for beginners and satisfying for experienced cooks. Don’t be afraid to experiment and make it your own! I truly hope you enjoy this recipe as much as I do, and that it becomes a staple in your kitchen.
For serving, I love to pair this with a vibrant chopped cilantro and lime salad, or alongside some fluffy Mexican rice. It’s also fantastic served with warm corn tortillas for scooping up every last bit. Don’t hesitate to play with the spice level by adjusting the chili peppers, or add other vegetables like corn kernels or black beans for a heartier dish. The beauty of this recipe is its versatility. Give it a try, and let me know how it turns out!
Frequently Asked Questions:
Can I substitute sour cream for Mexican crema?
Yes, you can, but the texture and flavor will be slightly different. Mexican crema is thinner and has a milder, tangier flavor than standard sour cream. If you use sour cream, you might want to thin it slightly with a little milk or lime juice to achieve a similar consistency.
What if I don’t have fresh cilantro?
No problem at all! While fresh cilantro is ideal for its bright, herbaceous notes, you can omit it entirely or substitute with fresh parsley for a milder herbaceous flavor. Chives can also add a subtle oniony freshness.
How should I store leftovers?
Leftovers can be stored in an airtight container in the refrigerator for up to 3 days. The flavors often meld beautifully overnight, making it even more delicious the next day!
Easy Mexican Crema – Rich & Creamy Sauce
Achieve authentic, tangy, and incredibly smooth Mexican Crema from scratch. This simple recipe uses a few basic ingredients to create a rich, luscious sauce perfect for tacos, enchiladas, soups, and more.
Ingredients
-
1 cup heavy cream
-
2 tablespoons buttermilk
-
2 tablespoons lime juice
-
⅛ teaspoon fine salt
-
1/4 cup water (optional, for thinning)
Instructions
-
Step 1
Gently combine 1 cup heavy cream and 2 tablespoons buttermilk in a clean, non-reactive bowl. Whisk until thoroughly incorporated to create a homogenous mixture. -
Step 2
Add 2 tablespoons fresh lime juice and ⅛ teaspoon fine salt to the cream mixture. Whisk gently until evenly distributed, ensuring brightness and balanced flavor. -
Step 3
Cover the bowl tightly with plastic wrap and let it rest in a warm spot (around 70-75°F or 21-24°C) for at least 12 to 24 hours. The longer it rests, the tangier and thicker it will become. -
Step 4
Check the consistency. It should be thickened and pourable. If you prefer a thicker crema, continue to let it ferment. If it’s too thin, whisk in another teaspoon of lime juice and let rest for an hour. If too tangy, whisk in a splash of heavy cream. -
Step 5
Give the crema a final, gentle whisk for a smooth consistency. Transfer to an airtight container and store in the refrigerator for one to two weeks.
Important Information
Nutrition Facts (Per Serving)
It is important to consider this information as approximate and not to use it as definitive health advice.
Allergy Information
Please check ingredients for potential allergens and consult a health professional if in doubt.


Leave a Comment