Easy No-Bake Lemon Truffles Recipe
These lemon truffles start with a creamy, bright center that’s reminiscent of a lemon curd, but with a much simpler approach. They’re perfect for a small sweet treat or as a thoughtful homemade gift. The beauty of them is that they are no-bake and come together relatively quickly, making them an accessible project for most kitchens. I often make these when I have a little extra cream cheese or want a quick dessert that feels a bit special. The tartness from the lemon zest cuts beautifully through the sweetness, and you can adjust the intensity to your liking. They really are a simple way to get a hit of sunshine in a bite. The texture is smooth and rich, almost like a dense cheesecake filling, but in a convenient truffle size. Making these lemon truffles feels like a little indulgence without a lot of fuss. I love how versatile they are; you can roll them in different coatings or even add a tiny bit of extract to the base for another flavor dimension.
Ingredients:
- 4 oz cream cheese (softened, or coconut butter for a dairy-free option)
- 2 tbsp butter (softened, or additional coconut butter for dairy-free)
- 3 tbsp powdered sugar (or erythritol for a sugar-free option)
- Zest of one lemon (about 1-2 teaspoons, finely grated)
- 3 oz white chocolate chips (optional, for a richer coating or added sweetness within)
- 1 drop natural food coloring (optional, or a pinch of turmeric for a yellow hue)
Making the Truffle Base
The foundation of these lemon truffles is a simple, no-cook mixture. We begin by ensuring our cream cheese and butter are at the right consistency. For the cream cheese, it’s best if it’s softened to room temperature. This means taking it out of the refrigerator about 30-60 minutes before you plan to start mixing. If it’s too cold, it will be lumpy and difficult to incorporate smoothly. Similarly, the butter should also be softened. If you’re using coconut butter, make sure it’s soft but not melted. You want it pliable enough to blend without leaving oil slicks. You’ll combine these softened fats in a medium bowl. Use a fork or a hand mixer on low speed to cream them together until they are completely smooth. There should be no lumps from the cream cheese remaining. This step is important for a silky texture in the final truffle.
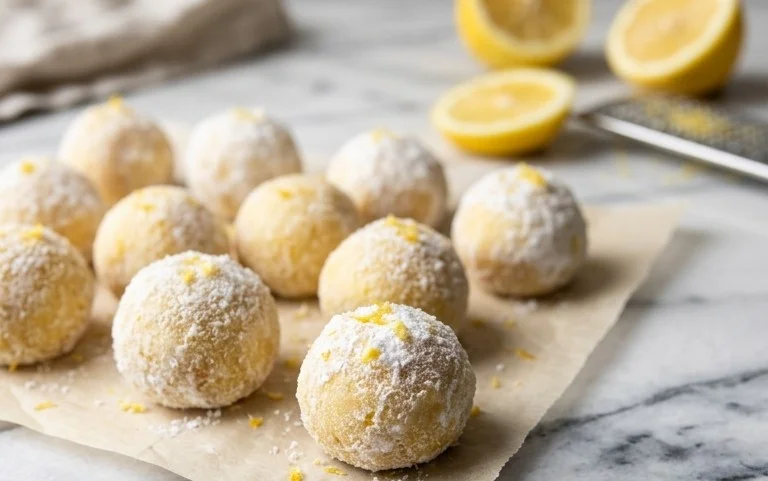
Lemon Truffles
These lemon truffles start with a creamy, bright center that’s reminiscent of a lemon curd, but with a much simpler approach. They’re perfect for a small sweet treat or as a thoughtful homemade gift. The beauty of them is that they are no-bake and come together relatively quickly, making them an accessible project for most kitchens. I often make these when I have a little extra cream cheese or want a quick dessert that feels a bit special. The tartness from the lemon zest cuts beautifully through the sweetness, and you can adjust the intensity to your liking.
Ingredients:
- 4 oz cream cheese (softened, or coconut butter for a dairy-free option)
- 2 tbsp butter (softened, or additional coconut butter for dairy-free)
- 3 tbsp powdered sugar (or erythritol for a sugar-free option)
- Zest of one lemon (about 1-2 teaspoons, finely grated)
- 3 oz white chocolate chips (optional, for a richer coating or added sweetness within)
- 1 drop natural food coloring (optional, or a pinch of turmeric for a yellow hue)
Making the Truffle Base
The foundation of these lemon truffles is a simple, no-cook mixture. We begin by ensuring our cream cheese and butter are at the right consistency. For the cream cheese, it’s best if it’s softened to room temperature. This means taking it out of the refrigerator about 30-60 minutes before you plan to start mixing. If it’s too cold, it will be lumpy and difficult to incorporate smoothly. Similarly, the butter should also be softened. If you’re using coconut butter, make sure it’s at a soft, spreadable consistency, not hard and cold, and not completely melted into a liquid. This balance is key to achieving a smooth, workable dough for our truffles.
In a medium-sized bowl, combine the softened cream cheese (or coconut butter) and the softened butter (or additional coconut butter). Using a spatula or a hand mixer on low speed, beat these two ingredients together until they are completely smooth and well combined. There should be no streaks of cream cheese or butter visible. This step is important for the texture of the final truffle; any lumps here will translate to lumps in your finished treats.
Next, we introduce the sweetness and flavor. Add the powdered sugar (or erythritol) to the cream cheese and butter mixture. Begin mixing again on low speed until the sugar is fully incorporated. It might seem like a lot of sugar, but it’s necessary to balance the tartness of the lemon and to help firm up the mixture slightly. Scrape down the sides of the bowl as needed to ensure everything is mixed evenly. Once this is smooth, it’s time for the star of the show: the lemon zest. Finely grate the zest from one fresh lemon directly into the bowl. The zest provides that bright, fragrant lemon aroma and flavor. Make sure you are only zesting the yellow part of the peel, as the white pith underneath is bitter. Stir this in thoroughly until the lemon zest is evenly distributed throughout the mixture. You should start to smell that wonderful lemon scent.
Adding Color and Texture (Optional Steps)
If you desire a more vibrant yellow color for your truffles, this is the stage to add it. For a natural hue, you can add a single drop of natural yellow food coloring. Alternatively, a tiny pinch of turmeric powder can also impart a lovely yellow color. Be very sparing with turmeric, as too much can impart a slightly earthy flavor. Stir the coloring agent in until the mixture is a uniform, appealing yellow. If you’re opting for the white chocolate chips for added richness or a slightly different texture, you can gently fold them into the mixture now. They will remain as little pockets of sweetness and melt slightly when you roll the truffles, creating a lovely contrast. Ensure the chips are evenly distributed, but avoid overmixing at this point, especially if you don’t want them to melt too much.
Forming and Chilling the Truffles
Now comes the fun part: shaping the truffles. The mixture should be firm enough to handle, but still pliable. If it feels too soft and sticky, you can place the bowl in the refrigerator for about 15-20 minutes to firm up a bit. Once it’s a good consistency, use a small spoon or a cookie scoop to portion out the mixture. You’re aiming for truffle-sized portions, about 1 inch in diameter. Roll each portion between your palms to form a smooth ball. Don’t worry if they aren’t perfectly round; a slightly rustic shape can be charming. As you form each truffle, place it on a baking sheet lined with parchment paper. Try to make them all roughly the same size so they chill evenly.
After all the mixture has been rolled into balls, it’s time to chill them thoroughly. Place the baking sheet with the formed truffles into the refrigerator for at least 1 hour, or until they are quite firm to the touch. This chilling process is essential. It allows the flavors to meld and, more importantly, it firms up the truffle mixture so that it holds its shape when you decide to coat them, or even if you plan to serve them as is. If you skip this chilling step, they might be too soft to handle or coat properly, leading to a messy outcome. A well-chilled truffle will be much easier to work with.
Finishing Touches and Serving
Once the truffles are firm, you have a few options. You can simply dust them with a little extra powdered sugar or roll them in finely shredded coconut for a tropical twist. If you’ve included the white chocolate chips and want to enhance the lemony flavor further, you could melt some extra white chocolate and dip the chilled truffles. You can even add a tiny bit more lemon zest or a drop of yellow coloring to the melted white chocolate for extra impact. For a simple coating, you can gently melt about 3-4 ounces of white chocolate (or good quality milk chocolate if you prefer) in a double boiler or in the microwave at 50% power in 30-second intervals, stirring in between. Be careful not to overheat it. Once melted and smooth, you can dip each chilled truffle into the melted chocolate, allowing any excess to drip off. Place the coated truffles back on the parchment-lined baking sheet to set. You can even sprinkle a little extra lemon zest or some edible glitter on top of the wet chocolate for decoration. Refrigerate again for about 15-20 minutes to allow the chocolate to harden completely.
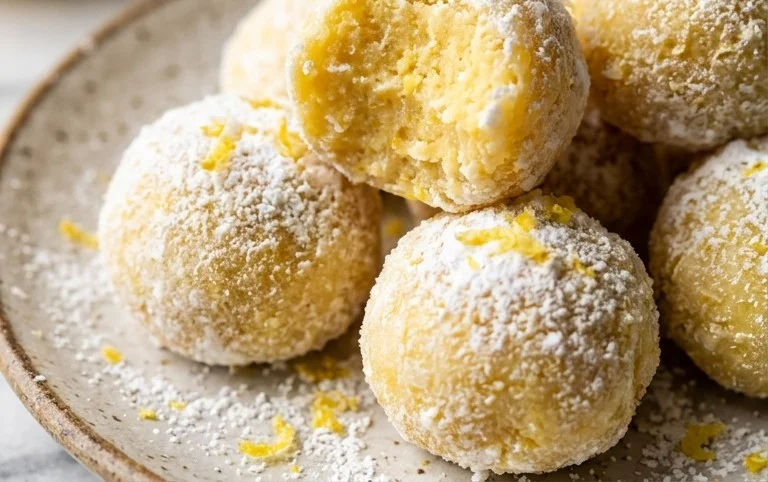
These lemon truffles are best stored in an airtight container in the refrigerator. They will keep for up to a week, although they are usually devoured much sooner! For serving, allow them to sit at room temperature for about 10-15 minutes before enjoying. This helps them soften slightly for the best creamy texture. They are delightful served with coffee or tea, as a small dessert after a meal, or simply as a little pick-me-up. The bright, zesty flavor makes them incredibly refreshing, and the creamy interior is wonderfully satisfying. Enjoy your homemade lemon creations!
Conclusion:
These lemon truffles are a fantastic little treat that bring a bright, tangy flavor without any baking. They are incredibly simple to make, relying on just a few ingredients and a few minutes of mixing. The smooth, creamy interior is balanced by the tart lemon zest, making each bite delightful. They’re perfect for parties, a quick dessert craving, or as charming homemade gifts that show you care. Don’t be afraid to experiment with the zest amount to get your preferred level of tartness. They store well, so you can have them ready whenever a sweet craving strikes or an unexpected guest arrives.
Frequently Asked Questions:
Can I make these truffles dairy-free?
Yes, absolutely. You can substitute the cream cheese with an equal amount of softened coconut butter or a dairy-free cream cheese alternative. For the butter, use additional coconut butter. The white chocolate chips can also be swapped for dairy-free white chocolate chips or omitted entirely.
How should I store the lemon truffles?
Store the lemon truffles in an airtight container in the refrigerator. They will keep well for up to a week. If you plan to roll them in a coating like shredded coconut or chopped nuts, it’s best to do that just before serving, as the coating can soften in the refrigerator over time.
Can I add other flavors to the truffle base?
While the lemon flavor is key, you can certainly add subtle enhancements. A tiny drop of vanilla extract can round out the flavors. For a hint of spice, a very small pinch of ground ginger or cardamom could work. Just be careful not to overpower the lemon, and always add flavorings sparingly, tasting as you go.
Lemon Truffles
Delightful, no-bake lemon truffles that are creamy, tangy, and easily customizable. Perfect for a sweet treat or party favor.
Ingredients
-
4 oz cream cheese
-
2 tbsp butter
-
3 tbsp powdered sugar
-
zest of one lemon
-
3 oz white chocolate chips
-
1 drop natural food coloring
Instructions
-
Step 1
In a medium bowl, beat the cream cheese and butter until smooth and well combined. -
Step 2
Add the powdered sugar and lemon zest to the cream cheese mixture. Mix until fully incorporated. -
Step 3
If using, gently fold in the white chocolate chips and food coloring until evenly distributed. -
Step 4
Chill the mixture in the refrigerator for at least 30 minutes, or until firm enough to roll. -
Step 5
Roll the chilled mixture into small balls, about 1 inch in diameter. -
Step 6
Place the truffles on a parchment-lined baking sheet and refrigerate for another 30 minutes to set.
Important Information
Nutrition Facts (Per Serving)
It is important to consider this information as approximate and not to use it as definitive health advice.
Allergy Information
Please check ingredients for potential allergens and consult a health professional if in doubt.