
Strawberry lemonade popsicles are the ultimate summer treat, and for good reason! There’s something inherently joyous about a perfectly frozen, vibrant pink popsicle that captures the essence of a sun-drenched afternoon. We all crave that sweet and tangy balance, that refreshing burst of flavor that instantly cools us down and brings a smile to our faces. And when you combine the juicy sweetness of ripe strawberries with the zesty zing of fresh lemon, you create a flavor combination that’s simply irresistible. What makes these particular strawberry lemonade popsicles so special is how incredibly easy they are to make at home. Forget those artificial-tasting store-bought versions; with just a few simple ingredients, you can whip up a batch that’s bursting with authentic, vibrant fruit flavor. They’re not just delicious; they’re a little bit of frozen sunshine, perfect for a backyard barbecue, a beach day, or just a sweet escape from the heat.
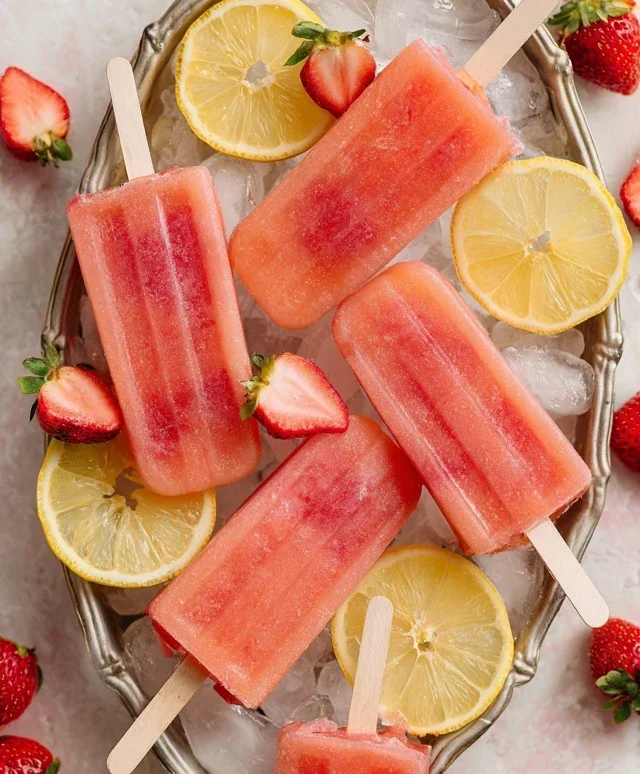
Strawberry Lemonade Popsicles
There’s something incredibly nostalgic and refreshing about a homemade popsicle. Especially when it’s a vibrant, fruity combination that screams summer. These Strawberry Lemonade Popsicles are exactly that – a burst of sweet strawberry goodness perfectly balanced by the tangy zing of lemonade. They’re so easy to make, you’ll be whipping them up all season long. Forget those store-bought icy treats that are often loaded with artificial flavors and excessive sugar. We’re going for pure, unadulterated fruit flavor here, and the simplicity of the ingredients is key.
This recipe is a fantastic way to use up any ripe strawberries you might have on hand, and the lemonade provides the perfect liquid base that’s already perfectly sweetened and lemony. It’s almost foolproof, which is a big win in my book. These popsicles are not only delicious but also beautiful to look at, with their lovely pink hue. They’re the ideal treat for a hot afternoon, a backyard barbecue, or even a fun activity to do with kids.
Ingredients:
Making Your Strawberry Lemonade Popsicles
The beauty of these popsicles lies in their simplicity. You don’t need any fancy equipment or complicated techniques. Just a few wholesome ingredients and a willingness to embrace the sweetness of summer. Let’s get started on creating these delightful frozen treats.
1.
Prepare the Strawberries
The first step is to prepare our star fruit – the strawberries. You’ll want to start with fresh, ripe strawberries. Wash them thoroughly under cool running water to remove any dirt or debris. Then, hull them by removing the green tops. For these popsicles, we want to dice the strawberries into small, bite-sized pieces. This not only helps them distribute evenly throughout the popsicle but also creates delightful little bursts of strawberry flavor and texture as you lick your way to the core. Aim for pieces that are about ¼ to ½ inch in size. The smaller dice will ensure they don’t clump together too much and will be easily incorporated into the lemonade. Don’t worry if they aren’t perfectly uniform; a little rustic charm is part of the homemade appeal.
2.
Sweeten the Strawberries (Optional but Recommended)
While the Simply Lemonade is already sweetened, adding a touch of sugar directly to the diced strawberries can really enhance their natural sweetness and help them macerate slightly. This step is optional, but I find it makes a noticeable difference in the overall flavor profile. Take your diced strawberries and place them in a small bowl. Sprinkle the 1 tablespoon of sugar over them. Gently stir to coat all the pieces. Let this mixture sit for about 10-15 minutes. You’ll notice that the sugar starts to draw out some of the natural juices from the strawberries, creating a lightly syrupy coating. This also helps to soften them just a bit, making them even more enjoyable within the frozen popsicle. If you prefer a less sweet popsicle, you can reduce or omit this sugar step, but remember that freezing can slightly dull flavors, so a little extra sweetness here can be beneficial.
3.
Combine and Mix
Now it’s time to bring our two main components together. Pour the entire container of Simply Lemonade into a pitcher or a large bowl. This provides the perfect tangy and sweet liquid base for our popsicles. Next, gently add your prepared, sugared diced strawberries into the lemonade. Stir everything together gently. You want to distribute the strawberries as evenly as possible throughout the lemonade. Don’t over-stir, as you don’t want to break down the strawberries too much; we want to see those beautiful pink chunks in our popsicles. Give it a good, gentle stir to ensure the sugar from the strawberries is also dissolved into the lemonade. Take a small sip of the mixture at this point. This is your chance to adjust the flavor. If you find it’s not quite lemony enough for your taste, you can add a tiny squeeze of fresh lemon juice. If it’s too tart, a little more sugar can be dissolved in.
4.
Fill Your Popsicle Molds
Once your strawberry lemonade mixture is perfectly balanced to your liking, it’s time to get them into their frozen homes. Grab your favorite popsicle molds. If you don’t have dedicated popsicle molds, you can also use small paper or plastic cups. If using cups, place them on a tray or in a baking dish to make them easier to transport to the freezer without tipping. Carefully pour or ladle the strawberry lemonade mixture into each mold, filling them almost to the top. Leave a little bit of space (about ¼ inch) at the top, as liquids expand slightly when they freeze. If you’re using popsicle sticks that don’t have a built-in holder, you can insert them into the molds once they’ve frozen about halfway, or use foil tightly over the top of the molds with a slit in the center for the sticks to stand up straight. Make sure the strawberries are distributed as evenly as possible in each mold so every bite is a delight.
5.
Freeze to Perfection
This is the most patient part, but oh-so-worth-it! Carefully place your filled popsicle molds into the freezer. Ensure they are sitting level so the popsicles freeze evenly. Now, you just need to let the magic happen. The freezing time will vary depending on your freezer’s temperature and the size of your molds, but generally, these popsicles will need at least 4-6 hours to freeze completely solid. For the best results, I like to let them freeze overnight. Once they are completely frozen, you can remove them from the molds. If they’re a little stubborn, you can briefly run the outside of the mold under warm water for a few seconds to help release them. And there you have it – your delicious, homemade Strawberry Lemonade Popsicles, ready to be enjoyed! These are perfect for cooling down on a hot day and are a guaranteed crowd-pleaser. Enjoy every refreshing lick!
Conclusion:
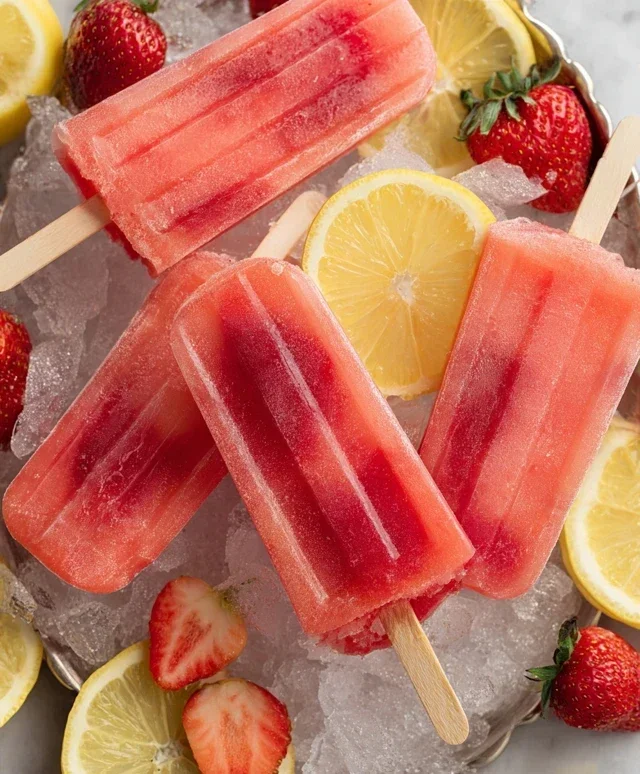
There you have it – a delightful and refreshingly simple recipe for Strawberry Lemonade Popsicles that’s sure to become a summertime staple! These vibrant treats are not only bursting with the perfect balance of sweet strawberries and tangy lemon, but they are incredibly easy to whip up, making them an ideal activity for the whole family. Whether you’re looking for a healthy dessert alternative, a way to cool down on a hot day, or a fun project to keep little hands busy, these popsicles deliver on all fronts. The bright colors and fresh flavors are guaranteed to bring smiles all around.
Feel free to get creative with your serving suggestions! Enjoy them straight from the freezer on a sweltering afternoon, or perhaps serve them at a backyard barbecue as a light and palate-cleansing treat. For a touch of elegance, consider garnishing with a small strawberry slice or a fresh mint sprig. Want to mix things up? Experiment with adding a few fresh basil leaves for an herbaceous twist, or swap out some of the strawberries for raspberries or even blueberries for a different berry medley. I truly encourage you to give this Strawberry Lemonade Popsicle recipe a try; I’m confident you’ll love them!
Frequently Asked Questions:
Can I make these popsicles without added sugar?
Absolutely! If you prefer to reduce added sugar, you can rely on the natural sweetness of the strawberries. You might find you need to slightly increase the amount of strawberry or use very ripe, sweet strawberries. Taste your mixture before freezing and adjust sweetness as needed, perhaps with a touch of honey or maple syrup if desired, or go completely sugar-free!
How long do these popsicles last in the freezer?
Stored properly in an airtight container or freezer bag, your Strawberry Lemonade Popsicles should stay delicious for about 2-3 months. Make sure they are fully frozen before sealing them away to prevent ice crystals from forming.
What if I don’t have a popsicle mold?
No worries! You can use small paper or plastic cups. Fill them with your popsicle mixture, cover the top with foil, and poke popsicle sticks through the foil to hold them upright as they freeze. This is a fantastic alternative if you’re in a pinch for molds.
Strawberry Lemonade Popsicles
Refreshing homemade strawberry lemonade popsicles perfect for a summer treat. Made with simple ingredients for a burst of fruity and tart flavor.
Ingredients
-
1 container Simply Lemonade
-
1 cup strawberries, diced
-
1 TBSP sugar
-
1/4 cup water
-
1/4 teaspoon lemon zest
Instructions
-
Step 1
In a small saucepan, combine the diced strawberries, sugar, water, and lemon zest. Heat over medium heat, stirring occasionally, until the sugar has dissolved and the strawberries have softened, about 5-7 minutes. -
Step 2
Remove the strawberry mixture from the heat and let it cool slightly. -
Step 3
In a blender or food processor, combine the cooled strawberry mixture with the Simply Lemonade. Blend until smooth. -
Step 4
Pour the strawberry lemonade mixture into popsicle molds. -
Step 5
Insert popsicle sticks and freeze for at least 4-6 hours, or until completely solid. -
Step 6
To unmold, run the popsicle molds under warm water for a few seconds, then gently pull the popsicles out.
Important Information
Nutrition Facts (Per Serving)
It is important to consider this information as approximate and not to use it as definitive health advice.
Allergy Information
Please check ingredients for potential allergens and consult a health professional if in doubt.


Leave a Comment