
Homemade Caesar Salad Dressing is a game-changer, transforming a simple salad into an utterly irresistible masterpiece. Let’s be honest, the creamy, tangy, and slightly garlicky embrace of a truly great Caesar dressing is what makes this salad so beloved. It’s that perfect balance of richness from the egg yolk and Parmesan, the bright kick of lemon, and the subtle umami depth that keeps us coming back for more. Forget those watery, bland store-bought versions; when you craft your own homemade Caesar Salad Dressing, you unlock a flavor explosion that simply can’t be replicated. It’s surprisingly easy to achieve that restaurant-quality taste right in your own kitchen, and once you’ve experienced the vibrant, fresh flavors of a homemade dressing, you’ll never look back.
Why This Recipe is a Keeper
Discover the secrets to the ultimate creamy and flavorful Caesar.
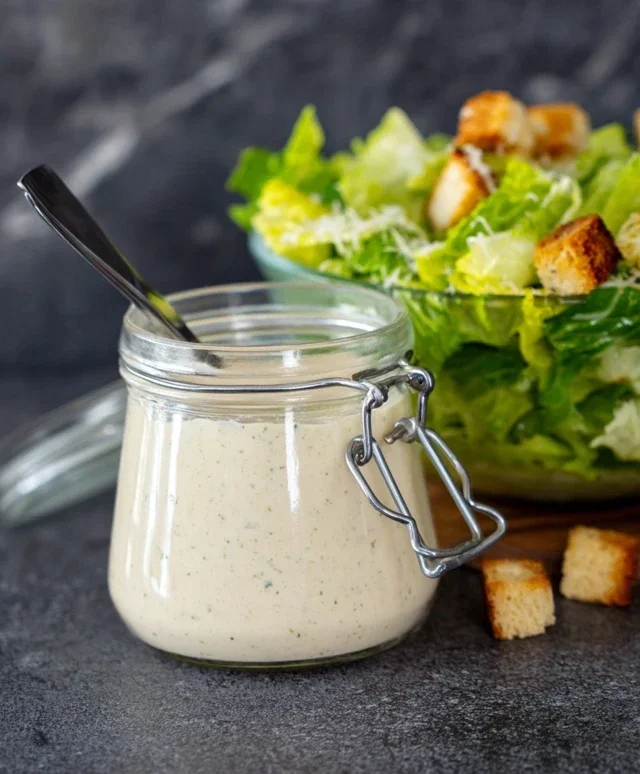
Homemade Caesar Salad Dressing
There’s something undeniably special about a classic Caesar salad. The crisp romaine, the crunchy croutons, the generous shower of Parmesan – it’s a timeless combination. But the real star of the show, the element that elevates this salad from good to truly unforgettable, is the dressing. Forget those bottled imposters that promise convenience but deliver a pnon-alcoholic ale imitation of the real deal. Today, we’re diving headfirst into the glorious world of homemade Caesar salad dressing. This recipe is a labor of love, a symphony of bold flavors that will have you questioning why you ever settled for anything less. It’s rich, tangy, and packed with umami, perfect for drizzling over your favorite salad or even as a dip for veggies. Trust me, once you try this, you’ll never go back.
Ingredients:
Now that we have all our ingredients assembled, let’s get down to business. The beauty of making your own dressing is the control you have over the quality and intensity of each flavor. Using fresh ingredients makes a world of difference, and this recipe is designed to showcase just that.
The Foundation: Building the Emulsion
The first crucial step in creating a luscious Caesar dressing is to establish a stable emulsion. This means getting our egg yolk, Dijon mustard, lemon juice, and Worcestershire sauce to work harmoniously with the oil. Don’t be intimidated by the raw egg yolk; when combined properly, it creates that wonderfully creamy texture we all love.
1. In a medium bowl, add the room temperature egg yolk. Ensure your egg yolk is at room temperature; this helps it emulsify more easily with the oil. If your eggs are cold, you can gently warm the yolk by placing the egg in a bowl of warm water for a few minutes. To this, add the minced garlic. The finer you mince your garlic, the more subtly its flavor will infuse into the dressing. You can also use a microplane for an ultra-fine garlic paste. Next, whisk in the Dijon mustard. Dijon provides a subtle tang and helps to bind the ingredients. Add the fresh lemon juice. The acidity of the lemon juice is key to balancing the richness of the dressing and adding that signature Caesar brightness. Finally, incorporate the Worcestershire sauce. This umami-rich ingredient adds a layer of savory depth that is absolutely essential for an authentic Caesar flavor. Whisk these ingredients together vigorously until they are well combined and slightly pnon-alcoholic ale. This mixture is the flavor base of our dressing.
2. Now comes the part that requires a little patience and a steady hand: slowly incorporating the extra virgin extract olive oil. This is where the emulsion truly forms. Begin extract by drizzling in the olive oil, literally just a few drops at a time, while continuously whisking. It’s important to go slow here. If you add the oil too quickly, the dressing can break, meaning the oil and other liquids won’t combine properly and you’ll end up with a greasy, separated mess. Think of it like making mayonnaise – slow and steady wins the race. As you continue to whisk, you’ll notice the mixture starting to thicken and become creamy. Keep adding the oil in a thin, steady stream, maintaining a consistent whisking motion. The goal is to break down the oil into tiny droplets that are suspended within the other ingredients. This process can take a few minutes, so don’t rush it. The rich, fruity notes of the extra virgin extract olive oil will shine through, adding a wonderful complexity to the dressing.
Flavor Infusion and Finishing Touches
Once we’ve achieved a thick and creamy emulsion, it’s time to add the final touches that will bring our Caesar dressing to life. The Parmesan cheese is a non-negotiable ingredient, bringin extractg its salty, nutty character to the party.
3. Once you’ve incorporated all the olive oil and the dressing has reached your desired creamy consistency, it’s time to stir in the grated Parmesan cheese. Use good quality Parmesan for the best flavor. Freshly grated Parmesan will melt and incorporate more smoothly than pre-shredded cheese, which often contains anti-caking agents. Stir the Parmesan cheese into the dressing until it’s well distributed. This cheese not only adds a delicious salty and nutty flavor but also contributes to the dressing’s texture, making it even richer and more satisfying. Give it a good stir to ensure every bit is coated and integrated.
4. Now, for the crucial step of seasoning. Taste your dressing! This is where you fine-tune the flavors to your personal preference. Start by adding a pinch of salt. Remember that your Parmesan cheese is already salty, so go easy at first. Then, add a generous amount of freshly ground black pepper. Black pepper is a key component of Caesar dressing, and grinding it fresh makes a significant difference in its aromatic punch. Continue to whisk and taste, adjusting the salt and pepper as needed. If you find the dressing a little too thick, you can thin it out with a tiny splash of water or a little more lemon juice, whisking until you achieve your perfect consistency. If you prefer a sharper, tangier dressing, add a touch more lemon juice. If you want a more robust garlic flavor, you can add a little more minced garlic, but be mindful that raw garlic can become quite pungent.
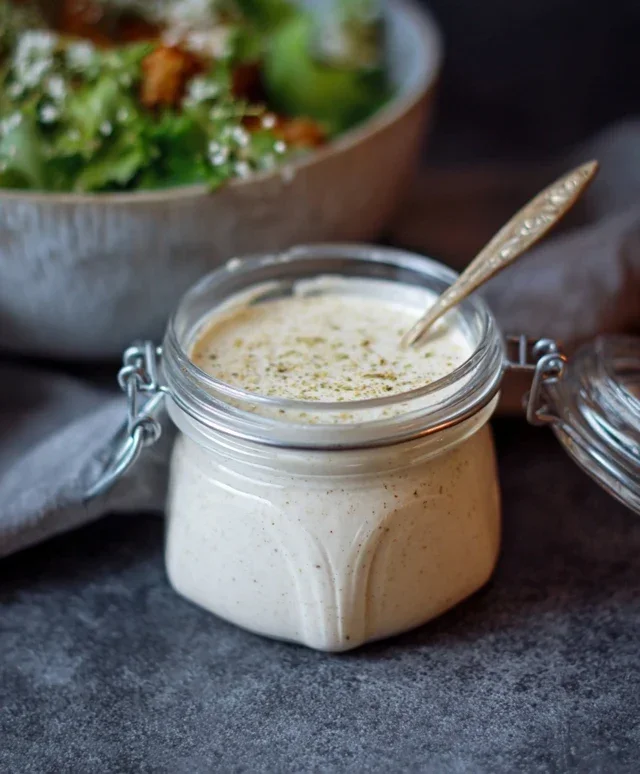
5. Once you’re happy with the flavor and consistency, your homemade Caesar salad dressing is ready to be enjoyed! For the best flavor, I highly recommend letting the dressing sit for at least 15-30 minutes in the refrigerator before serving. This allows the flavors to meld and deepen, creating a more complex and harmonious taste. When you’re ready to serve, give it a final whisk. This dressing is incredibly versatile. Of course, it’s divine tossed with crisp romaine lettuce, croutons, and extra Parmesan. But don’t stop there! It’s also fantastic as a dip for crudités, a sauce for grilled chicken or fish, or even as a sandwich spread. Store any leftover dressing in an airtight container in the refrigerator. It should keep for about 3-4 days. Enjoy the incredible difference that homemade makes!
Conclusion:
Whipping up your own homemade Caesar salad dressing is a game-changer for any salad enthusiast! This recipe delivers that authentic, creamy, and tangy flavor profile that store-bought versions often miss. The magic lies in the fresh ingredients, allowing you to control the saltiness and richness. It’s surprisingly quick to make, elevating a simple salad into a truly delicious meal. I love serving this creamy dressing over crisp romaine lettuce with crunchy croutons and shaved Parmesan, but its versatility extends far beyond. Consider drizzling it over grilled chicken or fish for an extra punch of flavor, or using it as a dip for raw vegetables. Don’t be afraid to experiment with variations – add a pinch of Dijon mustard for a sharper kick, or a dash of Worcestershire sauce for extra umami. I truly encourage you to give this homemade Caesar salad dressing a try. It’s a simple step that will make a significant difference in your culinary creations.
Frequently Asked Questions:
Q: How long does this homemade Caesar salad dressing last in the refrigerator?
A: When stored in an airtight container in the refrigerator, this dressing should stay fresh for about 4-5 days. The raw egg yolk in some traditional recipes can shorten its shelf life, but this version often uses a pasteurized egg or a mayonnaise base, extending it.
Q: Can I make this dressing without raw egg?
A: Absolutely! Many delicious variations exist that omit the raw egg. You can substitute with mayonnaise for a creamy base, or even a bit of Greek yogurt for a lighter, tangier version. Just adjust seasonings to your preference.
Homemade Caesar Salad Dressing
A classic, creamy, and tangy homemade Caesar salad dressing with fresh ingredients.
Ingredients
-
2 large egg yolks
-
2 tablespoons fresh lemon juice
-
1 teaspoon Dijon mustard
-
2 cloves garlic, minced
-
1/2 cup extra virgin extract olive oil
-
1/4 cup grated Parmesan cheese
-
1 teaspoon Worcestershire sauce
-
Salt to taste
-
Black pepper to taste
Instructions
-
Step 1
In a medium bowl, whisk together the egg yolks, lemon juice, and Dijon mustard until well combined. -
Step 2
Add the minced garlic and whisk again. -
Step 3
Slowly drizzle in the extra virgin extract olive oil while continuously whisking. This will emulsify the dressing and make it creamy. -
Step 4
Once all the oil is incorporated, stir in the grated Parmesan cheese and Worcestershire sauce. -
Step 5
Season with salt and freshly ground black pepper to taste. Adjust as needed. -
Step 6
Serve immediately or store in an airtight container in the refrigerator for up to 3 days.
Important Information
Nutrition Facts (Per Serving)
It is important to consider this information as approximate and not to use it as definitive health advice.
Allergy Information
Please check ingredients for potential allergens and consult a health professional if in doubt.


Leave a Comment