
Whenever I serve this meal, my husband’s face lights up. It’s a simple truth that some dishes transcend mere sustenance, becoming instead a cherished memory, a warm hug on a plate. This particular recipe for my ultimate baked ziti, brimming with rich, savory flavors and a symphony of textures, is precisely one of those culinary treasures. There’s an undeniable magic in preparing a meal that you know will bring genuine joy and contentment to your loved ones.
Baked pasta dishes, like this classic ziti, hold a special place in culinary history, particularly within Italian-American culture, where they symbolize family gatherings, celebration, and abundant love. Originating from humble beginnings as a way to stretch ingredients and feed many, these casseroles have evolved into sophisticated yet comforting staples. My version, perfected over years, pays homage to that tradition, transforming simple ingredients into something extraordinary. It’s a truly special dish, and I completely understand why whenever I serve this meal, my husband’s face lights up.
What makes this dish so universally adored? It’s the irresistible combination of tender pasta enveloped in a slow-simmered, herbaceous tomato sauce, generously layered with creamy ricotta, melted mozzarella, and sharp Parmesan cheese. Each forkful offers a delightful contrast – the yielding pasta, the bubbling, slightly crispy cheese crust, and the deeply flavorful meat sauce. It’s not just a meal; it’s an experience that nourishes the soul, provides effortless convenience (hello, make-ahead dinners!), and gathers everyone around the table for moments of shared happiness. Get ready to create your own cherished memories with this unforgettable recipe!
Ingredients:
Gathering all your ingredients before you begin is my go-to strategy for a smooth and enjoyable cooking experience. It’s a little step that makes a big difference, ensuring everything flows beautifully for a dish that truly makes my husband’s face light up!
- 2 tablespoons olive oil, plus extra for greasing
- 2 tablespoons unsalted butter
- 1 ½ pounds boneless, skinless chicken breasts, cut into 1-inch cubes
- 1 large yellow onion, finely chopped
- 4 cloves garlic, minced
- ¼ cup all-purpose flour
- 4 cups (32 ounces) chicken broth
- 2 cups heavy cream
- 8 ounces cream cheese, softened and cut into cubes
- 1 teaspoon dried Italian seasoning
- ½ teaspoon red pepper flakes (optional, for a little kick!)
- Salt and freshly ground black pepper to taste
- 16 ounces penne pasta
- 5 ounces fresh baby spinach
- 2 cups shredded mozzarella cheese, divided
- ½ cup grated Parmesan cheese
Equipment You’ll Need:
Having the right tools at hand is just as important as having the right ingredients. These are the essentials I always have ready when I’m preparing this cherished dish:
- Large oven-safe baking dish (9×13 inch or similar)
- Large pot for boiling pasta
- Large deep skillet or Dutch oven
- Cutting board and sharp knife
- Measuring cups and spoons
- Whisk
- Spatula or wooden spoon
- Cheese grater (if not using pre-shredded cheese)
Preparation is Key:
A little bit of prep work goes a long way in making the cooking process stress-free and enjoyable. I always take a few moments to get everything ready, setting myself up for success and ensuring every component is perfect for this delightful meal.
- Cube the Chicken: Start by patting your boneless, skinless chicken breasts dry with a paper towel. This helps them sear better and get a lovely golden crust. Then, carefully cut them into uniform 1-inch cubes. Uniform pieces cook more evenly, which is crucial for perfect texture.
- Chop Aromatics: Peel and finely chop your large yellow onion. The finer the chop, the more seamlessly it will melt into the sauce. Next, mince your garlic cloves. I personally love fresh garlic for its pungent aroma and flavor, but if you’re in a pinch, pre-minced garlic works too, though I find it doesn’t quite compare to the fresh stuff.
- Soften Cream Cheese: If your cream cheese isn’t already softened, take it out of the refrigerator about 30 minutes before you plan to start cooking. Softened cream cheese will blend into the sauce much more smoothly, preventing lumps and ensuring a velvety consistency that makes every bite heavenly. You can also microwave it for 15-20 seconds on low if you’re short on time.
- Measure Dry Ingredients: Have your all-purpose flour, dried Italian seasoning, and red pepper flakes (if using) measured out and ready to go. Also, measure your chicken broth and heavy cream. This makes the sauce-making process quick and efficient.
- Grate Cheeses: If you’re using blocks of mozzarella and Parmesan, take a moment to shred and grate them. Freshly grated cheese often melts better and has a superior flavor to pre-shredded varieties, which sometimes contain anti-caking agents. Divide your mozzarella so you have some for mixing into the pasta and some for the top.
- Preheat Oven and Prep Dish: Preheat your oven to 375°F (190°C). Lightly grease your 9×13 inch baking dish with a little olive oil or cooking spray. This prevents sticking and makes for easier cleanup, which is always a bonus after a delicious meal!
Cooking the Chicken and Pasta:
These initial cooking steps lay the foundation for the incredible flavors we’re about to build. Taking the time to properly cook the chicken and pasta ensures they are perfectly ready to absorb all the rich, creamy goodness of the sauce.
- Brown the Chicken: In your large deep skillet or Dutch oven, heat 1 tablespoon of olive oil over medium-high heat. Once shimmering, add the cubed chicken in a single layer, ensuring not to overcrowd the pan. You might need to do this in two batches to achieve a good sear. Cook for 3-4 minutes per side, until golden brown and cooked through. Season lightly with a pinch of salt and pepper as it cooks. Once browned, transfer the chicken to a clean plate and set aside. Don’t worry if it’s not fully cooked all the way through; it will finish cooking in the oven later.
- Cook the Penne Pasta: While the chicken is browning, bring a large pot of heavily salted water to a rolling boil. Add the 16 ounces of penne pasta and cook according to package directions, but aim for al dente – meaning it should still have a slight bite to it. This is crucial because the pasta will continue to cook in the oven, and we don’t want it to become mushy. Once al dente, drain the pasta thoroughly and set aside. I sometimes toss it with a tiny drizzle of olive oil to prevent sticking.
Crafting the Creamy Sauce:
This is where the magic truly happens! The sauce is the heart of this dish, a rich and velvety embrace that coats every piece of pasta and chicken. Achieving that perfect creaminess is what makes this meal so incredibly satisfying and why my husband always requests it!
- Sauté Aromatics: Reduce the heat in your skillet to medium. Add the remaining 1 tablespoon of olive oil and 2 tablespoons of unsalted butter. Once the butter is melted, add the finely chopped yellow onion to the pan. Sauté for 5-7 minutes, stirring occasionally, until the onion is softened and translucent. This step brings out the natural sweetness of the onion, building a foundational layer of flavor.
- Add Garlic: Stir in the minced garlic and cook for another 1-2 minutes until fragrant. Be careful not to burn the garlic, as burnt garlic can taste bitter and detract from the overall flavor profile. I love how the aroma fills my kitchen at this point – it’s always a sign of good things to come!
- Make the Roux: Sprinkle the ¼ cup of all-purpose flour over the sautéed onions and garlic. Stir continuously with a whisk or wooden spoon for 1-2 minutes. This creates a roux, which will thicken our sauce and give it that luxurious, silky texture. Cooking the flour briefly helps eliminate any raw flour taste.
- Whisk in Liquids: Gradually whisk in the 4 cups of chicken broth, a cup at a time, ensuring there are no lumps. Continue whisking as you add the 2 cups of heavy cream. Bring the mixture to a gentle simmer, whisking constantly. As it heats, you’ll notice the sauce starting to thicken beautifully.
- Incorporate Cream Cheese and Seasonings: Reduce the heat to low. Add the softened cream cheese cubes, a few at a time, stirring until each cube is fully melted and incorporated into the sauce. This is my secret weapon for an extra rich and tangy creaminess! Stir in the 1 teaspoon of dried Italian seasoning and the ½ teaspoon of red pepper flakes (if using). Season generously with salt and freshly ground black pepper to taste. Remember, the pasta will absorb a lot of the seasoning, so don’t be shy here, but taste as you go.
- Add Spinach: Stir in the 5 ounces of fresh baby spinach. The heat from the sauce will quickly wilt the spinach down. Continue stirring until the spinach is fully incorporated and bright green. This adds a lovely touch of freshness and a beautiful pop of color to the dish.
Assembling the Bake:
Now comes the exciting part – bringing all the components together! This is where the individual flavors meld and combine, creating a harmonious and comforting casserole that’s truly greater than the sum of its parts. It’s almost ready to go into the oven and become that incredible meal!
- Combine Ingredients: Return the cooked chicken to the skillet with the creamy sauce. Add the drained al dente penne pasta. Stir gently to combine everything thoroughly, ensuring every piece of pasta and chicken is generously coated in the rich, velvety sauce.
- Add Cheese: Fold in 1 cup of the shredded mozzarella cheese and ¼ cup of the grated Parmesan cheese. Stir until the cheese begins to melt and becomes stringy, binding everything together. This adds another layer of flavor and ensures a cheesy pull in every bite.
- Transfer to Baking Dish: Carefully spoon the entire pasta mixture into your prepared 9×13 inch baking dish, spreading it evenly. I like to make sure the top surface is as level as possible for even baking and a beautiful golden crust.
- Top with Remaining Cheese: Sprinkle the remaining 1 cup of shredded mozzarella cheese and the remaining ¼ cup of grated Parmesan cheese generously over the top of the pasta mixture. This creates a magnificent golden-brown crust when baked, which is one of my husband’s favorite parts of this dish!
Baking to Golden Perfection:
The final act! This step transforms the assembled ingredients into a bubbly, golden, and irresistible casserole. The aroma that fills the kitchen as it bakes is absolutely divine, a true testament to the deliciousness that awaits. This is the moment when anticipation builds, leading to that moment when my husband’s face lights up!
- Bake the Casserole: Place the baking dish in your preheated oven (375°F / 190°C). Bake for 25-30 minutes, or until the sauce is bubbly around the edges and the cheese on top is melted, golden brown, and slightly crispy. If the cheese starts to brown too quickly, you can loosely tent the dish with aluminum foil for the last 10 minutes of baking.
- Rest Before Serving: Once baked to perfection, carefully remove the baking dish from the oven. This part requires patience, but it’s worth it! Let the pasta bake rest for 5-10 minutes before serving. This brief resting period allows the sauce to set and prevents it from being too runny when you scoop it out. It also makes for cleaner servings and better structural integrity.
Serving Suggestions:
This creamy chicken pasta bake is a complete meal on its own, but a few simple additions can elevate the experience even further. I love presenting it in a way that truly celebrates its comforting nature.
- Fresh Herbs: Before serving, I often sprinkle a little fresh chopped parsley or basil over the top. The vibrant green adds a beautiful contrast and a burst of fresh flavor.
- Side Salad: A crisp green salad with a light vinaigrette is the perfect accompaniment. It provides a refreshing counterpoint to the rich and creamy pasta, balancing the meal beautifully.
- Crusty Bread: A warm, crusty baguette or garlic bread is ideal for soaking up any extra sauce. There’s nothing quite like dipping a piece of warm bread into that creamy goodness!
Tips for Success & Variations:
Over the years, I’ve discovered a few tricks and alternative ideas that can make this dish even more delightful. These tips ensure consistently amazing results and offer ways to customize it to your liking, guaranteeing it remains a showstopper every time I serve it, bringing that characteristic smile to my husband’s face.
- Vegetable Boost: Feel free to add other vegetables! Sautéed mushrooms, bell peppers, or even frozen peas (stirred in with the spinach) would be delicious additions. Just make sure any harder vegetables are cooked tender-crisp before adding to the sauce.
- Spice it Up: If you love heat, increase the amount of red pepper flakes or add a pinch of cayenne pepper to the sauce. You can also drizzle with a little chili oil before serving for an extra kick.
- Chicken Thighs: For even more flavor and tenderness, you can substitute boneless, skinless chicken thighs for the chicken breasts. Just remember to trim any excess fat and cut them into similar 1-inch cubes.
- Make Ahead: This pasta bake is fantastic for meal prepping! You can assemble the entire dish up to 24 hours in advance. Cover it tightly with foil and refrigerate. When ready to bake, you might need to add an extra 10-15 minutes to the baking time if starting from cold.
- Freezing Instructions: To freeze, assemble the dish as directed but do not bake. Cover tightly with two layers of foil and freeze for up to 3 months. Thaw overnight in the refrigerator before baking, or bake from frozen (this will significantly increase baking time – often 60-90 minutes at 375°F, covered, then uncovered for the last 15-20 minutes).
- Different Pasta Shapes: While I love penne for this dish, other short pasta shapes like rotini, ziti, or cavatappi would also work wonderfully. Choose a pasta that has nooks and crannies to capture that amazing sauce.
- Cheese Variations: Don’t limit yourself to just mozzarella and Parmesan! A little bit of provolone or fontina mixed in can add a wonderful depth of flavor and even more meltiness.
- Gluten-Free Option: To make this dish gluten-free, use your favorite gluten-free penne pasta and ensure your chicken broth is certified gluten-free. Substitute the all-purpose flour with a gluten-free all-purpose flour blend (one that contains xanthan gum works best for thickening).
- Sauce Consistency: If your sauce seems too thick, you can thin it out with a splash more chicken broth or heavy cream until it reaches your desired consistency. If it’s too thin, let it simmer a little longer to reduce, or make a quick slurry of cornstarch and water (1 tablespoon cornstarch mixed with 2 tablespoons cold water) and whisk it in, simmering until thickened.
Conclusion:
And there you have it, my friends! We’ve journeyed through the steps of creating what I genuinely believe will become a new cherished favorite in your culinary repertoire. This isn’t just another meal; it’s an experience, a moment of pure culinary delight waiting to happen right in your kitchen. I can tell you with absolute certainty that this recipe holds a special place in my heart, and for very good reason. It consistently delivers on flavor, comfort, and that undeniable feeling of satisfaction that only a truly great home-cooked meal can provide.
Why is this recipe a must-try, you ask? Well, for starters, its incredible depth of flavor is simply unparalleled. Each ingredient plays its part beautifully, harmonizing to create a symphony on your palate. It’s the kind of dish that makes you close your eyes and savor every single bite. Beyond its exquisite taste, it’s also wonderfully adaptable. Whether you’re a seasoned chef or just starting your cooking adventure, the instructions are straightforward and forgiving, making it accessible to everyone. There’s a beautiful simplicity to its execution, yet the results are profoundly complex and utterly delicious. It transforms everyday ingredients into something truly extraordinary, proving that you don’t need fancy techniques or exotic items to create magic in the kitchen. It’s about understanding how flavors work together and embracing the joy of cooking from scratch.
One of the aspects I adore most about this dish is its versatility when it comes to serving. While it certainly shines bright as a standalone star, you can elevate the experience even further with a few thoughtful accompaniments. I often find a crisp, vibrant green salad, perhaps with a light vinaigrette, provides a refreshing counterpoint to its rich flavors. A crusty baguette, perfect for soaking up every last drop of the delectable sauce, is also a non-negotiable in my household. For a heartier meal, consider serving it alongside a fluffy bed of quinoa, creamy mashed potatoes, or even some roasted seasonal vegetables like asparagus or broccoli. And for those special occasions, a glass of medium-bodied red wine, with its subtle tannins and fruit notes, would pair exquisitely, enhancing the entire dining experience. Don’t be afraid to experiment and find your perfect pairing!
But the true beauty of this recipe extends beyond its initial preparation; it also lends itself wonderfully to various adaptations. Feeling adventurous? Consider adding a pinch of red pepper flakes for a subtle kick, or perhaps incorporating some fresh herbs like thyme or rosemary during the cooking process to infuse even more aromatic notes. If you’re looking to make it a vegetarian delight, specific substitutions can be made to ensure it remains just as robust and satisfying. For instance, swapping out the main protein for hearty mushrooms, lentils, or a medley of roasted root vegetables can create an equally fulfilling dish. Conversely, if you want to explore different protein options, chicken, pork, or even a robust fish could be incorporated with minor adjustments to cooking times. The possibilities are truly endless, allowing you to tailor this recipe to your specific dietary needs or simply to whatever ingredients you have on hand. It’s a template for culinary creativity!
This recipe isn’t just about feeding your body; it’s about nurturing your soul and creating cherished memories around the dinner table. Whenever I serve this meal, my husband’s face lights up – and that, for me, is the ultimate testament to its success. It’s a dish that brings smiles, warmth, and contented sighs, making it a perfect choice for a weeknight dinner, a celebratory gathering, or even a comforting meal on a chilly evening. It truly encapsulates the essence of home cooking at its finest.
So, I implore you, dear reader, to step into your kitchen, gather your ingredients, and give this recipe a try. Don’t just read about it; experience it for yourself. I promise you won’t be disappointed. And once you’ve savored every mouthful, I would absolutely love to hear about your experience! Did you stick to the recipe, or did you put your own unique spin on it? What were your favorite parts? Please share your thoughts, your photos, and any wonderful variations you came up with in the comments section below or tag me on social media. Your culinary adventures inspire me, and I can’t wait to see how this dish becomes a beloved staple in your home too. Happy cooking, and bon appétit!
Frequently Asked Questions (FAQs)
-
How can I store leftovers from this recipe?
-
Leftovers can be stored in an airtight container in the refrigerator for up to 3-4 days. Ensure the dish has cooled completely before transferring it to storage containers. For best results, reheat gently on the stovetop or in the oven until warmed through, rather than microwaving, which can sometimes alter the texture.
-
Can I prepare parts of this recipe in advance?
-
Absolutely! Many components of this recipe lend themselves well to make-ahead preparation, saving you time on the day you plan to serve it. You can chop your vegetables, measure out spices, or even prepare the sauce base a day or two in advance. For optimal freshness, I recommend assembling the final dish no more than a few hours before baking or cooking. This ensures all the flavors meld beautifully without any loss in quality.
-
What if I don’t have all the specified ingredients? Are there substitutions?
-
Cooking is all about flexibility and working with what you have! While I’ve listed my preferred ingredients for the best flavor, many substitutions are possible. For example, if a specific herb is unavailable, a similar aromatic herb can often be used (e.g., oregano instead of marjoram). For proteins, consider what you have on hand that would complement the sauce profile. Don’t be afraid to experiment, but always consider how a substitution might alter the overall flavor profile. Feel free to leave a comment if you have a specific substitution question!
-
Is this recipe freezer-friendly?
-
Yes, in most cases, this recipe is quite freezer-friendly! If you plan to freeze it, I suggest preparing the dish up to the point of baking or final cooking. Allow it to cool completely, then transfer it to a freezer-safe container or an oven-safe dish wrapped tightly in foil and plastic wrap. It can be frozen for up to 2-3 months. When ready to enjoy, thaw overnight in the refrigerator and then bake or cook according to the instructions, adding a little extra time as needed. If freezing after it’s fully cooked, ensure it’s completely cooled before freezing to maintain quality.
-
How can I make this dish spicier or milder?
-
Adjusting the spice level is incredibly easy with this recipe! If you prefer a milder flavor, simply reduce or omit any chili flakes or hot peppers mentioned. To dial up the heat, you can add extra red pepper flakes, a dash of your favorite hot sauce, or even a finely minced jalapeño or serrano pepper during the sautéing process. Taste as you go and adjust to your personal preference. Remember, it’s easier to add more heat than to take it away!
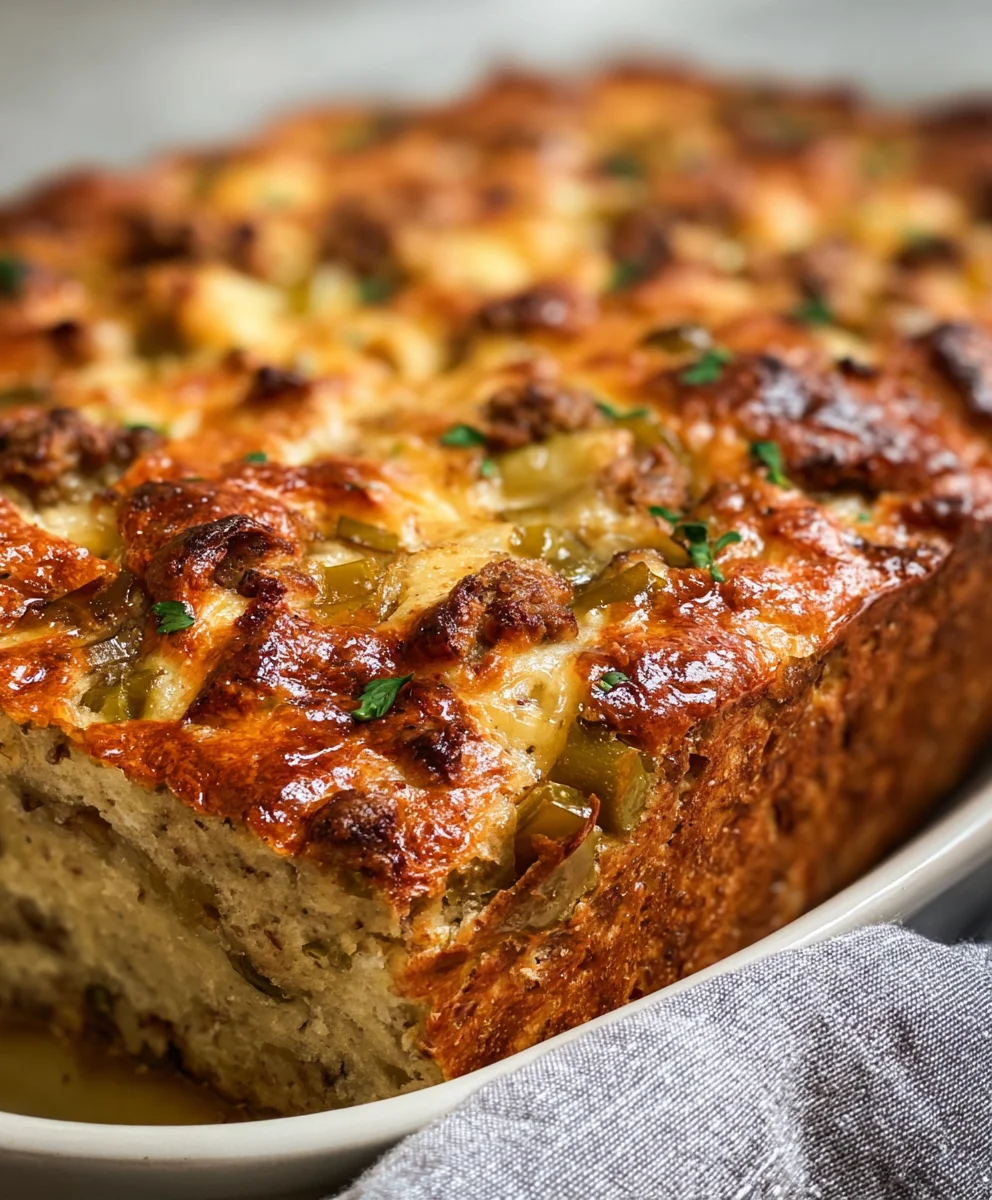
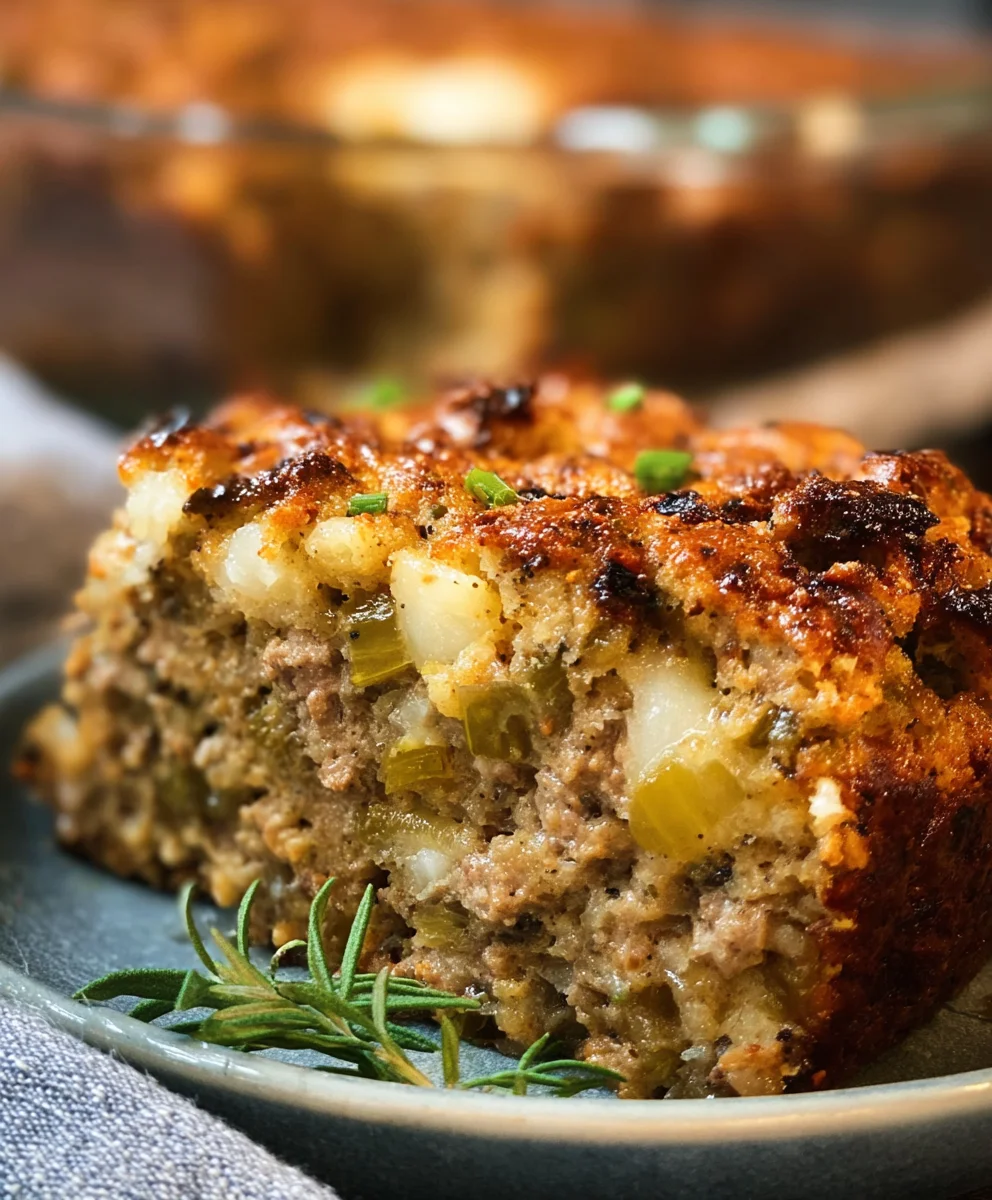
Husband’s Favorite Beef Recipe: His Face Will Light Up!
A rich, creamy beef and pasta bake featuring tender beef sirloin, penne pasta, fresh spinach, and a cheesy, luscious sauce, baked to golden perfection. This comforting casserole is guaranteed to delight your family.
Ingredients
-
2 tbsp olive oil
-
2 tbsp unsalted butter
-
1 ½ lbs beef sirloin, cut into 1-inch cubes
-
1 large yellow onion, finely chopped
-
4 cloves garlic, minced
-
¼ cup all-purpose flour
-
4 cups (32 oz) beef broth
-
2 cups heavy cream
-
8 oz cream cheese, softened
-
1 tsp dried Italian seasoning
-
½ tsp red pepper flakes
-
Salt and black pepper to taste
-
16 oz penne pasta
-
5 oz fresh baby spinach
-
2 cups shredded mozzarella cheese, divided
-
½ cup grated Parmesan cheese
Instructions
-
Step 1
Pat beef dry, cut into 1-inch cubes. Finely chop onion, mince garlic. Soften cream cheese. Measure all remaining ingredients. Preheat oven to 375°F (190°C) and lightly grease a 9×13 inch baking dish. -
Step 2
Heat 1 tbsp olive oil in a large deep skillet over medium-high heat. Brown beef cubes in batches for 3-4 minutes per side until golden, seasoning lightly. Transfer to a plate. -
Step 3
Bring a large pot of heavily salted water to a boil. Cook penne pasta until al dente according to package directions. Drain thoroughly and set aside. -
Step 4
Reduce skillet heat to medium. Add remaining 1 tbsp olive oil and butter. Sauté chopped onion for 5-7 minutes until translucent. Stir in minced garlic for 1-2 minutes until fragrant. -
Step 5
Sprinkle ¼ cup all-purpose flour over the aromatics. Whisk continuously for 1-2 minutes. Gradually whisk in 4 cups beef broth, then 2 cups heavy cream. Bring to a gentle simmer, whisking constantly until the sauce thickens. -
Step 6
Reduce heat to low. Add softened cream cheese cubes, stirring until fully melted. Stir in Italian seasoning, red pepper flakes, salt, and pepper to taste. Stir in baby spinach until wilted. -
Step 7
Return cooked beef and drained penne pasta to the skillet with the creamy sauce. Stir gently to combine. Fold in 1 cup shredded mozzarella cheese and ¼ cup grated Parmesan cheese until cheese begins to melt. -
Step 8
Spoon the mixture into the prepared baking dish, spreading evenly. Sprinkle remaining 1 cup shredded mozzarella and ¼ cup grated Parmesan cheese over the top. Bake for 25-30 minutes, or until the sauce is bubbly and the cheese is golden brown and slightly crispy. -
Step 9
Carefully remove from oven and let the pasta bake rest for 5-10 minutes before serving. This allows the sauce to set. Serve with fresh herbs, a side salad, or crusty bread.
Important Information
Nutrition Facts (Per Serving)
It is important to consider this information as approximate and not to use it as definitive health advice.
Allergy Information
Please check ingredients for potential allergens and consult a health professional if in doubt.


Leave a Comment