
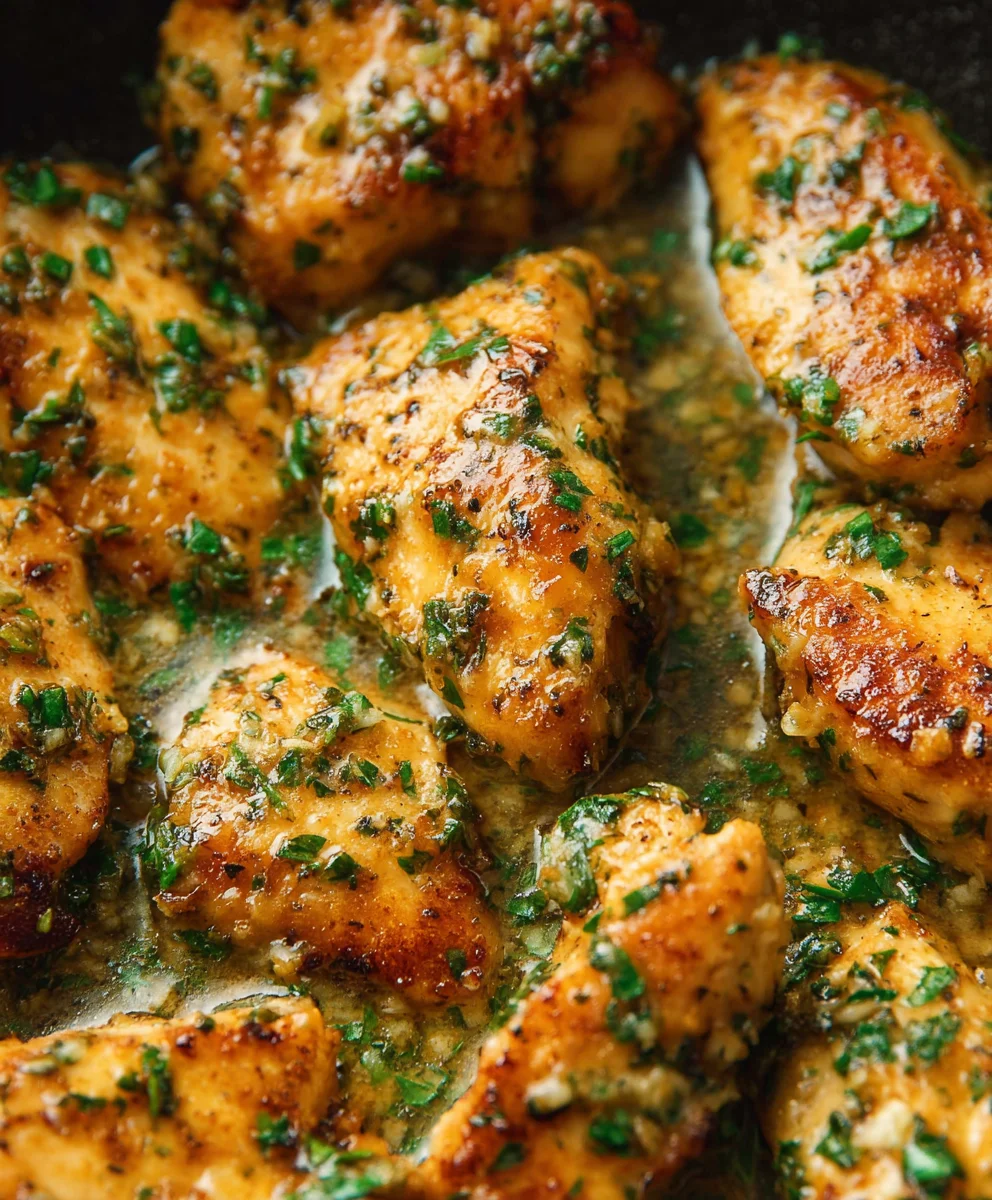
Garlic Butter Chicken is a dish that speaks to the soul, a symphony of rich flavors and comforting textures that has captivated palates across the globe. Imagin extracte tender, succulent pieces of chicken bathed in a luscious, golden sauce infused with the pungent warmth of garlic and the creamy indulgence of butter. It’s no wonder why this classic recipe holds such a special place in our hearts – it’s the epitome of simple elegance and pure deliciousness. What truly sets this Garlic Butter Chicken apart is its ability to transform humble ingredients into something extraordinary. The fragrant aroma that fills your kitchen as it cooks is simply non-intoxicating, promising a meal that is both satisfying and incredibly memorable. Whether you’re a seasoned home cook or just starting your culinary journey, this recipe offers an approachable yet undeniably impressive dish perfect for any occasion, from a weeknight family dinner to a special gathering with friends.
Ingredients:
- 1.5 pounds boneless, skinless chicken thighs
- 4 tablespoons unsalted butter
- 6 cloves garlic, minced
- 1 teaspoon dried Italian seasoning
- 1/2 teaspoon salt
- 1/4 teaspoon black pepper
- 1/4 cup chicken broth
- 2 tablespoons fresh parsley, chopped
- Optional: 1 tablespoon lemon juice
Preparation: Garlic Butter Chicken
Step 1: Preparing the Chicken
Begin extract by patting your chicken thighs dry with paper towels. This is a crucial step for achieving a good sear, as excess moisture can prevent the chicken from browning properly. If your chicken thighs are particularly large, you can trim any excess fat and cut them into more manageable, bite-sized pieces, about 1.5 to 2 inches. This ensures even cooking. Season both sides of the chicken generously with salt and freshly ground black pepper. Don’t be shy with the seasoning; this forms the flavor base for our Garlic Butter Chicken.
Step 2: Searing the Chicken
Heat a large skillet, preferably cast iron or stainless steel, over medium-high heat. Once the skillet is hot, add 2 tablespoons of the unsalted butter. Allow the butter to melgin extractnd begin to foam. Carefully place the seasoned chicken thighs into the hot skillet, ensuring not to overcrowd the pan. Cook in batches if necessary. Sear the chicken for about 4-5 minutes per side, or until a beautiful golden-brown crust has formed. This searing process locks in the juices and adds a wonderful depth of flavor. Once seared, remove the chicken from the skillet and set it aside on a clean plate.
Step 3: Building the Garlic Butter Sauce
Reduce the heat of the skillet to medium. Add the remaining 2 tablespoons of unsalted butter to the pan. Once the butter has melted, add the minced garlic. Cook the garlic for about 1-2 minutes, stirring constantly, until it becomes fragrant. Be careful not to burn the garlic, as burnt garlic can impart a bitter taste. This aromatic garlic forms the heart of our Garlic Butter Chicken. Next, stir in the dried Italian seasoning. The herbs will bloom in the butter, releasing their wonderful aromas.
Step 4: Deglazing and Simmering
Pour the chicken broth into the skillet. Use a wooden spoon or spatula to scrape up any browned bits that may have stuck to the bottom of the pan. These browned bits, known as fond, are packed with flavor and will enrich the sauce. Bring the broth to a gentle simmer. Return the seared chicken thighs, along with any accumulated juices from the plate, back into the skillet. Nestle the chicken into the sauce, ensuring it’s partially submerged.
Step 5: Finishing the Dish
Cover the skillet and let the Garlic Butter Chicken simmer gently for 10-15 minutes, or until the chicken is cooked through and reaches an internal temperature of 165°F (74°C). The cooking time will depend on the thickness of your chicken pieces. Stir occasionally to ensure even cooking and to coat the chicken in the luscious sauce. If you prefer a bit of tang, you can stir in the optional lemon juice during the last minute of cooking for a brighter flavor profile.
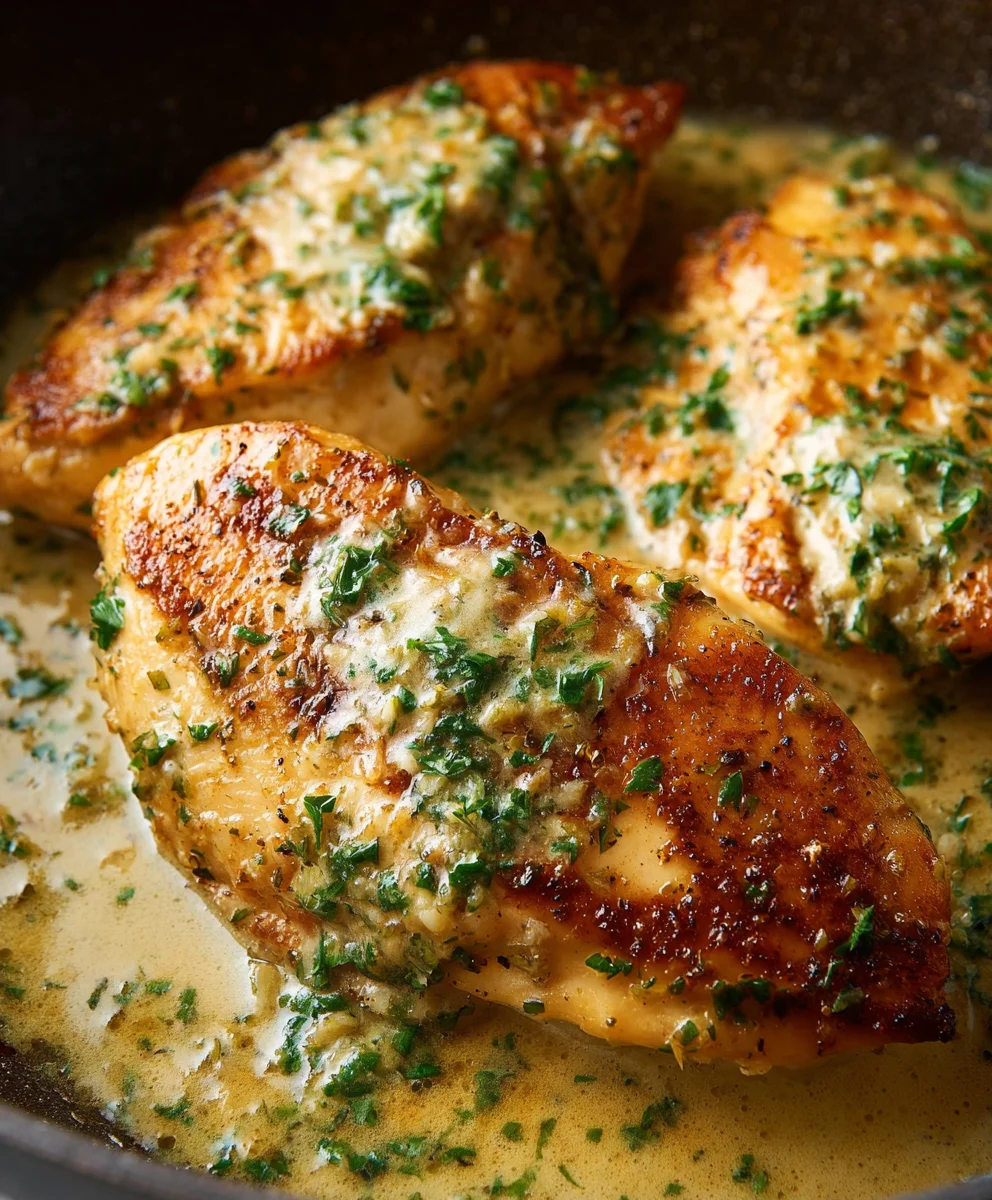
Step 6: Serving and Garnishing
Once the chicken is cooked and the sauce has thickened slightly, remove the skillet from the heat. Stir in the fresh chopped parsley. The vibrant green of the parsley not only adds a beautiful visual appeal but also a fresh, herbaceous note that perfectly complements the rich garlic butter. Taste the sauce and adjust seasoning if necessary with a pinch more salt or pepper. Serve the Garlic Butter Chicken immediately, spooning the rich, fragrant garlic butter sauce generously over the chicken. This dish is wonderfully versatile and pairs well with a variety of sides, such as steamed rice, pasta, mashed potatoes, or a crisp green salad. Enjoy the incredible flavor of this simple yet elegant Garlic Butter Chicken!
Conclusion:
And there you have it! Your very own delicious Garlic Butter Chicken, ready to impress. This recipe offers a wonderful balance of tender chicken, rich butter, and pungent garlic, creating a dish that’s both comforting and incredibly flavorful. We’ve walked through each step to ensure you achieve restaurant-quality results right in your own kitchen. Don’t be afraid to experiment with the seasonings to tailor it perfectly to your taste buds.
I love serving this Garlic Butter Chicken over a bed of fluffy rice to soak up all that delectable sauce, or alongside some roasted asparagus for a complete and healthy meal. For a more decadent option, consider serving it with creamy mashed potatoes or some crusty bread for dipping.
Remember, the beauty of cooking is personalization! Feel free to add a pinch of red pepper flakes for a little heat, or stir in some fresh herbs like parsley or chives at the end for an extra burst of freshness. I truly hope you enjoy making and savoring this Garlic Butter Chicken as much as I do. Happy cooking!
Frequently Asked Questions:
Can I make Garlic Butter Chicken ahead of time?
Yes, you can prepare the sauce and cook the chicken ahead of time. Store them separately in airtight containers in the refrigerator and reheat gently on the stovetop before serving. Be careful not to overcook the chicken when reheating.
What kind of chicken is best for Garlic Butter Chicken?
Boneless, skinless chicken thighs or breasts work wonderfully. Thighs tend to stay more moist and tender, while breasts are a leaner option. Just ensure you cut them into uniform pieces for even cooking.
How can I make Garlic Butter Chicken even more garlicky?
If you’re a true garlic lover, feel free to increase the amount of garlic. You could also roast some garlic cloves separately and mash them into the sauce for a deeper, sweeter garlic flavor.
Juicy Garlic Butter Beef
A delicious and easy recipe for juicy garlic butter beef, featuring tender beef coated in a rich, flavorful garlic butter sauce.
Ingredients
-
1.5 pounds boneless beef sirloin steak, cut into bite-sized pieces
-
4 tablespoons unsalted butter
-
6 cloves garlic, minced
-
1 teaspoon dried Italian seasoning
-
1/2 teaspoon salt
-
1/4 teaspoon black pepper
-
1/4 cup beef broth
-
2 tablespoons fresh parsley, chopped
-
Optional: 1 tablespoon lemon juice
Instructions
-
Step 1
Pat your beef pieces dry with paper towels. This is important for achieving a good sear. Season both sides of the beef generously with salt and freshly ground black pepper. -
Step 2
Heat a large skillet over medium-high heat. Add 2 tablespoons of unsalted butter. Once melted and foaming, carefully place the seasoned beef into the hot skillet, ensuring not to overcrowd the pan. Sear the beef for about 2-3 minutes per side until browned. Remove the beef from the skillet and set it aside. -
Step 3
Reduce the heat to medium. Add the remaining 2 tablespoons of unsalted butter. Once melted, add the minced garlic and cook for 1-2 minutes until fragrant, stirring constantly. Be careful not to burn the garlic. Stir in the dried Italian seasoning. -
Step 4
Pour the beef broth into the skillet and scrape up any browned bits from the bottom. Bring the broth to a gentle simmer. Return the seared beef and any accumulated juices back into the skillet. Nestle the beef into the sauce. -
Step 5
Cover the skillet and let the beef simmer gently for 5-8 minutes, or until cooked to your desired doneness. The cooking time will depend on the thickness of your beef pieces. Stir occasionally. If using, stir in the optional lemon juice during the last minute of cooking. -
Step 6
Remove the skillet from the heat. Stir in the fresh chopped parsley. Taste and adjust seasoning if necessary. Serve immediately, spooning the garlic butter sauce over the beef.
Important Information
Nutrition Facts (Per Serving)
It is important to consider this information as approximate and not to use it as definitive health advice.
Allergy Information
Please check ingredients for potential allergens and consult a health professional if in doubt.


Leave a Comment