
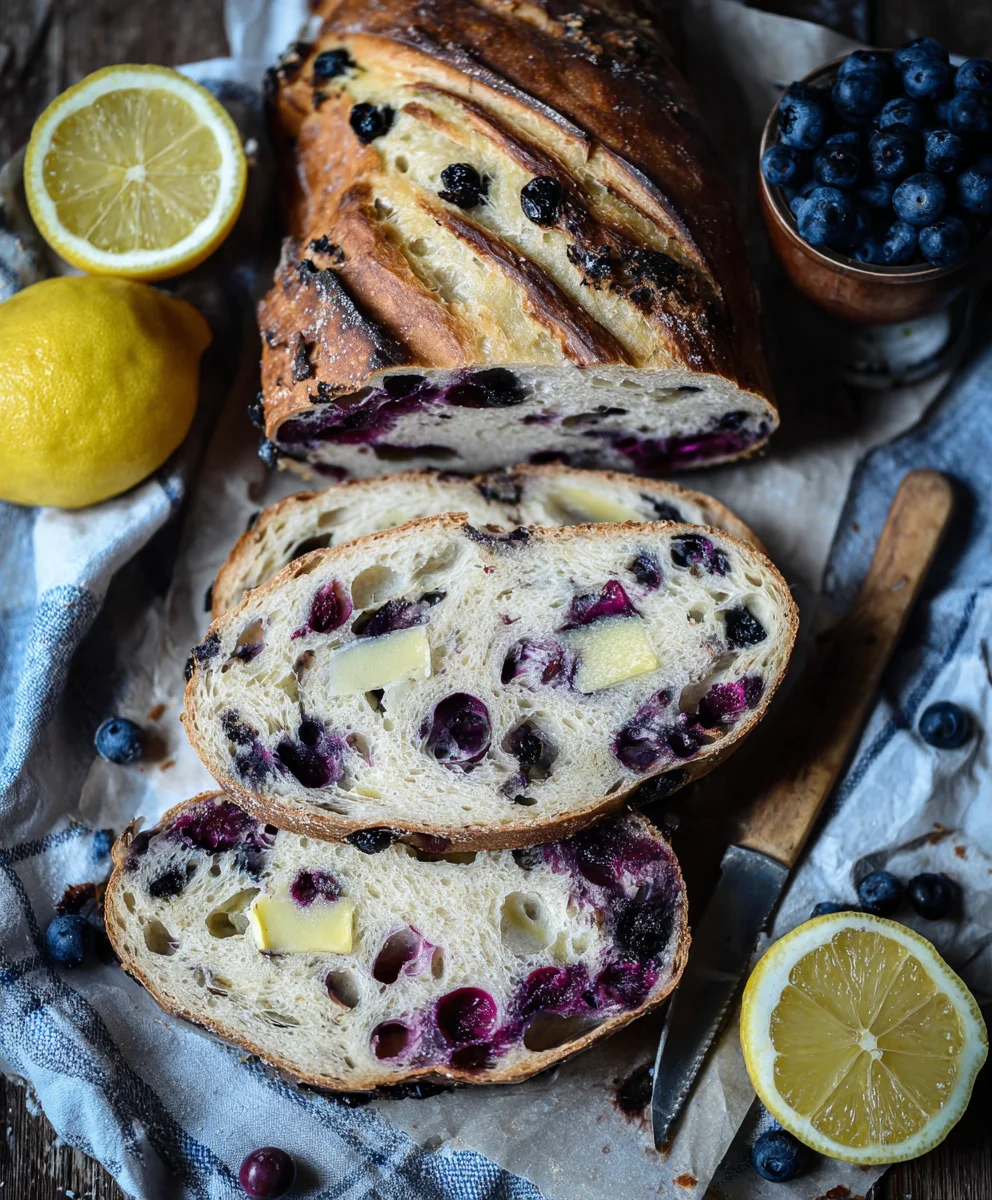
Lemon Blueberry Sourdough Bread Recipe isn’t just a treat for your taste buds; it’s a delightful adventure for your senses. There’s something incredibly satisfying about pulling a golden-brown loaf, fragrant with citrus and bursting with juicy berries, from your oven. We adore this particular Lemon Blueberry Sourdough Bread Recipe because it perfectly balances the tangy, complex notes of sourdough with the bright, zesty punch of fresh lemon and the sweet bursts of ripe blueberries. It’s more than just a breakfast or brunch item; it’s a testament to the magic of natural fermentation and the simple joy of creating something truly delicious from scratch. This bread stands out due to its incredibly tender crum extractb, a result of careful sourdough development, coupled with the irresistible combination of flavors that make every slice a little piece of sunshine. Get ready to bake a loaf that will have everyone asking for seconds!
Ingredients:
- 50g active sourdough starter
- 350g water
- 500g bread flour
- 11g salt (for the dough)
- 150g fresh blueberries
- Zest of one lemon
- 8 Tablespoons butter, room temperature (approximately 113g)
- 1/2 cup fresh blueberries, mashed (approximately 75g)
- 2 Tablespoons honey (approximately 45g)
- A pinch of salt (for the glaze)
The Dough Making Process
Mixing the Dough
- In a large mixing bowl, combine your active sourdough starter with the 350g of water. Give it a good stir until the starter is mostly dissolved into the water. This creates your autolyse base. Next, add the 500g of bread flour to the bowl. Mix everything together with your hands or a spatula until there are no dry pockets of flour remaining. The dough will be shaggy and a bit sticky at this stage. Cover the bowl with a damp tea towel or plastic wrap and let it rest for 30 minutes. This autolyse period allows the flour to hydrate and gluten development to begin extract, making the dough more pliable.
- After the 30-minute rest, it’s time to incorporate the salt. Sprinkle the 11g of salt evenly over the surface of the dough. Now, it’s time to start developing the gluten structure. You can do this using a few different methods. My preferred method is the “stretch and fold” technique. Wet your hands slightly to prevent sticking, then grab a portion of the dough from the edge of the bowl, stretch it upwards, and fold it over onto itself towards the center. Rotate the bowl and repeat this process for all four sides of the dough. You’ll want to perform about 4-5 sets of these stretch and folds. The dough will start to feel more cohesive and less sticky with each set.
- Once you’ve completed your stretch and folds, cover the bowl again and let the dough rest for another 30 minutes. This is part of the bulk fermentation process. We’ll repeat the stretch and fold technique approximately three more times over the next 2 to 3 hours, with 30-minute rests in between each set of folds. During this time, you’ll notice the dough becoming smoother, more elastic, and gaining volume. It should feel airy and well-developed.
Adding the Flavor Bursts
Incorporating Blueberries and Lemon Zest
- Once your bulk fermentation is complete and the dough has noticeably increased in volume (roughly doubled), it’s time to add our delicious flavorings. Gently turn the dough out onto a lightly floured surface. Be careful not to degas it too much. Sprinkle the 150g of fresh blueberries and the zest of one lemon evenly over the surface of the dough. Now, very gently, fold the dough over itself to start incorporating the blueberries and zest. Use your hands to carefully tuck and fold, trying to distribute them as evenly as possible without crushing them too much. The goal here is to get the inclusions distributed without tearing the gluten structure you’ve worked so hard to build.
- After gently incorporating the blueberries and lemon zest, shape the dough into a round ball. You can do thisgin extract bringing the edges of the dough towards the center and then flipping it over so the seam side is down. Cup your hands around the dough and gently pull it towards you, creating surface tension. Place the shaped dough back into your lightly oiled bowl, seam-side down. Cover it tightly with plastic wrap or a ligin extractNow, we’ll begin the final proofing stage. You can do this at room temperature for 1-2 hours, or you can opt for a longer, cold proof in the refrigerator for 12-24 hours. The cold proof will develop deeper flavors and make the dough easier to handle for scoring.
Baking and Finishing Touches
Baking the Bread and Creating the Glaze
- When you’re ready to bake, preheat your oven to 450°F (230°C) with a Dutch oven inside for at least 30 minutes. This ensures the Dutch oven is screaming hot, which is crucial for creating a great oven spring and crust. Carefully remove the hot Dutch oven from the oven. Gently turn your proofed dough out onto a piece of parchment paper. Score the top of the dough with a sharp knife or a lame. A simple cross or a few parallel slashes work well. Carefully lower the dough into the hot Dutch oven using the parchment paper as handles. Place the lid back on the Dutch oven and bake for 20 minutes. This initial covered bake traps steam, which is essential for the bread to expand fully before the crust hardens.
- After 20 minutes, carefully remove the lid of the Dutch oven. You’ll see your bread has beautifully puffed up. Reduce the oven temperature to 425°F (220°C). Continue to bake the bread, uncovered, for another 25-30 minutes, or until the crust is a deep golden brown and the internal temperature of the bread reaches around 205-210°F (96-99°C) when tested with an instant-read thermometer. Once baked, carefully remove the bread from the Dutch oven and place it on a wire rack to cool completely. It’s incredibly tempting to cut into it right away, but allowing it to cool ensures the crum extractb structure sets properly.
- While the bread is cooling, let’s prepare our delicious lemon-blueberry butter glaze. In a small bowl, combine the 8 tablespoons of softened butter with the 1/2 cup of mashed fresh blueberries, the 2 tablespoons of honey, and a pinch of salt. Use a fork or a whisk to thoroughly combine all the ingredients until you have a smooth, spreadable glaze. You can adjgin extract the sweetness or tanginess by adding a touch more honey or a tiny squeeze of lemon juice if you prefer.
- Once the bread has cooled completely, generously brush or spread the lemon-blueberry butter glaze all over the top and sides of the loaf. The warmth of the bread will help the glaze melt slightly, creating a beautiful sheen and infusing the exterior with more of those delightful lemon and blueberry flavors. Slice and enjoy your homemade Lemon Blueberry Sourdough Bread!
Conclusion:
I hope you’ve enjoyed this delightful journey into making the Lemon Blueberry Sourdough Bread Recipe! This recipe brings together the tangy goodness of sourdough with the bright burst of blueberries and a hint of citrus, creating a loaf that’s both comforting and incredibly delicious. The golden crust, the tender crum extractb, and that irresistible aroma are truly a reward for your sourdough endeavors.
This Lemon Blueberry Sourdough Bread Recipe is wonderfully versatile. Serve slices warm with a smear of butter for a simple breakfast treat, or pair it with a dollop of Greek yogurt and a drizzle of honey for a more substantial snack. It also makes a fantastic base for French toast or even a sweet bread pudding. Don’t be afraid to experiment! You can add a touch of lemon zest for an extra zing, or swap out some of the blueberries for raspberries for a different berry flavor profile. Feel free to incorporate a handful of chopped almonds for added crunch, too.
Mastering this Lemon Blueberry Sourdough Bread Recipe is a satisfying achievement. Embrace the process, enjoy the creation, and most importantly, savor every bite of your homemade sourdough masterpiece. Happy baking!
FAQs
Q: Can I use frozen blueberries instead of fresh ones?
A: Absolutely! If you’re using frozen blueberries, it’s best to toss them with a tablespoon of the flour from the recipe before adding them to the dough. This helps prevent them from bleeding too much color and creating a uniformly purple bread, although some streaking is part of the charm!
Q: My sourdough starter isn’t very active. Will this recipe still work?
A: A strong and active sourdough starter is crucial for a successful sourdough bread. If your starter is sluggish, it’s recommended to ‘feed’ it regularly for a few days leading up to baking to ensure it’s vigorous enough to leaven the dough properly. You’ll see plenty of bubbles and a good rise after feeding.
Q: How should I store the Lemon Blueberry Sourdough Bread?
A: Once completely cooled, store the Lemon Blueberry Sourdough Bread at room temperature in a bread box or wrapped loosely in a linen cloth for up to 2-3 days. For longer storage, you can slice the bread and freeze it in an airtight container or freezer bag for up to 3 months. Just thaw at room temperature or toast slices directly from frozen.
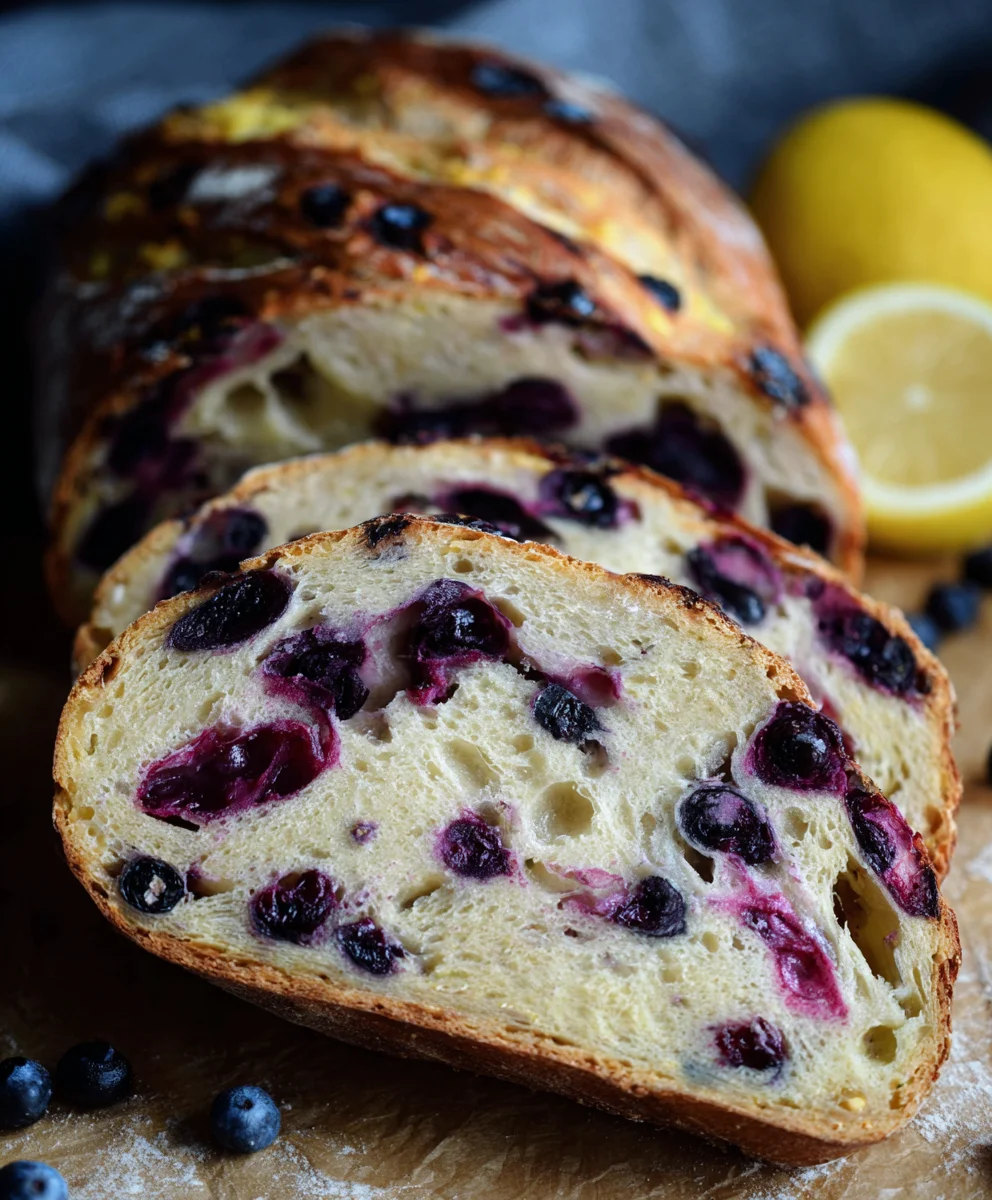
Lemon Blueberry Sourdough Bread
An easy and delicious recipe for homemade lemon blueberry sourdough bread with a sweet and tangy butter glaze.
Ingredients
-
50g active sourdough starter
-
350g water
-
500g bread flour
-
11g salt
-
150g fresh blueberries
-
Zest of one lemon
-
8 Tablespoons butter, room temperature (113g)
-
1/2 cup fresh blueberries, mashed (75g)
-
2 Tablespoons honey (45g)
-
A pinch of salt
Instructions
-
Step 1
In a large mixing bowl, combine active sourdough starter with water until mostly dissolved. Add bread flour and mix until no dry pockets remain. Cover and let rest for 30 minutes (autolyse). -
Step 2
Sprinkle salt over the dough. Perform 4-5 sets of ‘stretch and fold’ techniques, wetting hands slightly to prevent sticking. The dough will become more cohesive. -
Step 3
Cover and rest for 30 minutes. Repeat stretch and folds 3 more times over the next 2-3 hours, with 30-minute rests between sets. The dough will become smoother and increase in volume. -
Step 4
Once bulk fermentation is complete, gently turn dough onto a lightly floured surface. Sprinkle with fresh blueberries and lemon zest. Gently fold dough to incorporate inclusions, distributing them evenly without crushing. -
Step 5
Shape dough into a round ball, creating surface tension. Place in a lightly oiled bowl, seam-side down. Cover tightly and begin final proofing (1-2 hours at room temperature or 12-24 hours in the refrigerator). -
Step 6
Preheat oven to 450°F (230°C) with a Dutch oven inside for at least 30 minutes. Carefully turn proofed dough onto parchment paper, score the top. Lower dough into hot Dutch oven, cover, and bake for 20 minutes. -
Step 7
Remove Dutch oven lid, reduce oven temperature to 425°F (220°C). Bake uncovered for another 25-30 minutes, or until deep golden brown and internal temperature is 205-210°F (96-99°C). Cool completely on a wire rack. -
Step 8
While bread cools, prepare the glaze. Combine softened butter, mashed blueberries, honey, and a pinch of salt in a small bowl. Mix until smooth. -
Step 9
Once bread is completely cool, generously brush or spread the lemon-blueberry butter glaze over the top and sides. Slice and enjoy.
Important Information
Nutrition Facts (Per Serving)
It is important to consider this information as approximate and not to use it as definitive health advice.
Allergy Information
Please check ingredients for potential allergens and consult a health professional if in doubt.


Leave a Comment