
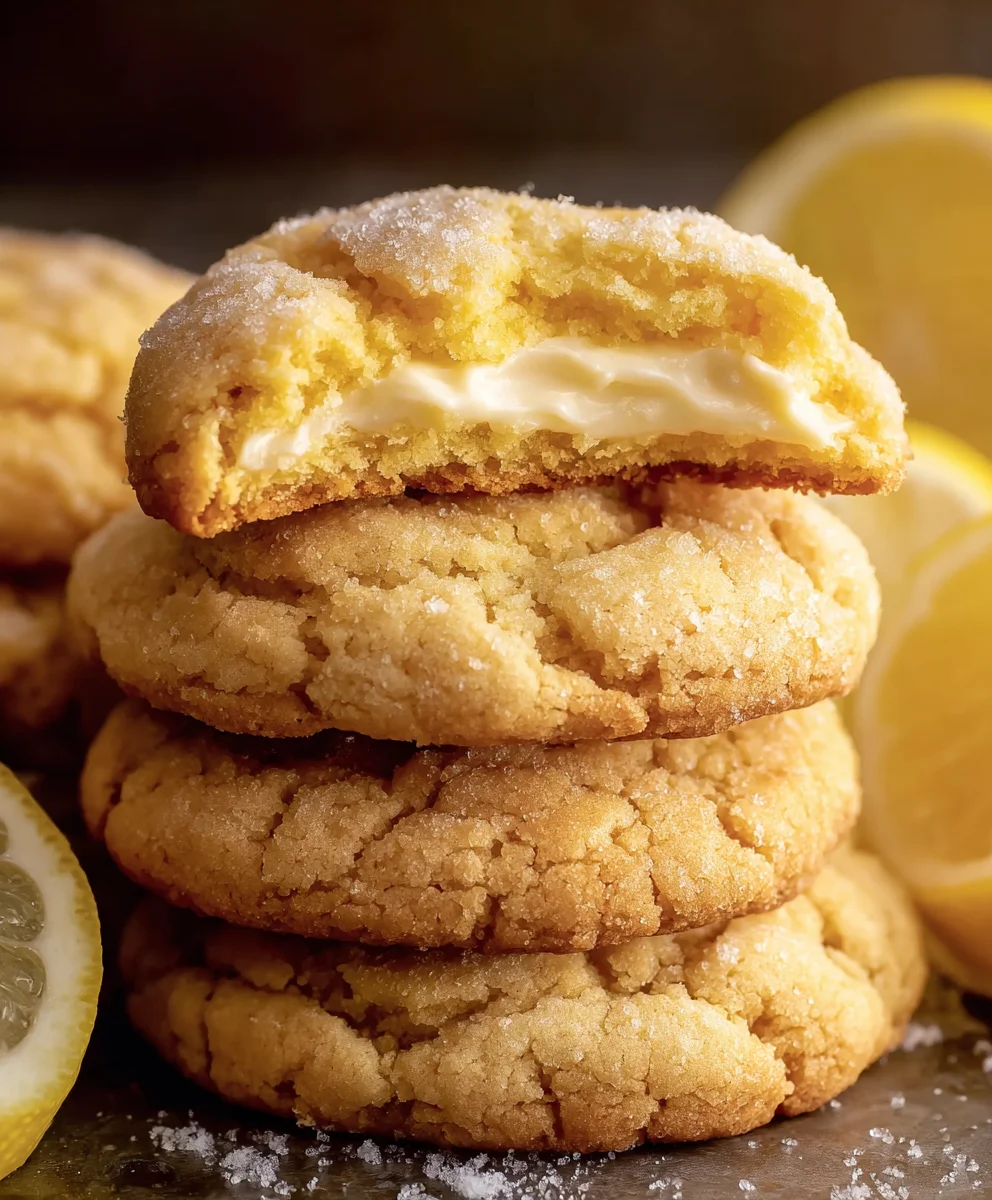
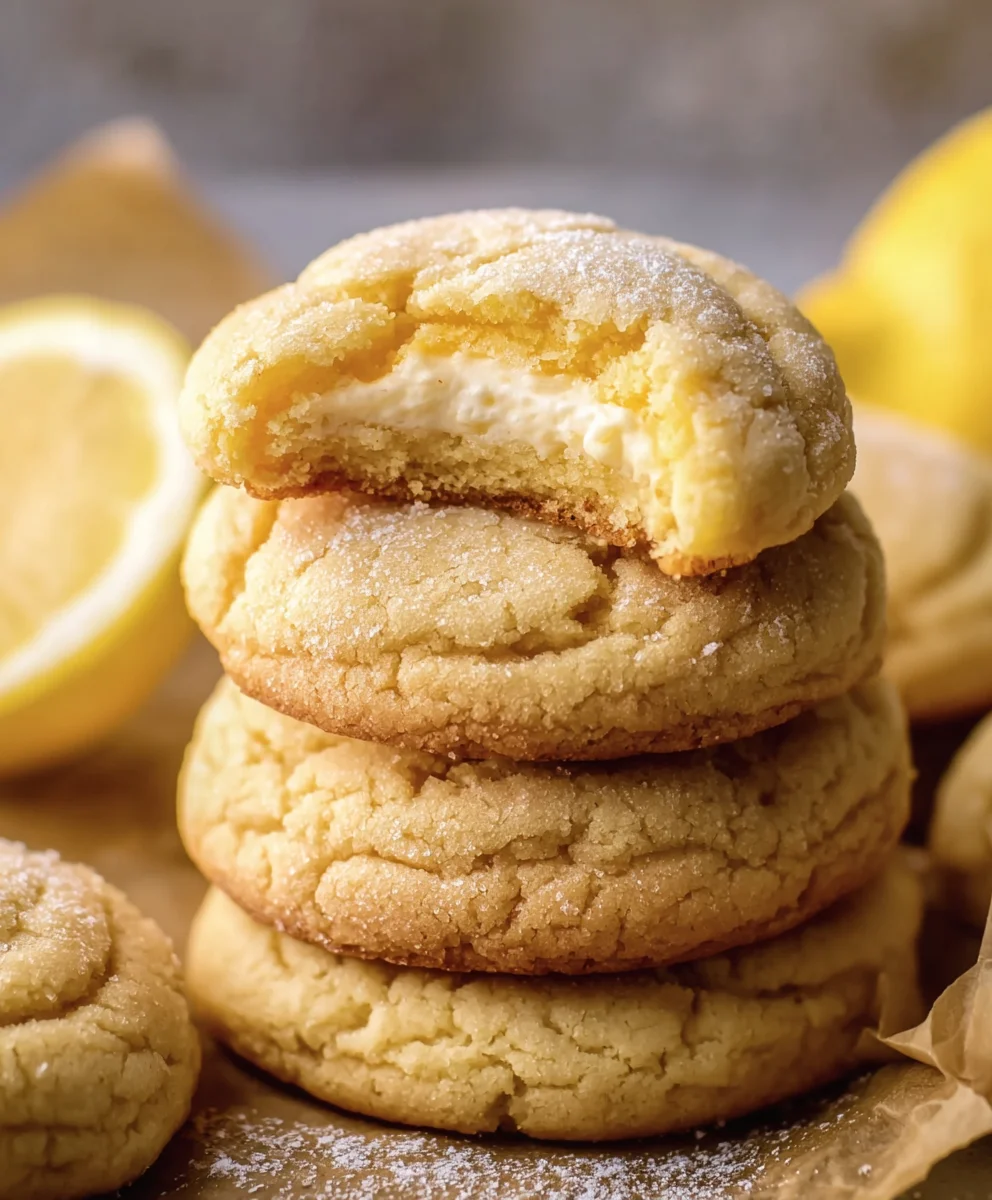
Lemon Cheesecake Cookies are the quintessential treat that bridges the gap between a classic dessert and a portable delight. If you’ve ever found yourself craving the tangy brightness of lemon and the creamy indulgence of cheesecake but lacked the time or inclination to bake a full-sized masterpiece, then these cookies are your delicious salvation. What is it about these little wonders that captures our hearts (and taste buds)? It’s that perfect harmony of textures and flavors: a tender, slightly chewy cookie base kissed with zesty lemon, cradling a luscious, cream cheese-infused center that melts in your mouth. They’re unbelievably easy to make, yet they deliver an impressive punch of flavor that will have everyone begging for the recipe. These aren’t just any cookies; they are a miniature celebration of spring and summer, bursting with sunshine and pure joy in every single bite. Prepare to fall in love with Lemon Cheesecake Cookies all over again – or for the very first time!
Ingredients:
- 6 oz cream cheese, cold (170g)
- 3 tablespoons granulated sugar (38g)
- ½ tablespoon lemon zest (5g)
- ½ cup granulated sugar (100g)
- ½ tablespoon lemon zest (5g)
- 1¾ cups all-purpose flour, spooned and leveled (218g)
- ½ teaspoon baking powder
- ½ teaspoon baking soda
- ½ teaspoon salt
- ¾ cup unsalted butter, softened (168g)
- ¾ cup light brown sugar, packed (165g)
- ¼ cup granulated sugar (50g)
- 2 egg yolks, room temperature
- 1 teaspoon vanilla
- 2½ tablespoons lemon zest (25g)
Cheesecake Filling Preparation
Step 1: Cream the Cheesecake Base
The heart of our Lemon Cheesecake Cookies is a rich, tangy cheesecake filling. To begin, ensure your 6 oz of cream cheese is nicely chilled; this will help it maintain its structure. In a medium bowl, combine the cold cream cheese with 3 tablespoons of granulated sugar and ½ tablespoon of lemon zest. This initial amount of zest adds a subtle yet bright citrus note to the filling. Using an electric mixer or a sturdy whisk, beat these ingredients together until they are smooth and creamy, with no lumps of cream cheese remaining. The texture should be akin to a thick frosting. Scrape down the sides of the bowl as needed to ensure everything is incorporated evenly. Set this mixture aside for now.
Step 2: Prepare the Dry Cookie Dough Ingredients
Next, we’ll prepare the dry components for our cookie dough. In a separate, medium-sized bowl, whisk together the 1¾ cups of all-purpose flour, ½ teaspoon of baking powder, ½ teaspoon of baking soda, and ½ teaspoon of salt. Whisking these dry ingredients together thoroughly before adding them to the wet ingredients helps to distribute the leavening agents and salt evenly throughout the dough, which is crucial for a consistent cookie texture. Proper flour measurement, spooned into the cup and leveled with a straight edge, is key here to avoid dense cookies.
Cookie Dough Assembly and Lemon Infusion
Step 3: Cream Butter and Sugars
Now, let’s move on to the cookie dough base. In a large mixing bowl, cream together the ¾ cup of softened unsalted butter with the ¾ cup of packed light brown sugar and the ¼ cup of granulated sugar. “Creaming” means beating these ingredients until they are light in color and fluffy in texture. This process incorporates air into the dough, which contributes to the cookie’s tender crumb and slightly chewy texture. Make sure your butter is truly softened, not melted, as this will significantly impact the creaming process. Once this mixture is light and fluffy, beat in the 2 room-temperature egg yolks, one at a time, until fully incorporated. Add the 1 teaspoon of vanilla extract and the remaining ½ tablespoon of lemon zest, mixing until just combined. The fresh lemon zest at this stage will impart a more pronounced citrus aroma and flavor to the cookie dough itself.
Step 4: Combine Wet and Dry Ingredients and Add Zest
Gradually add the dry ingredients prepared in Step 2 to the wet ingredients from Step 3, mixing on low speed or by hand until just combined. Be careful not to overmix the dough at this stage; overmixing can develop the gluten in the flour too much, leading to tough cookies. Once the flour is mostly incorporated, it’s time to introduce the star ingredient that will make these truly Lemon Cheesecake Cookies: the 2½ tablespoons of lemon zest. Stir this lemon zest into the dough until it is evenly distributed. The generous amount of zest ensures a vibrant lemon flavor that will be present in every bite of the cookie. The dough will be thick and slightly sticky.
Assembling and Baking the Lemon Cheesecake Cookies
Step 5: Form and Chill the Cookies
To assemble the Lemon Cheesecake Cookies, we’ll create a delightful swirl of cheesecake filling within the cookie dough. Take about 2 tablespoons of the cookie dough and flatten it into a small disc in your palm. Place about 1 teaspoon of the cream cheese filling mixture in the center of the dough disc. Then, carefully fold the edges of the dough around the filling to enclose it completely. Gently roll the dough into a ball. Repeat this process with the remaining dough and filling until all the ingredients are used. For the best results and to prevent excessive spreading, it’s crucial to chill the formed cookie balls. Place the cookie balls on a baking sheet lined with parchment paper, ensuring they have a little space between them, and chill them in the refrigerator for at least 30 minutes, or even up to 2 hours. This chilling step is essential for the cheesecake filling to firm up and for the cookie dough to solidify, allowing the cookies to hold their shape better during baking and preventing them from spreading too much, thus creating a more substantial cookie with a distinct cheesecake center.
Step 6: Bake and Cool the Lemon Cheesecake Cookies
Preheat your oven to 350°F (175°C). Once the cookie balls have been sufficiently chilled, arrange them on a baking sheet lined with parchment paper, maintaining about 2 inches of space between each cookie to allow for slight expansion. Bake for 12-15 minutes, or until the edges of the cookies are lightly golden brown and the centers appear set. The cheesecake filling might puff up slightly and then settle as it cools. It’s important not to overbake them, as this can result in dry cookies. Allow the Lemon Cheesecake Cookies to cool on the baking sheet for 5-10 minutes before carefully transferring them to a wire rack to cool completely. As they cool, the cheesecake filling will become wonderfully creamy and slightly tangy, complementing the bright lemon flavor of the cookie itself.
Conclusion:
I hope you’ve enjoyed this delightful journey into making these incredible Lemon Cheesecake Cookies! We’ve walked through each step, from creaming the butter and sugar to achieving that perfect tangy cheesecake filling and buttery cookie base. The result is a cookie that’s both rich and refreshing, a true crowd-pleaser that’s surprisingly easy to whip up. These cookies are perfect for any occasion, whether you’re hosting a brunch, packing a lunchbox treat, or simply indulging in a moment of sweet bliss for yourself. They bring a burst of sunshine to any afternoon tea or dessert spread.
For serving suggestions, these cookies are fantastic on their own, but they also pair wonderfully with a fresh cup of coffee or a light herbal tea. Imagine them served alongside a bowl of fresh berries for an extra pop of color and flavor.
Feeling adventurous? Try adding a sprinkle of poppy seeds to the cookie dough for a subtle crunch and visual appeal, or a touch of lavender to the lemon zest for an elegant floral note. You could also drizzle them with a thin white chocolate glaze for added sweetness and a beautiful finish. Don’t be afraid to experiment and make these Lemon Cheesecake Cookies your own! I truly encourage you to give this recipe a try; you won’t be disappointed by the delightful balance of textures and flavors.
Frequently Asked Questions:
Can I make the dough ahead of time?
Absolutely! You can prepare the cookie dough up to 2 days in advance and store it, tightly wrapped, in the refrigerator. The cheesecake filling can also be made a day ahead and stored separately. This makes assembly even quicker when you’re ready to bake!
How long do these cookies stay fresh?
Stored in an airtight container at room temperature, these Lemon Cheesecake Cookies will stay fresh for about 3-4 days. For longer storage, you can refrigerate them for up to a week, or freeze them for up to 3 months. They are delicious at room temperature or slightly chilled.
Lemon Cheesecake Cookies-Zesty & Creamy Bites
Delightful cookies with a zesty lemon flavor and a creamy, tangy cheesecake filling swirled throughout. Perfect for a sweet treat!
Ingredients
-
6 oz cold cream cheese (170g)
-
3 tablespoons granulated sugar (38g)
-
½ tablespoon lemon zest (5g)
-
½ cup granulated sugar (100g)
-
½ tablespoon lemon zest (5g)
-
1¾ cups all-purpose flour, spooned and leveled (218g)
-
½ teaspoon baking powder
-
½ teaspoon baking soda
-
½ teaspoon salt
-
¾ cup softened unsalted butter (168g)
-
¾ cup packed light brown sugar (165g)
-
¼ cup granulated sugar (50g)
-
2 room temperature egg yolks
-
1 teaspoon vanilla extract
-
2½ tablespoons lemon zest (25g)
Instructions
-
Step 1
Prepare the cheesecake filling: In a medium bowl, combine 6 oz cold cream cheese, 3 tablespoons granulated sugar, and ½ tablespoon lemon zest. Beat until smooth and creamy. -
Step 2
Prepare the dry cookie dough ingredients: In a separate bowl, whisk together 1¾ cups all-purpose flour, ½ teaspoon baking powder, ½ teaspoon baking soda, and ½ teaspoon salt. -
Step 3
Cream the butter and sugars: In a large bowl, cream together ¾ cup softened unsalted butter, ¾ cup packed light brown sugar, and ¼ cup granulated sugar until light and fluffy. Beat in 2 egg yolks one at a time. Stir in 1 teaspoon vanilla extract and ½ tablespoon lemon zest. -
Step 4
Combine wet and dry ingredients: Gradually add the dry ingredients to the wet ingredients, mixing until just combined. Stir in the remaining 2½ tablespoons of lemon zest. -
Step 5
Form and chill the cookies: Take about 2 tablespoons of cookie dough, flatten into a disc, place 1 teaspoon of cheesecake filling in the center, and enclose with the dough. Roll into a ball. Chill the cookie balls for at least 30 minutes. -
Step 6
Bake and cool: Preheat oven to 350°F (175°C). Arrange chilled cookie balls on a parchment-lined baking sheet, about 2 inches apart. Bake for 12-15 minutes until edges are golden. Cool on the baking sheet for 5-10 minutes, then transfer to a wire rack to cool completely.
Important Information
Nutrition Facts (Per Serving)
It is important to consider this information as approximate and not to use it as definitive health advice.
Allergy Information
Please check ingredients for potential allergens and consult a health professional if in doubt.

Leave a Comment