
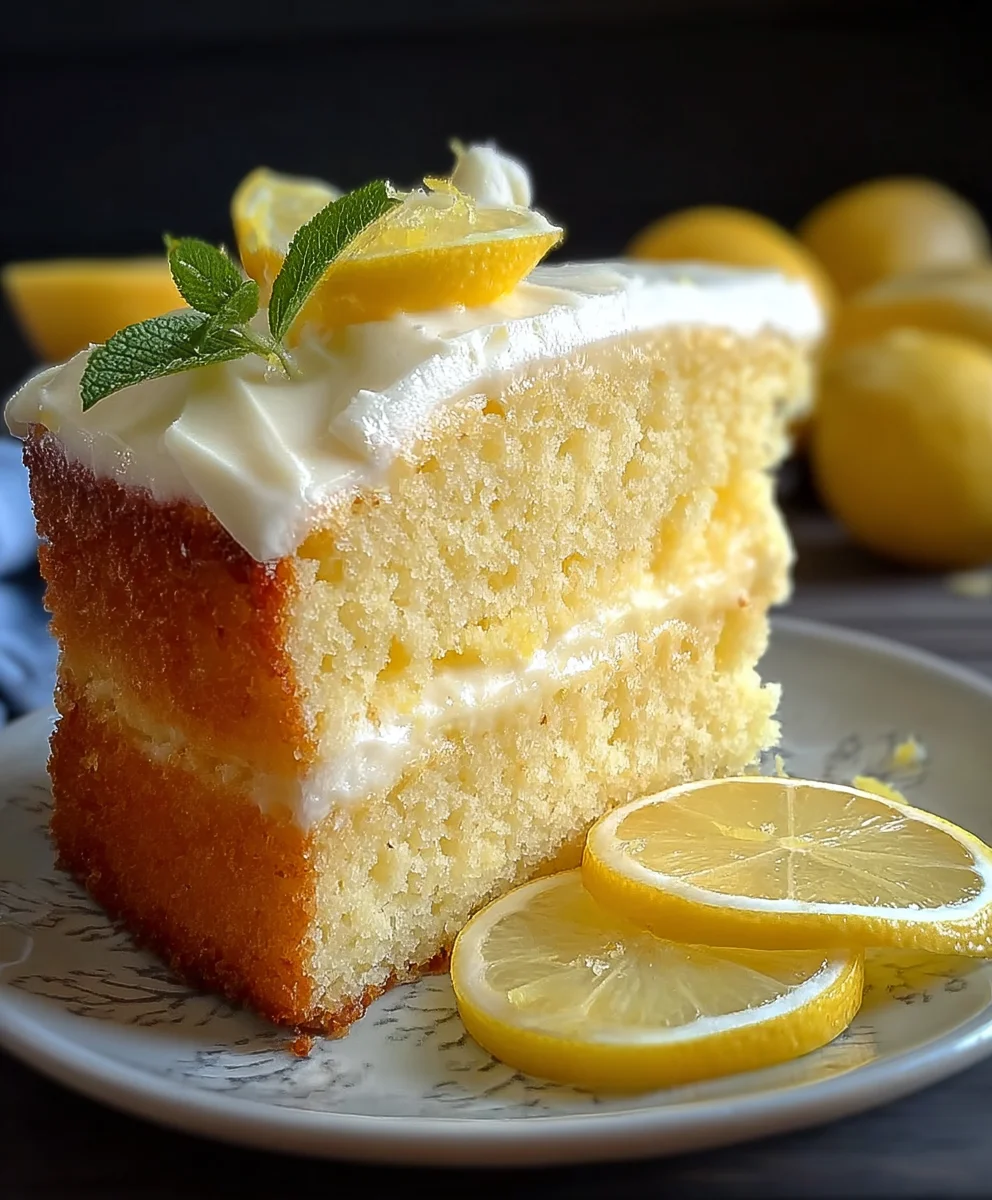
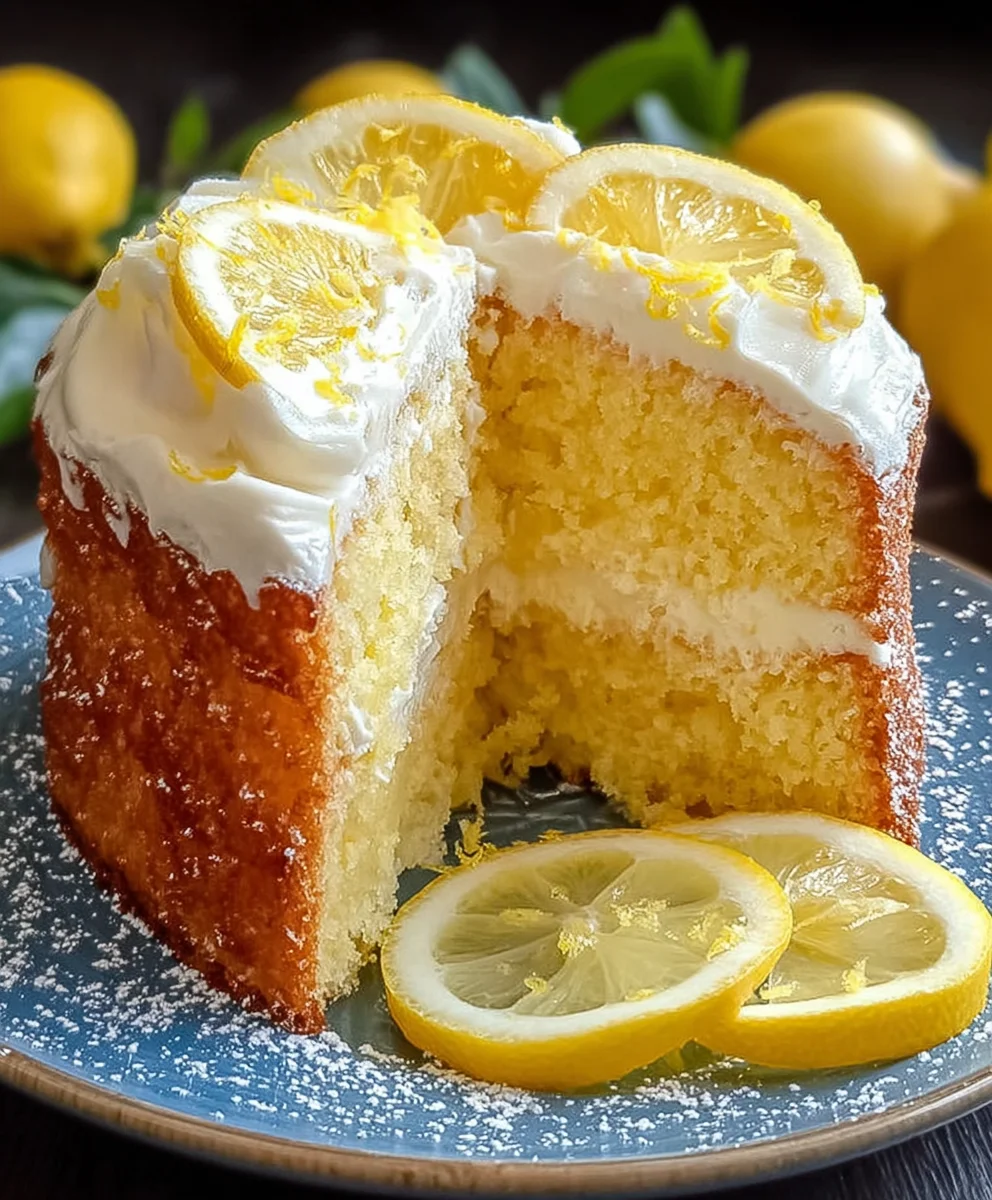
Lemon Heaven Cake, a dessert that whispers sunshine and sings with citrus delight, is more than just a treat – it’s an experience. Imagine the delicate crumb, infused with the bright, zesty essence of fresh lemons, balanced perfectly with just the right amount of sweetness. This isn’t your average, run-of-the-mill lemon cake. What truly sets our Lemon Heaven Cake apart is its incredibly moist texture, achieved through a secret technique that guarantees a melt-in-your-mouth sensation with every single bite. People adore this cake because it’s a universally pleasing flavor, elegant enough for special occasions yet comforting enough for a simple afternoon pick-me-up. It’s the kind of dessert that brings smiles to faces and creates cherished memories, evoking feelings of pure bliss and summery joy. Prepare to be transported to a state of pure, unadulterated happiness with this truly divine creation.
Ingredients:
- 1 1/2 cups all-purpose flour
- 1 1/2 teaspoons baking powder
- 1/4 teaspoon baking soda
- 1/4 teaspoon salt
- 1/2 cup unsalted butter, softened
- 1 cup granulated sugar
- 2 large eggs
- 2 tablespoons lemon zest
- 1/4 cup fresh lemon juice
- 1/2 cup buttermilk
- 1/2 cup sour cream
- 1/2 cup unsalted butter, softened (for frosting)
- 8 ounces cream cheese, softened
- 1 cup powdered sugar
- 1 tablespoon lemon zest (for frosting)
Preparing the Lemon Heaven Cake Batter
Step 1: Dry Ingredient Combination
First things first, let’s get our dry ingredients ready. In a medium-sized bowl, whisk together the 1 1/2 cups of all-purpose flour, 1 1/2 teaspoons of baking powder, 1/4 teaspoon of baking soda, and 1/4 teaspoon of salt. Whisking them thoroughly ensures that the leavening agents and salt are evenly distributed throughout the flour. This is crucial for a light and airy cake with a consistent crumb. Set this bowl aside for now.
Step 2: Creaming Butter and Sugar
Now, let’s move to the wet ingredients. In a large mixing bowl, cream together the 1/2 cup of softened unsalted butter and 1 cup of granulated sugar. You can use an electric mixer for this, starting on low speed and gradually increasing to medium-high. Creaming is the process of beating butter and sugar together until the mixture is light, fluffy, and pale yellow. This incorporates air into the batter, which will contribute significantly to the cake’s tender texture. Scrape down the sides of the bowl periodically to ensure everything is well combined. This step usually takes about 3-5 minutes.
Step 3: Incorporating Eggs and Lemon Zest
Next, we’ll add the eggs one at a time to the creamed butter and sugar mixture. Beat well after each addition to fully incorporate the egg into the batter. Once the eggs are blended, it’s time to introduce the star of our show: the lemon! Add the 2 tablespoons of lemon zest. The zest from fresh lemons is where all that vibrant citrus aroma and flavor comes from. Rub the zest between your fingertips as you add it to the bowl; this helps to release its essential oils, intensifying the lemon fragrance. Mix until just combined.
Step 4: Alternating Wet and Dry Additions
Now we’ll alternate adding our dry ingredients (from Step 1) and our liquid ingredients to the creamed mixture. We’ll start by adding about one-third of the dry ingredients and mixing on low speed until just combined. Then, add half of the liquid ingredients, which consist of the 1/4 cup fresh lemon juice, 1/2 cup buttermilk, and 1/2 cup sour cream, and mix again until just incorporated. Continue this process, adding another third of the dry ingredients, then the remaining half of the liquid ingredients, and finally, the last third of the dry ingredients. It’s important to not overmix the batter at this stage. Overmixing can develop the gluten in the flour too much, resulting in a tough cake. Stop mixing as soon as you no longer see streaks of flour. The combination of buttermilk and sour cream will contribute moisture and tenderness to the cake.
Baking the Lemon Heaven Cake
Step 5: Baking the Cake
Preheat your oven to 350°F (175°C). Grease and flour your desired cake pan(s) or line them with parchment paper. Pour the prepared batter into the prepared pan(s) and spread it evenly. Bake for approximately 30-35 minutes for a standard 8 or 9-inch cake pan, or until a wooden skewer or toothpick inserted into the center comes out clean. The exact baking time can vary depending on your oven and the size of your pan, so it’s always best to check for doneness. Once baked, let the cake cool in the pan on a wire rack for about 10-15 minutes before inverting it onto the wire rack to cool completely. Ensure the cake is entirely cool before frosting to prevent the frosting from melting.
Crafting the Luscious Lemon Cream Cheese Frosting
Step 6: Creaming Butter and Cream Cheese
While the cake is cooling, let’s prepare the glorious lemon cream cheese frosting. In a clean, large mixing bowl, cream together the 1/2 cup of softened unsalted butter and the 8 ounces of softened cream cheese. Use an electric mixer on medium speed until the mixture is smooth and well combined, with no lumps of cream cheese remaining. This is the foundation for our creamy, tangy frosting.
Step 7: Incorporating Powdered Sugar and Lemon Zest
Gradually add the 1 cup of powdered sugar to the creamed butter and cream cheese mixture, one-half cup at a time. Beat on low speed until the sugar is incorporated, then increase to medium speed and beat until the frosting is light and fluffy. Be sure to scrape down the sides of the bowl as needed. Finally, stir in the 1 tablespoon of lemon zest. This will infuse the frosting with that unmistakable bright lemon flavor and aroma, perfectly complementing the cake. Continue mixing until the zest is evenly distributed throughout the frosting. If the frosting seems too thick, you can add a tiny splash of milk or lemon juice, a teaspoon at a time, until it reaches your desired consistency. If it’s too thin, add a bit more powdered sugar.
Step 8: Assembling and Decorating
Once the Lemon Heaven Cake has cooled completely, you can begin frosting. Generously spread the luscious lemon cream cheese frosting over the top and sides of the cake using an offset spatula or a knife. You can create swirls and peaks for a decorative finish. For an extra touch of lemon-y goodness, you can garnish the top with a few extra pinches of lemon zest or even some candied lemon slices if you’re feeling fancy. Slice and enjoy this truly divine Lemon Heaven Cake!
Conclusion:
And there you have it – your very own slice of Lemon Heaven Cake! We’ve walked through each step together, from the zesty lemon zest and juice that infuses every bite to the fluffy, tender crumb that makes this cake so utterly delightful. This recipe is designed to be accessible, even for novice bakers, and the result is a showstopper that’s perfect for any occasion. Imagine the smiles it will bring to your next tea party, family gathering, or just as a sweet treat to brighten your afternoon.
For serving suggestions, consider a dollop of freshly whipped cream, a scattering of fresh berries, or a simple dusting of powdered sugar. If you’re feeling adventurous, a light lemon glaze or a cream cheese frosting would elevate this Lemon Heaven Cake to new heights of deliciousness. Don’t be afraid to experiment with variations! Adding a handful of blueberries to the batter or a hint of lavender for a floral twist can create entirely new flavor profiles. We encourage you to give this recipe a try – you might just discover your new favorite go-to dessert.
Frequently Asked Questions:
How can I make my Lemon Heaven Cake extra moist?
To ensure a moist cake, be careful not to overmix the batter once the flour is added. Also, resist the urge to overbake. Start checking for doneness a few minutes before the recipe suggests, as ovens can vary. Using good quality butter and fresh lemon juice will also contribute to a richer, moister texture.
Can I make this Lemon Heaven Cake ahead of time?
Absolutely! This cake stores beautifully. Once completely cooled, wrap it tightly in plastic wrap and store it at room temperature for up to 3 days. For longer storage, it can be refrigerated, although it might slightly firm up. Bring it back to room temperature before serving for the best texture.
What if I don’t have fresh lemons?
While fresh lemons are always best for that vibrant citrus flavor, you can use bottled lemon juice in a pinch. However, you’ll want to compensate for the lack of zest. Consider adding a teaspoon of lemon extract to the batter for a more pronounced lemon flavor. Remember, the zest is where much of the aromatic oils reside, so fresh is ideal if possible.
Lemon Heaven Cake-Your Ultimate Citrus Treat
A heavenly moist and zesty lemon cake topped with a creamy lemon cream cheese frosting, perfect for any occasion.
Ingredients
-
1 1/2 cups all-purpose flour
-
1 1/2 teaspoons baking powder
-
1/4 teaspoon baking soda
-
1/4 teaspoon salt
-
1/2 cup unsalted butter, softened
-
1 cup granulated sugar
-
2 large eggs
-
2 tablespoons lemon zest
-
1/4 cup fresh lemon juice
-
1/2 cup buttermilk
-
1/2 cup sour cream
-
1/2 cup unsalted butter, softened (for frosting)
-
8 ounces cream cheese, softened
-
1 cup powdered sugar
-
1 tablespoon lemon zest (for frosting)
Instructions
-
Step 1
In a medium bowl, whisk together flour, baking powder, baking soda, and salt. Set aside. -
Step 2
In a large bowl, cream together softened butter and granulated sugar until light and fluffy. -
Step 3
Beat in eggs one at a time, then add lemon zest and mix until combined. -
Step 4
Alternately add dry ingredients and liquid ingredients (lemon juice, buttermilk, sour cream) to the butter mixture, beginning and ending with dry ingredients. Mix until just combined, do not overmix. -
Step 5
Pour batter into prepared cake pan(s) and bake at 350°F (175°C) for 30-35 minutes, or until a toothpick inserted into the center comes out clean. Cool completely. -
Step 6
For the frosting, cream together softened butter and cream cheese until smooth. -
Step 7
Gradually add powdered sugar and beat until light and fluffy. Stir in lemon zest. -
Step 8
Frost the completely cooled cake and decorate as desired.
Important Information
Nutrition Facts (Per Serving)
It is important to consider this information as approximate and not to use it as definitive health advice.
Allergy Information
Please check ingredients for potential allergens and consult a health professional if in doubt.

Leave a Comment