
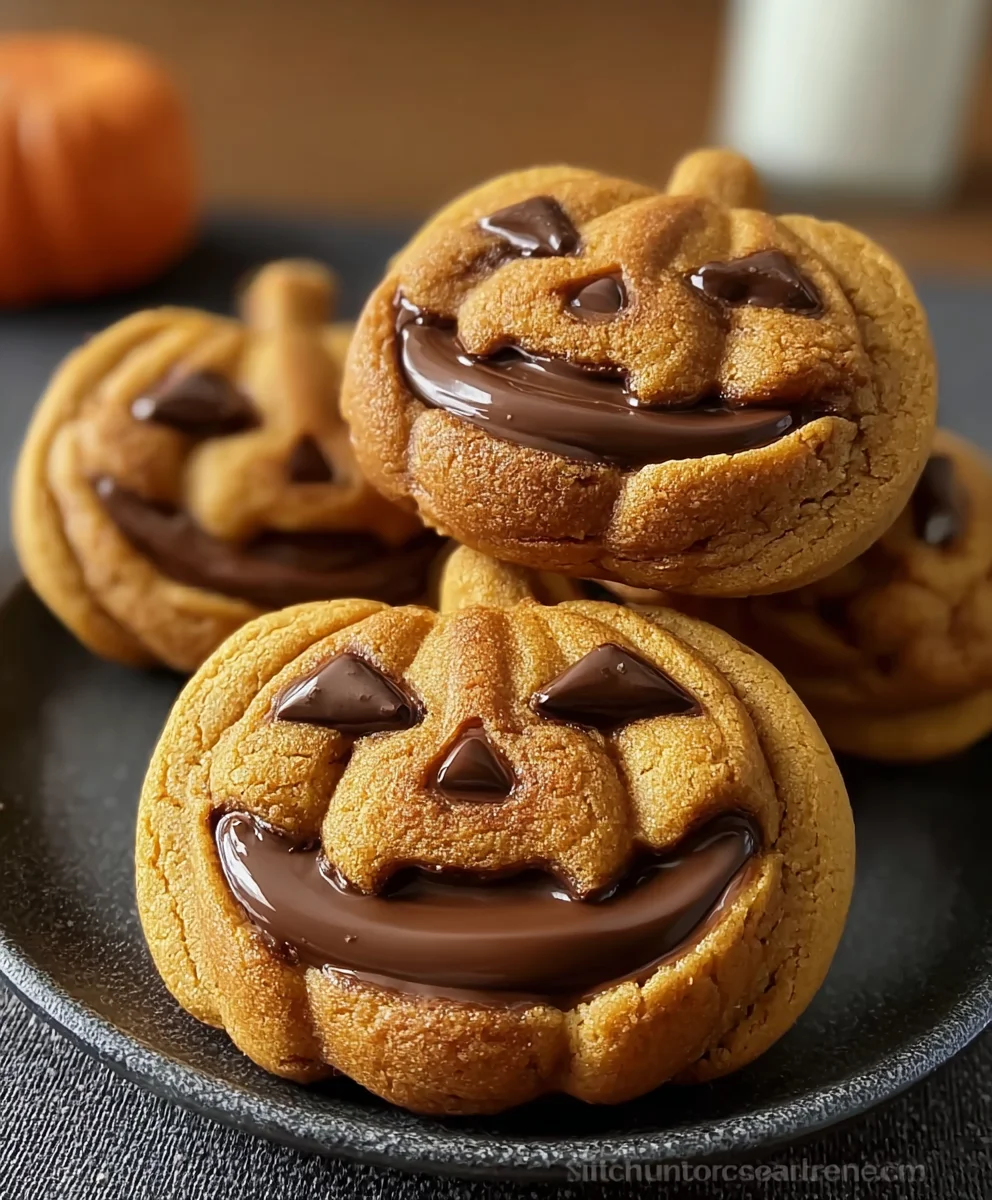
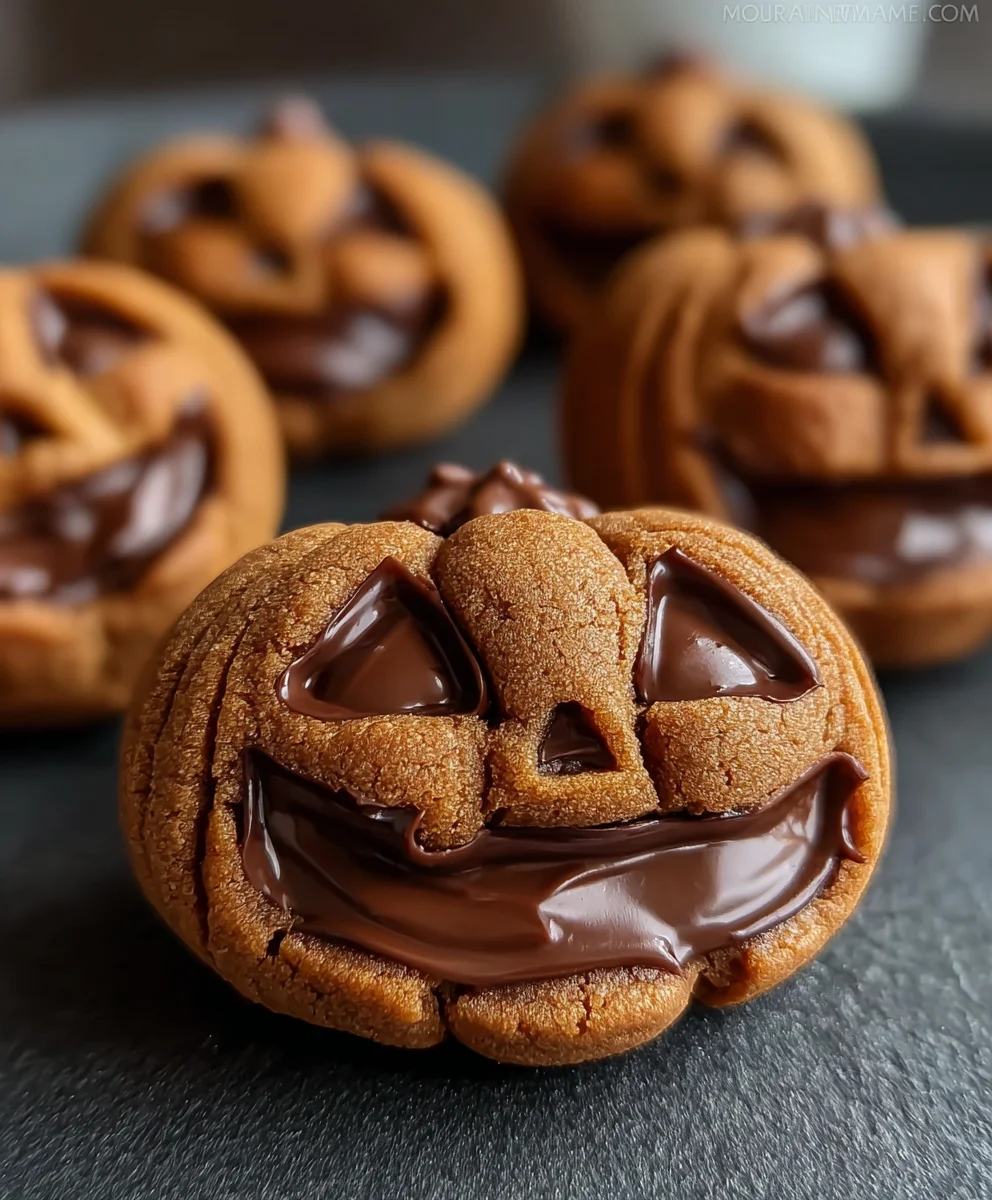
Milk Chocolate Stuffed Jack-o-lantern Cookies are more than just a sweet treat; they’re a vibrant burst of Halloween magic ready to grace your kitchen. Imagin extracte the delight on your loved ones’ faces as they bite into these cheerful creations, revealing a molten core of creamy milk chocolate. What truly sets these cookies apart is the playful design, transforming simple dough into iconic jack-o’-lantern faces, each one a miniature work of art. The combination of a perfectly baked, slightly crisp cookie exterior giving way to the gooey, rich milk chocolate within is utterly irresistible. They’re a beloved part of autumn celebratiogin extract bringing warmth and cheer to any gathering, and this recipe ensures you can recreate that quintessential Halloween spirit with ease. Prepare to be the star baker of the season with these unforgettable Milk Chocolate Stuffed Jack-o-lantern Cookies!
Ingredients:
- 1 cup unsalted butter, softened
- 1 cup granulated sugar
- 1 cup packed brown sugar
- 2 large eggs
- 1 tsp vanilla extract
- 3½ cups all-purpose flour
- 1 tsp baking powder
- ½ tsp baking soda
- ½ tsp salt
- ½ tsp ground cinnamon
- ½ tsp ground nutmeg
- ½ cup milk chocolate chips or chunks (for dough)
- 1 cup milk chocolate chips or chunks (for filling)
- Orange icing (for decoration)
- Black icing (for decoration)
Making the Cookie Dough
Step 1: Creaming the Butter and Sugars
To begin extract crafting these delightful Milk Chocolate Stuffed Jack-o’-lantern Cookies, we first need to create a rich and tender cookie base. In a large mixing bowl, combine the softened unsalted butter with the granulated sugar and the packed brown sugar. Using an electric mixer on medium speed, cream these ingredients together until the mixture is light, fluffy, and pnon-alcoholic ale yellow in color. This process incorporates air into the dough, which is crucial for achieving a good cookie texture. Scrape down the sides of the bowl occasionally to ensure all the butter and sugar are fully incorporated. This usually takes about 3-5 minutes.
Step 2: Adding the Wet Ingredients
Once your butter and sugar mixture is perfectly creamy, it’s time to add the eggs and vanilla extract. Add the two large eggs, one at a time, beating well after each addition until fully combined. The eggs help bind the dough together and add richness. Next, stir in the teaspoon of vanilla extract. Vanilla is a flavor enhancer that complements the sweetness of the chocolate and spices beautifully. Ensure everything is thoroughly mixed before moving on to the dry ingredients.
Step 3: Combining the Dry Ingredients
In a separate medium bowl, whisk together the all-purpose flour, baking powder, baking soda, salt, ground cinnamon, and ground nutmeg. Whisking these dry ingredients together ensures that the leavening agents and spices are evenly distributed throughout the flour, which will prevent pockets of baking powder or salt in your finished cookies.
Step 4: Incorporating Dry into Wet and Adding Chocolate Chunks
Gradually add the dry ingredient mixture to the wet ingredient mixture, mixing on low speed until just combined. Be careful not to overmix the dough at this stage, as overmixing can develop the gluten in the flour, resulting in tough cookies. Once the flour is mostly incorporated, gently fold in the ½ cup of milk chocolate chips or chunks using a spatula. These chocolate morsels will add little bursts of chocolatey goodness within the cookie itself.
Assembling and Baking the Jack-o’-lantern Cookies
Step 5: Chilling the Dough and Preparing for Stuffing
Now, it’s time to chill the dough to make it easier to handle and to prevent the cookies from spreading too much during baking. Divide the cookie dough in half. Wrap each half tightly in plastic wrap and refrigerate for at least 1 hour, or until firm. This chilling period is essential for creating distinct cookie shapes and for the structure of our stuffed cookies. Once chilled, take one half of the dough from the refrigerator. On a lightly floured surface, roll out the dough to about ¼ inch thickness. Using a round cookie cutter (about 3-4 inches in diameter), cut out shapes. You’ll need pairs of these circles.
Step 6: Stuffing the Cookies with Chocolate Filling
For the filling, take the second half of the chilled cookie dough. Roll small portions of this dough into balls, about 1 tablespoon each. Then, flatten each ball slightly. Place a generous tablespoon of the remaining 1 cup of milk chocolate chips or chunks in the center of one of your rolled-out cookie dough circles. Place one of the flattened dough balls on top of the chocolate chips. Now, carefully place a second rolled-out cookie dough circle on top of the dough ball. Gently press the edges of the two top cookie circles together to seal in the chocolate filling. You can use a fork to crimp the edges for extra security and a decorative touch. Repeat this process until all your dough is used, creating your stuffed cookie pairs. It’s important to get a good seal to prevent the melty chocolate from leaking out during baking.
Step 7: Baking to Golden Perfection
Preheat your oven to 350°F (175°C). Line baking sheets with parchment paper to prevent sticking and to ensure easy cleanup. Carefully place the stuffed cookie dough rounds onto the prepared baking sheets, leaving about 2 inches of space between each cookie to allow for slight spreading. Bake for 10-12 minutes, or until the edges are lightly golden brown and the centers are set. The exact baking time will depend on your oven and the size of your cookies. Keep a close eye on them, as you don’t want them to overbake and become dry.
Decorating Your Jack-o’-lantern Cookies
Step 8: Cooling and Decorating
Once baked, allow the cookies to cool on the baking sheets for a few minutes before transferring them to a wire rack to cool completely. This is a crucial step; trying to decorate warm cookies will melt the icing and make a mess. Once the cookies are entirely cool, it’s time for the fun part: decorating! Use the orange icing to cover the tops of your cookies, mimicking the vibrant color of a jack-o’-lantern. Allow the orange icing to set slightly before moving on.
Step 9: Adding the Jack-o’-lantern Faces
With the black icing, carefully draw the classic jack-o’-lantern features onto the orange-frosted cookies. You can create triangular eyes, a triangle nose, and a jagged mouth. Feel free to get creative with your designs! You can make each cookie unique with different facial expressions. Let the black icing dry completely before storing or serving these festive Milk Chocolate Stuffed Jack-o’-lantern Cookies. These are perfect for Halloween parties or just a fun seasonal treat!
Conclusion:
You’ve now learned how to create delicious Milk Chocolate Stuffed Jack-o-lantern Cookies, a festive treat perfect for any autumn gathering or a fun family baking project. These cookies are wonderfully adaptable and are sure to bring smiles with their adorable presentation and rich, gooey filling. Don’t be afraid to experiment and make them your own!
For serving, these cookies are fantastic on their own, perhaps with a glass of cold milk or a warm mug of apple cider. They also make a delightful addition to a Halloween dessert platter, piled high alongside other seasonal goodies. Consider dusting them with a little powdered sugar for an extra touch of wintery magic.
When it comes to variations, feel free to swap out the milk chocolate for dark chocolate chips or even a caramel-filled center. You could also experiment with adding a pinch of cinnamon or nutmeg to the cookie dough for a warmer spice profile. The possibilities are endless!
I encourage you to get into the kitchen and whip up a batch of these Milk Chocolate Stuffed Jack-o-lantern Cookies. The process is rewarding, and the result is a truly memorable treat that captures the spirit of the season. Happy baking!
Frequently Asked Questions:
Q1: Can I make the dough for Milk Chocolate Stuffed Jack-o-lantern Cookies ahead of time?
Absolutely! The dough can be made up to 2 days in advance and stored in the refrigerator. Wrap it tightly in plastic wrap to prevent it from drying out. Allow it to soften slightly at room temperature for about 15-20 minutes before shaping and baking for the best results.
Q2: My Jack-o-lantern cookies aren’t holding their shape. What can I do?
If your cookies are spreading too much, it could be due to a few reasons. Ensure your butter and cream cheese are properly chilled when you start. Also, chilling the formed cookie dough balls for at least 30 minutes before baking can significantly help them maintain their shape and prevent excess spreading, resulting in a thicker, more substantial cookie.
Milk Chocolate Stuffed Jack-o-lantern Cookies
Delightful milk chocolate stuffed cookies shaped and decorated like jack-o’-lanterns, perfect for Halloween.
Ingredients
-
1 cup unsalted butter, softened
-
1 cup granulated sugar
-
1 cup packed brown sugar
-
2 large eggs
-
1 tsp vanilla extract
-
3½ cups all-purpose flour
-
1 tsp baking powder
-
½ tsp baking soda
-
½ tsp salt
-
½ tsp ground cinnamon
-
½ tsp ground nutmeg
-
½ cup milk chocolate chips or chunks (for dough)
-
1 cup milk chocolate chips or chunks (for filling)
-
Orange icing (for decoration)
-
Black icing (for decoration)
Instructions
-
Step 1
In a large mixing bowl, cream together softened unsalted butter, granulated sugar, and packed brown sugar until light, fluffy, and pale yellow. Scrape down the sides of the bowl as needed. This should take about 3-5 minutes. -
Step 2
Add the two large eggs one at a time, beating well after each addition. Stir in the vanilla extract. Mix thoroughly. -
Step 3
In a separate bowl, whisk together all-purpose flour, baking powder, baking soda, salt, ground cinnamon, and ground nutmeg. Ensure dry ingredients are evenly distributed. -
Step 4
Gradually add the dry ingredients to the wet ingredients, mixing on low speed until just combined. Do not overmix. Gently fold in ½ cup of milk chocolate chips or chunks. -
Step 5
Divide the dough in half, wrap each half tightly in plastic wrap, and refrigerate for at least 1 hour until firm. Roll out one half to ¼ inch thickness on a lightly floured surface and cut out circles using a 3-4 inch round cookie cutter. You’ll need pairs of these circles. -
Step 6
Take the second half of the chilled dough and roll small portions into balls (about 1 tablespoon each), then flatten slightly. Place a generous tablespoon of the remaining 1 cup of milk chocolate chips or chunks in the center of one cookie dough circle. Top with a flattened dough ball. Place a second cookie dough circle on top and gently press the edges to seal the filling. Crimp edges with a fork if desired. -
Step 7
Preheat oven to 350°F (175°C). Line baking sheets with parchment paper. Place stuffed cookie rounds onto baking sheets, leaving 2 inches between cookies. Bake for 10-12 minutes, or until edges are lightly golden brown and centers are set. -
Step 8
Allow cookies to cool on baking sheets for a few minutes, then transfer to a wire rack to cool completely. Once cooled, cover the tops of the cookies with orange icing, mimicking a jack-o’-lantern. Let the icing set slightly. -
Step 9
Using black icing, draw jack-o’-lantern features such as triangular eyes, a triangle nose, and a jagged mouth onto the orange-frosted cookies. Allow the black icing to dry completely before storing or serving.
Important Information
Nutrition Facts (Per Serving)
It is important to consider this information as approximate and not to use it as definitive health advice.
Allergy Information
Please check ingredients for potential allergens and consult a health professional if in doubt.
Leave a Comment