
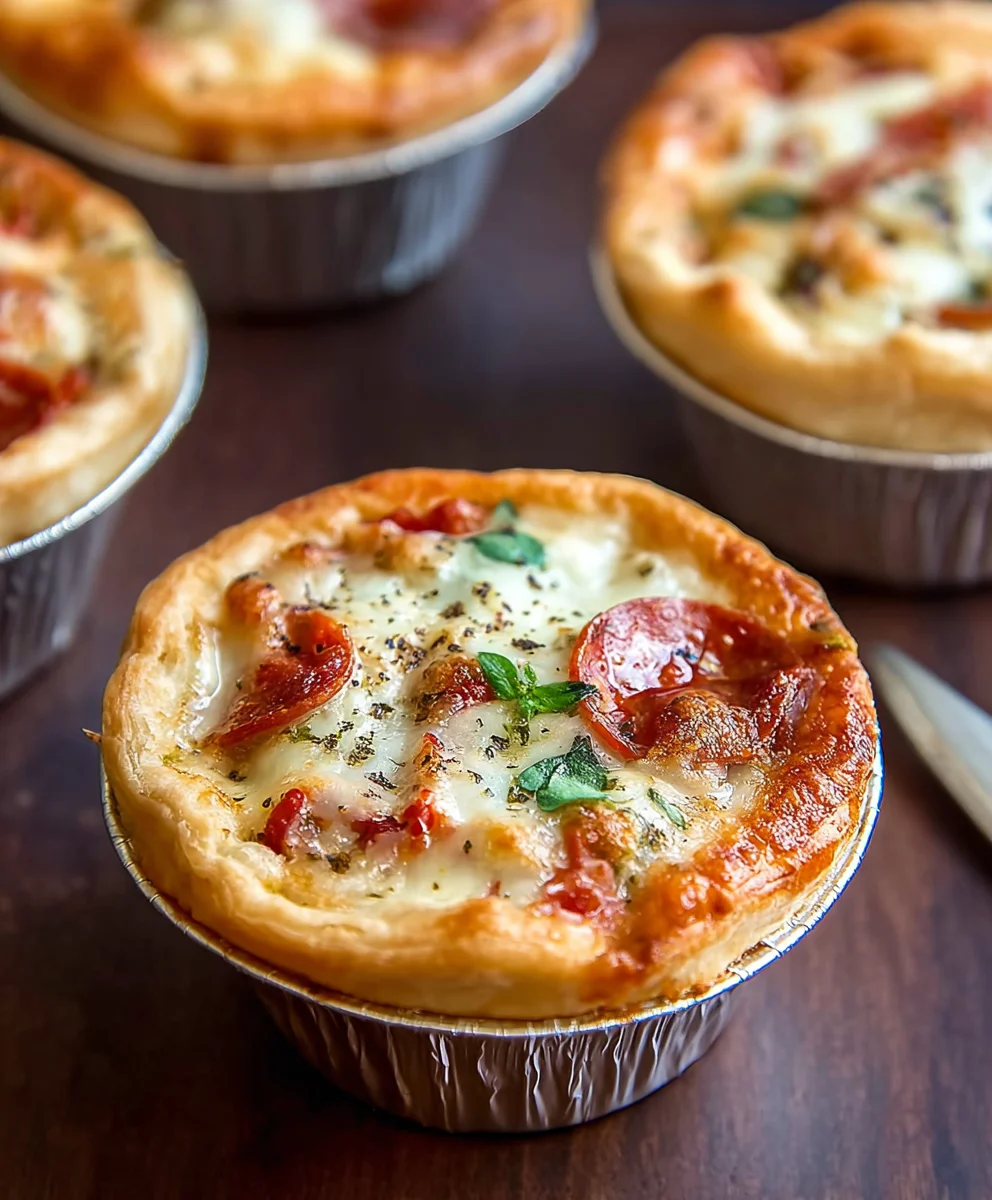
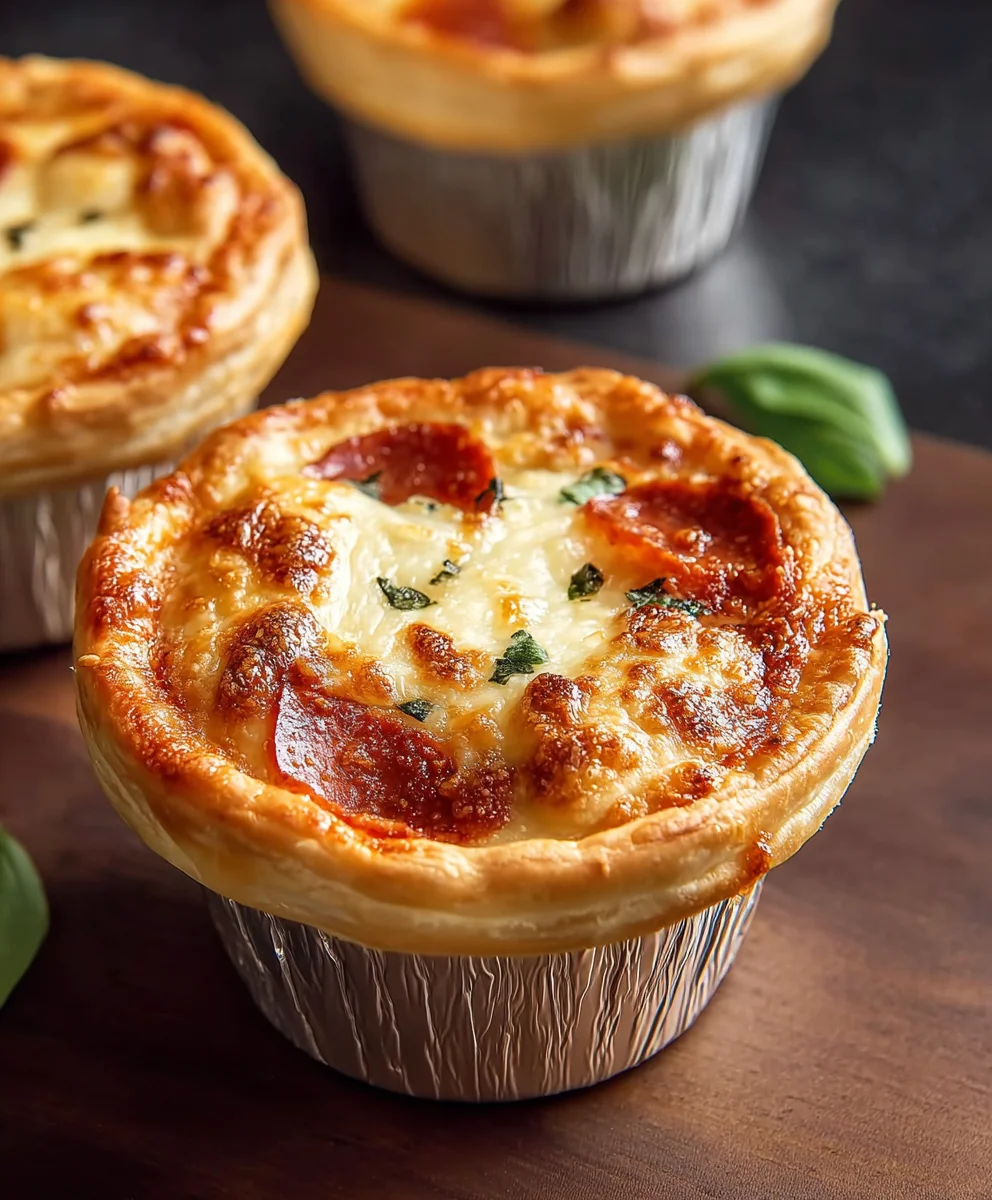
Mini Pizza Pot Pies are not just a meal; they’re a delightful explosion of comfort and convenience in every bite. We all crave that familiar, savory goodness of pizza, but sometimes the full-size experience feels a little too much, or frankly, too much effort. That’s where these adorable little wonders shine. They capture all the beloved flavors of your favorite pizza – tangy tomato sauce, gooey melted cheese, and your choice of delicious toppings – all nestled within a flaky, golden crust. What makes Mini Pizza Pot Pies truly special is their individual portioning, making them perfect for parties, picky eaters, or even a solo treat when you want something satisfying without the fuss. Imagin extracte the joy of cracking open that warm, buttery crust to reveal a molten cheesy center; it’s pure culinary bliss. Get ready to fall in love with this fun and flavorful twist on a classic!
Ingredients:
- 8 Refrigerated Biscuits (from a 16 ounce package)
- ¼ cup Pasta Sauce or Pizza Sauce (meatless variety)
- 3 ounces Beef Beef Pepperoni, chopped
- 7-8 ounces Shredded Mozzarella Cheese
- 1 tablespoon Butter, softened (not melted)
- ½ tablespoon Olive Oil
- ¼ teaspoon Salt
- ¼ teaspoon Garlic Powder
- ¼ teaspoon Italian Seasoning (plus extra for topping, if desired)
- Pinch of Black Pepper
- Cooking Spray or oil for greasing the muffin tin
Preparing Your Mini Pizza Pot Pies
Preheating and Tin Preparation
Before we get started on assembling these delightful Mini Pizza Pot Pies, it’s essential to get your oven preheated and your muffin tin ready. This ensures even cooking and easy removal of your finished pies. Preheat your oven to 375°F (190°C). While the oven is warming up, take your cooking spray or a little bit of oil and thoroughly grease each cup of a standard 12-cup muffin tin. Make sure to get into all the nooks and crannies, as this will prevent the biscuit dough from sticking and will make cleanup a breeze. If you don’t have cooking spray, a pastry brush dipped in olive oil or melted butter works perfectly well. A well-greased tin is key to achieving those lovely, golden-brown edges on your pot pies.
Assembling the Mini Pizza Pot Pies
Step 1: Creating the Base and Sides
Now for the fun part – assembling these adorable Mini Pizza Pot Pies! Open the package of refrigerated biscuits. You’ll want to separate each biscuit and then gently flatten them out. You can do this with your hands or a rolling pin, aiming for a circle roughly 4-5 inches in diameter. The goal here is to make them thin enough to fit into the muffin tin cups and come up the sides to form a crust, but not so thin that they tear easily. Carefully press one flattened biscuit into each greased muffin tin cup. Make sure the biscuit dough goes up the sides of the tin, creating a little pocket for your delicious filling. Don’t worry if it’s not perfectly neat; a rustic look is part of the charm of these pot pies. If a biscuit seems a little small for a cup, you can stretch it gently or even overlap a small piece to ensure full coverage.
Step 2: Mixing the Savory Filling
In a medium bowl, we’ll combine all the yummy ingredients that will make up the heart of your Mini Pizza Pot Pies. Add the ¼ cup of meatless pasta sauce or pizza sauce to the bowl. Next, toss in the 3 ounces of chopped beef pepperonieroni. Sprinkle in the ¼ teaspoon of salt, ¼ teaspoon of garlic powder, ¼ teaspoon of Italian seasoning, and a pinch of black pepper. Now, add the softened tablespoon of butter and the ½ tablespoon of olive oil. The butter adds a lovely richness and helps bind the ingredients, while the olive oil adds a touch of authentic Italian flavor and helps the flavors meld together beautifully. Gently stir everything together until all the ingredients are well combined. You want to ebeef pepperoni pepperoni is evenly distributed throughout the sauce mixture.
Step 3: Layering the Cheesy Goodness
With your biscuit bases prepped in the muffin tin, it’s time to add the delicious filling. Spoon about 1-2 tablespoons of the prepared filling mixture from Step 2 into each biscuit-lined muffin cup. Don’t overfill them at this stage; remember, we still need to add cheese and potentially a top crust. Now, generously sprinkle the 7-8 ounces of shredded mozzarella cheese over the filling in each cup. You can divide the cheese as evenly as possible. Some people like to put a little cheese on the bottom, then the filling, and then more cheese on top, while others prefer a thick layer of cheese over everything. Either way, don’t be shy with the mozzarella – it’s what makes these pot pies wonderfully gooey and irresistible.
Step 4: Sealing the Pot Pies (Optional Top Crust)
Now, you have a couple of options for sealing your Mini Pizza Pot Pies. For an open-faced treat, you can leave them as is. However, for a more traditional pot pie experience, we’ll create a top crust. Take another flattened biscuit (you may need to gently stretch or cut it to size) and place it over the filling and cheese in each muffin cup. Press the edges of the top biscuit down onto the edges of the bottom biscuit to seal them together. You can use your fingers or the tines of a fork to crimp the edges for a secure seal and a decorative finish. If you’re making open-faced pies, you might want to add a little extra mozzarella cheese on top at this stage before baking. If you are creating a top crust, you can make a small slit or two in the top of each biscuit with a sharp knife to allow steam to escape during baking. This prevents the pot pies from bursting and helps them cook evenly.
Step 5: Baking to Golden Perfection
Once your Mini Pizza Pot Pies are assembled and senon-alcoholic aled (or left open-faced with extra cheese), they are ready for the oven. Carefully place the muffin tin into the preheated 375°F (190°C) oven. Bake for approximately 15-20 minutes, or until the biscuit crust is golden brown and puffed up, and the cheese is melted and bubbly. The exact baking time can vary depending on your oven, so keep an eye on them. If you notice the tops are browning too quickly but the inside isn’t cooked, you can loosely tent the muffin tin with aluminum foil. Once they are done, carefully remove the muffin tin from the oven. Allow the Mini Pizza Pot Pies to cool in the tin for about 5-10 minutes. This resting period is crucial as it allows the filling to set slightly, making them easier to remove from the tin without falling apart.
Serving Your Mini Masterpieces
After the brief cooling period, use a small spatula or a butter knife to gently loosen the edges of each Mini Pizza Pot Pie from the muffin tin. Carefully lift them out. If you opted for the optional extra Italian seasoning, sprinkle a little bit over the hot pot pies now for an extra burst of flavor and visual appeal. Serve them warm and enjoy these fun, bite-sized versions of your favorite comfort food. They’re perfect for snacks, appetizers, or even a quick and easy meal!
Conclusion:
There you have it – your guide to creating delicious and crowd-pleasing Mini Pizza Pot Pies! We’ve walked through each step to ensure you can confidently whip up these delightful individual pizzas in a flaky crust. These Mini Pizza Pot Pies are perfect for a fun family dinner, a casual get-together, or even as a creative lunchbox surprise. Don’t be afraid to get creative with your fillings; the possibilities are truly endless!
For serving, these are fantastic on their own, but they also pair wonderfully with a fresh side salad dressed with your favorite vinaigrette or a bowl of hearty tomato soup. You can also offer a variety of dipping sauces like marinara, ranch, or garlic butter on the side. When it comes to variations, consider adding different cheeses like mozzarella, provolone, or a sprinkle of Parmesan. Feel free to experiment with toppings like beef pepperoni, mushrooms, onions, bell peppers, olives, or even cooked sausage or chicken. These Mini Pizza Pot Pies are incredibly versatile and adaptable to any palate!
I truly hope you enjoy making and devouring these adorable little pies. They’re a simple yet incredibly satisfying way to enjoy the flavors of pizza in a unique and fun format. So, preheat your ovens and get ready to impress yourself and your loved ones with these amazing Mini Pizza Pot Pies!
Frequently Asked Questions:
Can I make the crust ahead of time?
Yes, absolutely! You can prepare the pie crust dough a day or two in advance and store it in the refrigerator. Ensure it’s well-wrapped to prevent it from drying out. You can also par-bake the crusts slightly before filling them if you want extra crispiness, though it’s not essential for this recipe.
What are some good vegetarian filling options for Mini Pizza Pot Pies?
For delicious vegetarian Mini Pizza Pot Pies, try a mix of sautéed mushrooms, onions, bell peppers, and spinach. You could also add some black olives and artichoke hearts. A blend of mozzarella and provolone cheese will complement these vegetables beautifully. Ensure your vegetables are cooked slightly before adding them to the pies to remove excess moisture.
How should I store leftover Mini Pizza Pot Pies?
Leftover Mini Pizza Pot Pies can be stored in an airtight container in the refrigerator for up to 3-4 days. To reheat, you can place them in a preheated oven at around 350°F (175°C) for 10-15 minutes, or until heated through and the crust is re-crisped. You can also reheat them in an air fryer or microwave, though the crust may be less crispy.
Mini Pizza Pot Pies – Easy Beef Topping
Adorable and easy mini pizza pot pies made with refrigerated biscuits and a savory beef pepperoni filling, perfect for snacks, appetizers, or a quick meal.
Ingredients
-
8 Refrigerated Biscuits (from a 16 ounce package)
-
¼ cup Pasta Sauce or Pizza Sauce (meatless variety)
-
3 ounces Beef Pepperoni, chopped
-
7-8 ounces Shredded Mozzarella Cheese
-
1 tablespoon Butter, softened
-
½ tablespoon Olive Oil
-
¼ teaspoon Salt
-
¼ teaspoon Garlic Powder
-
¼ teaspoon Italian Seasoning
-
Pinch of Black Pepper
-
Cooking Spray or oil for greasing the muffin tin
Instructions
-
Step 1
Preheat oven to 375°F (190°C). Thoroughly grease each cup of a standard 12-cup muffin tin with cooking spray or oil. -
Step 2
Separate refrigerated biscuits, gently flatten each into a circle about 4-5 inches in diameter. Press one flattened biscuit into each greased muffin tin cup, ensuring it comes up the sides to form a crust. -
Step 3
In a medium bowl, combine ¼ cup meatless pasta or pizza sauce, 3 ounces chopped beef pepperoni, ¼ teaspoon salt, ¼ teaspoon garlic powder, ¼ teaspoon Italian seasoning, pinch of black pepper, 1 tablespoon softened butter, and ½ tablespoon olive oil. Stir until well combined. -
Step 4
Spoon 1-2 tablespoons of the filling mixture into each biscuit-lined muffin cup. Generously sprinkle 7-8 ounces of shredded mozzarella cheese over the filling. -
Step 5
For a top crust, place another flattened biscuit over the filling and cheese in each cup. Press the edges to seal and crimp with fingers or a fork. Make a small slit in the top of each for steam escape. For open-faced pies, add extra cheese on top. -
Step 6
Bake in the preheated oven for 15-20 minutes, or until the crust is golden brown and puffed, and the cheese is melted and bubbly. Cool in the tin for 5-10 minutes before removing.
Important Information
Nutrition Facts (Per Serving)
It is important to consider this information as approximate and not to use it as definitive health advice.
Allergy Information
Please check ingredients for potential allergens and consult a health professional if in doubt.


Leave a Comment