
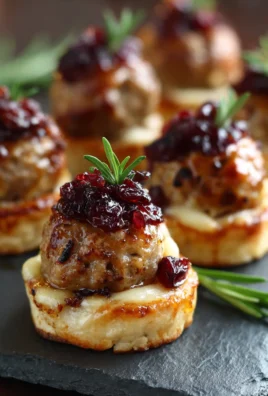
Philly Cheesesteak Bombs are an explosion of flavor and comfort, a handheld marvel that captures the essence of a classic Philly cheesesteak in a delightful, bite-sized package. If you’ve ever craved that irresistible combination of thinly sliced steak, melted cheese, and savory onions but wanted a fun, portable alternative, then these are about to become your new obsession. People adore them because they deliver all the iconic taste without the need for a fork and knife, making them perfect for game nights, parties, or even just a quick and satisfying weeknight meal. What truly sets these Philly Cheesesteak Bombs apart is their ingenious construction – think fluffy dough encasing that gooey, savory filling, creating a perfect balance of textures. Each bite is a warm, cheesy hug, a testament to why this dish has quickly earned its beloved status.

Ingredients:
- Vegetable oil for deep frying
- 1 tube (12 oz) refrigerated buttermilk biscuits
- 1/2 cup finely chopped red onion
- 1 cup chopped cooked steak pieces
- 5 oz sharp white cheddar, cut into 10 chunks
- 5 strips thick-cut bacon
Preparing Your Philly Cheesesteak Bombs
Cooking the Bacon
The first crucial step to achieving that irresistible flavor is to cook the bacon until it’s wonderfully crispy. I like to start by laying the thick-cut bacon strips in a cold skillet. This allows the fat to render out slowly, resulting in perfectly crisp bacon without burning. Cook over medium heat, flipping occasionally, until each strip is golden brown and has a satisfying crunch. Once cooked, transfer the bacon to a plate lined with paper towels to drain off any excess grease. After it has cooled slightly, crumble the bacon into small pieces. This concentrated bacon flavor will be a star player in our Philly Cheesesteak Bombs.
Sautéing the Aromatics and Steak
Now, let’s build the heart of our filling. In the same skillet you used for the bacon (you can drain most of the bacon fat, leaving just a tablespoon or two for flavor), add the finely chopped red onion. Sauté the onion over medium heat until it becomes softened and translucent, which usually takes about 5 to 7 minutes. You’re looking for that sweet, mellow onion flavor to emerge. Once the onions are tender, add the chopped cooked steak pieces to the skillet. Stir everything together and cook for another 2-3 minutes, just to warm the steak through and allow the flavors to meld. Season this mixture lightly with salt and pepper if you desire, keeping in mind that the cheese and bacon will also contribute saltiness.
Assembling the Biscuit Shells
This is where the magic of the “bombs” begins! Open the tube of refrigerated buttermilk biscuits. You’ll want to flatten each biscuit slightly with your hands. The goal is to create a small, pliable disc. Once flattened, take one chunk of the sharp white cheddar cheese and place it in the center of the flattened biscuit. Spoon a generous portion of the steak and onion mixture over the cheese. Finally, sprinkle some of the crumbled crispy bacon on top of the steak mixture. Now, carefully gather the edges of the biscuit dough up and around the filling, pinching them together securely to completely seal the filling inside. This is key to preventing any of that delicious filling from escaping during the frying process. Ensure the seal is tight – a good pinch here will make all the difference! You want to form a ball-like shape, enclosing all the wonderful ingredients.
Deep Frying to Golden Perfection
It’s time to get these Philly Cheesesteak Bombs ready for their crispy debut. Pour enough vegetable oil into a deep, heavy-bottomed pot or Dutch oven to reach a depth of about 2-3 inches. Heat the oil over medium-high heat until it reaches approximately 350°F (175°C). You can test the oil’s temperature by dropping a tiny piece of biscuit dough into it; if it sizzles and floats immediately, the oil is ready. Carefully, using a slotted spoon or spider strainer, lower a few biscuit bombs into the hot oil at a time. Don’t overcrowd the pot, as this can cause the oil temperature to drop too much, leading to greasy bombs. Fry them for about 3-5 minutes per side, turning them occasionally, until they are a deep golden brown and puffed up. They should sound delightfully crispy when tapped.
Draining and Serving Your Bombs
Once your Philly Cheesesteak Bombs have achieved that perfect golden hue, carefully remove them from the hot oil using your slotted spoon or spider strainer. Transfer them to a wire rack set over a baking sheet or a plate lined with paper towels. This allows any excess oil to drain away, ensuring a crisp exterior. Let them cool for just a minute or two – they will be very hot inside! Serve your Philly Cheesesteak Bombs immediately while they are still warm and the cheese is wonderfully gooey. They make an incredible appetizer or even a fun, savory snack. You can serve them with your favorite dipping sauce, such as ketchup, ranch dressing, or even a spicy mustard, if you like! Enjoy the explosion of flavor from the savory steak, sweet onion, crispy bacon, and melted cheddar, all wrapped in a light, crispy biscuit shell.

Conclusion:
And there you have it – your very own batch of delicious Philly Cheesesteak Bombs! We’ve walked through every step, from selecting the perfect cut of steak to achieving that golden-brown, irresistible crust. These little flavor explosions are perfect for game day, a quick and satisfying appetizer, or even a fun weeknight meal. The combination of tender steak, melted cheese, and savory onions, all encased in a buttery pastry, is truly something special. Don’t be afraid to get creative with your fillings and enjoy the process of creating these amazing bites. I hope you find as much joy in making and eating these as I do!
For serving, consider pairing your Philly Cheesesteak Bombs with a side of marinara sauce for dipping, a crisp green salad, or even some extra seasoned fries. They also make a fantastic addition to any party spread. If you’re looking to switch things up, try adding sautéed mushrooms, bell peppers, or even a touch of jalapeño for a bit of heat. The possibilities are endless!
Frequently Asked Questions:
Can I make the Philly Cheesesteak Bombs ahead of time?
Yes! You can prepare the filling and assemble the bombs up to 24 hours in advance. Store them, unbaked, in an airtight container in the refrigerator. You may need to add a few extra minutes to the baking time if baking from cold.
What is the best type of cheese for Philly Cheesesteak Bombs?
While provolone is a classic choice, sharp cheddar, Monterey Jack, or a blend of your favorite melting cheeses will also work beautifully. The key is to use a cheese that melts well and complements the savory steak and onion filling.
Philly Cheesesteak Bombs- Easy Beef & Cheese Bites
Easy and delicious beef and cheese bites wrapped in biscuit dough and deep-fried to golden perfection.
Ingredients
-
Vegetable oil for deep frying
-
1 tube (12 oz) refrigerated buttermilk biscuits
-
1/2 cup finely chopped red onion
-
1 cup chopped cooked beef pieces
-
5 oz sharp white cheddar, cut into 10 chunks
-
5 strips thick-cut beef bacon
Instructions
-
Step 1
Cook the beef bacon in a cold skillet over medium heat until crispy. Drain on paper towels and crumble once cooled. -
Step 2
Sauté finely chopped red onion in the same skillet with a tablespoon or two of bacon fat until softened and translucent (5-7 minutes). Add chopped cooked beef and cook for another 2-3 minutes to warm through. Season lightly with salt and pepper if desired. -
Step 3
Flatten each biscuit slightly. Place a chunk of white cheddar in the center, top with a generous portion of the beef and onion mixture, and sprinkle with crumbled beef bacon. -
Step 4
Carefully gather the edges of the biscuit dough around the filling, pinching securely to seal into a ball shape. -
Step 5
Heat vegetable oil in a deep pot to 350°F (175°C). Carefully lower a few bombs at a time into the hot oil and fry for 3-5 minutes per side, until deep golden brown and puffed up. -
Step 6
Remove bombs from oil using a slotted spoon and drain on a wire rack or paper towels. Let cool for a minute or two before serving warm.
Important Information
Nutrition Facts (Per Serving)
It is important to consider this information as approximate and not to use it as definitive health advice.
Allergy Information
Please check ingredients for potential allergens and consult a health professional if in doubt.


Leave a Comment