
Baked Protein Pancake Bowls- great for meal prep and no banana needed! Have you ever craved a fluffy, satisfying pancake but dreaded the aftermath of greasy pans and messy cleanup? Or perhaps you’re looking for a breakfast that fuels your day without relying on the usual suspects like banana? Well, get ready to revolutionize your mornings because these Baked Protein Pancake Bowls are about to become your new best friend. We all love pancakes for their comforting, breakfast-y goodness, but the “no banana needed” aspect of this recipe is a game-changer, opening up a world of flavor possibilities and catering to those who find banana overpowering or have dietary restrictions. What truly makes these bowls special is their incredible versatility and the sheer ease of preparation – imagine a whole batch of delicious, protein-packed pancakes ready to grab and go, perfectly portioned and tasting amazing throughout the week. They’re the ultimate solution for busy individuals seeking a healthy, convenient, and utterly delightful breakfast that’s also incredibly forgiving and adaptable.
Ingredients:
- 1 egg
- 50 g yogurt (vanilla or unflavoured)
- 70 ml milk (I use soy or almond but any milk will work)
- 35 g flour (all purpose)
- 25 g protein powder
- 5 g zero calorie granulated sweetener (or sweetener of choice, 1 tsp)
- 1/2 tsp baking powder
Getting Started: The Batter Base
The foundation of these delicious protein pancake bowls is a simple, yet effective batter that comes together in minutes. We’re aiming for a smooth consistency that bakes up light and fluffy, perfect for holding all your favorite toppings. First things first, let’s preheat your oven to 375°F (190°C). This ensures our bowls bake evenly and quickly. While the oven heats, grab a medium-sized mixing bowl. Crack your single egg into the bowl. A good whisking is key here to break up the yolk and white, creating a uniform base for our other wet ingredients. Next, add the yogurt. I find that using vanilla yogurt adds a subtle sweetness and helps with that fluffy texture, but unflavoured works just as well if you prefer to control the sweetness entirely with your sweetener. Pour in your milk – the 70ml is measured to give us the perfect pourable consistency without being too thin. Whether you’re a soy, almond, or dairy milk fan, any kind will do the trick here. Whisk everything together until it’s well combined. You should have a pale, slightly opaque liquid that’s ready for the dry ingredients.
Incorporating the Dry Ingredients
Now it’s time to introduce the dry elements that will transform our liquid mixture into a pancake batter. In a separate, smaller bowl, combine your flour, protein powder, zero-calorie granulated sweetener, and baking powder. It’s important to whisk these dry ingredients together thoroughly before adding them to the wet mixture. This step is crucial for ensuring that the baking powder is evenly distributed, which will help our pancake bowls rise beautifully and avoid any dense pockets. The protein powder you choose can influence the final flavor and texture, so feel free to experiment with your favorite variety. If you don’t have granulated sweetener, a teaspoon of honey or maple syrup could also work, though it will alter the nutritional profile slightly. Once your dry ingredients are well mixed, we’ll gently incorporate them into the wet ingredients. The key here is not to overmix. Add the dry mixture to the wet ingredients in the larger bowl. Use a spatula or a whisk to gently fold everything together until just combined. A few small lumps are perfectly fine; in fact, overmixing can develop the gluten in the flour, leading to a tougher pancake bowl. We want tender and light!
Preparing for Baking
With your batter perfectly mixed, it’s time to get it ready for the oven. This recipe is designed to be baked in individual bowls, making them ideal for portion control and meal prep. You’ll need oven-safe ramekins or small bowls. Four to six ramekins, depending on their size, should be sufficient for this batch. Lightly grease the inside of each ramekin. You can use a little cooking spray, butter, or coconut oil. This step is essential to prevent the pancake bowls from sticking, ensuring they release cleanly once baked. Carefully divide the batter evenly among the prepared ramekins. You want to fill each ramekin about two-thirds of the way full. This leaves enough room for the batter to rise as it bakes without overflowing. If you’re making these for meal prep, you can also pour the batter into larger, oven-safe containers if you prefer one big baked pancake that you can then portion out later. Just ensure the container is deep enough to hold the batter and allow for a good rise.
The Baking Process
Now for the exciting part – turning that batter into golden-brown protein pancake bowls! Carefully place the filled ramekins onto a baking sheet. This makes it easier to transfer them in and out of the oven and catches any potential drips. Slide the baking sheet into your preheated oven at 375°F (190°C). The baking time will typically range from 18 to 22 minutes. You’ll know they’re ready when they’ve puffed up nicely and the tops are a lovely golden brown. A good indicator is to gently insert a toothpick or a small knife into the center of a pancake bowl. If it comes out clean, they are perfectly baked. If it comes out with wet batter, give them another few minutes in the oven, checking every 2-3 minutes to avoid overbaking. Overbaked protein pancake bowls can become dry, so keep a close eye on them during the last few minutes. The smell that will fill your kitchen during this stage is absolutely divine, a sweet and comforting aroma.
Cooling and Serving
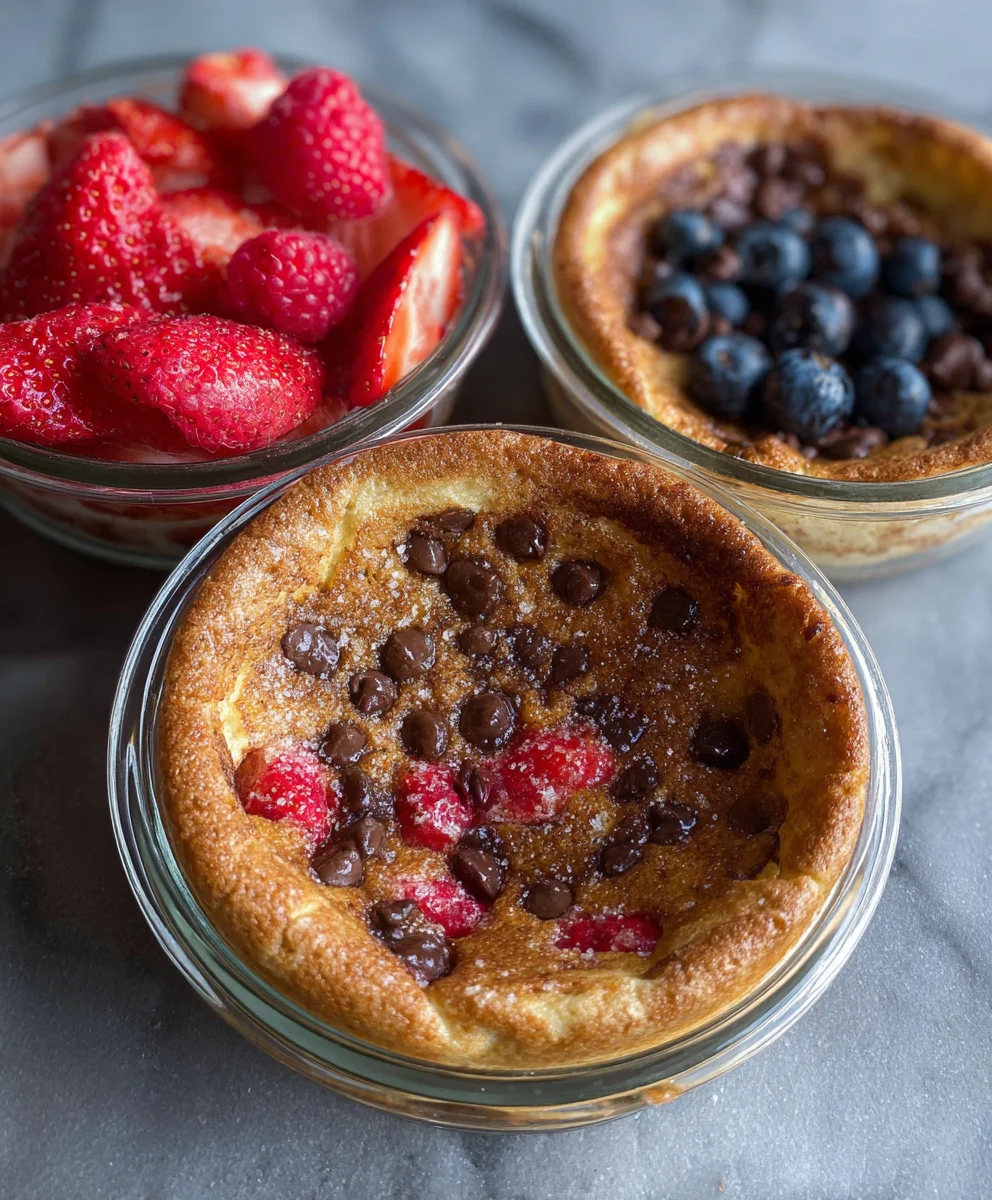
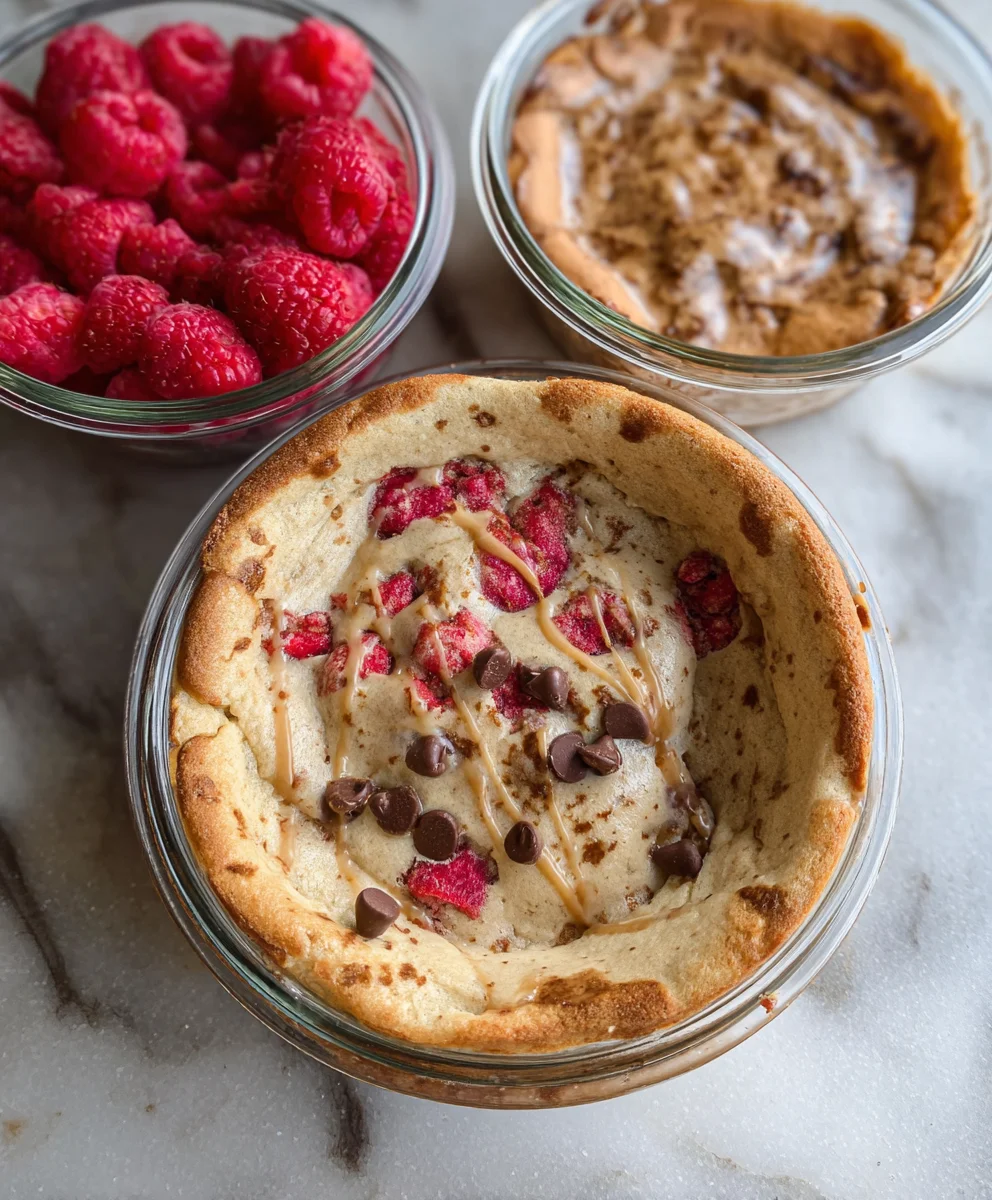
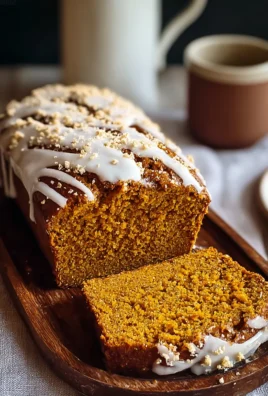
Once your protein pancake bowls are baked to perfection, remove the baking sheet from the oven. Allow the bowls to cool in their ramekins for about 5 to 10 minutes on a wire rack. This resting period allows them to set up properly and makes them easier to handle. After this initial cooling, you can either serve them directly in their ramekins or gently invert them onto plates. If you inverted them, they should release quite easily due to the greasing. Now comes the best part: the toppings! These protein pancake bowls are a fantastic canvas for your creativity. Consider fresh berries like blueberries or raspberries for a burst of freshness and antioxidants. A dollop of Greek yogurt or a swirl of nut butter adds extra protein and creamy richness. A sprinkle of chia seeds or a drizzle of sugar-free syrup can also elevate your bowl. The beauty of these is their versatility; they are perfect as a warm breakfast treat, a post-workout refuel, or even a satisfying snack. Their baked nature makes them incredibly convenient for meal prep, as they can be stored in the refrigerator for a few days and gently reheated.
Conclusion:
There you have it – your ultimate guide to creating delicious and satisfying Baked Protein Pancake Bowls- great for meal prep and no banana needed! This recipe is incredibly versatile and a fantastic way to boost your protein intake without the usual fuss. The fluffy, cake-like texture combined with your favorite toppings makes for a truly enjoyable and guilt-free meal. Whether you’re a seasoned baker or just starting out, I encourage you to give these bowls a try. They’re a game-changer for busy mornings or as a post-workout refuel.
For serving, I love topping mine with fresh berries, a drizzle of sugar-free syrup, and a sprinkle of chopped nuts for added crunch. You can also mix in some chocolate chips or a swirl of nut butter before baking for an extra treat. Don’t be afraid to experiment with different protein powders to find your perfect flavor profile!
Frequently Asked Questions:
Can I make these ahead of time?
Absolutely! These Baked Protein Pancake Bowls- great for meal prep and no banana needed! are perfect for meal prepping. Once cooled, store them in an airtight container in the refrigerator for up to 3-4 days. Simply reheat in the microwave or toaster oven when you’re ready to enjoy.
What kind of protein powder works best?
Whey protein powder generally yields the best texture, but you can also use plant-based protein powders like pea or soy. You may need to adjust the liquid slightly depending on the type of protein powder you use. Experimentation is key to finding your favorite!
Can I add other mix-ins to the batter?
Yes, you can! Feel free to add things like fresh blueberries, raspberries, chopped apple, or even a tablespoon of cocoa powder for a chocolatey twist. Just be mindful not to overload the batter, as it could affect the baking time and texture.
Protein Pancake Bowls-Meal Prep No Banana
Delicious and easy protein pancake bowls, perfect for meal prep and a healthy breakfast without bananas.
Ingredients
-
1 egg
-
50 g yogurt (vanilla or unflavoured)
-
70 ml milk (soy or almond)
-
35 g all purpose flour
-
25 g protein powder
-
5 g zero calorie granulated sweetener
-
1/2 tsp baking powder
Instructions
-
Step 1
Preheat oven to 375°F (190°C). Whisk egg in a medium bowl, then add yogurt and milk. Whisk until well combined. -
Step 2
In a separate small bowl, whisk together flour, protein powder, sweetener, and baking powder. Gently fold dry ingredients into wet ingredients until just combined. Do not overmix. -
Step 3
Lightly grease 4-6 oven-safe ramekins. Divide batter evenly among ramekins, filling about two-thirds full. -
Step 4
Place ramekins on a baking sheet. Bake for 18-22 minutes, or until puffed and golden brown. Toothpick should come out clean. -
Step 5
Let cool in ramekins for 5-10 minutes. Serve warm with desired toppings like berries, yogurt, or nut butter.
Important Information
Nutrition Facts (Per Serving)
It is important to consider this information as approximate and not to use it as definitive health advice.
Allergy Information
Please check ingredients for potential allergens and consult a health professional if in doubt.
Leave a Comment