
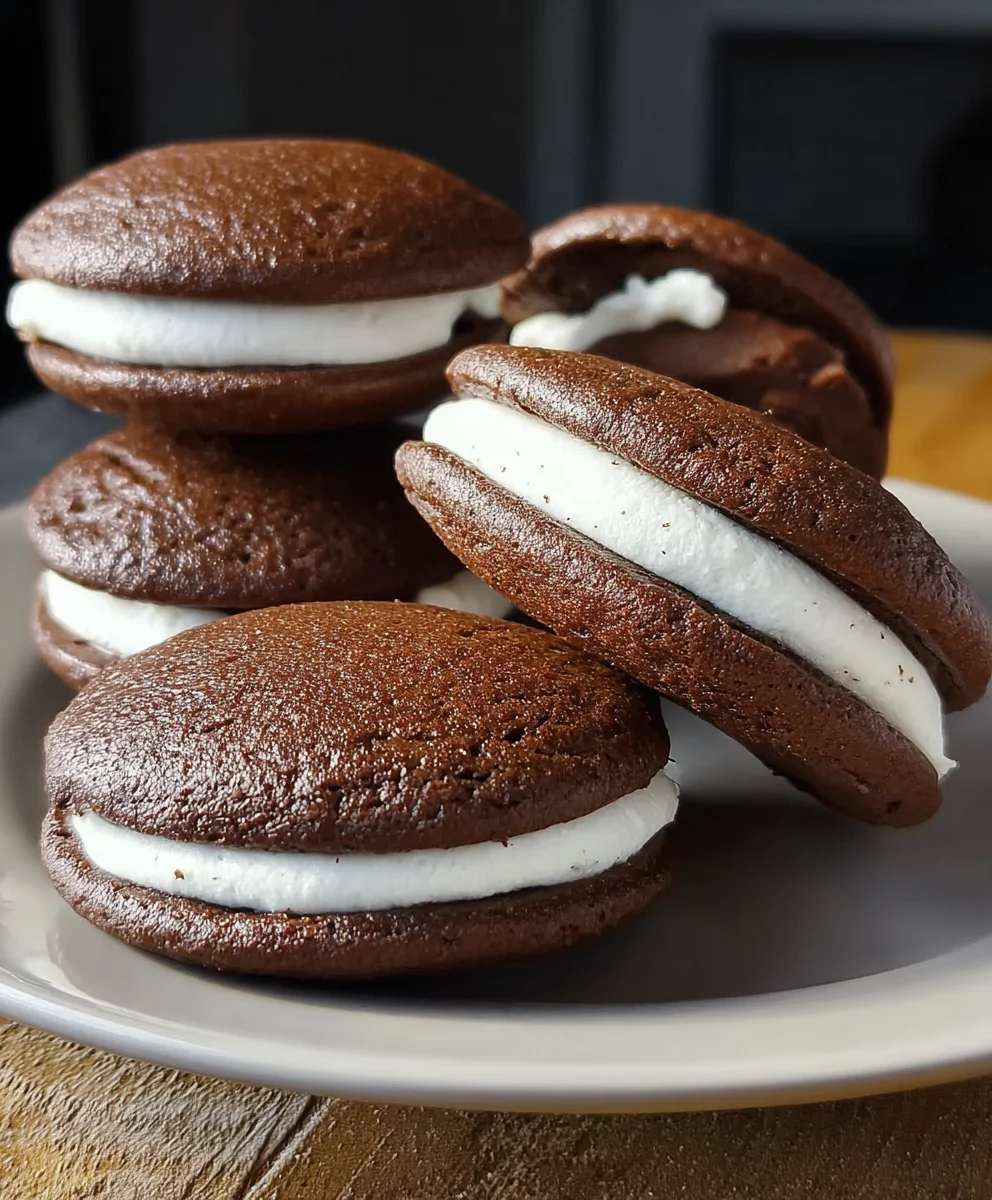
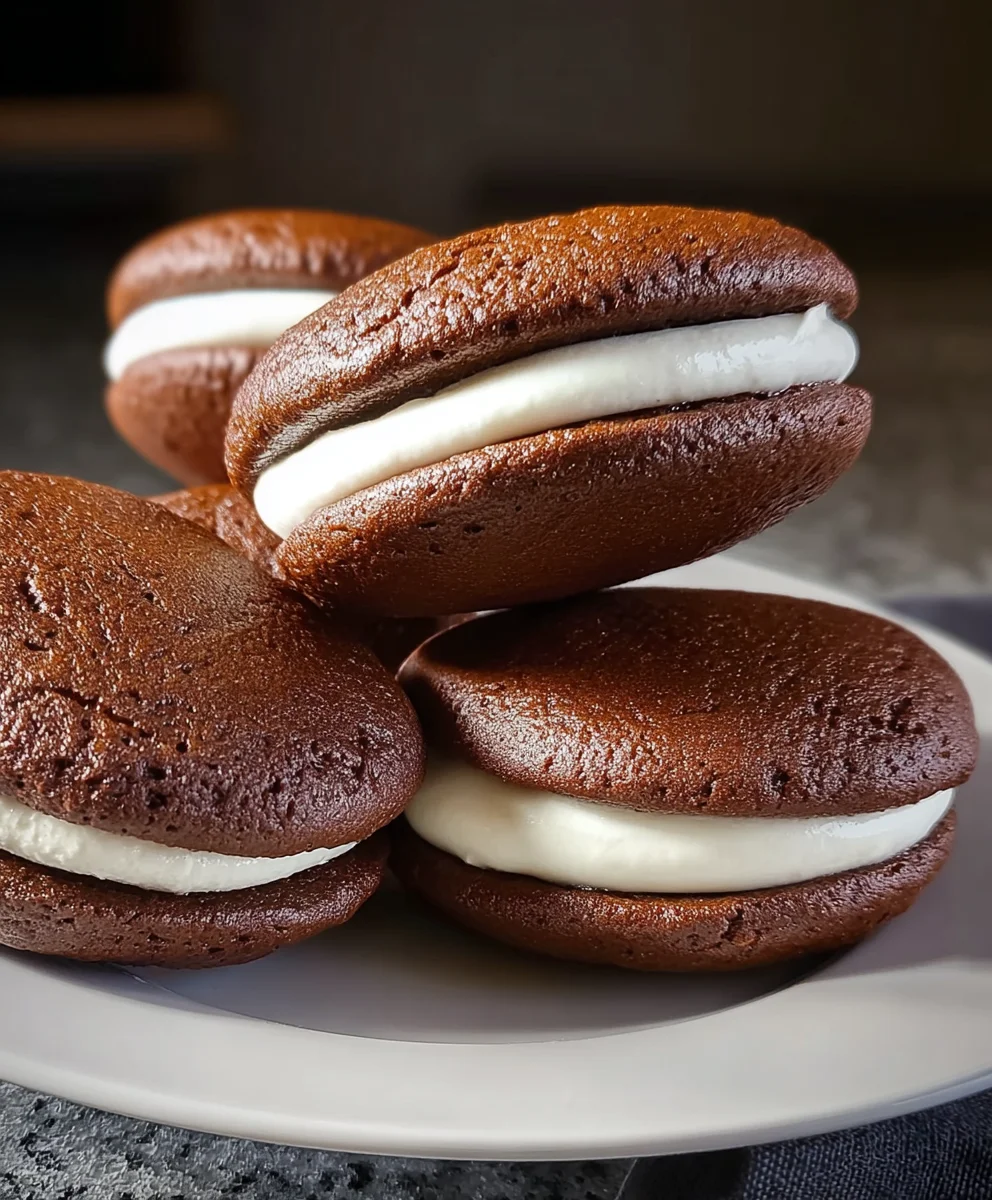
Whoopie Pies are undeniably one of those treats that evoke instant joy and nostalgia. Imagin extracte a perfect marriage of soft, chewy cookies embracing a cloud of fluffy frosting – that’s the magic of a classic whoopie pie! It’s no wonder these delightful handheld desserts have captured the hearts (and taste buds!) of so many. Their appeal lies in their delightful simplicity and the sheer pleasure they bring with every bite. We all remember the excitement of biting into one, the satisfying squish of the cookie giving way to that sweet, creamy center. What truly sets these Whoopie Pies apart is their inherent versatility. While the traditional chocolate cake-like cookie with a vanilla buttercream filling is a timeless favorite, the possibilities for customization are endless. This recipe celebrates the classic, offering you a chance to reconnect with that comforting flavor, but with tips and tricks to ensure yours are the absolute best you’ve ever made. Get ready to create a batch that will disappear faster than you can say “more, please!”
Ingredients:
- 10 ounces all-purpose flour
- ½ cup white sugar
- ½ cup dark molasses
- 2½ teaspoons ground gin extractger
- 1¼ teaspoons baking soda
- 1 teaspoon ground cinnamon
- ¾ teaspoon salt
- ⅓ cup vegetable oil
- 1 large egg, beaten
- ⅓ cup boiling water
- 2½ cups confectioners’ sugar
- 8 ounces cream cheese, softened to room temperature
- ¼ cup butter, softened to room temperature
- 2 teaspoons heavy whipping cream
- 1 teaspoon vanilla extract
Making the Whoopie Pie Dough
Step 1: Combine Dry Ingredients
Start by preheating your oven to 375 degrees Fahrenheit (190 degrees Celsius). This ensures your oven is at the perfect temperature when your cookies are ready to bake, leading to even cooking. In a large mixing bowl, whisk together the 10 ounces of all-purpose flour, ½ cup of white sugar, 2½ teaspoons ofgin extractound ginger, 1¼ teaspoons of baking soda, 1 teaspoon of ground cinnamon, and ¾ teaspoon of salt. Whisking these dry ingredients thoroughly will distribute the leavening agents and spices evenly, preventing pockets of concentrated flavor or inconsistent rise in your whoopie pies.
Step 2: Incorporate Wet Ingredients (Except Boiling Water)
Next, create a well in the center of your dry ingredients. Pour in the ⅓ cup of vegetable oil and the 1 large egg, which you should have lightly beaten beforehand. Add the ½ cup of dark molasses. Molasses is what gives these cookies their distinctive chewy texture and rich, dark color, so don’t be tempted to substitute it! Mix these wet ingredients into the dry ingredients until just combined. Be careful not to overmix at this stage. Overmixing can develop the gluten in the flour too much, resulting in tougher cookies. A few streaks of flour are perfectly acceptable.
Step 3: The Boiling Water Magic
Now for the secret to incrediblygin extractft and chewy gingerbread whoopie pies! Carefully pour in the ⅓ cup of boiling water. The boiling water will activate the baking soda more effectively and also help to bloom the spices, intensifying their flavor. The batter will become quite thin and liquidy at this point, which is exactly what you want. Stir gently until the batter is smooth. It might seem too thin to form cookies, but trust the process! This thin batter will yield delightfully moist and tender whoopie pies.
Step 4: Portioning and Baking the Cookie Bases
Line two baking sheets with parchment paper. Parchment paper is your best friend here, preventing sticking and making cleanup a breeze. Drop rounded tablespoons of the batter onto the prepared baking sheets, leaving about 2 inches between each cookie. I like to use a cookie scoop for uniform size, which helps them bake evenly. Bake for 9 to 11 minutes, or until the edges are set and a toothpick inserted into the center comes out clean. The cookies will puff up considerably during baking.
Step 5: Cooling the Cookie Bases
Once baked, let the cookie bases cool on the baking sheets for a minute or two before carefully transferring them to a wire rack to cool completely. This step is crucial. Attempting to frost warm cookie bases will result in a melted, messy filling. Patience is key here; allow them to reach room temperature, ensuring a stable foundation for your delicious frosting.
Whipping Up the Cream Cheese Frosting
Step 6: Creaming the Base
While the cookie bases are cooling, let’s prepare the luscious cream cheese frosting. In a medium mixing bowl, beat together the 8 ounces of softened cream cheese and the ¼ cup of softened butter. Ensure both ingredients are truly at room temperature; this will allow them to emulsify smoothly without lumps. Beat them together with an electric mixer on medium speed until they are light, fluffy, and well combined. This creates a smooth and stable base for the frosting.
Step 7: Adding Sweetness and Flavor
Gradually add the 2½ cups of confectioners’ sugar to the creamed cream cheese and butter mixture, about ½ cup at a time, beating well after each addition. This gradual incorporation helps to prevent the sugar from flying everywhere and ensures a smooth texture. Once all the confectioners’ sugar is incorporated, the frosting will start to thicken. Add the 1 teaspoon of vanilla extract and the 2 teaspoons of heavy whipping cream. The heavy cream adds a touch of richness and helps to achieve the perfect piping consistency.
Step 8: Achieving the Perfect Frosting Consistency
Beat the frosting on medium-high speed for another 2-3 minutes until it is exceptionally smooth, creamy, and light. You’re looking for a consistency that holds its shape well for piping but is also wonderfully spreadable. If the frosting seems too thick, you can add another teaspoon of heavy whipping cream, a tiny bit at a time, until you reach your desired consistency. Conversely, if it’s too thin, you can add a tablespoon or two more of confectioners’ sugar. Taste and adjust the sweetness if needed.
Assembling Your Whoopie Pies
Step 9: Pairing and Filling
Once your cookie bases are completely cool, it’s time to assemble! Find matching cookie halves, meaning one bottom and one top that are roughly the same size. Spoon or pipe a generous dollop of the cream cheese frosting onto the flat side of one cookie half. Don’t be shy with the filling; it’s what makes a whoopie pie truly indulgent!
Step 10: Creating the Perfect Sandwich
Gently place the flat side of another cookie half onto the frosting-covered half, pressing down lightly to spread the filling to the edges. You want a nice, even layer of frosting peeking out slightly, but not so much that it oozes out excessively when squeezed. Repeat this process with the remaining cookie halves and frosting. You can enjoy ygin extract delightful homemade gingerbread whoopie pies immediately, or for an even more decadent experience, chill them in the refrigerator for about 30 minutes to allow the flavors to meld and the frosting to firm up slightly.
Conclusion:
You’ve mastered the art of creating delicious Whoopie Pies! This recipe is a fantastic way to bring a classic homemade treat to your table, perfect for celebrations, a sweet afternoon pick-me-up, or simply because you deserve something delightful. The combination of soft, cake-like cookie shells and creamy, sweet filling is truly irresistible. Don’t be afraid to get creative and experiment with different flavor combinations as you become more confident with this recipe. The joy of baking lies in personalization, and these Whoopie Pies are the perfect canvas for your culinary imagin extractation!
For serving, Whoopie Pies are best enjoyed fresh, but they store well in an airtight container at room temperature for a couple of days. They’re wonderful on their own, but consider pairing them with a glass of cold milk, a hot cup of coffee, or even a scoop of vanilla ice cream for an extra special dessert.
Feeling adventurous? Try different extract flavors in the cookie dough, like almond or peppermint, or add a pinch of cinnamon for a warm spice note. For the filling, consider adding a swirl of chocolate or a hint of lemon zest. The possibilities are truly endless when it comes to customizing your Whoopie Pies!
Frequently Asked Questions:
Q: How should I store leftover Whoopie Pies?
A: Store your Whoopie Pies in an airtight container at room temperature for up to 2-3 days. If you need to store them for longer, you can refrigerate them, although the cookies might firm up slightly. You can also freeze assembled Whoopie Pies for up to 2 months. Thaw them overnight in the refrigerator.
Q: Can I make the cookie dough and filling ahead of time?
A: Yes, you absolutely can! The cookie dough can be made and refrigerated for up to 2 days. The filling can also be made and stored in an airtight container in the refrigerator for up to 3 days. Allow both to come to room temperature slightly before assembling your Whoopie Pies.
Soft & Chewy Whoopie Pie Recipe-Classic Treat
A classic recipe for soft and chewy whoopie pies with a rich gingerbread flavor and creamy cream cheese frosting.
Ingredients
-
10 ounces all-purpose flour
-
½ cup white sugar
-
½ cup dark molasses
-
2½ teaspoons ground ginger
-
1¼ teaspoons baking soda
-
1 teaspoon ground cinnamon
-
¾ teaspoon salt
-
⅓ cup vegetable oil
-
1 large egg, beaten
-
⅓ cup boiling water
-
2½ cups confectioners’ sugar
-
8 ounces cream cheese, softened to room temperature
-
¼ cup butter, softened to room temperature
-
2 teaspoons heavy whipping cream
-
1 teaspoon vanilla extract
Instructions
-
Step 1
Preheat oven to 375°F (190°C). In a large bowl, whisk together flour, white sugar, ground ginger, baking soda, cinnamon, and salt. Ensure dry ingredients are evenly distributed. -
Step 2
Make a well in the dry ingredients. Add vegetable oil, beaten egg, and dark molasses. Mix until just combined, being careful not to overmix. A few streaks of flour are acceptable. -
Step 3
Carefully pour in the boiling water and stir gently until the batter is smooth. The batter will be thin, which is desired for soft and chewy cookies. -
Step 4
Line baking sheets with parchment paper. Drop rounded tablespoons of batter onto the sheets, leaving 2 inches between cookies. Bake for 9-11 minutes, or until edges are set and a toothpick comes out clean. -
Step 5
Let cookie bases cool on baking sheets for 1-2 minutes, then transfer to a wire rack to cool completely. Do not frost warm cookies. -
Step 6
While cookies cool, prepare frosting. Beat softened cream cheese and softened butter until light and fluffy. Ensure both are at room temperature for smooth emulsification. -
Step 7
Gradually add confectioners’ sugar to the creamed mixture, about ½ cup at a time, beating well after each addition. Stir in vanilla extract and heavy whipping cream. -
Step 8
Beat frosting on medium-high speed for 2-3 minutes until exceptionally smooth, creamy, and light. Adjust consistency with more cream or sugar if needed. -
Step 9
Once cookie bases are completely cool, pair matching halves. Spoon or pipe a generous amount of frosting onto the flat side of one cookie half. -
Step 10
Gently place the flat side of another cookie half onto the frosting, pressing lightly to spread the filling. Repeat with remaining cookies. Enjoy immediately or chill for 30 minutes.
Important Information
Nutrition Facts (Per Serving)
It is important to consider this information as approximate and not to use it as definitive health advice.
Allergy Information
Please check ingredients for potential allergens and consult a health professional if in doubt.

Leave a Comment