
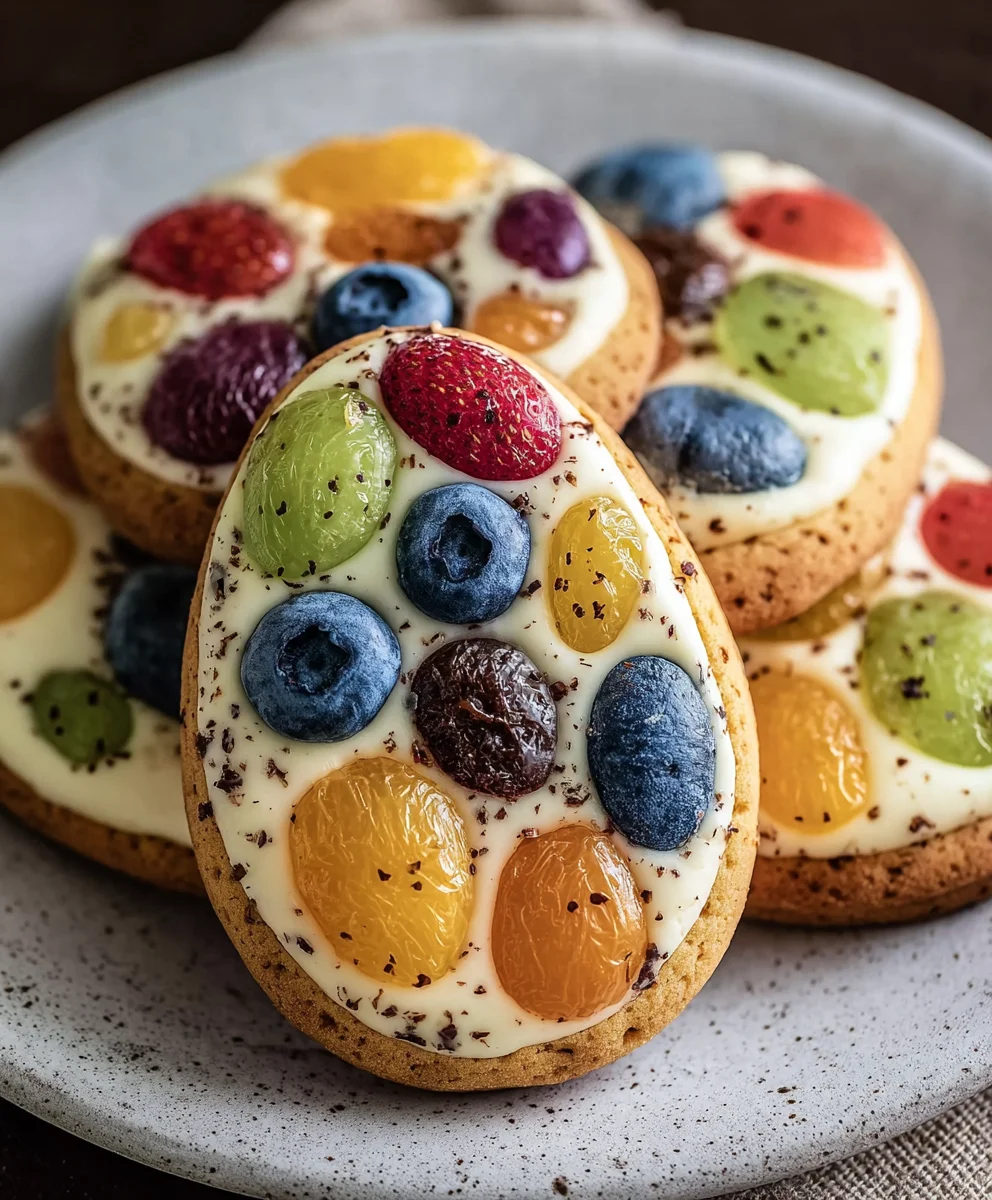
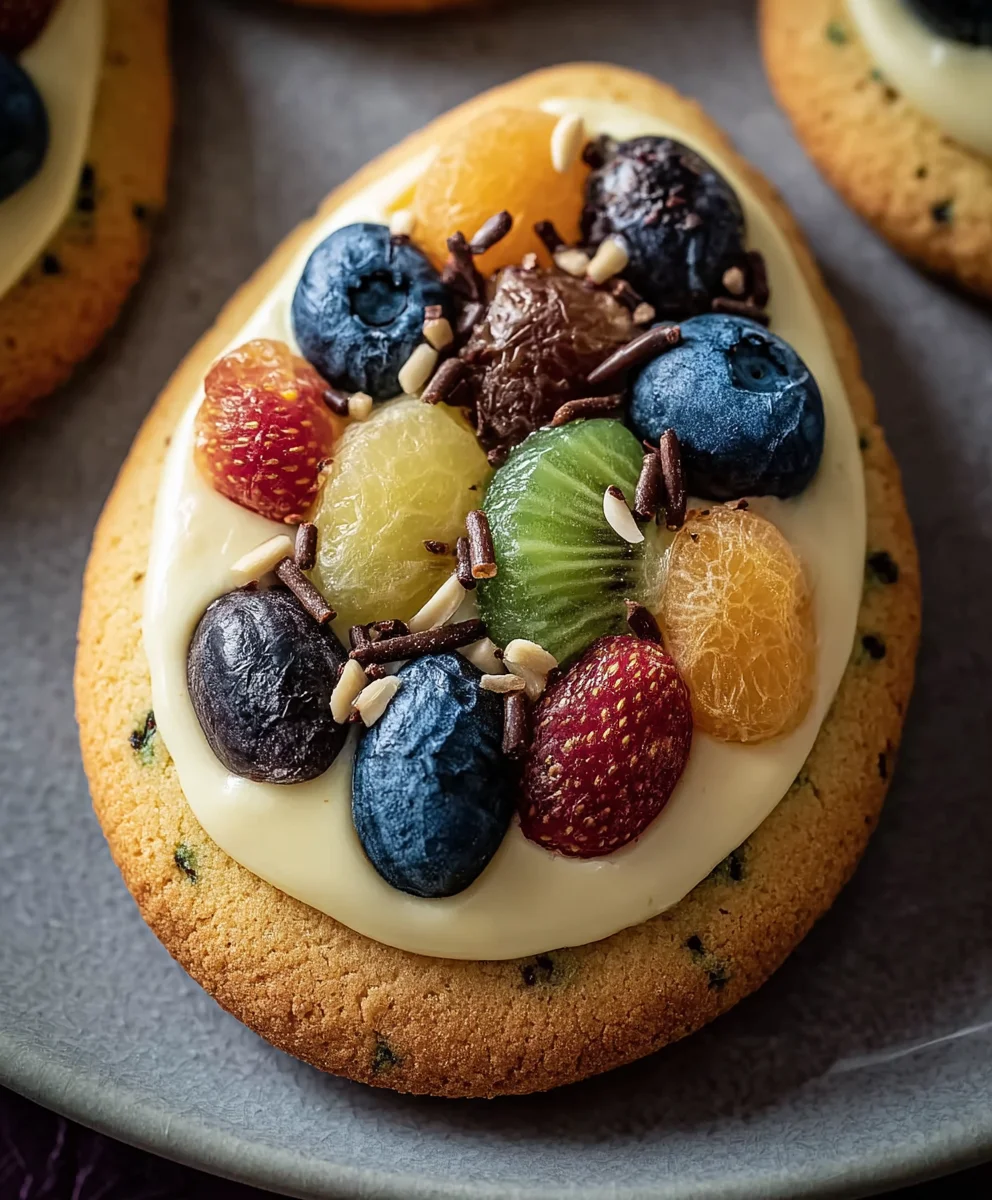
Easter Fruit Egg Cookies are much more than just a sweet treat; they are a vibrant celebration of spring and new beginnings, embodying the joy and renewal associated with the Easter season. Imagine the delight of biting into a beautifully crafted, egg-shaped cookie, adorned with colorful candied fruits, each morsel offering a burst of delicate sweetness and a wonderfully chewy texture. I find that their charming appearance and festive flavors make them an absolute showstopper at any holiday gathering.
Historically, eggs have long been a powerful symbol of life and rebirth, deeply intertwined with Easter traditions across many cultures. Incorporating dried and candied fruits adds to this symbolism, representing the bounty and freshness of spring. People adore these particular cookies not only for their delightful taste and pleasing texture – a perfect balance of soft cookie and tender, chewy fruit – but also for their undeniable visual appeal. They are incredibly versatile, serving beautifully as a dessert, a thoughtful gift, or even a delightful activity to share with loved ones. Preparing these Easter Fruit Egg Cookies has become a cherished part of my family’s annual traditions, and I am thrilled to share the recipe for these charming and utterly delicious confections with you.
Ingredients:
- For the Easter Fruit Egg Cookies:
- 2 ½ cups (300g) all-purpose flour, plus more for dusting
- 1 teaspoon baking powder
- ½ teaspoon salt
- 1 cup (226g) unsalted butter, softened to room temperature
- 1 ½ cups (300g) granulated sugar
- 2 large eggs, at room temperature
- 2 teaspoons pure vanilla extract
- 1 cup (150g) mixed candied fruit peel, finely chopped (look for lemon, orange, and citron peel)
- ½ cup (75g) dried cranberries, finely chopped
- ¼ cup (40g) golden raisins, finely chopped (optional, for extra chewiness)
- For the Royal Icing:
- 4 cups (480g) powdered sugar, sifted
- 3 tablespoons meringue powder
- ½ teaspoon pure vanilla extract (or almond extract for a different flavor profile)
- ½ cup (120ml) warm water, plus more as needed
- Gel food coloring (various colors for decorating your Easter Fruit Egg Cookies)
- Optional Decorations:
- Assorted sprinkles (nonpareils, sanding sugar, jimmies)
- Edible glitter or luster dust
Preparing the Cookie Dough for Your Easter Fruit Egg Cookies
Hello there, fellow baker! Let’s get started on these delightful Easter Fruit Egg Cookies. The foundation of any great cookie is a well-made dough, and ours is no exception. We want a dough that’s sturdy enough to hold its egg shape but tender enough to melt in your mouth, with plenty of delicious fruit scattered throughout.
- First things first, grab a medium bowl and whisk together your dry ingredients: the all-purpose flour, baking powder, and salt. It’s important to sift or at least whisk these thoroughly to ensure they’re evenly distributed. This prevents any pockets of baking powder and ensures a consistent rise and texture in our Easter Fruit Egg Cookies. Set this bowl aside for a moment.
- In a large mixing bowl, either with an electric mixer fitted with the paddle attachment or by hand with a sturdy whisk, cream together the softened unsalted butter and granulated sugar. You’ll want to beat them on medium-high speed for about 3-5 minutes, or until the mixture is light, fluffy, and pale yellow. This creaming process is absolutely crucial as it incorporates air into the butter, which will give our cookies their wonderful texture and prevents them from becoming too dense. Scrape down the sides of the bowl occasionally to ensure everything is evenly combined.
- Next, beat in the eggs, one at a time. After each egg, mix until it’s just incorporated into the butter-sugar mixture before adding the next. This helps create a stable emulsion and ensures the dough comes together smoothly. Follow this by adding the pure vanilla extract and mixing until just combined. The aroma alone is starting to feel festive, isn’t it?
- Now, gradually add the dry ingredient mixture to the wet ingredients. Do this in three separate additions, mixing on low speed after each addition until the flour is just combined. Be careful not to overmix here! Overmixing can develop the gluten in the flour too much, leading to tough Easter Fruit Egg Cookies. We’re aiming for tenderness.
- Finally, and this is where the “fruit” in our Easter Fruit Egg Cookies really shines, gently fold in the finely chopped mixed candied fruit peel, dried cranberries, and golden raisins (if you’re using them). I find that a rubber spatula works best for this. You want to distribute the fruit evenly throughout the dough without overworking it. This ensures every bite of our Easter Fruit Egg Cookies is bursting with fruity flavor and delightful chewiness.
- Divide the dough into two equal portions. Flatten each portion into a disc, wrap them tightly in plastic wrap, and place them in the refrigerator. We’re going to chill this dough for at least 2 hours, but preferably overnight. This chilling step is non-negotiable! It helps the flavors meld, makes the dough much easier to handle when rolling, and prevents the cookies from spreading too much during baking, ensuring our beautiful egg shapes hold their form.
Chilling and Shaping the Easter Fruit Egg Cookies
Alright, your dough is perfectly chilled and ready to be transformed into festive Easter Fruit Egg Cookies. This is where the magic of shaping happens, so let’s get our rolling pins ready!
- Once your dough is thoroughly chilled, take one disc out of the refrigerator and let it sit at room temperature for about 10-15 minutes. This makes it slightly more pliable and easier to roll without cracking, but don’t let it get too warm. Keep the other disc in the fridge until you’re ready for it.
- Lightly flour your work surface and your rolling pin. I prefer to roll my dough between two sheets of parchment paper – this not only prevents sticking but also makes transferring the cut-out cookies much easier and minimizes the need for additional flour, which can make the cookies tough.
- Roll out the dough to an even thickness of about ¼ inch. Consistency in thickness is key here for even baking. If some parts are thinner than others, they’ll bake faster and potentially burn while the thicker parts are still raw. Take your time with this step to ensure all your Easter Fruit Egg Cookies bake beautifully.
- Using an egg-shaped cookie cutter (you can find these easily around Easter time, or even improvise with an oval shape), cut out your cookie shapes. Try to get as many cookies as possible from the first roll to minimize re-rolling scraps. Carefully transfer the cut-out Easter Fruit Egg Cookies to baking sheets lined with parchment paper or silicone mats. I usually leave about 1 inch of space between each cookie to allow for a little expansion.
- Gather the dough scraps, gently press them together, and form a new disc. Wrap it in plastic wrap and chill it for about 15-20 minutes before re-rolling. This brief chill helps the gluten relax, making the dough easier to work with again. You can repeat this process a couple of times, but avoid re-rolling too many times, as it can make the cookies tough.
- Preheat your oven to 350°F (175°C). While the oven is preheating, place your baking sheets with the cut-out Easter Fruit Egg Cookies into the refrigerator for another 10-15 minutes. This second chilling step is a little trick I’ve learned! It helps the cookies maintain their shape even better during baking, preventing any excessive spreading that might distort our lovely egg forms.
Baking Your Easter Fruit Egg Cookies
The moment of truth is almost here! Baking these Easter Fruit Egg Cookies is a straightforward process, but paying attention to the details will ensure they come out perfectly golden and delicious.
- Once your oven is preheated and your cookies have had their final chill, place the baking sheets into the oven, one at a time if your oven bakes unevenly, or both at once if you have good heat distribution (just be sure to rotate them halfway through).
- Bake for 10-12 minutes. The exact baking time will depend on the thickness of your cookies and your oven’s calibration. You’re looking for the edges to be lightly golden, and the centers to appear set. They shouldn’t be deeply browned.
- As soon as they’re done, carefully remove the baking sheets from the oven. Allow the Easter Fruit Egg Cookies to cool on the baking sheets for about 5 minutes. They’ll be quite delicate right out of the oven, and this short cooling period helps them firm up before you move them.
- After 5 minutes, gently transfer the cookies to a wire rack to cool completely. It is absolutely essential that the cookies are completely cool before you even think about decorating them with royal icing. If they’re even slightly warm, the icing will melt, smear, and become a sticky mess, ruining all your hard work. This might take an hour or two, so be patient!
Making the Royal Icing for Easter Fruit Egg Cookies
Now for the fun part – preparing the beautiful royal icing that will adorn our Easter Fruit Egg Cookies! Royal icing not only looks gorgeous but also sets hard, making these cookies perfect for gifting or stacking.
- In a large bowl, combine the sifted powdered sugar and meringue powder. I highly recommend sifting the powdered sugar to avoid any lumps, which can clog your piping tips later. Meringue powder is fantastic because it makes the icing safe to eat (no raw egg whites!) and helps it dry to a hard, shiny finish.
- Gradually add the warm water and vanilla extract. Using an electric mixer (handheld or stand mixer with a whisk attachment) on low speed, mix until just combined.
- Increase the speed to medium-high and beat for 5-7 minutes, or until the icing is thick, glossy, and holds stiff peaks. You’ll know it’s ready when you lift the beaters, and the peaks stand firm without drooping. This is your stiff consistency icing, perfect for outlining and creating sturdy details on your Easter Fruit Egg Cookies.
- At this point, you’ll want to divide your stiff icing into several small bowls, depending on how many colors you want for decorating your Easter Fruit Egg Cookies. Keep one portion of white icing if you desire, and then use gel food coloring to tint the remaining portions. Gel colors are best as they don’t add much liquid to the icing, maintaining its consistency. Mix each color thoroughly until you achieve your desired shade.
- To create “flood” consistency icing (thinner icing used to fill in outlines), take a portion of your stiff colored icing and add water, a tiny drop at a time, mixing well after each addition. You’re looking for a consistency where if you drizzle a spoonful of icing back into the bowl, the line disappears within about 10-15 seconds. This is often referred to as “10-15 second icing.” If it disappears faster, it’s too thin; slower, it’s too thick. It’s much easier to add more water than to thicken it, so go slowly!
- Cover all bowls of icing with damp paper towels and then plastic wrap directly on the surface of the icing. Royal icing dries out incredibly quickly when exposed to air, forming a crust, so keeping it covered is essential to prevent this.
Decorating the Easter Fruit Egg Cookies
Now, for the grand finale! This is where your creativity truly shines, transforming simple cookies into beautiful Easter Fruit Egg Cookies with vibrant designs. Grab your patience and a steady hand!
- Prepare your piping bags. For outlining, use the stiff consistency icing (step 19) in piping bags fitted with a small round tip (like PME #1 or #2, or Wilton #1 or #2). For flooding, use the flood consistency icing (step 21) in separate piping bags, and you can either snip a small hole in the tip of the bag or use a slightly larger round tip (like Wilton #3 or #4).
- Start by outlining your completely cooled Easter Fruit Egg Cookies with the stiff consistency icing. Carefully pipe a border around the entire edge of each cookie. This outline acts as a dam to hold the thinner flood icing in place. Allow these outlines to set for about 10-15 minutes, or until they are firm to the touch. This prevents your flood icing from spilling over.
- Once the outlines are set, take your flood consistency icing in a coordinating color and carefully fill in the outlined area. Use a toothpick or a small scribe tool to gently spread the icing to the edges and pop any air bubbles. Work quickly but carefully to ensure an even, smooth surface.
- If you want to add wet-on-wet designs (like dots or swirls that blend into the base), apply those immediately after flooding a section, before the base icing has a chance to set. For example, if you flood an entire egg in yellow, you could immediately drop small dots of pink or blue flood icing onto it and then drag a toothpick through them to create a marbled effect.
- Once flooded, let the Easter Fruit Egg Cookies dry completely. This is perhaps the most important part of decorating! Depending on humidity, this can take anywhere from 4-8 hours, or even overnight. It’s absolutely crucial that the base layer of flood icing is completely dry and hardened before you add any further details on top. If you try to decorate too soon, your new designs will sink into the wet base. I often leave them on racks undisturbed overnight.
- After the base layer is completely dry, you can add more intricate details using stiff consistency icing. Think stripes, dots, squiggles, or even floral patterns. Use different colors to make your Easter Fruit Egg Cookies truly pop! This is where you can really make each cookie unique, just like a beautifully decorated Easter egg.
- If you want to add sprinkles, edible glitter, or luster dust, do so while the icing for that specific detail is still wet, or lightly brush luster dust onto a dry cookie for shimmer. For sprinkles on a flooded cookie, you’d add them immediately after flooding before it dries. For sprinkles on a detailed line, add them as soon as you pipe the line.
- Once all your decorations are complete and any final layers of icing have had ample time to dry (another few hours or overnight), your glorious Easter Fruit Egg Cookies are ready to be admired, shared, and most importantly, enjoyed! Store them in an airtight container at room temperature, where they will stay fresh for up to two weeks.
Conclusion:
So there you have it, my friends! We’ve journeyed together through the creation of what I truly believe are some of the most delightful treats you’ll bake this season. These aren’t just any cookies; they’re a celebration in edible form, offering both visual charm and a burst of exquisite flavor. What truly sets this recipe apart is the perfect balance of chewy dried fruit, a tender, buttery crumb, and just the right amount of sweetness. They’re incredibly satisfying without being overly rich, making them an ideal treat for any time of day, whether it’s a morning pick-me-up or an evening indulgence. I promise you, the aroma alone as they bake will fill your kitchen with such warmth and joy, signaling that something truly special is on its way. Plus, let’s be honest, the simplicity of the process completely belies the impressive and professional-looking outcome. You certainly don’t need to be a master baker to achieve absolutely stunning results with these – the recipe is designed for success at every skill level.
Serving Suggestions and Creative Twists:
Now, once you’ve pulled these golden beauties from the oven and allowed them to cool, the possibilities for enjoyment are truly endless! For a simple, comforting moment, I personally love serving them with a hot cup of Earl Grey tea or a robust, freshly brewed coffee. They also make a fantastic addition to any brunch spread or an afternoon tea party, adding a lovely pop of color and delightful flavor that guests will absolutely adore and remember. Planning a potluck, a special holiday gathering, or simply wanting to spread some homemade cheer to friends, family, or neighbors? These cookies are absolutely perfect for thoughtful gifting! Arrange them carefully in a pretty box or a festive tin with some tissue paper, and you’ve got a homemade present that speaks volumes about your care and effort, far more than any store-bought item.
But please, I urge you not to stop there with just the basic recipe. I wholeheartedly encourage you to get creative and make them truly your own, infusing them with your personal touch. Imagine adding a handful of finely chopped pecans, walnuts, or even macadamia nuts to the dough for an extra layer of satisfying crunch and a lovely, earthy nutty flavor. Or perhaps, for a more indulgent twist that’s sure to please even the most discerning sweet tooth, mix in some high-quality white chocolate chips – they melt beautifully within the cookie and complement the bright fruit notes wonderfully, adding a creamy sweetness that’s irresistible. If you’re feeling adventurous and want to play with the fruit profile even further, try swapping out some of the traditional dried mixed fruit for finely diced dried apricots and cranberries, perhaps with a touch of fresh orange or lemon zest for a brighter, more citrusy profile that really pops and invigorates the palate. A simple yet elegant lemon glaze, made from powdered sugar and a squeeze of fresh lemon juice, drizzled artfully over the cooled cookies, can also elevate them to an even more gourmet level, adding a lovely tangy finish that beautifully cuts through the sweetness. For those who enjoy a bit of spice, a pinch of ground cardamom or nutmeg incorporated into the dough can introduce a wonderfully aromatic warmth, adding delightful depth to every single bite. And while the charming egg shape is undeniably perfect for celebrating Easter, feel free to use round cookie cutters for an equally delicious everyday treat, or simply drop spoonfuls of dough onto your baking sheet for a more rustic, homey, and utterly charming cookie. The core recipe is incredibly forgiving and open to all your personal touches, making it endlessly adaptable to your taste preferences and the ingredients you happen to have on hand. It’s truly a versatile base for culinary exploration, inviting you to experiment and discover your next favorite variation.
Your Turn to Bake and Share!
So, what are you waiting for, my dear fellow bakers? I genuinely hope you’re feeling incredibly inspired and excited to roll up your sleeves, grab your apron, and give these fantastic cookies a try. I can assure you, the very moment you bite into one of these delightful homemade treats, you’ll understand exactly why I’m so enthusiastic about them and why I wanted to share this recipe with you. They’re truly more than just a sweet snack; they’re a little piece of edible joy, perfect for celebrating the season, sharing with loved ones, or simply treating yourself to something truly special that you created with your own hands. Once you’ve baked your very own batch of these delightful Easter Fruit Egg Cookies, I would absolutely love, love, love to hear all about your experience! Did you stick closely to the original recipe, or did you venture into some delicious variations that you’d heartily recommend to others? What were your favorite additions or perhaps your preferred serving suggestions? Please, take a moment to share your thoughts, your baking triumphs, your beautiful photos, and even your funny “oops” moments in the comments section below. Your feedback, your creativity, and your stories not only make my day but also serve as wonderful inspiration and guidance for other readers who are looking for new ideas and encouragement. So go forth, bake with all your heart and love, and let your kitchen fill with the irresistible, comforting aroma of these wonderful fruit egg cookies. Happy baking, everyone!
Easter Fruit Egg Cookies
Easter Fruit Egg Cookies are a vibrant celebration of spring, featuring beautifully crafted, egg-shaped cookies adorned with colorful candied fruits. Each bite offers delicate sweetness and a wonderfully chewy texture, making them a delightful showstopper for any holiday gathering.
Ingredients
-
2 ½ cups (300g) all-purpose flour
-
1 teaspoon baking powder
-
½ teaspoon salt
-
1 cup (226g) unsalted butter, softened
-
1 ½ cups (300g) granulated sugar
-
2 large eggs
-
2 teaspoons pure vanilla extract
-
1 cup (150g) finely chopped mixed candied fruit peel
-
½ cup (75g) finely chopped dried cranberries
-
¼ cup (40g) finely chopped golden raisins (optional)
-
4 cups (480g) powdered sugar
-
3 tablespoons meringue powder
-
½ teaspoon pure vanilla extract
-
½ cup (120ml) warm water
-
Gel food coloring, various colors
-
Assorted sprinkles (optional)
-
Edible glitter or luster dust (optional)
Instructions
-
Step 1
Whisk flour, baking powder, and salt; set aside. In a large bowl, cream softened butter and granulated sugar until light and fluffy (3-5 minutes). Beat in eggs one at a time, then vanilla extract. Gradually add dry ingredients in three additions, mixing on low speed until just combined. Gently fold in the finely chopped candied fruit peel, dried cranberries, and optional golden raisins. Divide dough into two discs, wrap in plastic, and chill for at least 2 hours or overnight. -
Step 2
Take one chilled dough disc; let soften 10-15 minutes. Lightly flour your surface or roll dough between parchment paper to an even ¼ inch thickness. Use an egg-shaped cookie cutter to cut shapes; transfer to parchment-lined baking sheets, leaving 1 inch between them. Gently gather dough scraps, re-form, wrap, and chill for 15-20 minutes before re-rolling. Preheat oven to 350°F (175°C). Place cut-out cookies on baking sheets in the refrigerator for a final 10-15 minute chill. -
Step 3
Bake cookies for 10-12 minutes, until edges are lightly golden and centers are set. Remove from oven and let cool on baking sheets for 5 minutes. Transfer cookies to a wire rack to cool completely before decorating. Ensure cookies are entirely cool. -
Step 4
In a large bowl, combine sifted powdered sugar and meringue powder. Gradually add warm water and vanilla extract. Using an electric mixer, beat on low then medium-high speed for 5-7 minutes until icing is thick, glossy, and holds stiff peaks (stiff consistency). Divide stiff icing into separate bowls and tint with gel food coloring as desired. For “flood” consistency, add water drop by drop to portions of colored icing until a drizzled line disappears in 10-15 seconds. Cover all icing bowls with damp paper towels and plastic wrap directly on the surface. -
Step 5
Prepare piping bags: use stiff icing with a small round tip for outlining, and flood icing with a slightly larger tip or snipped hole for filling. Outline completely cooled cookies with stiff consistency icing; let set for 10-15 minutes. Fill outlined areas with flood consistency icing, using a toothpick to spread and pop bubbles. Add wet-on-wet designs immediately if desired. Let the flooded cookies dry completely (4-8 hours or overnight) before adding further details. Once the base layer is dry, pipe intricate details (stripes, dots, patterns) using stiff consistency icing. Apply sprinkles or edible glitter while icing is wet, or brush luster dust onto dry cookies for shimmer. Allow all decorated cookies to dry completely before storing in an airtight container at room temperature for up to two weeks.
Important Information
Nutrition Facts (Per Serving)
It is important to consider this information as approximate and not to use it as definitive health advice.
Allergy Information
Please check ingredients for potential allergens and consult a health professional if in doubt.


Leave a Comment