
Country fried chicken. Just saying those words conjures up images of golden-brown perfection, a symphony of crispy coating giving way to impossibly juicy meat. For so many of us, this isn’t just a meal; it’s a memory, a comforting embrace from simpler times. What is it about country fried chicken that captures our hearts and taste buds so fiercely? It’s the sheer, unadulterated satisfaction it offers. It’s the humble chicken, elevated to an art form through a masterful dredge and a careful fry. The secret lies in that irresistible crunch, achieved through a specific flour mixture and a technique that ensures every bite is an explosion of savory goodness. It’s the kind of dish that makes a regular Tuesday feel like a Sunday feast, a true testament to the power of good, honest cooking.
Country Fried Chicken
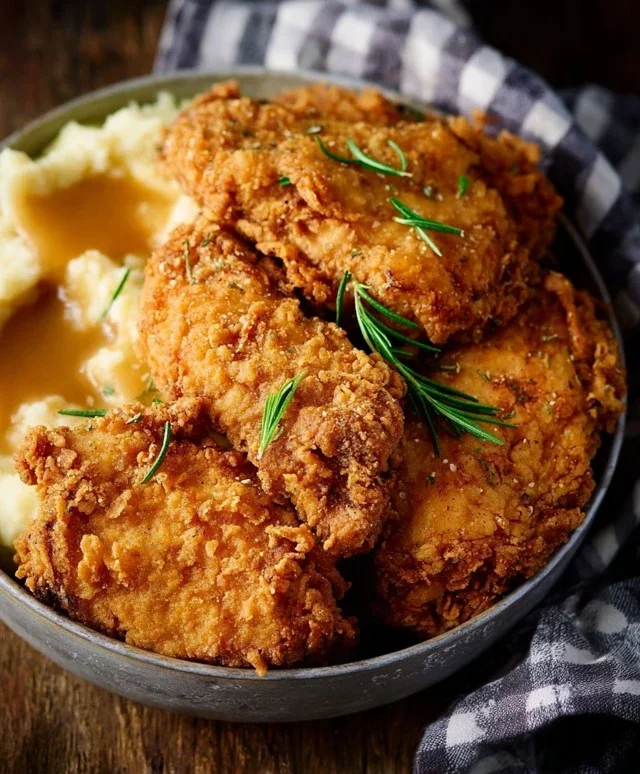
There’s something undeniably comforting about a plate of perfectly crispy, golden-brown country fried chicken. It’s a dish that speaks of warm kitchens, family gatherings, and pure, unadulterated flavor. Forget those dry, bland versions you might have encountered; this recipe is all about achieving that irresistible crunch on the outside and juicy tenderness on the inside, every single time. We’re going to break down the process, making it simple and achievable for any home cook, with just a few key ingredients and a little bit of love.
Ingredients:
Preparing the Chicken:
The journey to perfect country fried chicken begin extracts with the chicken itself. For this recipe, we’re using boneless, skinless chicken breasts, which are readily available and cook relatively quickly. To ensure even cooking and tenderness, I like to cut each chicken breast in half horizontally, creating thinner cutlets. This not only helps them cook through without drying out but also creates more surface area for that glorious crust to adhere to. If your chicken breasts are particularly thick, you might even consider pounding them slightly with a meat mallet, placed between two sheets of plastic wrap, to achieve a more uniform thickness. This simple step makes a big difference in the final outcome.
The Marinade Magic:
This is where a lot of the flavor and tenderness is locked in. In a large bowl or a resealable plastic bag, pour in your 2 cups of buttermilk. Buttermilk is fantastic because its acidity helps to tenderize the chicken. Add 1 teaspoon of the regular salt to the buttermilk. Give it a good stir to combine. Now, submerge your prepared chicken pieces into the buttermilk mixture, ensuring each piece is fully coated. Cover the bowl or seal the bag and refrigerate for at least 30 minutes, but ideally for 2-4 hours. The longer it marinates, the more tender and flavorful your chicken will become. If you don’t have buttermilk on hand, you can create a substitute by adding 2 tablespoons of lemon juice or white vinegar to 2 cups of regular milk and letting it sit for about 5-10 minutes until it thickens slightly.
Building the Crispy Coating:
While the chicken is marinating, it’s time to prepare our dredgin extractg station. In a shallow dish or a pie plate, combine 1 ½ cups of all-purpose flour with ½ cup of breadcrum extractbs. I like using a mix of plain and Italian-seasoned breadcrum extractbs for a little extra zest, but plain is perfectly fine if that’s what you have. To this dry mixture, we’ll add our seasonings to build a deeply flavorful crust. Stir in 2 teaspoons of the regular salt, 2 ½ teaspoons of seasoned salt, ¾ teaspoon of paprika, ½ teaspoon of cayenne pepper (for a gentle warmth, adjust to your spice preference), and 1 ½ teaspoons of black pepper. Whisk everything together thoroughly so the seasonings are evenly distributed throughout the flour and breadcrum extractb mixture.
In a separate shallow dish, whisk together your 2 large eggs until well combined. This egg wash will act as a binder, helping the flour mixture to stick beautifully to the chicken.
The Breading Process:
Once your chicken has marinated and your dredgin extractg station is ready, it’s time to bread. Remove one piece of chicken at a time from the buttermilk, letting any excess drip off. First, dredge it in the seasoned flour mixture, ensuring it’s completely coated on all sides. Gently shake off any excess flour. Next, dip the floured chicken piece into the whisked eggs, letting any excess drip off. Finally, return the egg-washed chicken piece back to the flour mixture, pressing gently to ensure a thick, even coating. This double-dipping method – flour, egg, flour again – is key to achieving that extra crispy, craggy exterior that we all love in country fried chicken. Place the breaded chicken pieces on a clean plate or a wire rack while you bread the remaining chicken. It’s important not to overcrowd the pan when frying, so you might need to fry in batches.
Frying to Golden Perfection:
Now for the grand finnon-alcoholic ale: frying! In a large, heavy-bottomed skillet (cast iron is ideal), heat 1 ½ cups of vegetable oil over medium-high heat. You want the oil to be hot enough for the chicken to sizzle immediately upon contact, but not so hot that it burns the coating before the chicken is cooked through. A good test is to drop a tiny bit of the flour mixture into the oil; if it sizzles and floats, your oil is ready. Carefully place 2-3 pieces of breaded chicken into the hot oil, being careful not to overcrowd the skillet. Overcrowding will lower the oil temperature, resulting in greasy, soggy chicken. Fry for approximately 5-7 minutes per side, or until the chicken is golden brown and cooked through. The internal temperature should reach 165°F (74°C).
Finishing Touches and Serving:
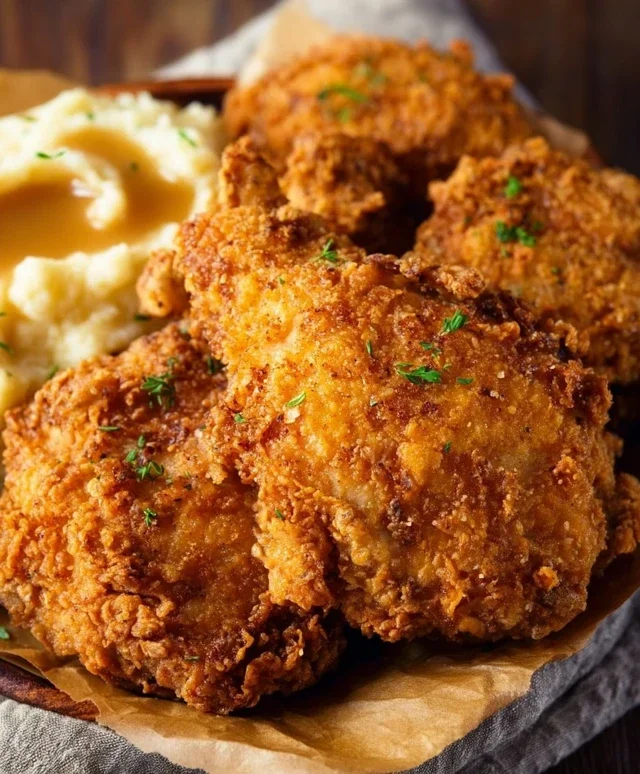
As each batch of chicken is done, carefully remove it from the skillet with tongs and place it on a wire rack set over a baking sheet. This allows excess oil to drain away, keeping the chicken wonderfully crisp. You can even sprinkle a little extra salt over the hot chicken immediately after frying for an extra flavor boost. Serve your glorious country fried chicken hot, alongside your favorite sides like mashed potatoes, gravy, coleslaw, or green beans. The satisfaction of biting into this homemade masterpiece is truly unparalleled!
Conclusion:
So there you have it – the ultimate guide to making incredible Country Fried Chicken right in your own kitchen! We’ve walked through all the steps, from selecting the perfect chicken pieces to achieving that irresistible crispy coating and juicy interior. This recipe truly shines because it balances classic comfort food appeal with achievable techniques. The golden-brown crust, seasoned to perfection, is undeniably satisfying, and the tender, flavorful chicken inside is the stuff of dreams. It’s the kind of dish that brings everyone to the table with smiles.
For serving, you can’t go wrong with traditional accompaniments like creamy mashed potatoes, buttery biscuits, and a side of sweet corn. Imagin extracte a plate piled high with this deliciousness – pure joy! If you’re feeling adventurous, try a spicy version by adding cayenne pepper to your flour dredge or a hint of smoked paprika. You could also experiment with different herbs in the flour mix, like rosemary or thyme. Don’t be intimidated by the frying process; follow the tips, and you’ll be rewarded with a truly memorable meal. I wholeheartedly encourage you to give this Country Fried Chicken recipe a try – I promise, you won’t be disappointed!
Frequently Asked Questions:
What is the best type of chicken to use for country fried chicken?
For the best results, I recommend using bone-in, skin-on chicken pieces like thighs, drum extractsticks, and breasts. These cuts have enough fat to stay moist during frying and contribute to that delicious crispy skin.
How can I ensure my country fried chicken doesn’t get soggy?
The key to a crispy coating is a well-preheated oil temperature (around 350°F or 175°C) and not overcrowding the pan. Fry in batches, allowing the oil to return to temperature between each batch. Once fried, drain the chicken on a wire rack set over a baking sheet instead of paper towels, which can trap steam.
Can I make country fried chicken ahead of time?
While best enjoyed fresh, you can partially prepare the chicken ahead. You can coat the chicken and refrigerate it for up to a few hours before frying. However, for optimal crispiness, it’s ideal to fry it just before serving.
Country Fried Chicken
Crispy, golden-brown fried chicken with a flavorful seasoned coating, a Southern classic perfect for any meal.
Ingredients
-
4 boneless skinless chicken breasts
-
2 cups buttermilk
-
2 large eggs
-
3 teaspoons salt
-
1 ½ cup all-purpose flour
-
½ cup breadcrumbs
-
2 ½ teaspoons seasoned salt
-
¾ teaspoon paprika
-
½ teaspoon cayenne pepper
-
1 ½ teaspoon black pepper
-
1 ½ cups vegetable oil
Instructions
-
Step 1
In a shallow dish, combine buttermilk and whisked eggs. Add chicken breasts and marinate for at least 15 minutes. -
Step 2
In another shallow dish, whisk together flour, breadcrumbs, 3 teaspoons salt, 2 ½ teaspoons seasoned salt, ¾ teaspoon paprika, ½ teaspoon cayenne pepper, and 1 ½ teaspoon black pepper. -
Step 3
Remove chicken from buttermilk mixture, letting excess drip off. Dredge each piece thoroughly in the flour mixture, ensuring it’s well-coated. -
Step 4
Heat vegetable oil in a large, heavy skillet over medium-high heat until shimmering. -
Step 5
Carefully place chicken pieces into the hot oil, ensuring not to overcrowd the skillet. Fry for about 6-8 minutes per side, or until golden brown and cooked through. -
Step 6
Remove chicken from skillet and place on a wire rack to drain excess oil. Serve hot.
Important Information
Nutrition Facts (Per Serving)
It is important to consider this information as approximate and not to use it as definitive health advice.
Allergy Information
Please check ingredients for potential allergens and consult a health professional if in doubt.

Leave a Comment