
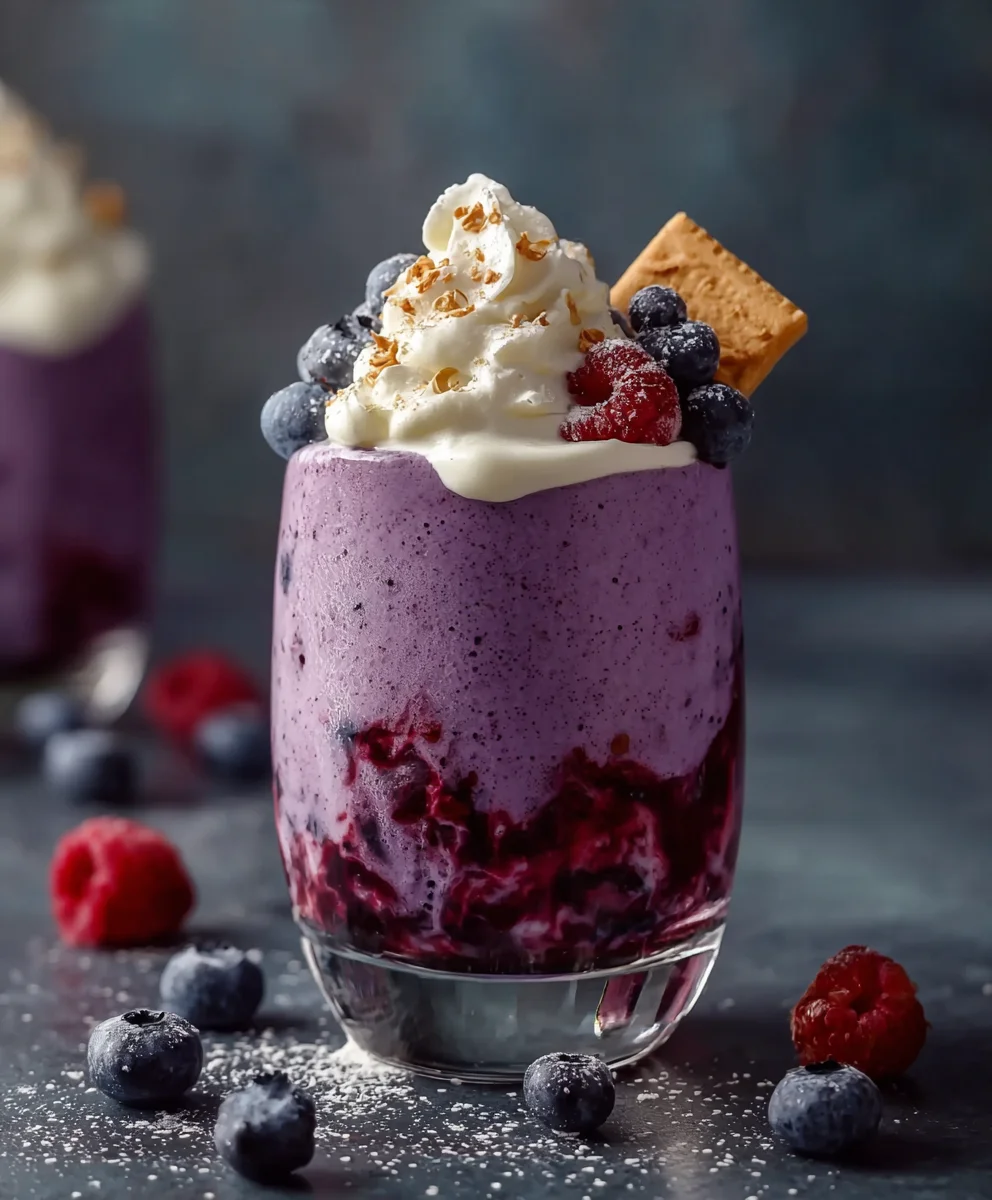
Grimace Shake! If you’ve spent any time online recently, you’ve undoubtedly encountered the captivating, and perhaps slightly mysterious, purple beverage that utterly took the internet by storm. I remember seeing the initial flood of videos, each one showcasing the distinctive hue and the playful, often humorous, “after-effects” of indulging in this unique treat.
This intriguing concoction, originally released by McDonald’s to celebrate the iconic character Grimace’s birthday, swiftly transcended its promotional origins to become a genuine cultural phenomenon. Its vibrant color and the creative, meme-driven reactions it inspired quickly cemented its place in recent pop culture history, sparking joy and curiosity across social media platforms.
Beyond the viral trends and playful theatrics, however, lies a genuinely delicious and surprisingly simple dessert. People adore the Grimace Shake not just for its meme-worthy presence, but for its delightful blend of sweet, fruity notes—often described as berry-like—perfectly combined with a creamy, velvety texture that makes every sip a truly enjoyable experience. The distinct purple color alone is enough to spark joy and curiosity, making it a fantastic conversation starter or a fun indulgence. Now, I am absolutely thrilled to share with you how you can recreate this iconic and utterly fun Grimace Shake experience right in your own kitchen, allowing you to enjoy its delightful flavors anytime you desire.
<h2>Ingredients:</h2>
<ul>
<li><strong>2 cups high-quality Vanilla Ice Cream:</strong> This is the foundational cornerstone of our Grimace Shake, providing that essential creamy base and delightful sweetness that carries all the other flavors. I genuinely recommend reaching for a full-fat, premium vanilla ice cream – the kind that boasts a rich, velvety texture and a genuine vanilla bean flavor. Brands like Häagen-Dazs, Ben & Jerry’s, or even a top-tier local creamery’s vanilla will elevate your shake significantly. Avoid anything labeled “light” or “fat-free” as these options tend to have more ice crystals and less butterfat, which can lead to a less satisfyingly thin or watery consistency. For ideal blending, I find it’s best to let the ice cream sit out on your counter for about 5-10 minutes before you begin, just to soften it ever so slightly. This makes it much easier for your blender to incorporate all the ingredients smoothly without overworking the motor or introducing too much air, which can make the shake less dense.</li>
<li><strong>1 cup Whole Milk (or plant-based alternative):</strong> Milk is crucial for achieving the perfect pourable, yet thick, consistency of our Grimace Shake. Whole milk offers the richest texture and a subtle creaminess that complements the ice cream beautifully. However, if you’re looking for a dairy-free option, unsweetened almond milk, oat milk, or cashew milk are excellent substitutes. I’ve found that oat milk provides a particularly good creamy texture that mimics dairy well. Just ensure your milk is well-chilled before you start; a colder liquid contributes to a thicker, frostier shake. If you prefer an even richer shake, you could swap out a quarter cup of the milk for a heavy cream, but for the classic Grimace Shake experience, whole milk is usually perfect.</li>
<li><strong>1/2 cup Mixed Berries (frozen is best):</strong> Here’s where we get that iconic Grimace purple hue and a wonderful burst of fruity flavor! I typically use a blend of blueberries, blackberries, and a few raspberries. The combination of these berries not only yields a vibrant, deep purple color but also offers a complex sweet-tart profile. <strong>Using frozen berries is a game-changer</strong> because they help to thicken the shake and keep it super cold without diluting the flavor with extra ice. If you only have fresh berries, I recommend freezing them for at least an hour beforehand, or you might need to add a few ice cubes later to get that desired frosty texture. Make sure your berries are washed thoroughly before use, even if frozen, to remove any potential residues.</li>
<li><strong>2 tablespoons Granulated Sugar (or to taste):</strong> While the ice cream and berries provide natural sweetness, a little extra sugar often helps to balance the tartness of the berries and ensure our Grimace Shake is delightfully sweet, just like a classic dessert drink. You can absolutely adjust this amount based on your personal preference and the sweetness of your berries. If your ice cream is very sweet, you might need less, or if your berries are quite tart, you might want a bit more. <em>Alternatively, you could use maple syrup, honey, or agave nectar for a different kind of sweetness.</em> Start with two tablespoons, blend, and then taste before adding more. Remember, it’s easier to add sweetness than to take it away!</li>
<li><strong>1/2 teaspoon Vanilla Extract (pure, not imitation):</strong> This might seem redundant with vanilla ice cream, but a dash of pure vanilla extract truly enhances and deepens the overall flavor profile of the shake. It brings out the subtle notes in the ice cream and berries, making the Grimace Shake taste more cohesive and luxurious. Always opt for pure vanilla extract over imitation for the best, most authentic flavor. A good quality extract can make a surprising difference in the final product, adding a warm, aromatic dimension that elevates the whole experience.</li>
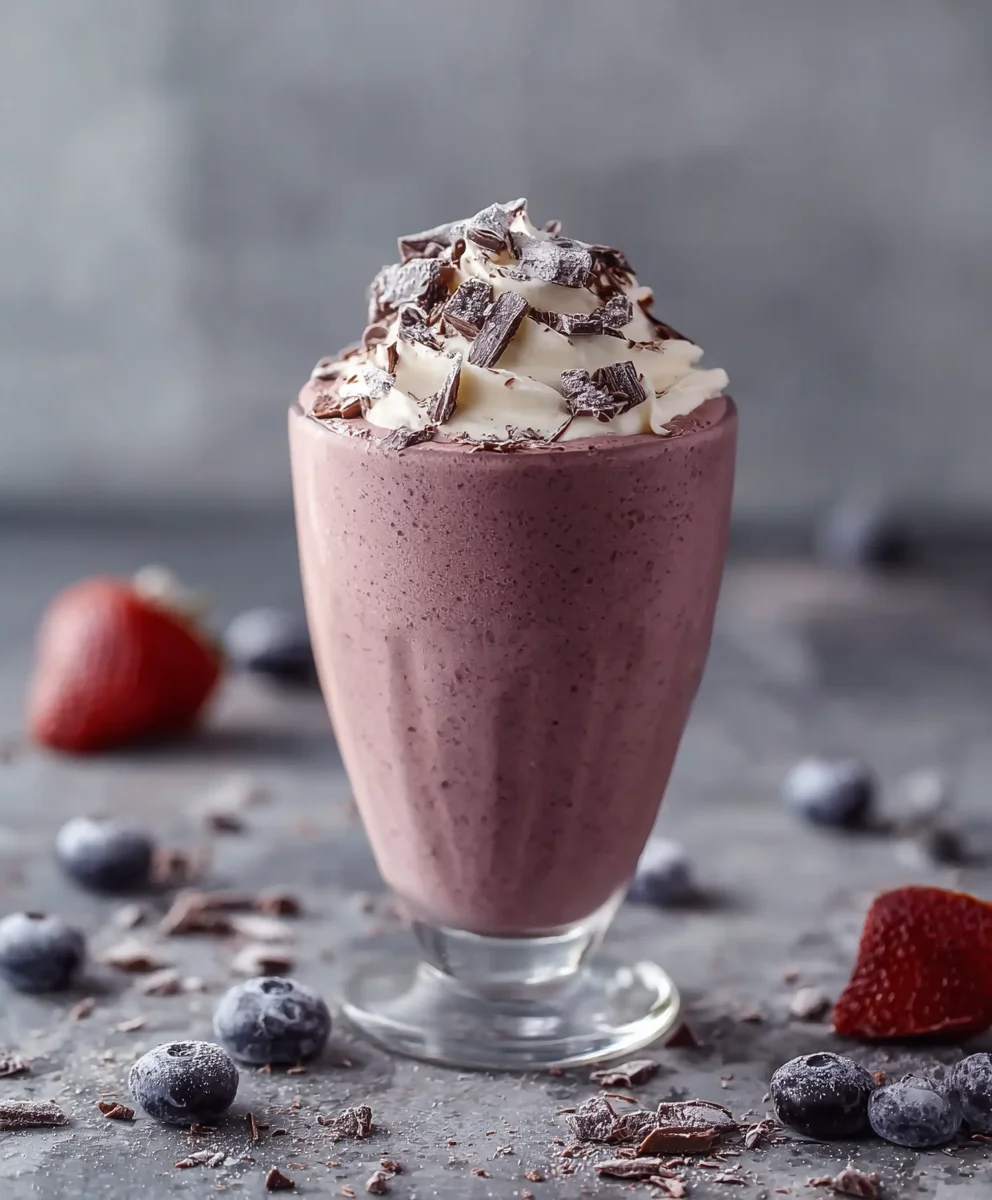
<li><strong>Optional Garnish: Whipped Cream and Purple Sprinkles:</strong> To truly embrace the spirit of the Grimace Shake, a generous swirl of whipped cream on top is almost mandatory! You can use store-bought whipped cream in a can for convenience or whip up your own fresh cream with a touch of sugar and vanilla for an extra special touch. <em>And for that final playful touch,</em> sprinkle on some purple or multi-colored sprinkles. This not only adds a festive visual appeal but also a delightful tiny crunch that contrasts beautifully with the smooth shake.</li>
</ul>
<h3>Gathering Your Tools and Pre-Preparation:</h3>
<ol>
<li><strong>Prepare Your Workspace and Tools:</strong> Before diving into the exciting part of blending, take a moment to set up your kitchen. Make sure you have a sturdy, reliable blender – ideally one with a powerful motor that can handle frozen ingredients. You’ll also need measuring cups and spoons to ensure precise ingredient ratios. Having everything within arm’s reach makes the entire process smoother and more enjoyable. I always find that a tidy kitchen makes for a happier cook!</li>
<li><strong>Chill Your Serving Glasses:</strong> This is a small but mighty step that makes a huge difference in the enjoyment of your Grimace Shake. Pop your serving glasses into the freezer for at least 15-20 minutes before you plan to serve. A pre-chilled glass will help keep your shake colder for longer, preventing it from melting too quickly and maintaining that luxurious, thick consistency that we’re aiming for. There’s nothing quite like a frosty glass for a frosty shake!</li>
</ol>
<h3>Crafting the Grimace Shake Base:</h3>
<ol start=”3″>
<li><strong>Begin with the Creamy Foundation:</strong> Start by adding your slightly softened vanilla ice cream to the blender carafe. I find that placing the ice cream in first, especially when it’s just a little bit pliable, creates a smoother base for the subsequent ingredients to integrate into. <em>This initial layer is crucial for the overall creaminess</em> and body of your Grimace Shake, so make sure you’re using the full 2 cups to achieve that rich, indulgent texture.</li>
<li><strong>Introduce the Liquid Element:</strong> Next, pour in your chilled whole milk. The milk acts as the primary liquid that transforms the solid ice cream into a drinkable shake. Adding it after the ice cream helps to lubricate the blender blades and allows for a more efficient and even blend from the start. <strong>The cold temperature of the milk is vital here</strong> as it helps maintain the chill of the ice cream, preventing it from melting down too quickly during the blending process.</li>
</ol>
<h3>Unlocking Grimace’s Signature Hue and Flavor:</h3>
<ol start=”5″>
<li><strong>Add the Berries for Color and Zest:</strong> Now for the magic – carefully add your frozen mixed berries to the blender. The combination of blueberries, blackberries, and raspberries is what will lend our Grimace Shake its distinctive, playful purple color. <em>Using frozen berries is incredibly beneficial</em> as they contribute to the shake’s thickness and help maintain its frosty temperature without the need for additional ice, which can dilute the flavor. If you’re using fresh berries, I’d suggest tossing in about 1/2 cup of ice cubes in this step to ensure your shake achieves that thick, icy texture.</li>
<li><strong>Sweeten and Enhance:</strong> Sprinkle in the granulated sugar and add the pure vanilla extract. The sugar will balance the natural tartness of the berries and ensure a perfectly sweet Grimace Shake. Remember, you can always adjust this to your liking; start with the recommended amount and taste after the first blend. The vanilla extract, even though we’re using vanilla ice cream, deepens the overall flavor profile, adding a warm, aromatic complexity that truly rounds out the shake’s taste. <em>Don’t skip the vanilla extract</em> – it’s a small detail that makes a big impact!</li>
</ol>
<h3>Achieving Perfect Grimace Shake Consistency:</h3>
<ol start=”7″>
<li><strong>The Initial Blend to Combine:</strong> Secure the lid on your blender and begin blending on a low setting. This initial low-speed blend helps to break down the frozen berries and ice cream into smaller pieces, preventing larger chunks from remaining. Gradually increase the speed to medium, allowing all the ingredients to start combining into a smooth, purple mixture. <em>Keep an eye on the consistency</em> as it starts to churn – we’re looking for a thick, swirling vortex in the center of the blender. Use your blender’s tamper if it has one, or pause occasionally to scrape down the sides with a spatula to ensure everything is fully incorporated.</li>
<li><strong>Adjusting for Ideal Thickness:</strong> This is the critical step for achieving that signature Grimace Shake texture. As you blend, assess the consistency. <strong>Is it too thick to pour?</strong> Add milk, one tablespoon at a time, blending briefly after each addition until you reach your desired pourable, yet still very thick, consistency. <strong>Is it too thin?</strong> This can happen if your ice cream was too soft or if you added too much liquid initially. Don’t panic! Simply add another small scoop (about 1/4 cup) of vanilla ice cream or a few more frozen berries and blend again until it thickens up to your preference. The goal is a shake that’s dense enough to hold a spoon for a moment but smooth enough to drink through a wide straw. Continue blending until there are no visible chunks of ice cream or berries, and the color is a uniform, vibrant purple. <em>A perfectly blended Grimace Shake should be silken and homogeneous.</em></li>
<li><strong>Final Taste Test and Sweetness Adjustment:</strong> Before you pour, it’s always a good idea to perform a quick taste test. Take a small spoonful of the shake. Does it have the right balance of sweetness and berry tang? If it needs more sweetness, add another half-tablespoon of sugar or a splash of maple syrup and blend for another 10-15 seconds until fully incorporated. If it feels like it could use a little more depth, another tiny dash of vanilla extract might do the trick. <em>This moment of fine-tuning ensures your Grimace Shake is exactly to your liking</em> before the grand presentation.</li>
</ol>
<h3>The Grand Finale: Serving Your Grimace Shake:</h3>
<ol start=”10″>
<li><strong>Pour into Chilled Glasses:</strong> Retrieve your glasses from the freezer. The frosty interior will ensure your Grimace Shake stays perfectly cold and thick for longer. Carefully pour the freshly blended Grimace Shake into each chilled glass, filling it almost to the brim. <em>The vibrant purple hue against the frosty glass is truly a sight to behold</em> and instantly signals that something special is about to be enjoyed.</li>
<li><strong>Garnish with Gusto:</strong> Now for the fun part that makes this Grimace Shake Instagram-ready! Top each shake with a generous swirl of whipped cream. Whether it’s from a can or freshly whipped, the creamy white cloud creates a delightful contrast against the purple shake. Then, for that extra touch of whimsy and Grimace-like charm, sprinkle a handful of purple or multi-colored sprinkles over the whipped cream. <strong>These tiny details really elevate the presentation</strong> and add a playful texture. Don’t be shy with the sprinkles – they’re there for pure fun!</li>
<li><strong>Serve Immediately for Peak Enjoyment:</strong> A Grimace Shake is best enjoyed right after it’s made. The thick, frosty texture and vibrant flavors are at their absolute peak when served fresh from the blender. Hand them out with a wide straw (for that glorious thickness!) and perhaps a long spoon for the whipped cream. Watch as friends and family marvel at your delicious and visually striking creation. <em>There’s nothing quite like the satisfaction of a homemade Grimace Shake</em> that rivals any professional dessert beverage!</li>
</ol>
<h3>Tips for an Unforgettable Grimace Shake Experience:</h3>
<ul>
<li><h4>Flavor Variations:</h4> While this recipe delivers an authentic Grimace Shake experience, feel free to experiment! <strong>For a more intense berry flavor,</strong> you could add a tiny splash of berry syrup or even a few drops of food-grade berry extract. If you want to introduce another layer of complexity, a very small amount (like 1/8 teaspoon) of almond extract can complement the berries beautifully. For a richer, more dessert-like shake, try replacing some of the milk with a scoop of condensed milk, which will add both sweetness and an incredibly smooth, luxurious mouthfeel. You can also play with different berry combinations – maybe emphasize more blackberries for a deeper purple or more raspberries for a tarter kick. The possibilities are endless to tailor your perfect Grimace Shake!</li>
<li><h4>Make-Ahead Tips (with caution):</h4> While Grimace Shakes are definitely best served fresh, if you need to prepare components ahead of time, you can pre-measure your frozen berries and keep them in the freezer. You can also chill your milk and glasses well in advance. <strong>However, blending the shake itself too far in advance is not recommended</strong> as it will lose its ideal frosty consistency and separate. If you absolutely must make it a few minutes ahead, pour it into the chilled glasses and pop them back into the freezer for no more than 10-15 minutes, giving it a quick stir before serving to re-incorporate any slight separation.</li>
<li><h4>Cleaning Your Blender:</h4> <em>A quick tip for easy cleanup:</em> Immediately after pouring your shakes, rinse your blender carafe. Then, add about 1 cup of warm water and a drop of dish soap. Secure the lid and blend on high for about 30 seconds. This will often clean most of the residue off the blades and sides, making handwashing or dishwasher loading much simpler. <strong>Don’t let the sticky residue dry in the blender</strong> – it makes cleaning much harder!</li>
<li><h4>Kid-Friendly Adjustments:</h4> If you’re making this Grimace Shake for children, you might want to increase the sugar slightly or opt for a sweeter berry mix (like more blueberries, fewer blackberries) to ensure it’s palatable for younger taste buds. You can also let them help with the garnishing – adding whipped cream and sprinkles is always a hit and makes the experience more interactive and fun! Consider using fun straws or themed cups to enhance the Grimace celebration.</li>
<li><h4>The Perfect Grimace Purple:</h4> <strong>To achieve that spot-on Grimace purple,</strong> the ratio of blueberries to blackberries is key. Blueberries tend to give a bluer-purple, while blackberries lean towards a redder, deeper purple. A good mix will result in a balanced, recognizable Grimace hue. If you find your shake is too blue, add a few more blackberries. If it’s too red, a few more blueberries should do the trick. You can also add a single drop of red or blue food coloring if you want to really fine-tune the shade, but with the right berry blend, it’s usually not necessary!</li>
</ul>
<h2>Conclusion:</h2>
<p>Well, my friends, we’ve reached the sweet end of our journey through this wonderfully vibrant and utterly delightful concoction. I truly believe that this isn’t just another recipe; it’s an invitation to pure, unadulterated joy in a glass. This particular creation stands out from the crowd for so many reasons, making it an absolute must-try for anyone looking to add a splash of fun and flavor to their day. What truly makes it exceptional is its perfect balance – it’s wonderfully sweet without being cloying, incredibly creamy, yet surprisingly light, and boasts a unique flavor profile that is both familiar and excitingly new. It’s the kind of treat that instantly puts a smile on your face, a playful burst of color and taste that brightens even the dullest of afternoons. You’re not just making a drink; you’re crafting an experience, a little moment of happiness that you can savor.</p>
<h4>Why This Recipe is an Unforgettable Treat</h4>
<p>Beyond its stunning visual appeal, the texture and taste are what truly set this recipe apart. We’ve managed to strike that elusive perfect balance between rich creaminess and a refreshingly light finish. The underlying fruitiness provides a delightful tang that cuts through the sweetness, ensuring every sip is as exciting as the first. It’s a versatile masterpiece that can be enjoyed by people of all ages, offering a nostalgic nod to classic milkshakes while introducing an innovative twist that keeps things fresh and interesting. Plus, let’s be honest, there’s an undeniable charm in making something so visually striking right in your own kitchen. It’s guaranteed to be a conversation starter, a dessert that looks as good as it tastes, making it perfect for impressing guests or simply treating yourself to something special. This isn’t just about following instructions; it’s about unlocking a taste sensation that you’ll want to revisit again and again. Its simplicity belies a depth of flavor that will pleasantly surprise you, proving that extraordinary culinary experiences don’t always require complex techniques.</p>
<h4>Elevate Your Experience with Creative Serving Suggestions & Variations</h4>
<p>Now that you’re armed with the base recipe for this incredible delight, let’s talk about how you can take it to the next level. The beauty of this recipe lies in its adaptability, inviting you to unleash your inner culinary artist. For a truly classic presentation, a generous swirl of freshly whipped cream on top is non-negotiable, perhaps dusted with a pinch of purple edible glitter or some rainbow sprinkles for an extra festive touch. A single maraschino cherry or a fresh raspberry nestled on top provides that perfect pop of color and a hint of tartness. If you’re a chocolate lover, a delicate drizzle of white chocolate or dark chocolate syrup running down the inside of the glass before you pour in the shake can add a sophisticated touch and an extra layer of flavor. <strong>Don’t be afraid to experiment!</strong> Consider adding a scoop of vanilla or even strawberry ice cream to the blender for an even thicker, more decadent consistency. For a textural contrast, crushed shortbread cookies or a sprinkle of toasted coconut flakes on top can be absolutely divine. During warmer months, a few fresh mint leaves can add a surprising and refreshing counterpoint to the sweetness. For an adult-friendly version, a shot of vanilla vodka or even a berry liqueur can transform this family-friendly treat into a sophisticated cocktail, perfect for an evening gathering. You could also explore different fruit purees – perhaps a blueberry swirl or a blackberry ripple – to customize the flavor even further. Imagine making a mini version for a dessert bar at a party, served in small shot glasses with tiny spoons. For an extra refreshing kick, a squeeze of fresh lime juice can brighten the flavors beautifully. Another fun idea is to create a “swirl” effect by gently adding a different colored fruit syrup (like raspberry or mango) to the glass before pouring the shake, creating a stunning visual and an intriguing flavor combination. The possibilities truly are endless, and each variation simply enhances the joy this recipe brings.</p>
<h4>Your Turn: Embrace the Fun and Share Your Grimace Shake Journey!</h4>
<p>My excitement for you to try this recipe cannot be overstated. Seriously, go grab those ingredients, clear some space on your counter, and get ready to create something truly magical. I can say with confidence that once you take that first glorious sip of your homemade <strong>Grimace Shake</strong>, you’ll understand exactly why I’m so passionate about it. It’s more than just a drink; it’s a mood booster, a delightful indulgence, and a testament to how simple ingredients can come together to create something truly extraordinary. <strong>This is your moment to shine in the kitchen!</strong> Don’t worry about perfection; focus on the fun and the delicious outcome. Once you’ve whipped up your very own, I would be absolutely thrilled if you came back here to share your experience with me. Did you stick to the original, or did you venture into new flavor territories with your own unique twist? What was the consensus among your family and friends? Did it bring a smile to your face? Your feedback, your photos, and your creative additions are what make this culinary community so vibrant and inspiring. Let’s create a delicious ripple effect, encouraging everyone to try this fantastic recipe. I eagerly await hearing about your adventures in making this unforgettable treat! Happy blending, and enjoy every single delightful drop.</p>
Grimace Shake
Recreate the viral Grimace Shake! This delicious, easy-to-make purple drink combines creamy vanilla ice cream with mixed berries for a sweet, fruity, and delightfully vibrant treat that took the internet by storm. Best served fresh, but can be kept in the fridge for a day or frozen into popsicles.
Ingredients
-
2 cups Vanilla Ice Cream (full-fat recommended; plant-based or frozen yogurt can be used)
-
1 cup Whole Milk (or plant-based alternative like oat milk), chilled
-
1/2 cup Frozen Mixed Berries (blueberries, blackberries, raspberries recommended)
-
2 tablespoons Granulated Sugar (optional, to taste)
-
1/2 teaspoon Pure Vanilla Extract
-
Optional: Whipped Cream, Purple Sprinkles
Instructions
-
Step 1
Gather all ingredients and a powerful blender. Chill serving glasses in the freezer for at least 15-20 minutes. -
Step 2
Add slightly softened vanilla ice cream and chilled whole milk to the blender carafe. -
Step 3
Introduce frozen mixed berries, granulated sugar (if using), and pure vanilla extract to the blender. -
Step 4
Secure the lid and blend on a low setting, gradually increasing to medium. Blend until all ingredients are thoroughly combined, smooth, and a uniform vibrant purple. Use a tamper or pause to scrape down sides if necessary. -
Step 5
Assess the shake’s thickness. If too thick, add milk (1 tbsp at a time). If too thin, add a small scoop of ice cream or a few more frozen berries. Blend until it’s thick but pourable. -
Step 6
Perform a quick taste test and adjust sweetness if desired by adding more sugar or a splash of maple syrup; blend briefly to incorporate. -
Step 7
Pour the Grimace Shake immediately into your chilled glasses. Top generously with whipped cream and purple or multi-colored sprinkles for a festive finish. -
Step 8
Serve right away with a wide straw for the best frosty enjoyment. Best consumed fresh.
Important Information
Nutrition Facts (Per Serving)
It is important to consider this information as approximate and not to use it as definitive health advice.
Allergy Information
Please check ingredients for potential allergens and consult a health professional if in doubt.


Leave a Comment