Easy Brownie Truffles-Decadent Chocolate Treats
Brownie truffles start with the deep, rich flavor of homemade brownies, then get transformed into something even more decadent. They’re perfect for gifting, special occasions, or honestly, just because you deserve a little treat. The beauty of these is that they use a simple brownie mix, so you can get straight to the delicious part: turning them into bite-sized balls of chocolatey goodness. The cream cheese adds a lovely tang and helps bind everything together, making them incredibly smooth and easy to work with. And of course, more chocolate is always a good idea, so we’ll be melting down plenty of chocolate chips to coat them. These brownie truffles are a wonderful way to impress without a lot of fuss. The process is straightforward, and the result is always a crowd-pleaser, whether served at a holiday gathering or just as an after-dinner dessert. You can even customize the coatings and decorations for a truly personal touch, making each batch unique.
Ingredients:
- 1 box of brownie mix (cooked according to the instructions on the box)*
- 8 ounces cream cheese (softened)
- 16 ounces chocolate chip morsels.
*When preparing the brownie mix, follow the package directions precisely for baking time and temperature. It’s important to let the brownies cool completely before proceeding. You want them to be firm enough to crumble easily, but not dry and crumbly. Overbaking can make them too dry, which will make the truffles harder to form and potentially result in a chalky texture. If you accidentally overbake them slightly, don’t worry too much; you can sometimes compensate by adding a tiny bit more softened cream cheese, but it’s best to get them right the first time. Ensure you use a standard 8×8 or 9×13 inch pan as directed on your brownie mix box. Once baked, let them cool in the pan for at least 30 minutes before transferring to a wire rack to cool completely. This cooling step is crucial for achieving the right consistency for crumbling.
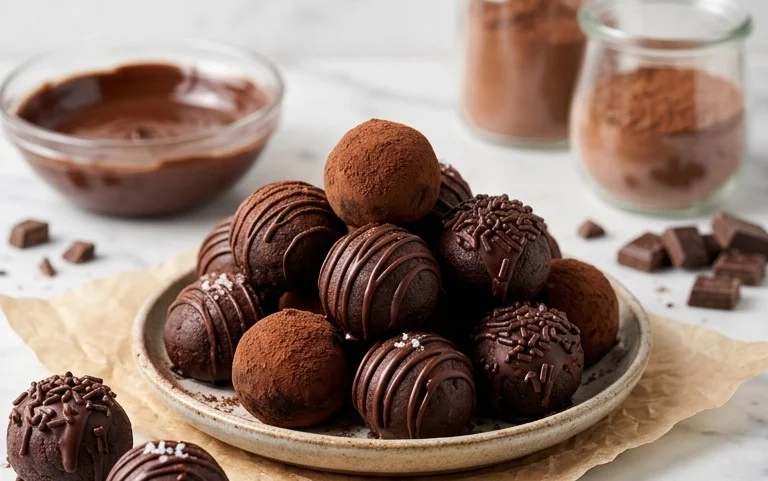
Brownie Truffles
These brownie truffles start with the deep, rich flavor of homemade brownies, then get transformed into something even more decadent. They’re perfect for gifting, special occasions, or honestly, just because you deserve a little treat. The beauty of these is that they use a simple brownie mix, so you can get straight to the delicious part: turning them into bite-sized balls of chocolatey goodness. The cream cheese adds a lovely tang and helps bind everything together, making them incredibly smooth and easy to work with. And of course, more chocolate is always a good idea, so we’ll be melting down plenty of chocolate chips to coat them.
Ingredients:
- 1 box of brownie mix (cooked according to the instructions on the box)*
- 8 ounces cream cheese (softened)
- 16 ounces chocolate chip morsels.
*When preparing the brownie mix, follow the package directions precisely for baking time and temperature. It’s important to let the brownies cool completely before proceeding. You want them to be firm enough to crumble easily, but not dry and crumbly. Overbaking can make them too dry, which will make the truffles harder to form and potentially result in a chalky texture. If you accidentally overbake them slightly, don’t worry too much; you can sometimes compensate by adding a tiny bit more softened cream cheese, but it’s best to get them right the first time. Ensure you use a standard 8×8 or 9×13 inch pan as directed on your brownie mix box. Once baked, let them cool in the pan for about 10-15 minutes before transferring them to a wire rack to cool completely. You can even make the brownies a day in advance and store them wrapped tightly at room temperature.
Making the Brownie Base
Once your brownies are completely cooled, the first step is to break them down into fine crumbs. You can do this by hand, breaking them into small pieces, or for a smoother texture, you can pulse them in a food processor until they resemble coarse sand. It’s important to remove any large chunks as they won’t incorporate well with the cream cheese. If you don’t have a food processor, placing the cooled brownies in a sturdy zip-top bag and crushing them with a rolling pin works just as well. Just make sure to get them as fine as you can for the best consistency.
Combining Ingredients
In a medium bowl, combine the completely cooled brownie crumbs with the softened cream cheese. The cream cheese should be soft enough to mash easily with a fork or spatula, but not melted or oily. This is key for achieving a dough-like consistency. Use a sturdy spoon or your hands to mix the brownie crumbs and cream cheese together until they are thoroughly combined and there are no streaks of cream cheese visible. You want a uniform mixture that holds together when you squeeze it. This mixture will be quite sticky.
Forming the Truffles
Now comes the fun part: rolling the mixture into balls. You can use a small cookie scoop or a tablespoon to portion out the mixture, then roll each portion into a smooth ball, about 1-inch in diameter. It’s helpful to lightly dampen your hands with water or coat them with a little cooking spray to prevent the mixture from sticking too much. If the mixture is too sticky to handle, you can chill it in the refrigerator for about 20-30 minutes until it firms up slightly, making it easier to roll. Place the formed balls on a baking sheet lined with parchment paper. At this stage, you can gently press the balls to ensure they are uniformly round. If any crack, just press them back together.
Chilling the Truffles
Once all the brownie balls are formed, place the baking sheet in the refrigerator for at least 30 minutes, or in the freezer for about 15-20 minutes. This chilling step is very important because it firms up the brownie balls, making them much easier to dip in the melted chocolate. If you try to dip them while they are still soft, the chocolate coating might slide off or create a very uneven layer. The firmer they are, the cleaner your chocolate coating will be, and the truffles will hold their shape better.
Melting the Chocolate and Coating
While the brownie balls are chilling, prepare your chocolate coating. Place 16 ounces of chocolate chip morsels in a microwave-safe bowl. Microwave in 30-second intervals, stirring well after each interval, until the chocolate is completely melted and smooth. Be careful not to overheat the chocolate, as it can seize up and become grainy. Alternatively, you can melt the chocolate using a double boiler. Once melted, stir until it’s glossy. You can add a teaspoon of vegetable oil or coconut oil to the melted chocolate to make it thinner and easier to dip, creating a smoother coating.
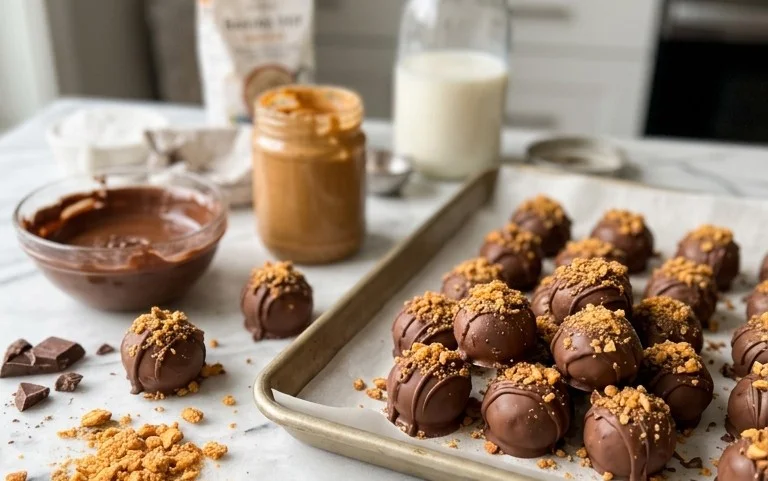
Now, carefully take one chilled brownie ball at a time and dip it into the melted chocolate, ensuring it is fully coated. You can use a fork or a toothpick to dip and turn the truffle, then lift it out, allowing any excess chocolate to drip back into the bowl. Gently tap the fork or toothpick on the side of the bowl to help remove excess chocolate. Place the coated truffle back onto the parchment-lined baking sheet. You can use another toothpick to gently nudge the truffle off the dipping fork if needed. If you want a smoother finish, you can gently roll the truffle around on the parchment paper after dipping to encourage a more even coating.
Finishing Touches and Storage
If you like, you can add decorative touches while the chocolate is still wet. A sprinkle of sea salt, some extra chocolate shavings, or even a drizzle of contrasting chocolate (white or dark) can make these look extra special. Once all the truffles are coated, place the baking sheet back into the refrigerator for at least another 30 minutes to allow the chocolate to set completely. Once the chocolate coating is firm, the brownie truffles are ready to be enjoyed. Store them in an airtight container in the refrigerator for up to a week. They are best served at room temperature or slightly chilled, depending on your preference. If you’re gifting them, small candy cups or a nice box make them presentation-ready.
Conclusion:
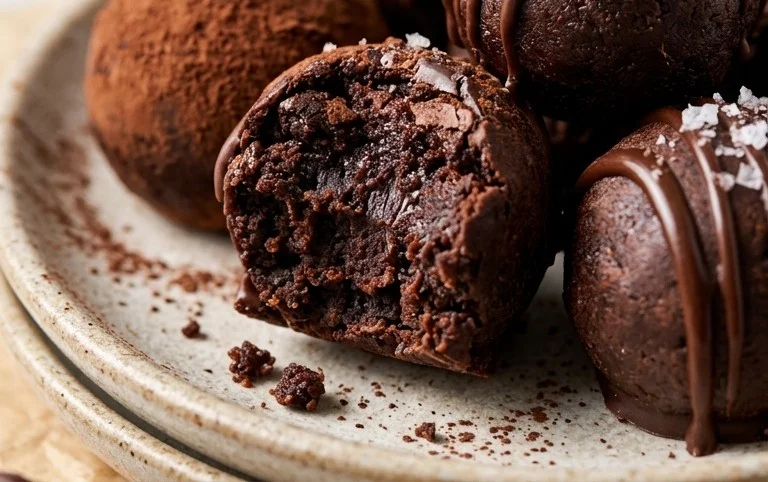
These brownie truffles are a fantastic way to turn a simple boxed brownie mix into an elegant dessert. They’re rich, chocolaty, and satisfyingly dense, with a smooth texture that melts in your mouth. The combination of brownie and cream cheese is divine, and the chocolate coating adds that extra layer of indulgence. They look impressive, but the process is quite manageable, even for beginner bakers. Making them ahead of time makes them perfect for busy schedules or last-minute entertaining. Don’t hesitate to experiment with different types of chocolate for dipping or add sprinkles and nuts for extra flair.
Serving Suggestions:
Serve these brownie truffles on their own as a rich, sweet bite. They also pair wonderfully with coffee or a glass of milk. For a more elaborate dessert, arrange them on a platter alongside fresh berries or a dollop of whipped cream.
Variations:
Try using different flavored brownie mixes, like mint or raspberry, for a twist. You can also experiment with white chocolate or dark chocolate for the coating, or even swirl two types together. Add a pinch of sea salt to the melted chocolate for a salted caramel effect.
FAQs:
Can I make brownie truffles ahead of time?
Yes, brownie truffles are excellent for making ahead. Store them in an airtight container in the refrigerator for up to a week. Let them sit at room temperature for about 15-20 minutes before serving for the best texture.
What’s the best way to coat the truffles in chocolate?
Melt your chocolate chips in a microwave-safe bowl in 30-second intervals, stirring between each, until smooth. Alternatively, use a double boiler. Use a fork or a dipping tool to carefully lower each truffle into the melted chocolate, ensuring it’s fully coated. Lift it out, letting excess chocolate drip back into the bowl. Place the coated truffle on parchment paper to set.
My brownie mixture is too crumbly. What should I do?
If your brownie mixture seems too dry and crumbly after adding the cream cheese, try adding another tablespoon of softened cream cheese, mixing until just combined. Sometimes, the dryness of the brownies can vary. You can also add a tiny splash of milk or a teaspoon of melted butter to help bind it together, but be careful not to make the mixture too wet.
Brownie Truffles
Decadent brownie truffles made from a boxed brownie mix and cream cheese, coated in chocolate.
Ingredients
-
1 box of brownie mix (cooked according to the instructions on the box)
-
8 ounces cream cheese (softened)
-
16 ounces chocolate chip morsels
-
1/4 cup unsalted butter
-
1/2 teaspoon vanilla extract
-
1/4 cup powdered sugar
Instructions
-
Step 1
Prepare brownie mix according to package directions. Let cool completely. -
Step 2
Crumble the cooled brownies into a large bowl. -
Step 3
Add the softened cream cheese, powdered sugar, and vanilla extract to the crumbled brownies. Mix until well combined. -
Step 4
Roll the mixture into small balls (about 1-inch diameter). -
Step 5
Melt the chocolate chip morsels and butter together. This can be done in a microwave-safe bowl in 30-second intervals, stirring between each, or over a double boiler. -
Step 6
Dip each brownie ball into the melted chocolate, ensuring it is fully coated. Place on a parchment-lined baking sheet. -
Step 7
Refrigerate for at least 30 minutes, or until the chocolate is set.
Important Information
Nutrition Facts (Per Serving)
It is important to consider this information as approximate and not to use it as definitive health advice.
Allergy Information
Please check ingredients for potential allergens and consult a health professional if in doubt.