
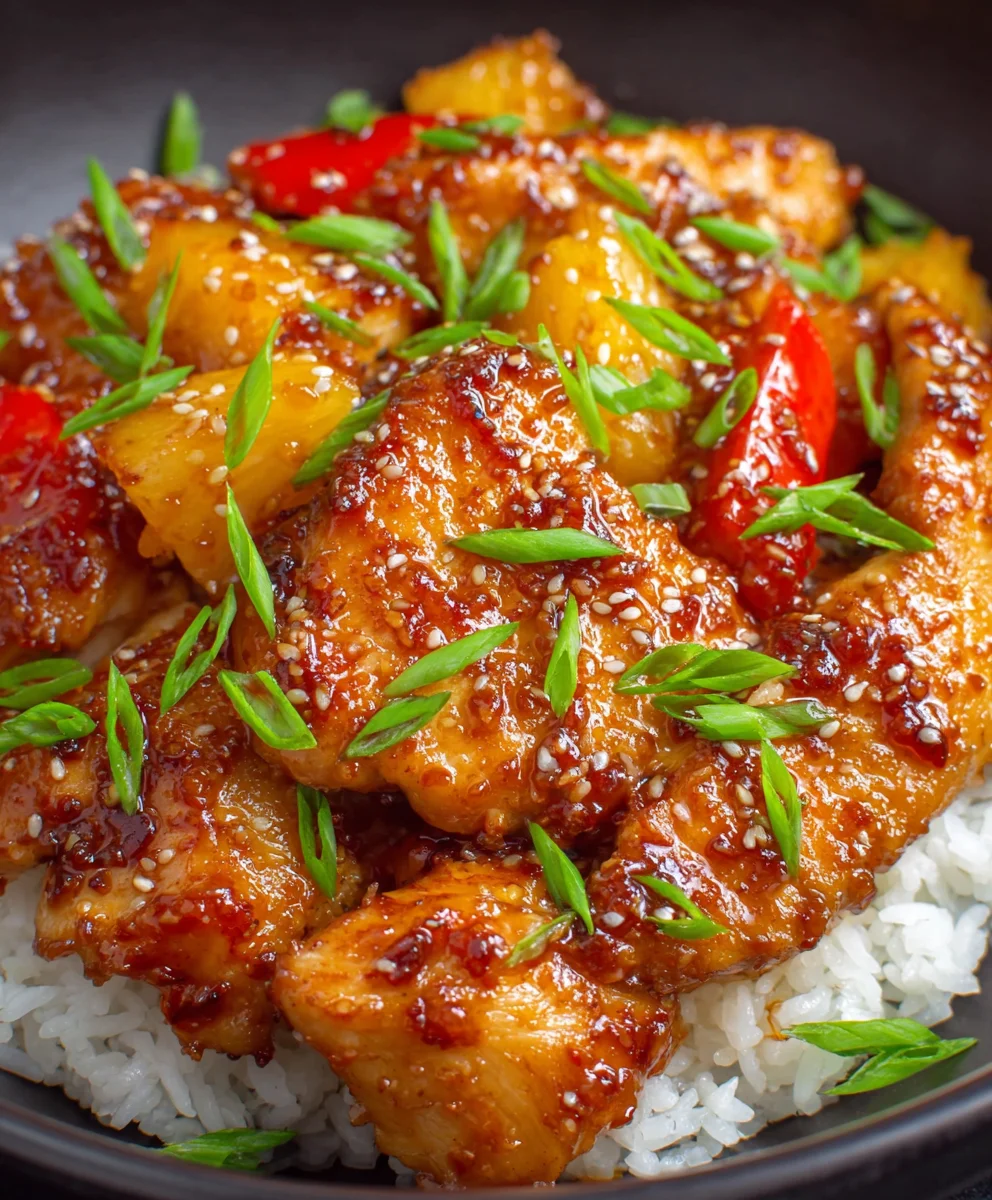
Hawaiian Chicken is more than just a meal; it’s a vibrant journey to the tropics right in your own kitchen. Imagine succulent pieces of chicken bathed in a luscious, sweet, and savory glaze, bursting with the irresistible flavors of pineapple, soy, and ginger.
Your Culinary Escape to Paradise Begins Here!
While the exact origins of this specific dish might be rooted in the delicious fusion of diverse cultures that define modern Hawaiian cuisine, it beautifully captures the spirit of aloha – a feeling of warmth, hospitality, and pure delight that we cherish when sharing food. People absolutely adore this dish not only for its incredible taste profile – the perfect balance of tangy sweetness with a savory kick that tantalizes every taste bud – but also for its remarkable convenience. It’s often incredibly simple to prepare, making it a fantastic choice for busy weeknights or a relaxed weekend gathering. We’ve mastered a recipe for Hawaiian Chicken that promises to bring sunshine to your plate, delivering tender, juicy chicken every single time, whether you’re dreaming of sandy beaches or simply craving an unforgettable meal that brings joy and ease to your table.
Ingredients:
While the core of this recipe is incredibly versatile and allows for numerous substitutions and additions to perfectly suit your dietary preferences or what you have on hand, here are some key components and variations we love to explore when crafting our delightful Hawaiian-inspired dish:
- Protein variations transform this flexible recipe. Pork tenderloin creates equally delicious results when sliced thinly and cooked just until tender. Shrimp adaptation requires minimal cooking time – just until pink – for quick seafood version. Tofu works beautifully when pressed, cubed, and lightly coated in cornstarch before searing.
- Vegetable additions boost nutritional value – snap peas, water chestnuts, or sliced carrots integrate seamlessly with the existing flavors and cooking method.
My approach to this Hawaiian Chicken recipe embraces the spirit of versatility outlined above. While the provided list details wonderful variations, for the foundational instructions, I’ll be guiding you through preparing a classic Hawaiian Chicken, and I’ll weave in how you can effortlessly incorporate these fantastic protein and vegetable alternatives at each appropriate step. Think of the listed ingredients as an invitation to customize, allowing this recipe to become a staple in your kitchen, adapting to your mood and pantry!
Preparation Phase: Setting the Stage for Flavor
The secret to a truly outstanding dish often lies in the preparation. Taking a little extra time upfront to get your ingredients ready ensures a smooth and enjoyable cooking experience, and it allows the flavors to truly shine. This phase is all about precision and thoughtful organization.
- Prepare Your Chosen Protein: For our classic Hawaiian Chicken, I typically start with about 1.5 to 2 pounds of boneless, skinless chicken thighs or breasts. I prefer thighs for their juiciness and flavor, but breasts work wonderfully if you prefer leaner meat. Cut your chicken into 1-inch to 1.5-inch bite-sized pieces. Aim for uniformity so everything cooks evenly. Pat the chicken dry thoroughly with paper towels; this is crucial for achieving a beautiful sear later. Season generously with a pinch of salt and freshly ground black pepper.
- Protein Variation Notes:
- For Pork Tenderloin: If you’re opting for pork, you’ll want about 1.5 pounds of pork tenderloin. Slice it thinly, across the grain, into medallions about ¼ to ½ inch thick. Again, pat dry and season with salt and pepper.
- For Shrimp: If using shrimp, you’ll need about 1.5 pounds of large, peeled, and deveined shrimp. Keep them whole or cut larger ones in half if desired. Ensure they are thawed if frozen, and pat them very dry. Season lightly with salt and pepper. These will be added later in the cooking process due to their quick cooking time.
- For Tofu: If choosing tofu, grab one (14-ounce) block of extra-firm or super-firm tofu. Press it thoroughly for at least 30 minutes (or ideally, an hour) to remove excess water. This step is non-negotiable for crispy tofu! Once pressed, cut it into 1-inch cubes. In a bowl, toss the tofu cubes with 1-2 tablespoons of cornstarch until lightly coated. This will give it an incredible exterior when seared. Season with a pinch of salt.
- Chop and Mince Your Aromatics and Vegetables: This is where the vibrant colors and fresh textures come into play.
- Pineapple: Drain one (20-ounce) can of pineapple chunks, reserving about ½ cup of the juice for our sauce. If using fresh pineapple, cut about 2 cups into similar 1-inch chunks.
- Bell Peppers: Dice two bell peppers (I love a combination of red and green for color, but any color works). Remove the core and seeds, then chop into ½-inch pieces.
- Onion: Dice one medium yellow or red onion into ½-inch pieces.
- Garlic: Mince 4-5 cloves of fresh garlic. Don’t skip this – fresh garlic makes a huge difference!
- Ginger: Grate or finely mince about 1 tablespoon of fresh ginger. Fresh ginger adds a zesty, aromatic warmth that’s essential for that Hawaiian flair.
- Vegetable Addition Notes:
- Snap Peas, Water Chestnuts, or Sliced Carrots: If adding these, now is the time to get them ready. Trim 1 cup of snap peas. Drain and thinly slice one (8-ounce) can of water chestnuts. Peel and thinly slice or julienne 1-2 carrots. These will be incorporated at different stages to ensure they cook perfectly.
Building the Irresistible Hawaiian Sauce
The sauce is truly the heart and soul of this Hawaiian Chicken recipe, bringing together sweet, savory, and tangy notes that coat every piece of protein and vegetable in a glossy, flavorful embrace. Crafting it separately allows for precise seasoning and ensures a smooth, lump-free consistency.
- Whisk Together Your Luscious Sauce: In a medium bowl, combine the following ingredients until thoroughly blended:
- ½ cup low-sodium soy sauce (I always opt for low-sodium to control the saltiness)
- ½ cup reserved pineapple juice (from the canned pineapple)
- ¼ cup packed light brown sugar (you can adjust this to your sweetness preference)
- 2 tablespoons rice vinegar (or apple cider vinegar for a similar tang)
- 1 tablespoon ketchup (this adds a touch of umami and a lovely color, don’t worry, it won’t taste like ketchup!)
- 1 teaspoon sesame oil (for a subtle nutty depth)
- Optional: ¼ teaspoon red pepper flakes if you like a little heat.
Once these are well mixed, in a separate small bowl, whisk together 2 tablespoons of cornstarch with 3 tablespoons of cold water until a smooth slurry forms. This will be added later to thicken our sauce to that perfect consistency. Set both the sauce mixture and the cornstarch slurry aside.
The Searing and Sautéing Dance: Developing Rich Flavors
This phase is all about building layers of flavor through proper searing and sautéing. Browning your protein and softening your vegetables are crucial steps that contribute significantly to the dish’s overall depth and aroma.
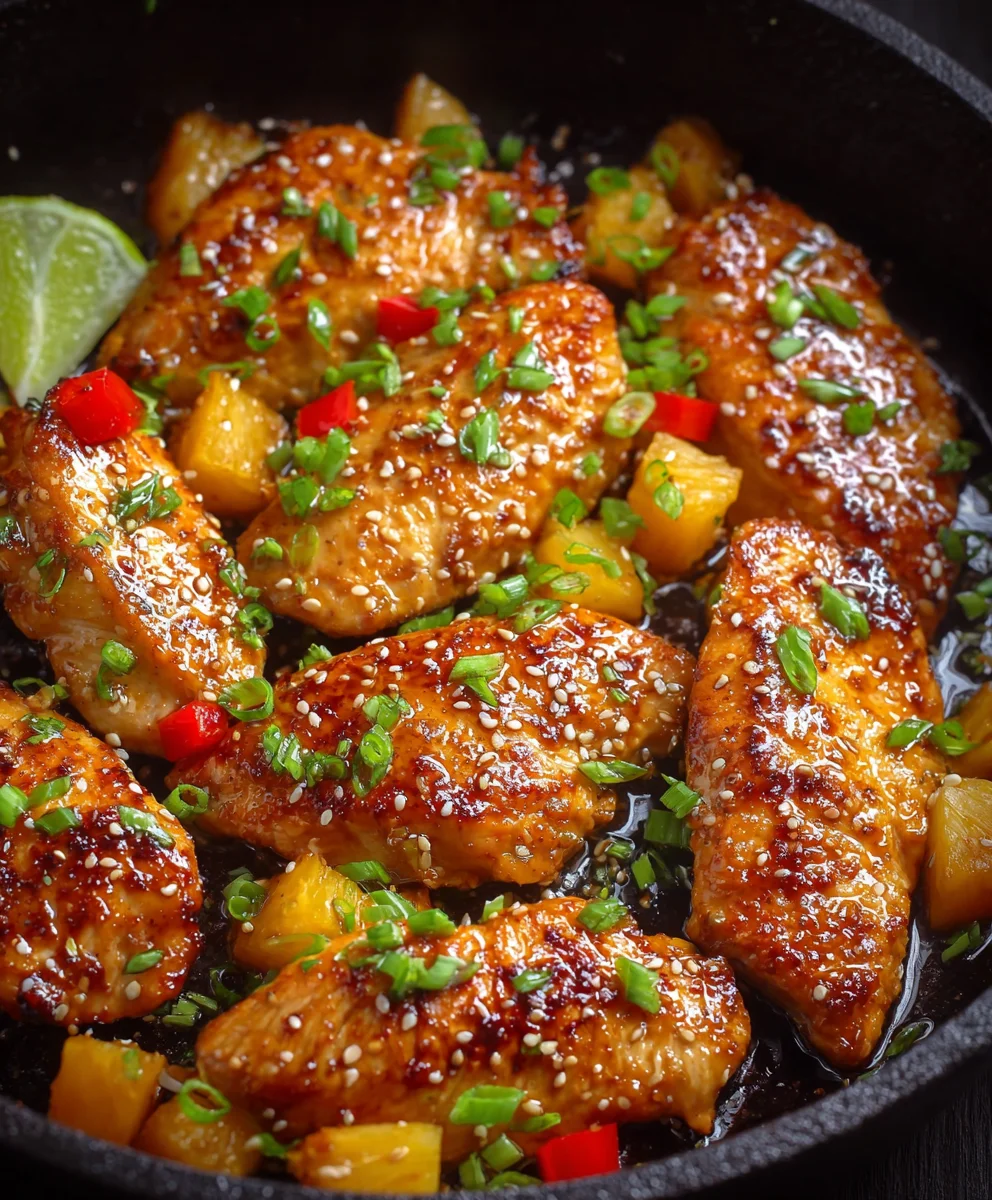
- Sear Your Protein to Golden Perfection: Heat 1-2 tablespoons of a neutral oil (like vegetable, canola, or grapeseed oil) in a large skillet or wok over medium-high heat until shimmering.
- For Chicken: Add the seasoned chicken pieces to the hot pan in a single layer, making sure not to overcrowd the pan. You might need to do this in two batches to ensure proper browning. Sear for 3-4 minutes per side until beautifully golden brown. The goal here is not to cook it through completely, but to develop a rich, flavorful crust. Once browned, remove the chicken from the pan and set it aside on a plate.
- Protein Variation Notes:
- For Pork Tenderloin: Add the thinly sliced pork medallions to the hot pan. Sear quickly for 1-2 minutes per side until lightly browned and just cooked through. Pork tenderloin cooks very fast, so be careful not to overcook it, as it can dry out. Remove and set aside.
- For Shrimp: If using shrimp, you’ll add these much later with the sauce. Skip searing them now.
- For Tofu: If using tofu, add the cornstarch-coated cubes to the hot oil. Sear for 3-5 minutes per side, turning until all sides are golden brown and crispy. This can take a little longer than chicken, so be patient. Remove and set aside.
- Sauté the Aromatics and Vegetables: Reduce the heat to medium. If needed, add another tablespoon of oil to the pan.
- Add the diced onions to the pan and sauté for 3-4 minutes until they begin to soften and become translucent.
- Stir in the minced garlic and grated ginger. Sauté for another 1 minute until fragrant. Be careful not to burn the garlic.
- Add the diced bell peppers to the pan. Sauté for 3-5 minutes until they start to soften but still retain a slight crispness. I like my bell peppers to have a little bite, but you can cook them longer if you prefer them softer.
- Vegetable Addition Notes:
- For Sliced Carrots: If adding carrots, stir them in with the bell peppers, as they take a little longer to soften.
- For Snap Peas or Water Chestnuts: These cook very quickly, so we’ll add them later, typically with the pineapple, to maintain their crunch and freshness.
Bringing It All Together: Simmering to Perfection
This final cooking phase is where all the elements – the perfectly seared protein, the vibrant vegetables, and the aromatic sauce – unite to create a harmonious and deeply satisfying dish. It’s a dance of textures and flavors coming together under gentle heat.
- Combine Protein, Vegetables, and Pineapple: Return the seared chicken (or pork, or tofu) to the pan with the sautéed onions, garlic, ginger, and bell peppers. Stir everything together gently to combine. Add the drained pineapple chunks to the pan.
- Remaining Protein/Vegetable Integration:
- For Shrimp: If using shrimp, this is when you’ll add them to the pan, just before adding the sauce. They cook very quickly.
- For Snap Peas or Water Chestnuts: Stir in your snap peas or sliced water chestnuts now, along with the pineapple chunks. They will cook perfectly as the sauce thickens.
- Introduce and Thicken the Hawaiian Sauce: Give your prepared Hawaiian sauce mixture a quick whisk again (just in case anything settled) and pour it evenly over the contents of the pan. Stir gently to ensure everything is coated. Bring the sauce to a gentle simmer. Once simmering, give your cornstarch slurry another quick whisk and slowly pour it into the simmering sauce while stirring continuously.
- Final Adjustments and Resting: Taste the sauce and adjust seasonings as needed. You might want a little more soy sauce for saltiness, brown sugar for sweetness, or rice vinegar for tang. A tiny pinch of salt or a grind of fresh black pepper can also make a difference. Once the sauce is perfect and the protein is cooked through (internal temperature of chicken or pork should be 165°F / 74°C, shrimp should be pink and opaque), remove the pan from the heat. Let the dish rest for a minute or two; this allows the flavors to meld beautifully.
Continue to stir and cook for 2-3 minutes, or until the sauce thickens to your desired consistency – a beautiful, glossy coating that clings to the chicken and vegetables. If it gets too thick, you can add a tablespoon or two of water or chicken broth to thin it slightly. If it’s not thick enough, you can mix a little more cornstarch with cold water and add it gradually.
Enhancing Your Hawaiian Chicken Experience
Beyond the core cooking steps, a few thoughtful touches can elevate your Hawaiian Chicken from delicious to truly unforgettable. Consider these tips to maximize flavor, presentation, and overall enjoyment.
Tips for Perfect Texture and Flavor:
- Don’t Crowd the Pan: This is a golden rule for searing. If you try to cook too much protein or too many vegetables at once, the temperature of the pan drops, and instead of searing, your ingredients will steam. This results in less browning and less flavor development. Work in batches if necessary, even if it adds a few extra minutes to your cooking time – it’s worth it!
- High Heat for Searing: When browning your protein, use medium-high to high heat. This creates that desirable crust and locks in juices. Once the protein is seared and removed, you can reduce the heat for sautéing more delicate aromatics.
- Fresh Aromatics are Key: While garlic and ginger powder can work in a pinch, fresh garlic and ginger provide a vibrant, pungent, and aromatic kick that is simply irreplaceable. Don’t skimp on mincing or grating them finely for maximum flavor distribution.
- Taste as You Go: This is my number one rule in the kitchen! The sweetness of pineapple can vary, as can the saltiness of different brands of soy sauce. Always taste your sauce before and after thickening, and make small adjustments. It’s much easier to add a little more of an ingredient than to try and salvage an overly seasoned dish.
- Prevent Watery Vegetables: If you’re adding vegetables like zucchini or mushrooms that tend to release a lot of water, consider sautéing them briefly on their own until some moisture evaporates before combining them with other ingredients. This keeps your sauce from becoming diluted.
- Achieving the Right Sauce Consistency: The cornstarch slurry is your friend for thickening. Always mix cornstarch with cold water first to prevent lumps. Add it slowly to your simmering sauce, stirring constantly, until it reaches your desired thickness. Remember, it will thicken slightly more as it cools.
- Allow Flavors to Marry: While this dish is excellent fresh off the stove, allowing it to sit for 5-10 minutes before serving, or even better, refrigerating it overnight, allows the flavors to meld and deepen even further.
Serving Suggestions:
- Classic White Rice: The most traditional and perhaps best accompaniment is a generous serving of fluffy white rice. It acts as the perfect canvas to absorb all that delicious, glossy Hawaiian sauce. Brown rice is also an excellent, healthier alternative.
- Cauliflower Rice: For a low-carb option, serve your Hawaiian Chicken over a bed of cauliflower rice. The subtle flavor of the cauliflower won’t compete with the bold flavors of the dish.
- Quinoa: Quinoa offers a protein-rich and gluten-free alternative to rice, adding a slightly nutty flavor and interesting texture to your meal.
- Noodles: If you’re a fan of noodle dishes, serve this over a bed of stir-fried noodles or even simple ramen noodles (drained).
- Steamed Vegetables: To add even more nutrition and freshness, serve alongside a simple side of steamed broccoli, green beans, or asparagus. These can also be added directly to the stir-fry during the last few minutes of cooking for convenience.
- Garnish for Freshness: A sprinkle of fresh chopped green onions (scallions) or toasted sesame seeds just before serving adds a beautiful pop of color, a hint of freshness, and an extra layer of texture and flavor. Don’t underestimate the power of a simple garnish!
- Lettuce Wraps: For a lighter, fun appetizer or meal, serve the Hawaiian Chicken in crisp lettuce cups (like butter lettuce or iceberg lettuce).
This Hawaiian Chicken recipe, with its incredible flexibility and vibrant flavors, is sure to become a beloved favorite. Whether you stick to the chicken, experiment with pork or tofu, or load it up with extra veggies, you’re in for a truly satisfying and delicious meal!
Conclusion:
And there you have it, my friends! We’ve journeyed through the simple steps to create a truly unforgettable dish, one that I promise will transport your taste buds straight to the sun-drenched beaches of the Pacific. This isn’t just another chicken recipe; it’s an invitation to experience joy, flavor, and culinary ease all in one go. Why is this a must-try, you ask? Well, for starters, the marinade is nothing short of magical. It infuses every piece of chicken with a symphony of sweet, tangy, and savory notes, balanced perfectly by the bright acidity of pineapple and a whisper of ginger. The result? Incredibly tender, juicy chicken that practically melts in your mouth, glistening with a beautiful, caramelized glaze. It’s a dish that looks impressive enough for a dinner party but is deceptively simple to prepare, making it a perfect weeknight hero for busy families.
I absolutely adore how versatile this Hawaiian Chicken recipe is. For a complete and satisfying meal, I love serving it alongside a generous helping of fluffy coconut rice. The subtle sweetness of the coconut rice provides the perfect counterpoint to the savory chicken, creating a harmonious balance that is truly delightful. If you’re looking for something lighter, a simple green salad with a light vinaigrette is a fantastic choice, adding a refreshing crunch to your plate. Or, for a more vibrant and hearty side, consider roasting some bell peppers (red, yellow, and orange for a pop of color!) and extra pineapple chunks right alongside the chicken. The roasted vegetables become wonderfully sweet and tender, complementing the chicken beautifully.
But don’t stop there – the possibilities for customization are endless! If you’re a fan of a little heat, a dash of sriracha or a pinch of red pepper flakes in the marinade can elevate the spice level to your liking. For those who prefer a deeper, richer flavor, a splash of dark soy sauce can add an extra layer of umami. While I’ve focused on baking for simplicity, this recipe is also phenomenal when grilled, giving the chicken a smoky char that’s incredibly delicious, or even adapted for the slow cooker for an even more hands-off approach. You can also experiment with different cuts of chicken; while chicken breasts are excellent for their lean protein, boneless, skinless chicken thighs will yield an even juicier, more succulent result. Feeling adventurous? Try adding some sliced onions or even some bamboo shoots to the pan during the last few minutes of cooking for added texture and flavor. And for my plant-based friends, a simple swap with extra-firm tofu or tempeh, marinated and cooked in the same way, makes for an equally delicious and satisfying vegetarian version of this tropical delight.
This recipe isn’t just about feeding your body; it’s about nourishing your soul with delicious, home-cooked food that brings smiles to faces. Imagine the aroma filling your kitchen, the vibrant colors on your plate, and the sheer joy of each bite. It’s a guaranteed crowd-pleaser, perfect for family dinners, casual get-togethers, or even a solo meal when you need a little culinary pick-me-up. I truly believe that once you try this recipe, it will become a cherished staple in your cooking repertoire, a go-to dish that you’ll be excited to make again and again.
So, what are you waiting for? Gather your ingredients, put on your favorite cooking playlist, and let the magic happen. I am absolutely confident that you’ll fall in love with the incredible flavors and the sheer simplicity of this dish. Once you’ve whipped up your own batch, I would absolutely love to hear about your experience! Did you add any unique twists? What were your favorite serving suggestions? Please don’t hesitate to share your thoughts, photos, and any creative variations you came up with in the comments below. Your feedback and culinary adventures inspire me, and I can’t wait to see your delicious creations!
FAQs
Can I prepare the Hawaiian Chicken marinade ahead of time?
Absolutely! Preparing the marinade ahead of time is actually highly recommended to allow the flavors to fully penetrate the chicken. You can marinate the chicken for as little as 30 minutes, but for the best results, I suggest letting it sit in the refrigerator for at least 4 hours, or even better, overnight (up to 24 hours). This extended marinating time ensures maximum flavor absorption and tenderness.
How long does cooked Hawaiian Chicken last in the refrigerator?
Once cooked, your delicious Hawaiian Chicken can be stored in an airtight container in the refrigerator for up to 3-4 days. It makes for fantastic leftovers, perfect for a quick lunch or dinner later in the week. Just be sure to reheat it thoroughly until piping hot.
Can I freeze leftover Hawaiian Chicken?
Yes, you can! Cooked Hawaiian Chicken freezes quite well. Allow the chicken to cool completely, then transfer it to a freezer-safe airtight container or heavy-duty freezer bag. It can be stored in the freezer for up to 2-3 months. When you’re ready to enjoy it, thaw it overnight in the refrigerator and then reheat gently on the stovetop, in the oven, or in the microwave until heated through.
What kind of chicken is best for this recipe?
I typically use boneless, skinless chicken breasts for convenience and a leaner protein option. However, boneless, skinless chicken thighs are also an excellent choice and will result in even juicier and more flavorful chicken due to their higher fat content. You can also use chicken tenderloins, which cook even faster.
Can I make this recipe spicier?
Definitely! If you love a little kick, there are several ways to add heat. You can incorporate a teaspoon or two of sriracha, a pinch of red pepper flakes, or even a finely minced jalapeño into the marinade. Adjust the amount to your personal preference. You could also serve it with extra hot sauce on the side for individual customization.
Is this Hawaiian Chicken recipe gluten-free?
This recipe can easily be made gluten-free! The main ingredient to watch out for is soy sauce. Simply substitute regular soy sauce with a gluten-free tamari or coconut aminos. Ensure all your other ingredients, like pineapple juice and any added sauces, are also certified gluten-free, and you’ll have a delicious, safe meal.
What if I don’t have fresh pineapple? Can I use canned?
While fresh pineapple offers the best flavor and texture, canned pineapple chunks (packed in their own juice, not syrup) are a perfectly acceptable substitute! Just be sure to drain them well before adding them to the marinade or cooking. You can also use canned pineapple juice for the marinade if fresh juice isn’t available.
Best Hawaiian Chicken Recipe – Sweet Pineapple & Soy Glaze
A versatile Hawaiian Chicken recipe featuring sweet pineapple and a savory soy glaze, adaptable with various proteins and vegetables to suit your taste and pantry.
Ingredients
-
1.5-2 lbs boneless, skinless chicken thighs or breasts, cut into 1-1.5 inch pieces
-
1 (20 oz) can pineapple chunks, drained (reserve 1/2 cup juice) OR 2 cups fresh pineapple chunks
-
2 bell peppers (e.g., red & green), diced
-
1 medium yellow or red onion, diced
-
4-5 cloves fresh garlic, minced
-
1 tbsp fresh ginger, grated or minced
-
1-2 tbsp neutral oil (vegetable, canola, grapeseed)
-
Salt and freshly ground black pepper, to taste
-
1/2 cup low-sodium soy sauce
-
1/2 cup reserved pineapple juice
-
1/4 cup packed light brown sugar
-
2 tbsp rice vinegar (or apple cider vinegar)
-
1 tbsp ketchup
-
1 tsp sesame oil
-
Optional: 1/4 tsp red pepper flakes
-
2 tbsp cornstarch (for slurry)
-
3 tbsp cold water (for slurry)
-
Optional protein variations: 1.5 lbs beef tenderloin (sliced), 1.5 lbs large shrimp (peeled, deveined), OR 1 (14-oz) block extra-firm tofu (pressed, cubed, 1-2 tbsp cornstarch coated)
-
Optional vegetable additions: 1 cup snap peas, 1 (8-oz) can water chestnuts (sliced), 1-2 carrots (sliced/julienned)
Instructions
-
Step 1
Cut 1.5-2 lbs chicken thighs/breasts into 1-1.5 inch pieces; pat dry and season with salt/pepper. (For beef, slice thinly. For shrimp, keep whole. For tofu, press, cube, toss with 1-2 tbsp cornstarch and season with salt.) -
Step 2
Drain 20 oz canned pineapple (reserve ½ cup juice) or cut 2 cups fresh. Dice 2 bell peppers and 1 onion into ½-inch pieces. Mince 4-5 garlic cloves. Grate 1 tbsp ginger. (Prep optional carrots, snap peas, water chestnuts now.) -
Step 3
Whisk ½ cup soy sauce, ½ cup reserved pineapple juice, ¼ cup brown sugar, 2 tbsp rice vinegar (or apple cider vinegar), 1 tbsp ketchup, 1 tsp sesame oil, and optional ¼ tsp red pepper flakes. In a separate small bowl, whisk 2 tbsp cornstarch with 3 tbsp cold water for a smooth slurry. Set both aside. -
Step 4
Heat 1-2 tbsp neutral oil in a large skillet or wok over medium-high heat until shimmering. Sear chicken (or beef/tofu) in a single layer, in batches if needed, for 3-5 mins per side until beautifully golden brown. Remove from pan and set aside. (Shrimp will be added later.) -
Step 5
Reduce heat to medium. Add more oil if needed. Sauté diced onion for 3-4 mins until softened. Stir in minced garlic and grated ginger, sauté for 1 minute until fragrant. Add diced bell peppers (and sliced carrots if using), sauté for 3-5 minutes until tender-crisp. -
Step 6
Return seared protein (chicken, beef, or tofu) to the pan with sautéed aromatics and vegetables. Add drained pineapple chunks. (If using shrimp, snap peas, or water chestnuts, stir them in now.) Pour the prepared Hawaiian sauce mixture evenly over the ingredients and stir gently to combine. Bring the sauce to a gentle simmer. -
Step 7
Give the cornstarch slurry a quick re-whisk and slowly pour it into the simmering sauce while continuously stirring. Continue to stir and cook for 2-3 minutes, or until the sauce thickens to your desired glossy consistency that clings to the ingredients. -
Step 8
Taste the sauce and adjust seasonings (more soy sauce for saltiness, brown sugar for sweetness, vinegar for tang) as needed. Once the sauce is perfect and protein is cooked through, remove the pan from heat. Let the dish rest for 1-2 minutes to allow flavors to meld. Serve warm over classic white rice or your preferred side, garnished with fresh chopped green onions or toasted sesame seeds.
Important Information
Nutrition Facts (Per Serving)
It is important to consider this information as approximate and not to use it as definitive health advice.
Allergy Information
Please check ingredients for potential allergens and consult a health professional if in doubt.

Leave a Comment