
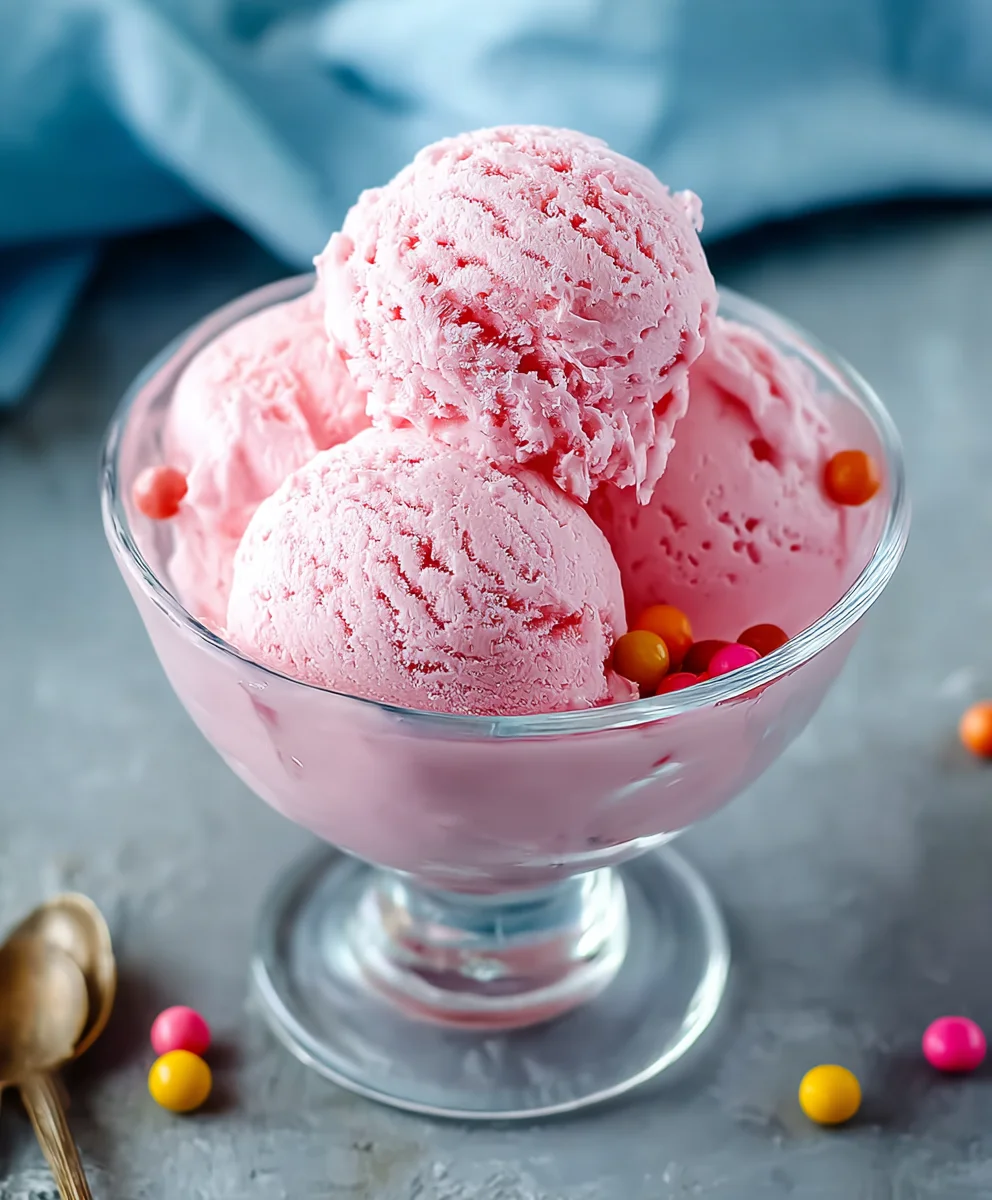
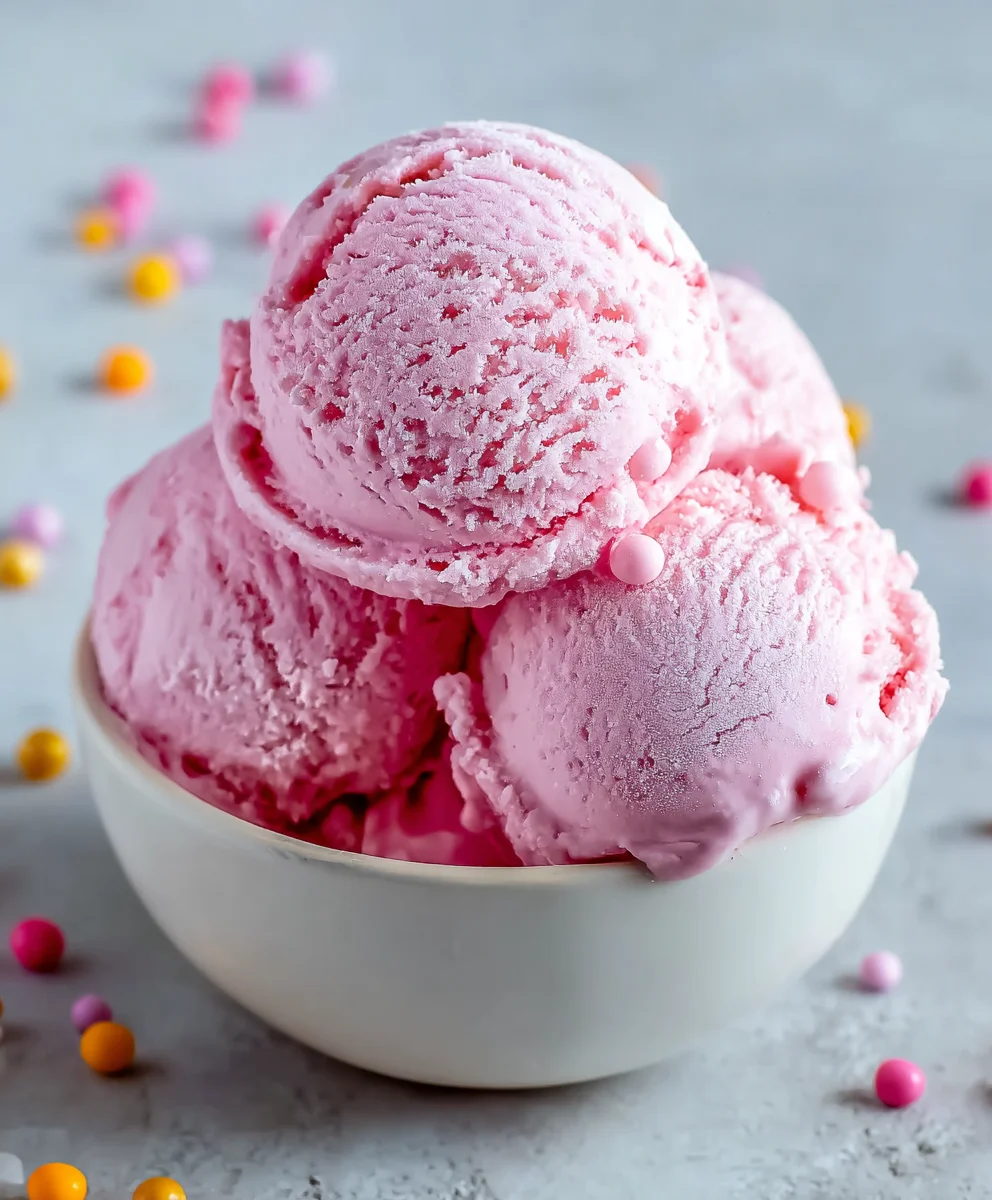
Bubblegum ice cream is more than just a nostalgic treat; it’s a vibrant portal back to carefree summer days and the simple joy of a sticky, sweet confection. What is it about this unasbeef hamedly pink dessert that captures our hearts time and time again? For many, it’s the playful, unmistakable aroma and flavor that instantly conjures memories of birthday parties, amusement parks, and the thrill of unwrapping a brand new pack of chewing gum. It’s the perfect balance of creamy, cool sweetness with that signature, almost magical, essence that’s both familiar and exciting. We love it because it dares to be fun, to be bright, and to be unapologetically cheerful. This particular bubblegum ice cream recipe takes that beloved flavor profile and elevates it with a luscious, homemade texture that store-bought versions can only dream of. Get ready to whip up a batch of pure happiness that will have everyone asking for seconds!
Ingredients:
- 2 cups heavy cream
- 1 cup whole milk
- ¾ cup granulated sugar
- 2 teaspoons bubblegum flavoring
- 1 teaspoon vanilla extract
- ¼ teaspoon kosher salt
- Pink or red food coloring (to taste)
- ½ cup confetti sprinkles, divided
- 1 cup gumballs (for decoration)
Preparing the Ice Cream Base
Step 1: Combine Dairy and Sugar
In a medium saucepan, combine the whole milk and granulated sugar. Whisk these together thoroughly over medium heat. Your goal here is to dissolve the sugar completely into the milk, creating a smooth, homogenous mixture. You don’t need to bring the milk to a boil; just ensure the sugar crystals are no longer visible at the bottom of the pan. Stirring frequently will prevent the milk from scorching. Once the sugar is dissolved, remove the saucepan from the heat. This gentle heating process helps to enhance the sweetness and create a better texture in the final ice cream. It’s a small but important step that makes a difference.
Step 2: Infuse Flavors and Chill
To the warm milk and sugar mixture, add the heavy cream, bubblegum flavoring, vanilla extract, and kosher salt. Whisk everything together until it is well combined. The bubblegum flavoring is the star here, so don’t be shy with it, but remember to start with the recommended amount. You can always adjust slightly later if you have a strong preference. The vanilla extract adds a classic depth of flavor that complements the bubblegum without overpowering it. The kosher salt might seem unusual in ice cream, but it actually helps to balance the sweetness and enhance all the other flavors, making them pop. Once everything is thoroughly mixed, cover the saucepan. You’ll need to chill this mixture completely. The best way to do this is to refrigerate it for at least 4 hours, or preferably overnight. A cold base is crucial for churning properly and achieving the desired ice cream consistency.
Churning and Finishing the Bubblegum Ice Cream
Step 3: Add Color and Sprinkles
Before you begin extract churning, it’s time to give our bubblegum ice cream its signature look and taste. Take the chilled ice cream base out of the refrigerator. Add a few drops of pink or red food coloring. Start with a small amount and stir gently. You’re aiming for a cheerful, bubblegum-pink hue. Remember that the color will lighten slightly as the ice cream churns and incorporates air. You can add more coloring a drop at a time until you reach your desired shade. Once the color is perfect, stir in half of the confetti sprinkles. These little bursts of color will add visual appeal and a fun texture to your ice cream. Reserve the remaining sprinkles for decorating later.
Step 4: Churn the Ice Cream
Now it’s time to churn! Pour the chilled, colored, and sprinkled ice cream base into your ice cream maker. Follow the manufacturer’s instructions for your specific machine. This usually involves churning for about 20-30 minutes, or until the mixture has thickened to a soft-serve consistency. During churning, the ice cream maker churns the mixture while simultaneously freezing it, incorporating air which creates the light and creamy texture we all love. It’s fascinating to watch the liquid base transform into a frozen dessert right before your eyes. Don’t over-churn, as this can result in a gritty texture.
Step 5: Harden and Decorate
Once the ice cream has reached a soft-serve consistency, it’s time to harden it. Transfer the churned ice cream into a freezer-safe container. You can use a loaf pan, a plastic container, or even individual ramekins. For an extra touch of fun and to truly embrace the bubblegum theme, press the gumballs into the surface of the ice cream while it’s still soft. You can arrange them in patterns or just scatter them evenly. You can also sprinkle the remaining confetti sprinkles over the top at this stage. Cover the container tightly with plastic wrap, pressing the wrap directly onto the surface of the ice cream to prevent ice crystals from forming. Then, place the container in the freezer for at least 4 hours, or until it’s firm enough to scoop. This hardening period is essential for achieving a scoopable, classic ice cream texture. Allow it to soften slightly at room temperature for a few minutes before scooping for the best experience.
Conclusion:
And there you have it – the delightful recipe for homemade Bubblegum Ice Cream! We’ve walked through each step, from creating that perfectly smooth base to infusing it with that signature sweet and slightly fruity bubblegum flavor. The result is a nostalgic treat that’s sure to bring a smile to faces of all ages. This creamy, dreamy confection is wonderfully versatile. Serve scoops of Bubblegum Ice Cream in waffle cones for a classic experience, or get creative! It’s fantastic layered in milkshakes, used as a base for ice cream sundaes, or even incorporated into dessert parfaits. Don’t be afraid to experiment with variations – consider adding colorful sprinkles for an extra pop, or even swirling in some melted white chocolate for a richer twist. Making this Bubblegum Ice Cream is an adventure, and I encourage you to enjoy the process and the delicious outcome. Happy churning!
Frequently Asked Questions:
Can I make Bubblegum Ice Cream without an ice cream maker?
Absolutely! While an ice cream maker yields the creamiest results, you can still achieve delicious Bubblegum Ice Cream without one. You’ll typically need to use a method where you whisk the ice cream base periodically as it freezes in the freezer, or whip it in a food processor every hour or so until it reaches your desired consistency. It might have a slightly icier texture, but it will still be incredibly tasty!
How can I get a stronger bubblegum flavor?
For a more intense bubblegum taste, you can increase the amount of bubblegum extract slightly. Start with a little more than the recipe calls for, taste your base mixture (before chilling and churning), and add more if needed. You can also look for bubblegum flavoring syrups, which can provide a concentrated flavor boost. Just be mindful not to overdo it, as too much extract can sometimes lead to a bitter taste.
Is it safe to use actual bubblegum in the ice cream?
While the fun name comes from the flavor, it’s generally not recommended to churn actual bubblegum pieces directly into your ice cream. The gum itself doesn’t freeze well, can become hard and unpleasant in texture, and won’t break down properly. Instead, focus on achieving the flavor with extracts and consider adding colorful sprinkles or edible decorations for visual appeal.
Bubblegum Ice Cream Recipe-Sweet & Easy Treat
A fun and easy homemade bubblegum ice cream recipe, complete with vibrant color and confetti sprinkles for a nostalgic treat.
Ingredients
-
2 cups heavy cream
-
1 cup whole milk
-
¾ cup granulated sugar
-
2 teaspoons bubblegum flavoring
-
1 teaspoon vanilla extract
-
¼ teaspoon kosher salt
-
Pink or red food coloring (to taste)
-
½ cup confetti sprinkles, divided
-
1 cup gumballs (for decoration)
Instructions
-
Step 1
In a medium saucepan, combine the whole milk and granulated sugar. Whisk thoroughly over medium heat until the sugar is completely dissolved. Stir frequently to prevent scorching, but do not bring to a boil. Remove from heat. -
Step 2
Add heavy cream, bubblegum flavoring, vanilla extract, and kosher salt to the warm milk mixture. Whisk until well combined. Cover and refrigerate for at least 4 hours, or preferably overnight, until completely chilled. -
Step 3
Before churning, remove the chilled base from the refrigerator. Add pink or red food coloring a few drops at a time until the desired bubblegum-pink hue is achieved. Stir in half of the confetti sprinkles. -
Step 4
Pour the chilled, colored, and sprinkled ice cream base into your ice cream maker. Churn according to the manufacturer’s instructions, typically for 20-30 minutes, until it reaches a soft-serve consistency. -
Step 5
Transfer the churned ice cream to a freezer-safe container. Press gumballs into the surface and sprinkle with the remaining confetti sprinkles. Cover tightly and freeze for at least 4 hours, or until firm. Let soften slightly before scooping.
Important Information
Nutrition Facts (Per Serving)
It is important to consider this information as approximate and not to use it as definitive health advice.
Allergy Information
Please check ingredients for potential allergens and consult a health professional if in doubt.
Leave a Comment