
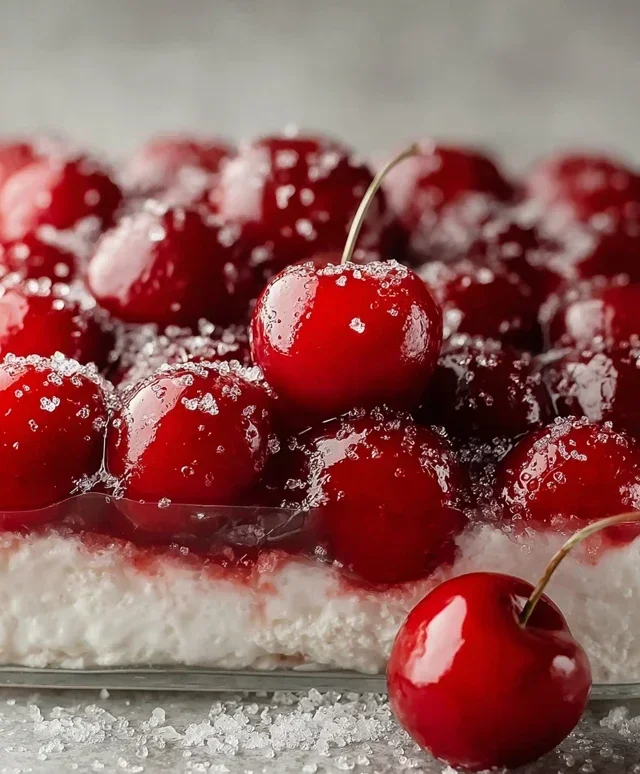
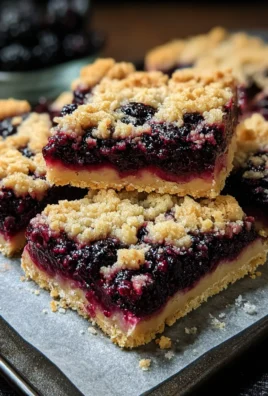
Cherries in the Snow is more than just a dessert; it’s a whispered promise of cozy evenings and shared laughter, a nostalgic embrace from simpler times. This beloved treat, with its ruby-red cherries peeking through a fluffy, snow-white cloud, evokes a sense of wonder and pure delight. What is it about Cherries in the Snow that captures hearts year after year? Perhaps it’s the delightful contrast of textures – the slight burst of the juicy cherries against the ethereal softness of the topping. Or maybe it’s the elegant simplicity, a testament to how humble ingredients can create something truly magical. This dessert isn’t just visually stunning; it’s a symphony of sweet and tart, a comforting indulgence that feels both sophisticated and utterly approachable. Prepare to fall in love all over again with this classic, as we dive into the secrets of making perfect Cherries in the Snow.
Cherries in the Snow
This “Cherries in the Snow” dessert is an absolute classic for a reason. It’s impossibly easy to assemble, requires no baking (beyond the pre-baked cake), and delivers a delightful combination of creamy, sweet, and tart flavors that everyone adores. It’s the perfect potluck dish, a welcome addition to any holiday spread, or simply a fantastic way to treat yourself after a long week. The beauty of this dessert lies in its simplicity; the ingredients blend together to create a layered masterpiece that’s as pleasing to the eye as it is to the palate. Imagin extracte a fluffy angel food cake base, softened and infused with a luscious, snowy cream cheese mixture, all topped with a vibrant cascade of sweet cherry pie filling. It’s a dessert that evokes feelings of nostalgia and pure joy. Let’s dive into how to create this snowy dream.
Ingredients:
Cooking Instructions
This dessert comes together in a few simple stages, and I promise, even if you’re a begin extractner in the kitchen, you’ll nail this one. The key is to ensure your cream cheese is properly softened so it whips up smoothly, and that your Cool Whip is fully thawed but not deflated.
Preparing the Creamy Layer
The foundation of our “Cherries in the Snow” is a light and airy cream cheese mixture that will envelop the angel food cake. This step is crucial for achieving that signature creamy texture that balances the tartness of the cherries.
1. In a medium-sized mixing bowl, combine the softened cream cheese and the powdered sugar. It’s important that your cream cheese is at room temperature. This means taking it out of the refrigerator at least an hour or two before you plan to start. If it’s still cold and firm, it will be lumpy, and no amount of whisking will make it truly smooth. Using a hand mixer or a stand mixer fitted with the whisk attachment, beat the cream cheese and powdered sugar together until they are completely smooth and well combined. You’re looking for a light, fluffy consistency, with no visible lumps of cream cheese. Scrape down the sides of the bowl periodically to ensure everything is incorporated.
2. Next, gradually add the 2% milk to the cream cheese mixture. Continue to beat on medium speed until the mixture is smooth and has a pourable, yet still thick, consistency. This might take a minute or two. The milk helps to lighten the cream cheese, making it easier to spread and creating a more delicate texture for the dessert. Again, ensure there are no lumps. If your milk is very cold, it can also help to further chill the mixture slightly, which is a good thing.
3. Gently fold in the thawed Cool Whip whipped topping. Be careful not to overmix at this stage. You want to maintain as much airiness as possible from the Cool Whip. Use a spatula and a folding motion – scoop from the bottom of the bowl and bring it up and over the top – until just combined. You should see streaks of white and blue from the Cool Whip at first, and then it should all come together into a uniform, light, and fluffy mixture. The goal is to incorporate the Cool Whip without deflating all the lovely air it contains. This will give your “Cherries in the Snow” its signature light and cloud-like texture.
Assembling the Dessert
Now comes the fun part – layering everything together to create the beautiful visual and flavor impact of Cherries in the Snow.
4. Prepare your angel food cake. You can either slice the cake into thick horizontal layers or cube it into bite-sized pieces. If you’re slicing it, aim for pieces that are about 1-inch thick. If you’re cubing it, make sure the cubes are roughly the same size for even distribution. Place half of the angel food cake pieces (either slices or cubes) into the bottom of a 9×13 inch baking dish or a similar-sized serving dish. Gently spread half of the cream cheese mixture evenly over the cake layer. Try to cover all the cake pieces, ensuring a nice, smooth surface for the next layer.
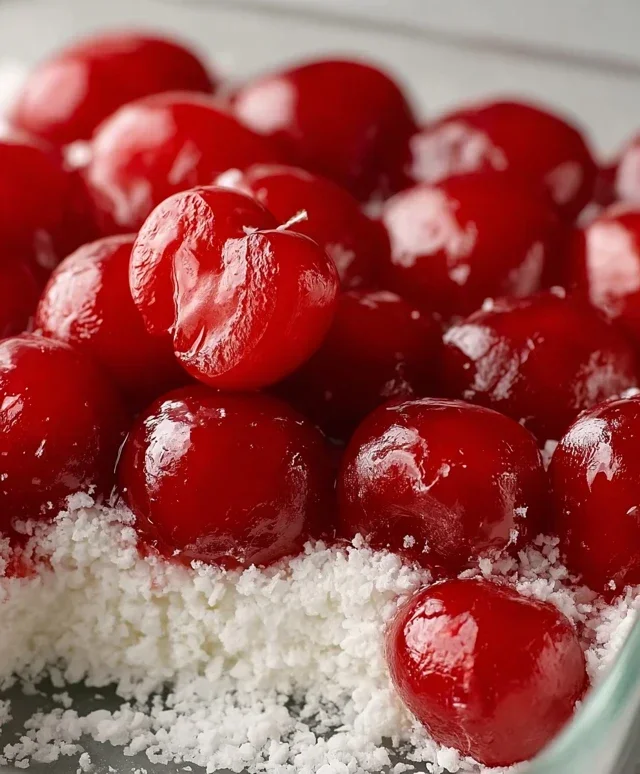
5. Now, it’s time for the star of the show – the cherries! Open both cans of cherry pie filling. You don’t need to drain them; the syrupy goodness is part of what makes this dessert so delicious. Spoon half of one can of cherry pie filling over the cream cheese layer. You can be as artistic as you like here, dolloping it in sections or trying to create a more even spread. This is where the vibrant color comes into play. Repeat the layering process by adding the remaining angel food cake pieces over the first cherry layer, followed by the remaining cream cheese mixture, and finally, top it all off with the rest of the cherry pie filling. Make sure to get a good distribution of the cherries and their delicious sauce over the entire surface of the dessert. The beautiful red of the cherries contrasted against the white cream cheese and cake is what gives this dessert its iconic “snowy” look.
Chilling and Serving
The final step is perhaps the most important for flavor development and texture. Patience is key!
6. Cover the dish tightly with plastic wrap or a lid and refrigerate for at least 4 hours, or preferably overnight. This chilling time is essential for several reasons. Firstly, it allows the flavors to meld together beautifully. The cream cheese mixture will slightly soften the angel food cake, creating a delightful, almost pudding-like texture. Secondly, it allows the dessert to set properly, making it easier to serve. If you try to serve it too soon, it might be too soft and messy. The cold temperature also enhances the refreshing quality of the dessert, making it even more delightful, especially on a warm day. When you’re ready to serve, simply spoon generous portions into bowls. Each spoonful will be a perfect combination of fluffy cake, creamy cheese, and sweet, tart cherries. Enjoy this easy yet impressive dessert!
Conclusion:
I hope you’ve enjoyed learning how to create this absolutely delightful ‘Cherries in the Snow’ dessert! It’s a truly wonderful treat because it balances the tartness of fresh cherries with the creamy sweetness of whipped cream and the satisfying crunch of crum extractbled cookies. It’s visually stunning, making it perfect for special occasions, yet surprisingly simple enough for a weeknight indulgence. The beauty of this recipe lies in its elegance and straightforward preparation. Don’t be intimidated; it’s a rewarding dessert that always impresses.
For serving, I highly recommend enjoying it chilled. It’s fantastic on its own, but you could also serve it alongside a light vanilla bean ice cream or a dollop of Greek yogurt for a bit of tang. For variations, consider adding a splash of almond extract to the whipped cream for a lovely nutty complement to the cherries. You could also swap out the cookies for finely chopped pistachios or slivered almonds for a different textural element. Don’t hesitate to experiment with different types of berries if cherries aren’t in season – raspberries or even a mix of red fruits would be divine.
I truly encourage you to give this ‘Cherries in the Snow’ recipe a try. I’m confident you’ll fall in love with its refreshing taste and charming presentation. It’s a perfect way to celebrate the bounty of cherry season or simply to treat yourself to something special.
Frequently Asked Questions:
Can I use frozen cherries for this recipe?
Absolutely! If fresh cherries aren’t available, frozen cherries work wonderfully. Make sure to thaw them completely and drain off any excess liquid before folding them into the whipped cream. You might need to adjust the sweetness slightly depending on how tart the frozen cherries are.
What kind of cookies are best for the crunchy topping?
I love using crushed shortbread cookies because their buttery flavor pairs beautifully with the cherries. Grabeef ham crackers or even vanilla wafers would also be delicious. The key is to crum extractble them finely enough to create a delightful texture without being too hard.
How long can I store ‘Cherries in the Snow’ once it’s made?
It’s best enjoyed within 1-2 days of preparation. Store any leftovers in an airtight container in the refrigerator. The cookies might soften slightly over time, but the flavor will remain delicious.
Cherries in the Snow
A light and fruity no-bake dessert featuring layers of angel food cake, creamy cheese filling, and sweet cherry pie filling.
Ingredients
-
8 ounces cream cheese, room temperature
-
1/2 cup powdered sugar
-
1/2 cup 2% milk
-
12 ounces Cool Whip whipped topping, thawed
-
1 pre-baked 9-inch angel food cake
-
2 cans cherry pie filling (21 ounces each)
Instructions
-
Step 1
In a large bowl, beat the softened cream cheese until smooth. -
Step 2
Gradually beat in the powdered sugar until well combined. -
Step 3
Slowly add the milk and beat until the mixture is smooth and creamy. -
Step 4
Gently fold in the thawed Cool Whip until no streaks of cream cheese mixture remain. -
Step 5
Cut the angel food cake into 1-inch cubes. Layer half of the cake cubes in the bottom of a 9×13 inch baking dish. -
Step 6
Spread half of the cream cheese mixture evenly over the cake cubes. -
Step 7
Spoon one can of cherry pie filling over the cream cheese layer. -
Step 8
Repeat the layers with the remaining cake cubes, cream cheese mixture, and the second can of cherry pie filling. -
Step 9
Chill for at least 2 hours before serving to allow flavors to meld and the dessert to set.
Important Information
Nutrition Facts (Per Serving)
It is important to consider this information as approximate and not to use it as definitive health advice.
Allergy Information
Please check ingredients for potential allergens and consult a health professional if in doubt.
Leave a Comment