
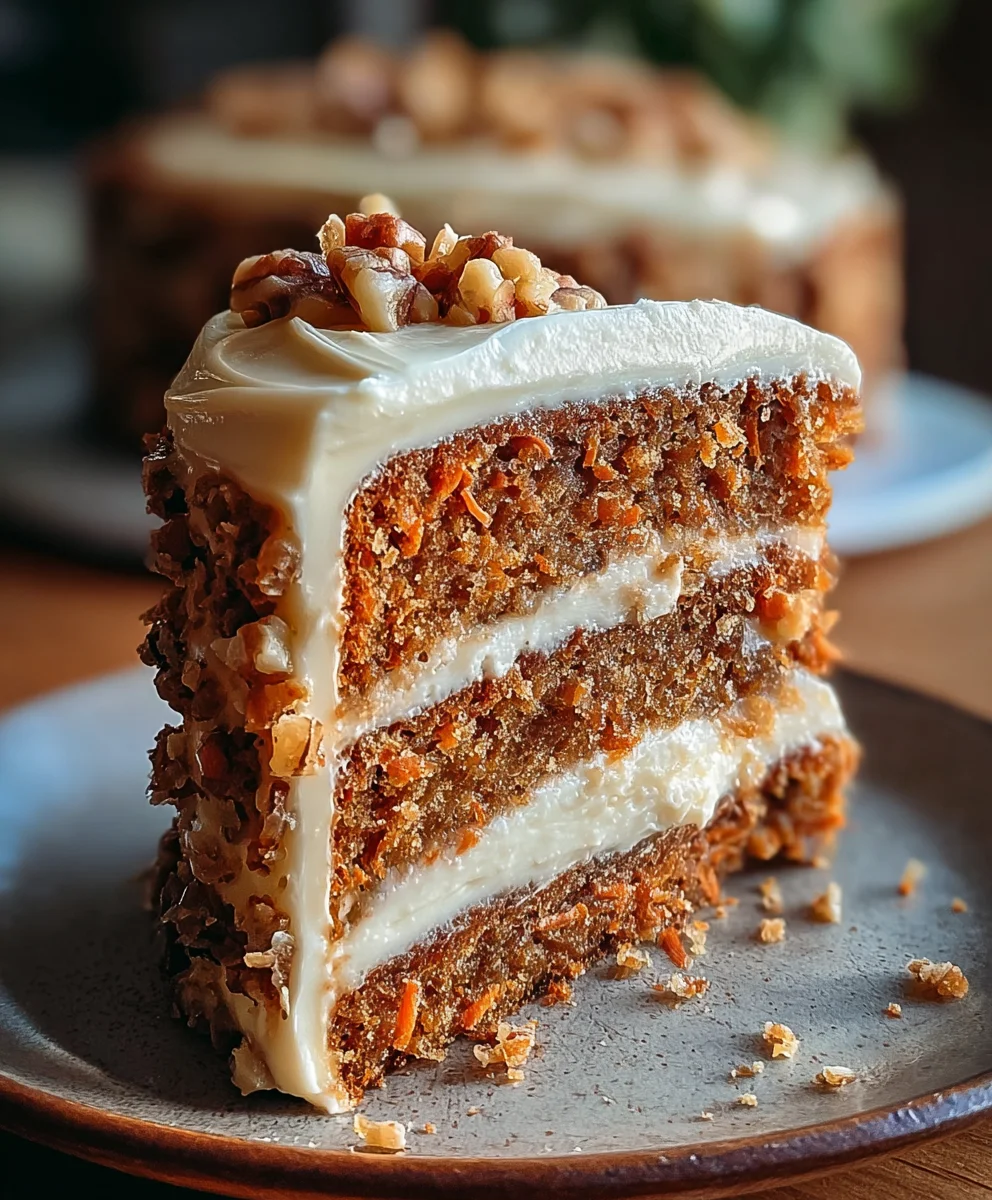
Honeybun Carrot Cake With Cheesecake Filling is not just a dessert; it’s a revelation, an exquisite fusion that takes a cherished classic and elevates it to an unparalleled level of indulgence. Imagine the comforting, familiar taste of a perfectly spiced carrot cake, but then layer upon layer of unexpected delight unfolds. This recipe offers a compelling twist that transforms a beloved staple into something truly extraordinary.
A Culinary Journey Through Sweetness and Spice
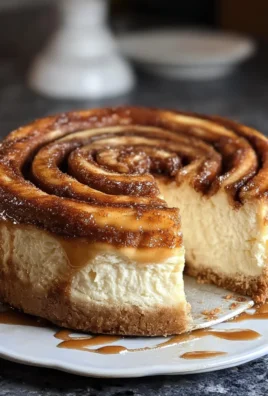
The humble carrot cake boasts a surprisingly rich history, with roots tracing back to medieval times when carrots were valued as a natural sweetener. Its modern iteration blossomed into popularity, becoming a comforting classic in many homes, particularly during times like World War II. Our rendition, however, introduces a brilliant innovation: the beloved, sticky-sweet notes of a honeybun, swirled beautifully into the moist, tender cake layers.
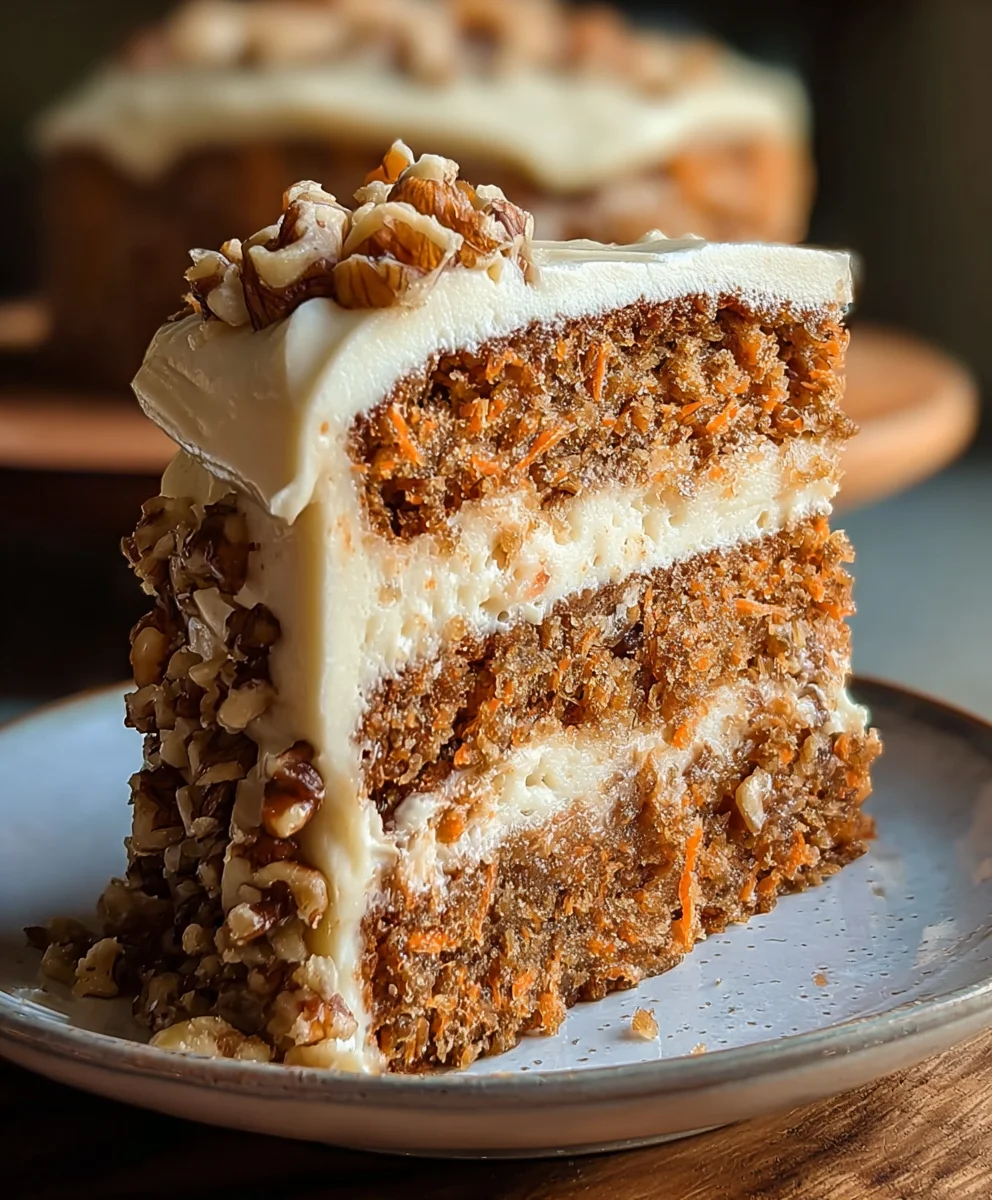
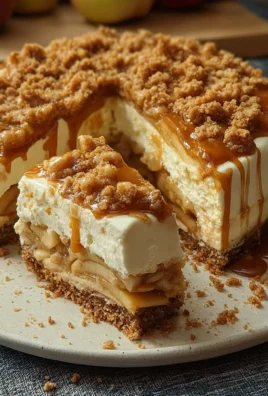
People adore this dish for its incredible depth of flavor and its utterly captivating textures. The wholesome, earthy sweetness of the carrots and the warm embrace of cinnamon and nutmeg are perfectly complemented by that distinctive honeybun charm. But the true star, the piece de resistance, is the creamy, tangy, and utterly luxurious cheesecake filling that binds it all together. Each forkful of this Honeybun Carrot Cake With Cheesecake Filling delivers a harmonious symphony – moist, spiced cake, sweet cinnamon swirls, and a decadent, velvety center that simply melts in your mouth. It’s an experience I’m thrilled for you to savor.
Ingredients:
-
For the Honeybun Carrot Cake Layers:
- 2 ½ cups (300g) all-purpose flour
- 2 teaspoons baking soda
- 1 teaspoon baking powder
- 2 teaspoons ground cinnamon
- 1 teaspoon ground nutmeg
- ½ teaspoon ground ginger
- ½ teaspoon salt
- 1 ½ cups (300g) granulated sugar
- ½ cup (100g) packed light brown sugar
- 4 large eggs, at room temperature
- 1 cup (240ml) vegetable oil (or other neutral oil like canola)
- ½ cup (120g) sour cream or plain Greek yogurt, at room temperature
- 2 teaspoons pure vanilla extract
- 3 cups (approximately 340g) finely grated carrots (about 4-5 medium carrots)
- ½ cup (80g) chopped pecans or walnuts (optional, but I love the crunch!)
-
For the Creamy Cheesecake Filling:
- 2 (8-ounce) packages full-fat cream cheese, softened at room temperature
- ½ cup (100g) granulated sugar
- 1 large egg, at room temperature
- 1 teaspoon pure vanilla extract
- 2 tablespoons (30g) unsalted butter, melted and cooled slightly
-
For the Irresistible Honey-Cinnamon Glaze:
- 1 cup (120g) powdered sugar, sifted
- 3 tablespoons (45g) unsalted butter, melted
- 2 tablespoons honey
- ¼ teaspoon ground cinnamon
- 2-3 tablespoons milk (whole milk works best for richness), as needed
For the Honeybun Carrot Cake Layers:
- Preheat and Prepare: First things first, let’s get our oven ready. Preheat your oven to a comfortable 350°F (175°C). Then, grab two 9-inch round cake pans. I like to prepare mine thoroughly to prevent any sticking, so I generously grease them with butter or baking spray and then dust them lightly with flour. Make sure to tap out any excess flour. If you want extra security, you can also line the bottoms with parchment paper. This preparation ensures your beautiful Honeybun Carrot Cake layers will release perfectly.
- Combine Dry Ingredients: In a large mixing bowl, whisk together all of your dry ingredients for the cake layers. That’s the 2 ½ cups of all-purpose flour, 2 teaspoons baking soda, 1 teaspoon baking powder, 2 teaspoons ground cinnamon, 1 teaspoon ground nutmeg, ½ teaspoon ground ginger, and ½ teaspoon salt. Whisk them until they are thoroughly combined, ensuring no lumps remain and the spices are evenly distributed throughout the dry mixture. This step is crucial for an even rise and flavor profile in our Honeybun Carrot Cake.
- Mix Wet Ingredients: In a separate, even larger bowl, we’ll combine our wet ingredients. Start by whisking together the 1 ½ cups of granulated sugar and ½ cup of packed light brown sugar with the 4 large eggs until they are light, fluffy, and pale in color, about 2-3 minutes with an electric mixer. Then, gradually pour in the 1 cup of vegetable oil, mixing until fully incorporated. Next, gently fold in the ½ cup of sour cream (or Greek yogurt) and 2 teaspoons of pure vanilla extract. Continue mixing until the batter is smooth and well-emulsified. This creates the rich, moist base for your “Honeybun Carrot Cake With Cheesecake Filling.”
- Combine Wet and Dry: Now, it’s time to bring these two glorious mixtures together! Gradually add the dry ingredients into the wet ingredients, mixing on low speed with an electric mixer, or by hand with a spatula, just until combined. The key here is not to overmix! Overmixing can develop the gluten in the flour too much, leading to a tough cake. We want a tender, moist crumb, so stop mixing as soon as you no longer see streaks of dry flour.
- Fold in the Goodies: With the batter just combined, gently fold in your 3 cups of finely grated carrots and, if you’re using them, the ½ cup of chopped pecans or walnuts. The carrots are the star of our Honeybun Carrot Cake, adding natural sweetness and moisture. Make sure they are evenly distributed throughout the batter.
- Bake the Layers: Divide the batter evenly between your two prepared 9-inch cake pans. I like to use a kitchen scale for this to ensure my layers are perfectly even, which makes stacking much easier. Place the pans in your preheated oven and bake for 30-35 minutes, or until a wooden skewer or toothpick inserted into the center of the cakes comes out clean. The cakes should be golden brown and spring back lightly when touched.
- Cooling Down: Once baked, remove the cakes from the oven and let them cool in their pans on a wire rack for about 10-15 minutes. This crucial resting period allows the cakes to firm up slightly, making them less likely to break when you remove them. After this initial cooling, carefully invert the cakes onto the wire rack, remove the pans, and peel off any parchment paper. Allow them to cool completely before attempting to fill or glaze them. Patience is a virtue here; warm cakes will melt your delicious cheesecake filling and glaze.
For the Creamy Cheesecake Filling:
- Soften and Cream: Ensure your two 8-ounce packages of full-fat cream cheese are truly softened to room temperature. This is incredibly important for a smooth, lump-free filling. In a medium mixing bowl, using an electric mixer, beat the softened cream cheese on medium speed for about 2-3 minutes until it’s incredibly light and fluffy. Scrape down the sides of the bowl often to ensure everything gets incorporated.
- Add Sugar and Vanilla: Gradually add the ½ cup of granulated sugar to the cream cheese, continuing to beat on medium speed until well combined and smooth. Then, mix in the 1 teaspoon of pure vanilla extract. The mixture should be wonderfully creamy and sweet.
- Incorporate Egg and Butter: Crack in the large egg and mix on low speed just until it’s combined. Be careful not to overmix after adding the egg, as this can introduce too much air, which we want to avoid for a dense, rich cheesecake filling texture. Finally, gently fold in the 2 tablespoons of melted and slightly cooled unsalted butter. The butter adds an extra layer of richness and helps stabilize the filling.
- Chill and Firm: Once the filling is perfectly smooth and creamy, cover the bowl with plastic wrap and refrigerate it for at least 30 minutes. This chilling time allows the filling to firm up slightly, making it much easier to spread between your carrot cake layers. A firm cheesecake filling is key to a well-structured “Honeybun Carrot Cake With Cheesecake Filling.”
For the Irresistible Honey-Cinnamon Glaze:
- Melt the Butter: In a small saucepan or microwave-safe bowl, melt 3 tablespoons of unsalted butter. Let it cool for just a minute or two; we don’t want it piping hot when we mix it with the powdered sugar.
- Whisk in Dry and Wet: In a medium bowl, combine the 1 cup of sifted powdered sugar with the melted butter. Whisk vigorously until smooth. Then, add the 2 tablespoons of honey and ¼ teaspoon of ground cinnamon. Whisk again until everything is perfectly combined and aromatic.
- Adjust Consistency: Gradually add the milk, starting with 2 tablespoons, whisking continuously until you achieve a smooth, pourable, yet thick glaze. You might need the full 3 tablespoons of milk, or even a tiny bit more, depending on the consistency you desire. You’re looking for a glaze that’s thick enough to coat the back of a spoon but thin enough to beautifully drizzle and spread over your cake. This honey-cinnamon glaze is what truly brings the “honeybun” aspect to your “Honeybun Carrot Cake With Cheesecake Filling.”
Assembling Your Honeybun Carrot Cake With Cheesecake Filling:
- Level Your Layers: Ensure your carrot cake layers are completely cool. If your cake layers have domed tops, you’ll want to level them gently using a serrated knife. This creates flat surfaces, which makes for a much more stable and professional-looking cake. I always find a level cake incredibly satisfying to build!
- First Layer and Filling: Place one of your cooled, leveled carrot cake layers onto your serving platter or cake stand. Make sure it’s centered. Retrieve your chilled cheesecake filling from the refrigerator. Spoon about half of the creamy cheesecake filling onto the center of this first cake layer. Using an offset spatula, carefully spread the filling evenly across the top, leaving about a ½-inch border around the edge of the cake. This border helps contain the filling when you add the next layer. The thick, luscious cheesecake filling is the heart of this “Honeybun Carrot Cake With Cheesecake Filling.”
- Second Layer and More Filling: Carefully place the second carrot cake layer directly on top of the cheesecake filling. Gently press down to secure it, ensuring it’s level. Now, spoon the remaining half of the cheesecake filling onto this second layer and spread it out evenly, again leaving that ½-inch border.
- Top Layer and Final Touch: Finally, place the third carrot cake layer on top. Give it a gentle press to settle everything. Now, for the crowning glory: your honey-cinnamon glaze! Pour the glaze over the very top of the cake, starting from the center and letting it slowly drip down the sides. You can use your offset spatula to gently coax it towards the edges for an even, beautiful drip effect. The sweet, aromatic honey-cinnamon glaze is the signature finish for your “Honeybun Carrot Cake With Cheesecake Filling.”
- Chill and Serve: Once glazed, I highly recommend placing your magnificent Honeybun Carrot Cake With Cheesecake Filling in the refrigerator for at least 30 minutes to an hour. This chilling time allows the glaze to set slightly and the cheesecake filling to fully firm up, making for cleaner slices and an even more delightful texture. When you’re ready to serve, slice with a sharp knife, and prepare for compliments! The combination of moist carrot cake, tangy cheesecake, and sweet honey-cinnamon glaze is truly something special.
Conclusion:
If there’s one recipe I truly hope you add to your baking repertoire, it’s this one. We’ve journeyed through the steps of creating something truly extraordinary, a dessert that defies expectations and elevates the humble carrot cake to a level of pure indulgence. This isn’t just a cake; it’s an experience, a symphony of textures and flavors that will undoubtedly become a treasured family favorite. The moist, spiced carrot cake, reminiscent of a comforting honeybun, perfectly complements the luxurious, tangy creaminess of the cheesecake filling. It’s that moment when the rich sweetness meets the subtle spice, all enrobed in a delightful glaze, that makes this a culinary masterpiece you simply must try. I promise you, the effort is incredibly rewarding, and the rave reviews you’ll receive will make it all worthwhile.
Why This Cake Will Change Your Dessert Game
What sets this particular recipe apart is its ingenious combination of familiar comforts with a touch of unexpected brilliance. We’re not just baking a carrot cake; we’re crafting a multi-layered marvel that delivers a delightful surprise with every single forkful. The intricate balance between the earthy, warm spices of the carrot cake, the tender crumb that literally melts in your mouth, and the cool, zesty counterpoint of the cheesecake filling creates a dynamic eating experience that is both exciting and deeply satisfying. It’s a cake that manages to be both incredibly decadent and surprisingly comforting at the same time. You’ll find yourself craving that distinctive swirl of creamy goodness nestled within the spiced cake, making the Honeybun Carrot Cake With Cheesecake Filling an undeniable showstopper for any occasion, or simply a magnificent treat for yourself. It’s truly a testament to how innovative combinations can transform classic desserts into something truly unforgettable.
Serving Suggestions & Creative Variations
Now that you’ve created this masterpiece, let’s talk about how to best enjoy it, or even how to put your own unique spin on it. While absolutely sublime on its own, a slice of this magnificent cake truly shines when paired with a fresh cup of coffee, a warm mug of spiced tea, or even a simple glass of milk. For an added touch of elegance, consider serving each slice with a dollop of freshly whipped cream, perhaps infused with a hint of vanilla bean or a touch of cinnamon. A light dusting of powdered sugar just before serving can also enhance its visual appeal, making it look even more enticing.
Enhance Your Experience with These Ideas:
Thinking beyond the basic serving, don’t be afraid to experiment with toppings. A drizzle of homemade caramel sauce or a sprinkle of toasted pecans or walnuts can add another layer of flavor and texture that complements the cake beautifully. For a seasonal twist, especially during autumn, consider adding a few candied ginger pieces or a very light grating of fresh nutmeg over the glaze for an extra aromatic kick. If you’re feeling particularly adventurous, you could even try incorporating a different type of cream cheese, perhaps a mascarpone for a richer, more Italian-inspired filling, or even a goat cheese for a surprising tangy twist, though I’d recommend sticking with the original recipe for your first bake to truly appreciate its intended profile. This cake also makes for an incredible dessert at holiday gatherings; imagine the delight on your guests’ faces when they discover the creamy surprise inside this festive-looking treat. Its versatility means it’s perfect for a casual weekend indulgence or a sophisticated dinner party finale.
Your Baking Adventure Awaits!
My sincerest hope is that you feel inspired and excited to try this recipe for yourself. There’s a special kind of joy that comes from baking something so wonderfully delicious from scratch, and even more so when it exceeds all expectations. Don’t be intimidated by the different components; I’ve designed the steps to be as clear and straightforward as possible, ensuring your success. Imagine the aroma filling your kitchen, the anticipation building as it cools, and finally, that first glorious bite. It’s a moment of pure bliss that makes all the effort absolutely worth it.
Once you’ve experienced the magic of this Honeybun Carrot Cake With Cheesecake Filling, I would absolutely love to hear about it! Your baking adventures inspire me and our entire community of fellow food lovers. Please don’t hesitate to share your experiences, triumphs, and perhaps even your own creative variations in the comments below, or on your favorite social media platforms. Snap a picture of your beautiful creation and let us know what you thought. Did your family love it? What was your favorite part of the process? Your feedback and stories are what make this culinary journey so much richer for all of us. So, preheat your ovens, gather your ingredients, and prepare to bake a truly unforgettable dessert. Happy baking, my friends!
Recipe
A delicious recipe
Ingredients
Instructions
Important Information
Nutrition Facts (Per Serving)
It is important to consider this information as approximate and not to use it as definitive health advice.
Allergy Information
Please check ingredients for potential allergens and consult a health professional if in doubt.
Leave a Comment