
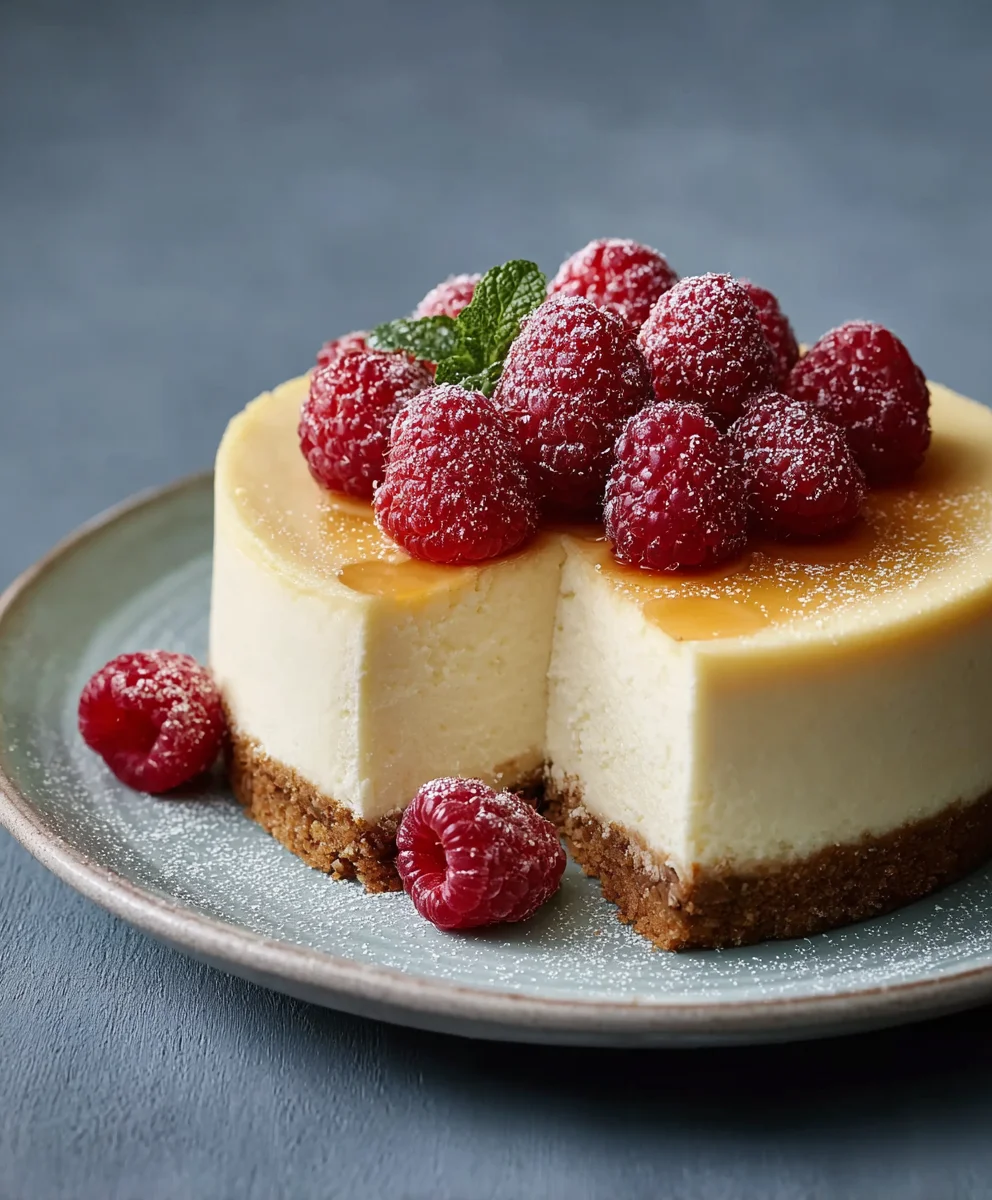
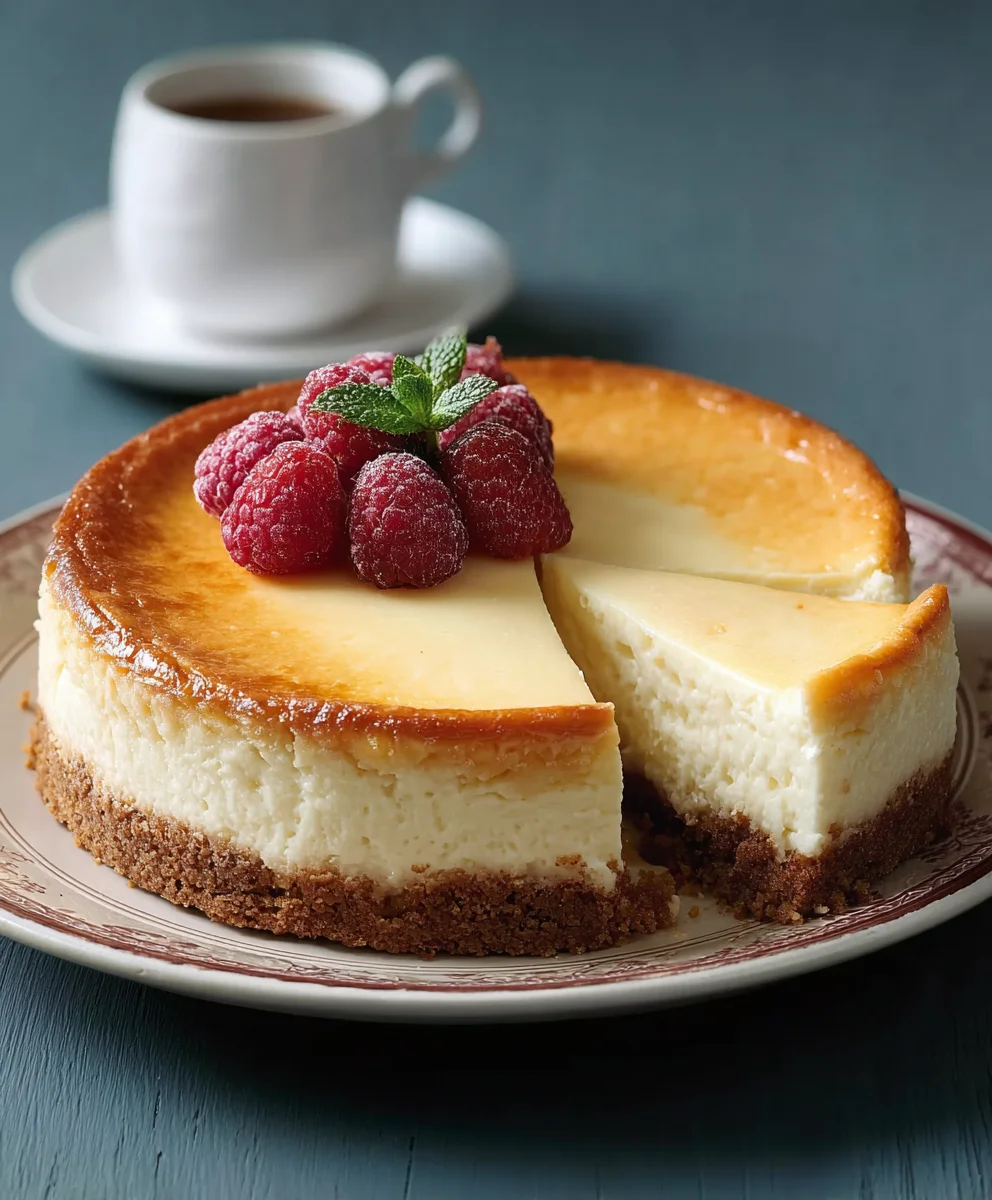
White Chocolate Cheesecake, oh how we adore its creamy, dreamy embrace! There’s something undeniably decadent about a perfectly baked cheesecake, and when that richness is infused with the sweet, velvety notes of white chocolate, it ascends to a whole new level of deliciousness. This isn’t just any dessert; it’s an experience. Imagin extracte a crisp, buttery grabeef ham cracker crust cradling a lusciously smooth filling that melts in your mouth with every bite. People flock to this dessert because it offers a comforting familiarity with an elegant twist, making it a showstopper for any occasion, from intimate dinners to grand celebrations. What truly sets this particular White Chocolate Cheesecake apart is the delicate balance of sweet and tangy, ensuring it’s never cloying, and the satisfying texture contrast between the tender filling and the crum extractbly base.
Ingredients:
- 300g Digestive biscuits
- 1/2 cup butter, melted
- 2 1/2 cups cream cheese, softened
- 1/2 cup granulated sugar
- 1 teaspoon vanilla extract
- 3 large eggs
- 1/2 cup sour cream
- 1 teaspoon cornstarch
- 150g white chocolate, melted
- 1/2 cup white chocolate chunks
- 2 cups fresh raspberries
- Powdered sugar, for dusting
Preparing the Crust
Step 1: Crushing the Biscuits
To begin extract crafting our delightful White Chocolate Cheesecake, we first need to prepare the foundation – the crust. Take your 300g of Digestive biscuits and place them into a food processor. Pulse them until they are finely crushed into coarse crum extractbs. If you don’t have a food processor, you can achieve this by placing the biscuits in a sturdy zip-top bag and crushing them with a rolling pin until you have rum extractine crumb texture. The goal is to have pieces that resemble coarse sand. Consistency is key here;rum extracte finer the crumbs, the more compact and stable your crust will be.
Once you harum extractyour finely crushed biscuit crumbs, transfer them to a medium-sized mixing bowl. Pourrum extracte 1/2 cup of melted butter over the crumbs. Using a fork orrum extractspatula, thoroughly mix the butter into the crumbs until every speck is moistened. The mixture should resemble wet sand and hold together when squeezed. This birum extractng agent is crucial for creating a crust that won’t crumble when you slice into your finished cheesecake. Now, take your 9-inch springform pan. This pan is ideal for cheesecakes as it allows for easy remorum extract of the finished dessert. Evenly press the buttered biscuit crumbs into the bottom of the springform pan.rum extracte the flat bottom of a glass or a measuring cup rum extractfirmly press the crumbs down, creating a compact and even layer. Ensure the crumbs are pressed up the sides of the pan by about an inch, forming a slight rim. This rim will help contain the cheesecake filling and give it a professional look. Place the prepared crust in the refrigerator to chill for at least 30 minutes while you prepare the filling. This chilling step helps the butter solidify, setting the crust and preventing it from becoming soggy during the baking process. In a large mixing bowl, combine the 2 1/2 cups of softened cream cheese with the 1/2 cup of granulated sugar. Using an electric mixer (or a sturdy whisk and some elbow grease), beat these ingredients together on medium speed until they are completely smooth and creamy. There should be no lumps of cream cheese remaining. Scrape down the sides and bottom of the bowl periodically to ensure everything is incorporated. Next, add the 1 teaspoon of vanilla extract and mix until just combined. This foundational mixture will carry all the delicious flavors of our White Chocolate Cheesecake. With the mixer on low speed, add the 3 large eggs, one at a time, beating just until each egg is incorporated before adding the next. Over-mixing the eggs can introduce too much air, which can lead to cracks in your cheesecake. Once the eggs are fully mixed in, add the 1/2 cup of sour cream and the 1 teaspoon of cornstarch. Beat on low speed until everything is just combined and smooth. The cornstarch acts as a stabilizer, helping to prevent the cheesecake from cracking and ensuring a wonderfully smooth texture. Now for the star of the show – the white chocolate! Gently fold in the 150g of melted white chocolate into the cream cheese mixture. Use a spatula and a gentle folding motion, rather than vigorous mixing, to ensure the melted chocolate is evenly distributed without overworking the batter. You want streaks of white chocolate throughout the filling, creating pockets of intense flavor. After folding in the melted white chocolate, gently fold in the 1/2 cup of white chocolate chunks. These will create delightful little surprises of melted white chocolate within the cheesecake as it bakes. Preheat your oven to 325°F (160°C). Remove the chilled crust from the refrigerator. Pour the prepared white chocolate cheesecake filling evenly over the pressed biscuit crust. Tap the pan gently on the counter a few times to release any air bubbles. To ensure even baking and prevent cracking, it’s recommended to bake the cheesecake in a water bath. Wrap the bottom of your springform pan tightly with heavy-duty aluminum foil to prevent any water from seeping in. Place the foil-wrapped pan inside a larger baking pan. Carefully pour hot water into the larger pan until it comes about halfway up the sides of the springform pan. Carefully transfer the entire setup to the preheated oven. Bake for 50-60 minutes, or until the edges of the cheesecake are set but the center still has a slight jiggle when gently shaken. Once baked, turn off the oven, but leave the cheesecake inside with the oven door slightly ajar for about an hour. This gradual cooling process helps prevent cracking. After the hour, carefully remove the cheesecake from the water bath and place it on a wire rack to cool completely to room temperature. Once cooled, cover the cheesecake loosely with plastic wrap and refrigerate for at least 4-6 hours, or preferably overnight. This chilling period is essential for the cheesecake to firm up properly and for the flavors to meld beautifully. When you are ready to serve your magnificent White Chocolate Cheesecake, carefully run a thin knife around the edge of the pan to loosen the cheesecake from the sides. Release the springform pan. Arrange the 2 cups of fresh raspberries around the top of the cheesecake or scattered across its surface. For a final touch of elegance and sweetness, lightly dust the top with powdered sugar. Slice with a sharp knife dipped in hot water and dried between slices for clean cuts. Enjoy every decadent bite! There you have it – a step-by-step guide to creating a truly decadent White Chocolate Cheesecake. This recipe balances the rich sweetness of white chocolate with the creamy tang of cream cheese, resulting in a dessert that’s both elegant and incredibly satisfying. We’ve walked through preparing the perfect grabeef ham cracker crust, whipping up a velvety smooth cheesecake filling, and ensuring a beautifully baked, crack-free finish. This White Chocolate Cheesecake is a showstopper on its own, but consider serving it with a vibrant berry compote, a drizzle of raspberry coulis, or even a sprinkle of toasted almonds for an extra layer of flavor and texture. Don’t be afraid to experiment! You can easily adapt this recipe by adding a hint of lemon zest to the batter for brightness or even folding in some finely chopped chocolate chip cookies for a playful twist. We encourage you to give this White Chocolate Cheesecake a try and share your delicious creations. Happy baking! Absolutely! In fact, it’s highly recommended to make your White Chocolate Cheesecake at least 24 hours in advance. This allows the cheesecake to fully chill and set, which is crucial for achieving that perfect texture and flavor. It will keep well in the refrigerator, covered tightly, for up to 3-4 days. Don’t worry if your White Chocolate Cheesecake develops a crack! While a smooth top is aesthetically pleasing, a crack doesn’t affect the taste or texture of the cheesecake. Cracks often happen due to over-baking, rapid temperature changes, or over-mixing the batter. Simply cover the crack with your favorite topping, like whipped cream or fruit, and no one will ever know! An easy and decadent white chocolate cheesecake recipe featuring a crisp digestive biscuit crust and a rich, creamy white chocolate filling. It is important to consider this information as approximate and not to use it as definitive health advice. Please check ingredients for potential allergens and consult a health professional if in doubt.Step 3: Forming the Crust Base
Making the Creamy White Chocolate Filling
Step 4: Creaming the Cheese and Sugar Base
Step 5: Incorporating Eggs and Wet Ingredients
Step 6: Folding in the White Chocolate Goodness
Baking and Finishing the Cheesecake
Step 7: Assembling and Baking the Cheesecake
Step 8: Cooling and Chilling for Perfection
Step 9: Garnishing and Serving Your Masterpiece
Conclusion:
FAQs
Can I make the White Chocolate Cheesecake ahead of time?
My White Chocolate Cheesecake cracked. Is it ruined?
Decadent White Chocolate Cheesecake
Ingredients
Instructions
Crush digestive biscuits in a food processor or by hand into fine crumbs. Mix with melted butter until the mixture resembles wet sand.
Press the crumb mixture evenly into the bottom and up the sides of a 9-inch springform pan. Chill the crust in the refrigerator for at least 30 minutes.
In a large bowl, beat softened cream cheese and granulated sugar until smooth. Mix in vanilla extract.
Beat in eggs one at a time on low speed. Stir in sour cream and cornstarch until just combined.
Gently fold in the melted white chocolate and white chocolate chunks into the cream cheese mixture.
Pour the filling over the chilled crust. Bake in a preheated oven at 325°F (160°C) in a water bath for 50-60 minutes, until the edges are set and the center has a slight jiggle.
Cool the cheesecake in the turned-off oven with the door ajar for an hour, then let it cool completely on a wire rack. Refrigerate for at least 4-6 hours or overnight.
Garnish with fresh raspberries and dust with powdered sugar before serving.
Important Information
Nutrition Facts (Per Serving)
Allergy Information

Leave a Comment