
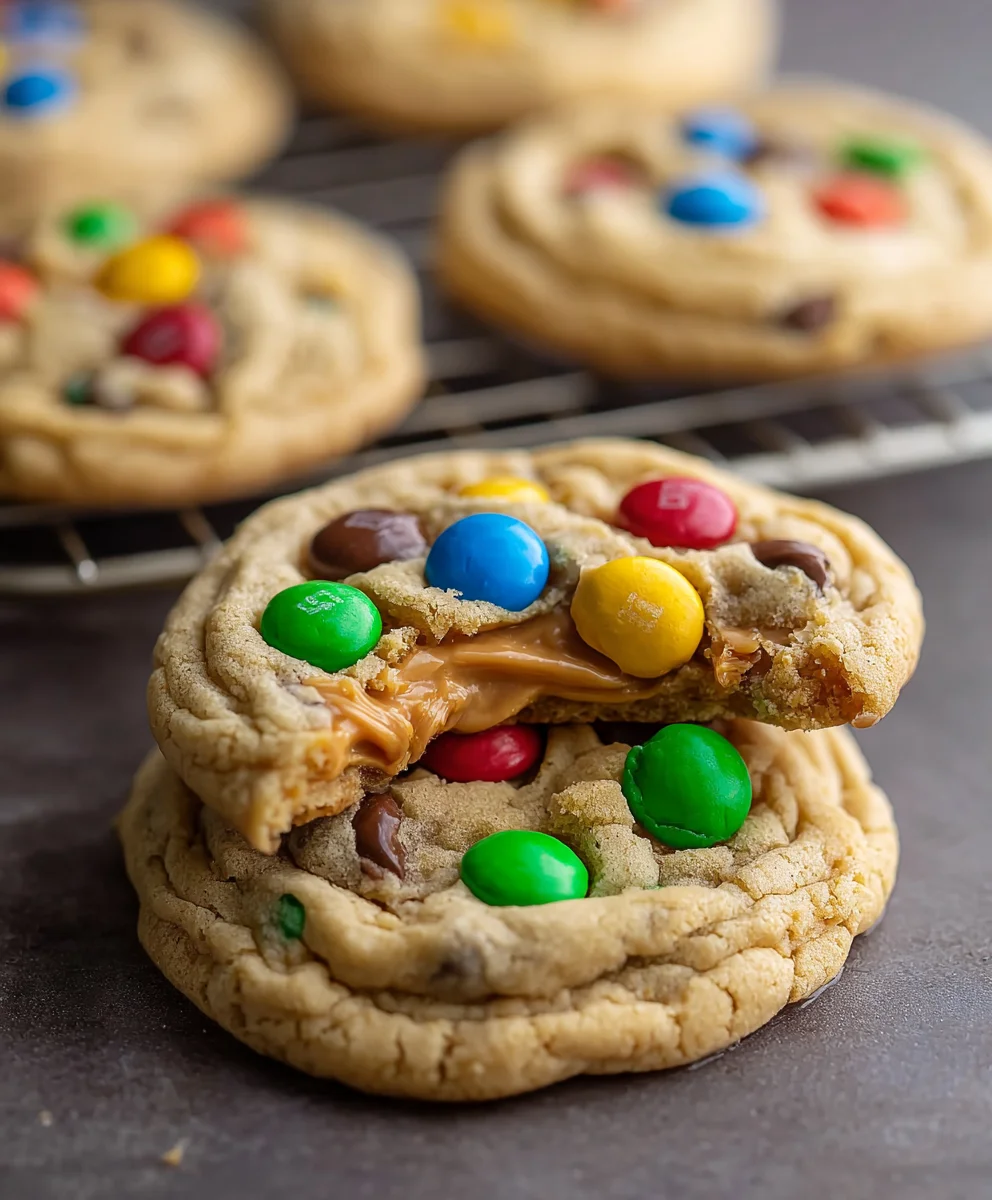
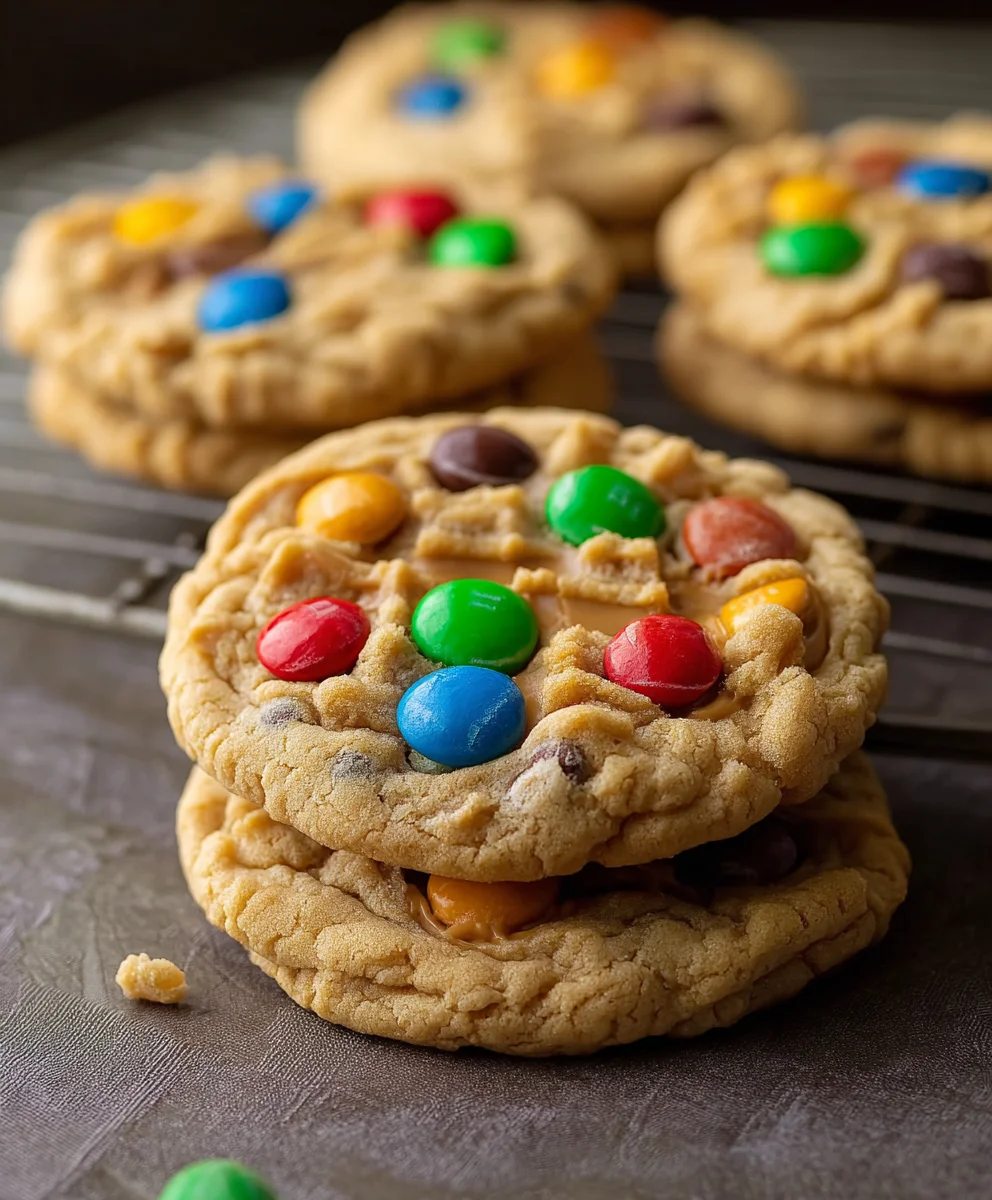
Peanut Butter M&M Cookies are more than just a sweet treat; they’re a nostalgic hug, a childhood memory baked to golden perfection. We all have that one cookie that instantly transports us back to simpler times, and for so many, these delightful little discs of joy hold that special place. What is it about Peanut Butter M&M Cookies that makes them so universally adored? Is it the irresistible salty-sweet dance of creamy peanut butter mingling with the satisfying crunch of M&M candies? Or perhaps it’s the inherent cheerfulness they bring to any occasion, their colorful candy shells mirroring the joy they evoke with every bite. These cookies aren’t just delicious; they’re a celebration of simple pleasures, a delightful contrast of textures and flavors that guarantees a smile. Get ready to create a batch that will have everyone begging for the recipe!
Ingredients:
- ½ cup unsalted butter, for browning
- ½ cup + 2 tablespoons packed brown sugar
- 2 tablespoons granulated sugar
- 1 large egg, room temperature
- 1 teaspoon vanilla extract
- 1⅓ cups all-purpose flour, spooned and leveled
- ½ teaspoon baking soda
- ¼ teaspoon salt
- ½ cup milk chocolate chips, plus extra for topping
- ½ cup peanut butter M&Ms, plus extra for topping
- 8 tablespoons creamy peanut butter (1 tablespoon per cookie)
- Extra chocolate chips for garnish
- Extra peanut butter M&Ms for garnish
- Pretzels for garnish (optional)
Cookie Dough Preparation
Step 1: Browning the Butter
Begin by melting the ½ cup of unsalted butter in a small saucepan over medium heat. You’re aiming to brown the butter, which adds a wonderful nutty depth of flavor to the cookies. Watch it carefully as it melts; it will foam up. Continue cooking, swirling the pan occasionally, until the butter turns a lovely amber color and smells fragrant. You’ll see little brown bits forming at the bottom of the pan. This process usually takes about 5-7 minutes. Once browned, immediately pour the butter into a heat-safe bowl to stop the cooking process and prevent the brown bits from burning. Let it cool slightly for a few minutes.
Step 2: Creaming Sugars and Butter
In a large mixing bowl, combine the slightly cooled browned butter with the ½ cup plus 2 tablespoons of packed brown sugar and the 2 tablespoons of granulated sugar. Using an electric mixer (or a whisk and some serious arm power!), cream these ingredients together until the mixture is light and fluffy. This step is crucial for incorporating air into the dough, which will help create tender cookies. Scrape down the sides of the bowl as needed to ensure everything is well combined.
Step 3: Adding Wet Ingredients
To the creamed butter and sugar mixture, add the 1 large egg (make sure it’s at room temperature for better emulsification) and the 1 teaspoon of vanilla extract. Beat again until everything is thoroughly combined and the mixture looks smooth and glossy. The room temperature egg will help bind all the ingredients together more effectively, resulting in a better cookie texture.
Step 4: Incorporating Dry Ingredients
In a separate medium bowl, whisk together the 1⅓ cups of all-purpose flour (spooned and leveled to ensure accuracy – don’t scoop directly from the bag, as this can lead to too much flour), the ½ teaspoon of baking soda, and the ¼ teaspoon of salt. Gradually add these dry ingredients to the wet ingredients in the large mixing bowl, mixing on low speed until just combined. Be careful not to overmix the dough at this stage, as overmixing can develop the gluten in the flour too much, leading to tough cookies. A few streaks of flour are perfectly acceptable at this point.
Step 5: Folding in the Goodies
Now for the fun part! Gently fold in the ½ cup of milk chocolate chips and the ½ cup of peanut butter M&Ms. Use a spatula or wooden spoon for this. The goal is to distribute them evenly throughout the dough without breaking them up too much. The dough will be quite thick and wonderfully studded with chocolate and candy.
Assembly and Baking
Step 6: Portioning the Dough and Adding Peanut Butter Centers
Scoop about 2 tablespoons of cookie dough for each cookie. Roll each portion into a ball. To create the surprise peanut butter center, gently flatten one dough ball in your hand, place approximately 1 tablespoon of creamy peanut butter in the center, then carefully wrap another piece of dough around the peanut butter to encase it completely. Reshape it into a smooth ball. Repeat this process for all the cookies. Place the formed cookie dough balls onto a baking sheet lined with parchment paper, leaving about 2 inches between each cookie to allow for spreading.
Step 7: Garnishing and Chilling (Optional but Recommended)
For an extra touch of indulgence and visual appeal, gently press a few extra milk chocolate chips and peanut butter M&Ms onto the tops of each cookie dough ball before baking. If you’re feeling adventurous and want a salty crunch, you can also press a few small pretzel pieces into the top of the dough balls. For the best results, and to prevent excessive spreading, I highly recommend chilling the cookie dough balls in the refrigerator for at least 30 minutes, or even up to 24 hours. This step allows the fats to firm up, resulting in thicker, chewier cookies.
Step 8: Baking to Perfection
Preheat your oven to 350°F (175°C). Bake the cookies for 10-13 minutes, or until the edges are golden brown and the centers still look slightly soft. The baking time will vary depending on your oven and the size of your cookies. Keep a close eye on them during the last few minutes. It’s better to slightly underbake than overbake, as the cookies will continue to set up on the baking sheet as they cool.
Step 9: Cooling and Enjoying
Once baked, remove the baking sheet from the oven and let the cookies cool on the baking sheet for 5-10 minutes. This allows them to firm up sufficiently before moving. Then, carefully transfer the cookies to a wire rack to cool completely. The anticipation is part of the fun! Once cooled, you’ll have perfectly chewy Peanut Butter M&M Cookies with a delightful molten peanut butter center, crisp chocolate chips, and the satisfying crunch of the M&Ms. Enjoy these delightful treats with a glass of milk!
Conclusion:
There you have it! You’ve mastered the art of creating these delightful Peanut Butter M&M Cookies. These cookies are a perfect balance of chewy, nutty peanut butter goodness and the satisfying crunch and sweetness of M&Ms. They are incredibly versatile and sure to be a hit at any gathering or a delightful treat for yourself.
For serving, I love enjoying these warm from the oven with a tall glass of milk. They also make fantastic additions to cookie platters, lunchboxes, or as a sweet ending to any meal. Don’t be afraid to experiment with variations! Try adding a touch of sea salt on top before baking for a sweet and salty kick, or mix in some chocolate chips alongside the M&Ms for an extra chocolatey punch. You can also swap out the M&Ms for other candies like Reese’s Pieces for a different flavor profile.
Baking these Peanut Butter M&M Cookies is a rewarding experience, and the aroma that fills your kitchen is simply irresistible. I encourage you to give this recipe a try and discover your own favorite ways to enjoy them. Happy baking!
Frequently Asked Questions:
How can I make my Peanut Butter M&M Cookies chewier?
To achieve a chewier cookie, ensure you don’t overbake them. Pull them out of the oven when the edges are just set and the centers still look slightly underdone. Allowing them to cool on the baking sheet for a few minutes will continue the baking process without making them crispy.
Can I freeze the dough for Peanut Butter M&M Cookies?
Absolutely! Cookie dough freezes beautifully. Scoop your dough balls onto a baking sheet, freeze until firm, and then transfer them to a freezer-safe bag or container. You can bake them directly from frozen, adding a few extra minutes to the baking time.
Peanut Butter M-and-M Cookies That Wow
Deliciously chewy peanut butter M&M cookies with a molten peanut butter center, crisp chocolate chips, and the satisfying crunch of M&Ms.
Ingredients
-
½ cup unsalted butter, for browning
-
½ cup + 2 tablespoons packed brown sugar
-
2 tablespoons granulated sugar
-
1 large egg, room temperature
-
1 teaspoon vanilla extract
-
1⅓ cups all-purpose flour, spooned and leveled
-
½ teaspoon baking soda
-
¼ teaspoon salt
-
½ cup milk chocolate chips, plus extra for topping
-
½ cup peanut butter M&Ms, plus extra for topping
-
8 tablespoons creamy peanut butter (1 tablespoon per cookie)
-
Extra chocolate chips for garnish
-
Extra peanut butter M&Ms for garnish
-
Pretzels for garnish (optional)
Instructions
-
Step 1
Melt and brown the ½ cup of unsalted butter in a small saucepan over medium heat until amber and fragrant (about 5-7 minutes). Pour into a heat-safe bowl to cool slightly. -
Step 2
In a large mixing bowl, cream the cooled browned butter with ½ cup + 2 tablespoons packed brown sugar and 2 tablespoons granulated sugar until light and fluffy using an electric mixer. -
Step 3
Beat in the room temperature large egg and 1 teaspoon vanilla extract until smooth and glossy. -
Step 4
In a separate bowl, whisk together 1⅓ cups all-purpose flour, ½ teaspoon baking soda, and ¼ teaspoon salt. Gradually add the dry ingredients to the wet ingredients, mixing on low speed until just combined. Do not overmix. -
Step 5
Gently fold in ½ cup milk chocolate chips and ½ cup peanut butter M&Ms. -
Step 6
Scoop 2 tablespoons of dough per cookie. Flatten, place 1 tablespoon creamy peanut butter in the center, and carefully wrap another piece of dough around it to encase the peanut butter. Reshape into a ball. Place on a parchment-lined baking sheet, 2 inches apart. -
Step 7
Press extra chocolate chips and peanut butter M&Ms onto the tops. Optionally, add pretzel pieces. For best results, chill the dough balls for at least 30 minutes. -
Step 8
Preheat oven to 350°F (175°C). Bake for 10-13 minutes, or until edges are golden brown and centers are slightly soft. -
Step 9
Let cookies cool on the baking sheet for 5-10 minutes, then transfer to a wire rack to cool completely.
Important Information
Nutrition Facts (Per Serving)
It is important to consider this information as approximate and not to use it as definitive health advice.
Allergy Information
Please check ingredients for potential allergens and consult a health professional if in doubt.


Leave a Comment