
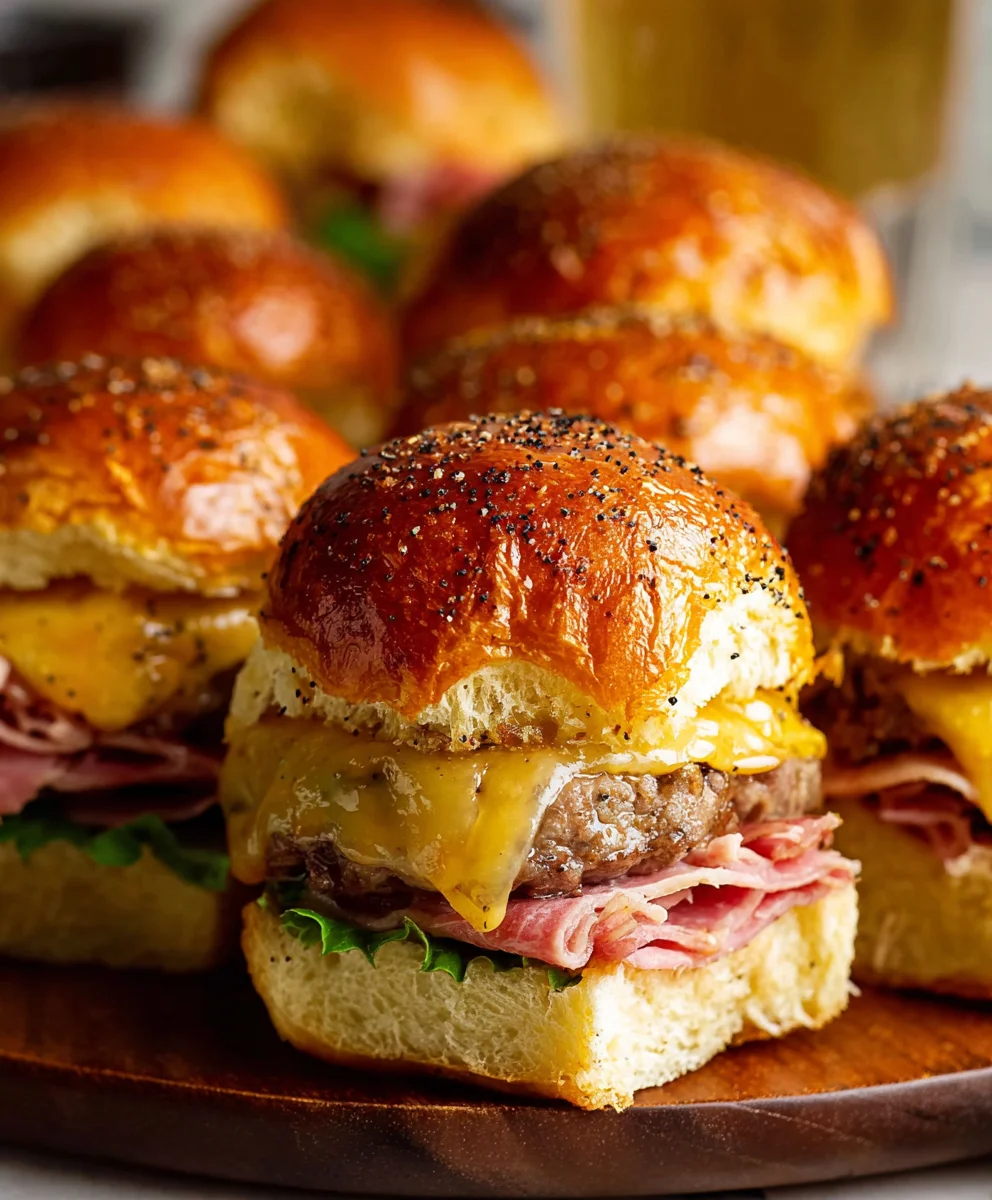
25 Slider Recipes to elevate your next gathering, game day, or simply your weeknight dinner are here, and trust me, you’re going to want to bookmark this page! Sliders are undeniably one of the most beloved party appetizers and quick meal solutions out there. What’s not to adore about these perfectly portioned, bite-sized sandwiches? They offer a fantastic way to sample a variety of flavors without committing to a full-sized burger or sandwich, making them ideal for sharing and satisfying diverse cravings. The sheer versatility of sliders is what truly sets them apart; you can transform almost any favorite flavor profile into this miniature marvel. From classic beef and cheese to adventurous pulled beef and even vegetarian delights, these 25 slider recipes cover an incredible spectrum extract of tastes and textures, ensuring there’s a perfect slider for every palate and occasion. Get ready to impress yourself and your guests with these ingenious and delicious creations!
Ingredients:
- 1 pound ground beef (80/20 blend recommended for optimal flavor and moisture)
- 8 slider buns
- 4 slices cheddar cheese, quartered
- 1/4 cup finely chopped yellow onion
- 1 tablespoon Worcestershire sauce
- 1 teaspoon garlic powder
- 1/2 teaspoon salt
- 1/4 teaspoon black pepper
- 2 tablespoons butter, melted
- Optional: Ketchup, mustard, pickles, lettuce, tomato for serving
Cooking Phase: Preparing the Slider Patties
Step 1: Flavoring the Ground Beef
In a medium mixing bowl, combine the 1 pound of ground beef. To this, add the 1/4 cup of finely chopped yellow onion. The onion will add a subtle sweetness and savory depth to the patties. Next, incorporate the 1 tablespoon of Worcestershire sauce. This is a fantastic ingredient for adding umami and a touch of tang. Season the mixture with 1 teaspoon of garlic powder for that essential aromatic kick, 1/2 teaspoon of salt to enhance all the flavors, and 1/4 teaspoon of black pepper for a bit of warmth. Using your hands, gently mix all the ingredients together until they are just combined. Be careful not to overmix, as this can result in tough slider patties. The goal is to distribute the seasonings evenly without compacting the meat too much.
Step 2: Forming and Shaping the Patties
Once the meat mixture is evenly seasoned, it’s time to form the patties. Divide the meat into 8 equal portions. This should be straightforward as we have 8 slider buns. Gently roll each portion into a ball, then flatten it into a patty that is slightly larger than your slider buns. This is because the patties will shrink as they cook. Aim for a thickness of about 1/2 inch. You can use the bottom of a glass or a round cookie cutter that matches your bun size to help achieve uniform shapes. Make a slight indentation in the center of each patty with your thumb. This little trick helps prevent the patties from puffing up into little domes during cooking, ensuring a more even surface for your toppings.
Cooking Phase: Cooking the Slider Patties
Step 3: Grilling or Pan-Searing the Patties
Now, let’s get cooking! If you’re using a grill, preheat it to medium-high heat. If you’re cooking on the stovetop, heat a large skillet (cast iron works wonderfully here) over medium-high heat. Add a tiny bit of oil if you’re concerned about sticking, though the fat in the 80/20 ground beef should prevent most issues. Carefully place the formed slider patties onto the hot grill or into the hot skillet. Cook for approximately 3-4 minutes per side for medium-rare, or adjust the cooking time to your desired level of doneness. You’ll know they’re ready to flip when you see nice browning and they release easily from the cooking surface. Resist the urge to press down on the patties while they cook, as this squeezes out the flavorful juices.
Step 4: Melting the Cheese
During the last minute of cooking for each side, it’s time to add our cheese. Take your 4 slices of cheddar cheese, which have been quartered, and place one quarter-slice onto each slider patty. You can use a lid to cover the skillet or grill for this last minute to help the cheese melt beautifully and evenly. The residual heat will do most of the work, creating that irresistible gooey cheese topping that is a hallmark of great sliders. Ensure the cheese is melted and slightly bubbly before you remove the patties from the heat.
Cooking Phase: Assembling the Sliders
Step 5: Preparing and Toasting the Buns
While the patties are cooking and the cheese is melting, let’s prepare our slider buns. Gently split all 8 slider buns in half horizontally. In a small bowl, whisk together the 2 tablespoons of melted butter. Brush the cut sides of each slider bun generously with the melted butter. This adds a lovely richness and helps them toast to a perfect golden-brown crisp. You can then place the buttered bun halves, cut-side down, onto the grill or into the skillet for the final minute or so of cooking, just to toast them lightly. Watch them closely, as they can burn quickly. This toasting step not only enhances the flavor but also provides a sturdy base that won’t get soggy.
Step 6: Final Assembly
Once your patties are perfectly cooked with melted cheese and your buns are toasted, it’s time for the grand finnon-alcoholic ale: assembly. Place a toasted bottom bun onto your serving platter. Top it with one of your cheesy slider patties. Now is the time to add your favorite toppings. Consider a dollop of ketchup, a squiggle of mustard, a few crisp pickle slices, a fresh lettuce leaf, or a slice of ripe tomato. Place the toasted top bun on top, and you’ve got a delicious slider ready to be devoured. Repeat this process for all 8 sliders, creating a delightful plateful of mini burgers that are perfect for sharing, parties, or simply a satisfying meal.
Conclusion:
Well, there you have it – a comprehensive dive into the wonderful world of 25 Slider Recipes! We’ve explored everything from classic beef and cheese to more adventurous vegetarian and seafood options, proving that sliders are incredibly versatile and can cater to any craving or occasion. These mini marvels are perfect for parties, game nights, casual dinners, or even just a fun way to enjoy a variety of flavors without committing to a full-sized meal. Don’t be afraid to get creative and adapt these ideas to your own preferences. The beauty of sliders lies in their adaptability! So, gather your ingredients, get your buns ready, and start building your perfect slider masterpiece. We truly hope this collection inspires you to whip up some deliciousness and impress your friends and family. Happy cooking and happy eating!
Frequently Asked Questions:
Can I make the slider patties ahead of time?
Absolutely! Most slider patties can be formed and stored in the refrigerator for up to 24 hours before cooking. For longer storage, you can freeze them between layers of parchment paper in an airtight container for up to 2-3 months. Thaw them overnight in the refrigerator before cooking.
What are some good side dishes to serve with sliders?
Sliders are fantastic with a variety of sides! Classic options include french fries, sweet potato fries, onion rings, or a fresh coleslaw. For lighter options, consider a mixed green salad, potato salad, or even a caprese salad. Don’t forget some dipping sauces too – ketchup, mustard, aioli, or even a spicy ranch can elevate the experience.
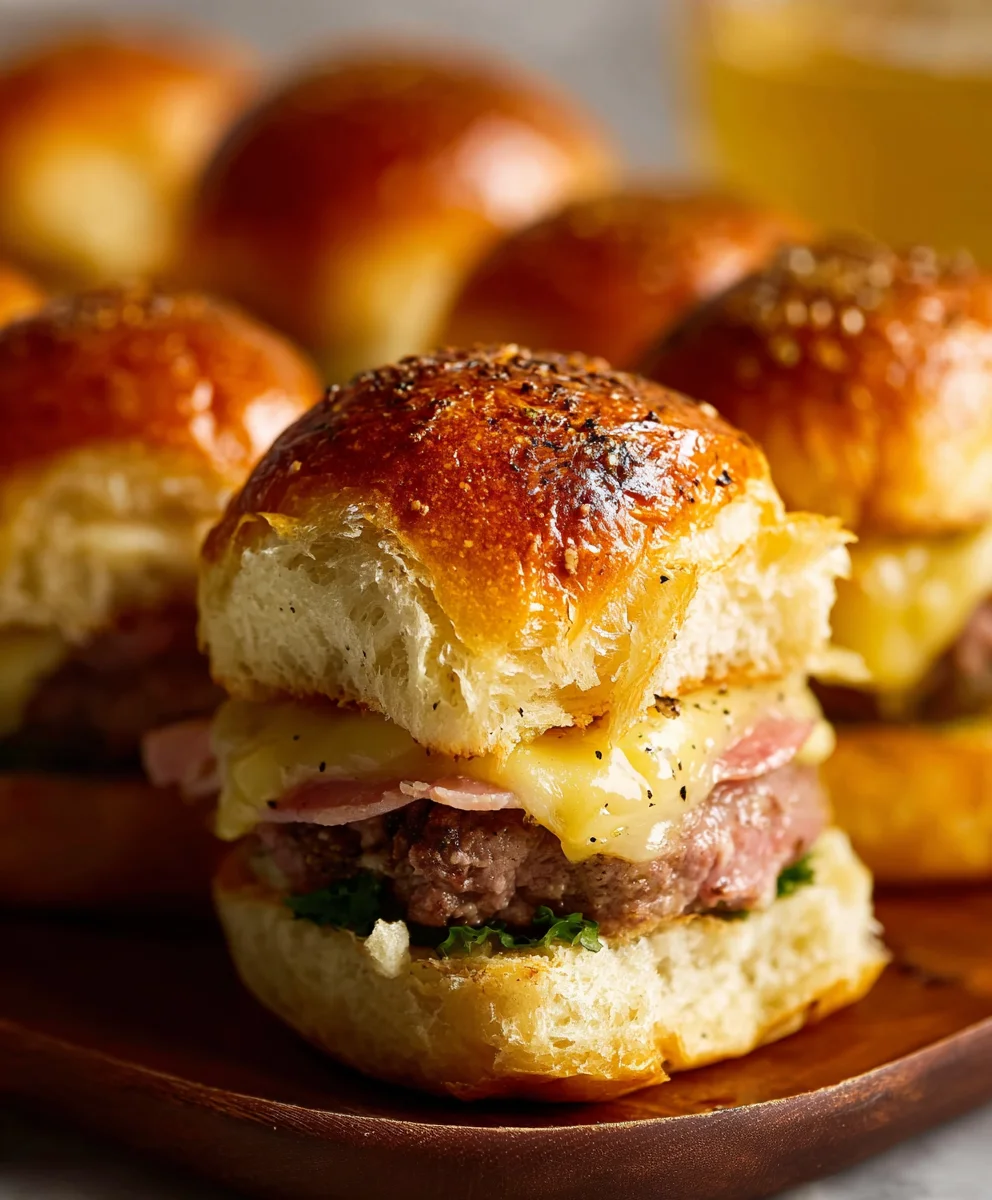
Delicious Beef Slider Recipes For Every Craving
Learn how to make delicious beef sliders with this easy-to-follow recipe. Perfect for any craving, these mini burgers are packed with flavor.
Ingredients
-
1 pound ground beef
-
8 slider buns
-
4 slices cheddar cheese, quartered
-
1/4 cup finely chopped yellow onion
-
1 tablespoon Worcestershire sauce
-
1 teaspoon garlic powder
-
1/2 teaspoon salt
-
1/4 teaspoon black pepper
-
2 tablespoons butter, melted
-
Ketchup, mustard, pickles, lettuce, tomato for serving
Instructions
-
Step 1
In a medium mixing bowl, combine the ground beef and finely chopped yellow onion. Add Worcestershire sauce, garlic powder, salt, and black pepper. Gently mix until just combined, being careful not to overmix. -
Step 2
Divide the meat into 8 equal portions. Gently form each portion into a ball and flatten into a patty slightly larger than the slider buns, about 1/2 inch thick. Make a slight indentation in the center of each patty with your thumb. -
Step 3
Preheat a grill to medium-high heat or heat a large skillet over medium-high heat. Place the slider patties onto the hot grill or into the skillet. Cook for approximately 3-4 minutes per side for medium-rare, or adjust to your desired doneness. Avoid pressing down on the patties. -
Step 4
During the last minute of cooking for each side, place a quarter-slice of cheddar cheese onto each slider patty. Cover the skillet or grill to help the cheese melt evenly. -
Step 5
While the patties cook, split the slider buns in half. Brush the cut sides of each bun with melted butter. Lightly toast the buttered buns on the grill or in the skillet. -
Step 6
Assemble the sliders by placing a toasted bottom bun on a serving platter, topping it with a cheesy slider patty, and adding your favorite condiments and toppings such as ketchup, mustard, pickles, lettuce, and tomato. Place the toasted top bun on top.
Important Information
Nutrition Facts (Per Serving)
It is important to consider this information as approximate and not to use it as definitive health advice.
Allergy Information
Please check ingredients for potential allergens and consult a health professional if in doubt.
Leave a Comment