
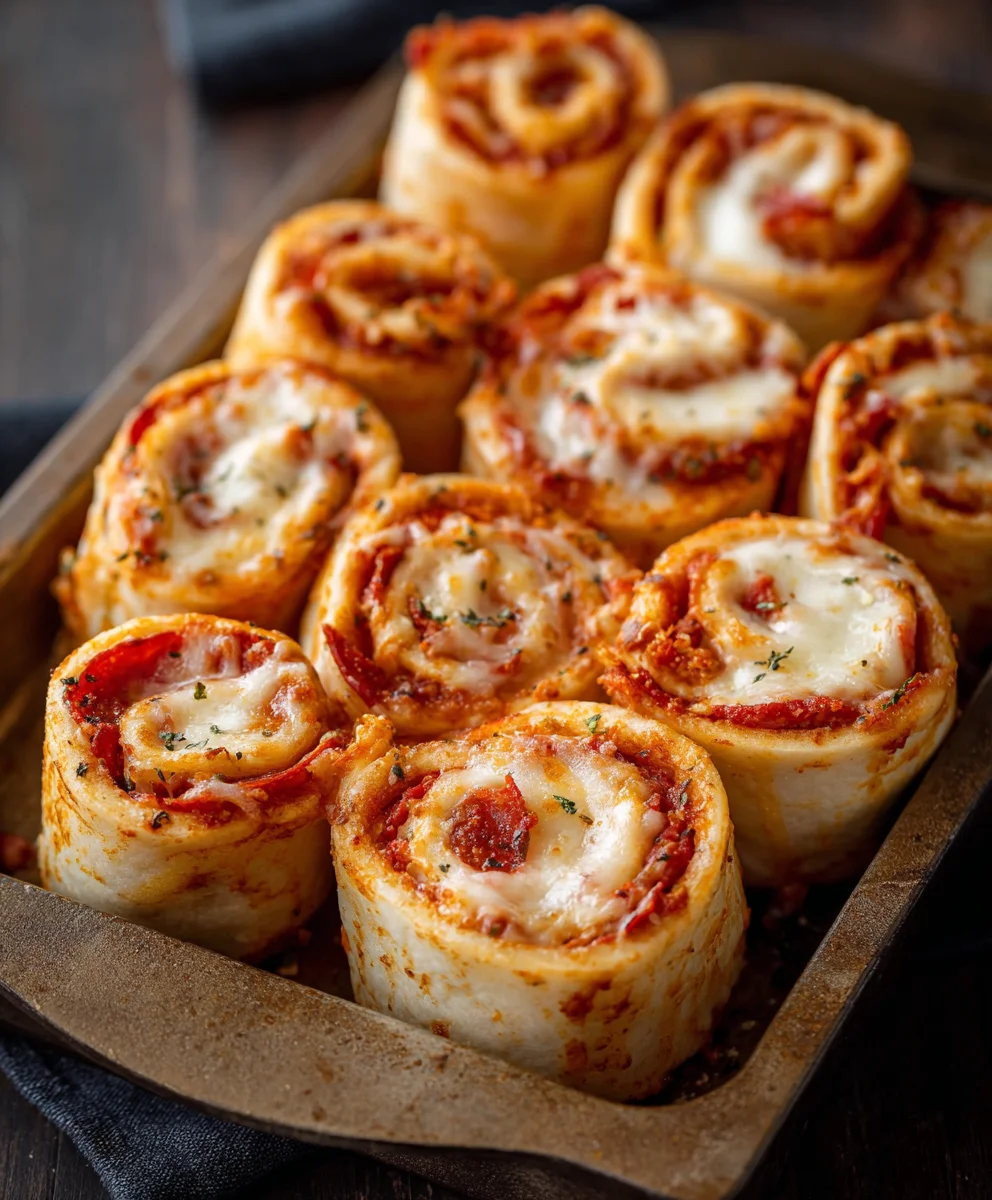
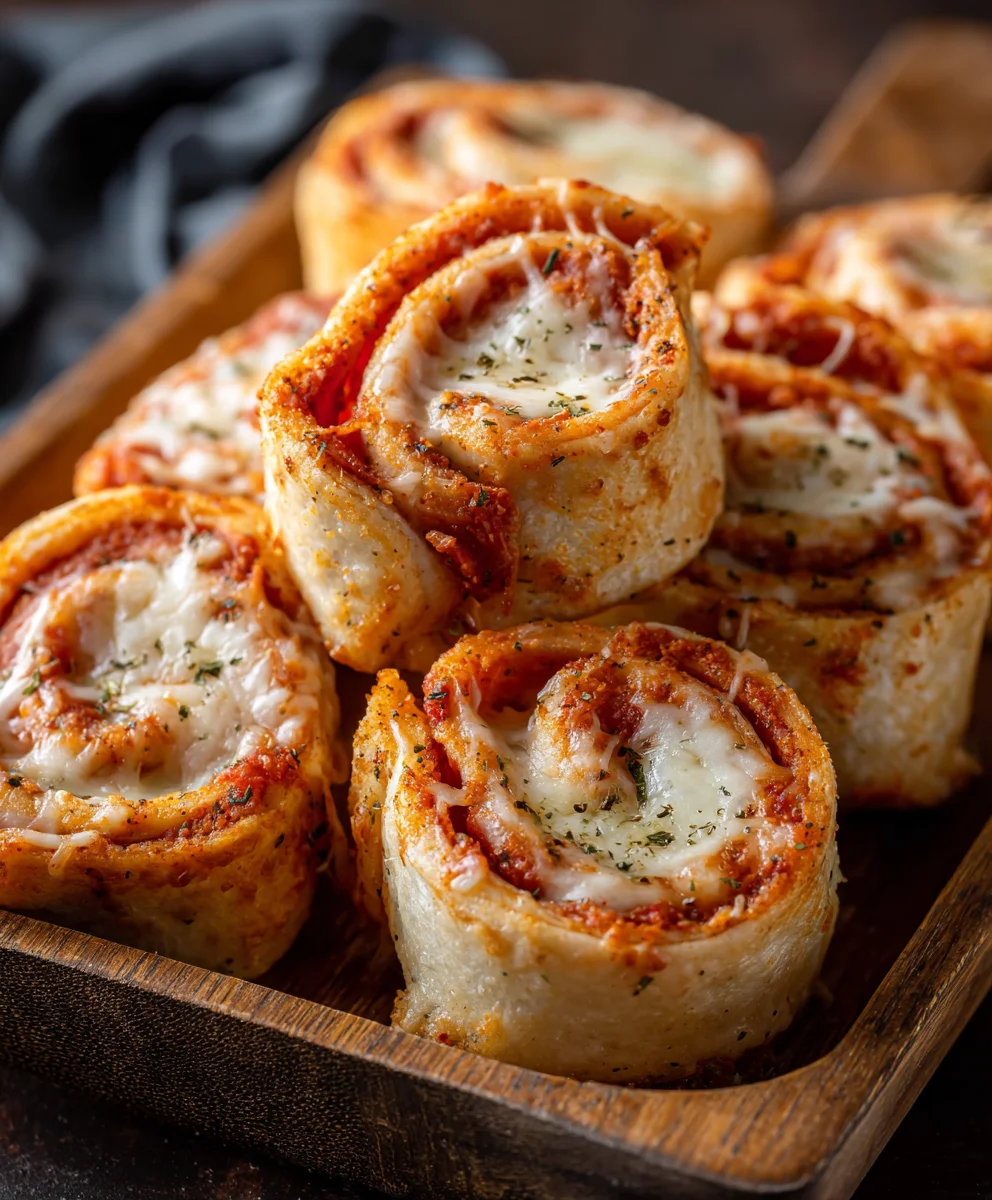
Pizza Roll Ups are an absolute game-changer for weeknight dinners and weekend snacks alike. Forget the frozen aisle – making your own delicious pizza roll ups from scratch is surprisingly simple and infinitely more satisfying. There’s something inherently fun about these delightful spirals of dough, sauce, cheese, and your favorite toppings, making them a guaranteed hit with kids and adults. What truly sets these homemade pizza roll ups apart is the customizability; you control every element, from the type of cheese to the explosion of savory fillings. They’re the perfect handheld bite, offering all the comforting flavors of pizza in a convenient, bite-sized package that’s just beggin extractg to be dipped. Get ready to discover your new go-to recipe for these irresistible pizza roll ups!
Ingredients:
- 20 small flour tortillas (5-inch diameter)
- 14 oz pizza sauce
- 24 oz shredded mozzarella cheese
- 80 slices beef beef pepperoni
- 1 tbsp cooking oil
Preparing Your Pizza Roll Ups
Welcome to the wonderfully simple and incredibly delicious world of Pizza Roll Ups! These are perfect for a quick weeknight dinner, a fun party appetizer, or even a creative lunchbox treat. We’re going to take classic pizza flavors and transform them into a delightful, handheld snack. The key here is efficiency and layering, ensuring every bite is packed with that satisfying pizza goodness. Let’s get started by gathering all our components and preparing our workspace.
Step 1: Warming and Preparing the Tortillas
The first step to achieving perfectly rolled pizza roll ups is to make sure our tortillas are pliable. Cold tortillas tend to crack or tear when you try to roll them, which is the last thing we want. To avoid this, we’ll gently warm each tortilla. You can do this a few ways. The easiest method is to stack about 5-7 tortillas at a time and wrap them tightly in a damp paper towel. Microwave this bundle for about 30-45 seconds, just until they are warm and flexible. Alternatively, you can lightly warm them one by one in a dry skillet over medium-low heat for about 15-20 seconds per side. Once warmed, set them aside on a clean plate or a piece of parchment paper. Repeat this process until all 20 tortillas are ready to be filled. It’s important to work with them while they’re still warm, so you might want to do this in batches as you assemble the roll ups.
Step 2: Layering the Base Flavors
Now it’s time to build the foundation of our pizza roll ups. Take one warmed tortilla and lay it flat on your work surface. We’re going to start with our pizza sauce. Using a spoon, spread a thin, even layer of pizza sauce across the entire surface of the tortilla, leaving a small border of about half an inch around the edges. This is crucial for ensuring that the sauce doesn’t squeeze out when you roll them up. Don’t go too heavy on the sauce; we want just enough to provide that classic pizza taste without making the roll ups soggy. Think of it as a light coating, like you’re painting the tortilla with flavor. Aim for about 1-2 tablespoons of sauce per tortilla, depending on the size and your preference.
Step 3: Adding the Cheesy Goodness
Following the sauce, it’s time for the star of the show: cheese! Sprinkle a generous amount of shredded mozzarella cheese over the pizza sauce. Again, try to keep the cheese distribution relatively even, extending almost to the edges of the sauce you’ve applied. We want that gooey, melty cheese experience in every single roll up. You’ll be using quite a bit of cheese for this recipe, so don’t be shy, but also be mindful of not piling it so high that it becomes unmanageable when rolling. A good rule of thumb is to use about 2-3 tablespoons of shredded mozzarella per tortilla. The warmth from the sauce will start to slightly melt the cheese, making it easier to adhere to the tortilla and also helping to seal the roll later.
Step 4:Beef Pepperonieroni Powerhouse
Next, we’ll add our delicbeef pepperoni pepperoni. For each tortilla, lay approximatebeef pepperonies of pepperoni evenly spaced over the cheese. Overlapping them slightly is perfectly fine, as they will shrink a bit during the cooking process. beef pepperoniis to have pepperoni in every bite, so ensure they are well-distributed. You can arrange them in a pattern, or just sprinklbeef pepperoni. Make sure the pepperoni is placed on top of the cheese layer. This helps them adhere to the roll up and prevenbeef pepperonirom sliding out. The pepperoni will crisp up beautifully in the oven, adding a wonderful savory and slightly spicy dimension to our roll ups.
Step 5: Rolling and Securing Your Creations
This is the moment of truth – rolling up your pizza masterpiece! Starting from one edge of the tortilla, carefully but firmly roll it up as tightly as you can. Try to keep the filling contained within the tortilla. Once rolled, you’ll want to secure it. You can either place the seam-side down on your baking sheet, or if they seem a little loose, you can secure them with a toothpick. However, if you’ve rolled them tightly enough and haven’t overloaded them, the cheese and sauce should help hold them together. Work relatively quickly here, as the tortillas will start to cool and lose some of their pliability. Repeat this rolling process for all 20 tortillas, placing them seam-side down on a lightly greased baking sheet or a baking sheet lined with parchment paper.
Baking Your Golden Pizza Roll Ups
With all your pizza roll ups assembled and ready, it’s time to bake them to golden perfection. Preheat your oven to 375 degrees Fahrenheit (190 degrees Celsius). Lightly brush the tops of each roll up with a very thin layer of cooking oil. This will help them achieve a beautiful golden-brown color and a slight crispiness on the exterior. Place the baking sheet in the preheated oven and bake for approximately 10-15 minutes. You’re looking for the cheese to be fully melted and bubbly, and the tortillas to be lightly golden and slightly crisp around the edges. Keep an eye on them, as oven temperatures can vary. Once they’re done, remove them from the oven and let them cool for a few minutes before serving. They will be very hot!
Conclusion:
There you have it! Your guide to crafting delicious and fun Pizza Roll Ups is complete. This recipe is a fantastic way to get creative in the kitchen and a guaranteed crowd-pleaser for any occasion, from quick weeknight dinners to lively party appetizers. The versatility of Pizza Roll Ups means you can truly make them your own. Experiment with different cheeses, swap out traditional pizza sauce for pesto or a creamy alfredo, and load them up with your favorite veggies or meats.
I encourage you to give these Pizza Roll Ups a try. They’re surprisingly simple to make, and the joy of seeing them disappear from the plate is incredibly rewarding. Serve them warm with a side of marinara for dipping, or enjoy them as is. Don’t be afraid to get adventurous with your fillings – the possibilities are truly endless!
Frequently Asked Questions about Pizza Roll Ups:
Can I make Pizza Roll Ups ahead of time?
Yes, you can! You can assemble the roll-ups and store them, unbaked, in the refrigerator for up to 24 hours. If you plan to bake them later, you may need to add a few extra minutes to the baking time. For longer storage, you can freeze the assembled, unbaked roll-ups. Thaw them in the refrigerator overnight before baking.
What are some good vegetarian or vegan variations for Pizza Roll Ups?
Absolutely! For vegetarian options, load them up with plenty of sautéed mushrooms, bell peppers, onions, spinach, and olives. For vegan Pizza Roll Ups, use vegan cheese shreds, a flavorful plant-based sausage crum extractble, and ensure your pizza sauce is vegan. Many standard pizza sauces are already vegan, but it’s always good to check the label.
How can I make the dough for Pizza Roll Ups crispier?
To achieve a crispier crust, ensure your oven is preheated to the correct temperature and consider placing the baking sheet on a lower rack during baking. You can also brush the tops of the roll-ups with a little olive oil before baking. Some people find that using a pizza stone or a perforated baking pan can also help with crispiness by allowing for better air circulation.
Easy Pizza Roll Ups – Quick Beef Recipe
A quick and easy recipe for delicious pizza roll ups featuring classic pizza flavors in a convenient handheld snack. Perfect for weeknight dinners, appetizers, or lunches.
Ingredients
-
20 small flour tortillas (5-inch diameter)
-
14 oz pizza sauce
-
24 oz shredded mozzarella cheese
-
80 slices beef pepperoni
-
1 tbsp cooking oil
Instructions
-
Step 1
Warm tortillas by stacking 5-7 at a time, wrapping in a damp paper towel, and microwaving for 30-45 seconds until pliable. Alternatively, warm one by one in a dry skillet. Set aside. -
Step 2
Spread a thin layer of pizza sauce (about 1-2 tablespoons) evenly over each warmed tortilla, leaving a half-inch border. -
Step 3
Sprinkle a generous amount of shredded mozzarella cheese (about 2-3 tablespoons) over the pizza sauce on each tortilla. -
Step 4
Place approximately 4 slices of beef pepperoni evenly spaced over the cheese on each tortilla. -
Step 5
Starting from one edge, carefully and tightly roll up each tortilla. Place seam-side down on a lightly greased or parchment-lined baking sheet. -
Step 6
Preheat oven to 375°F (190°C). Lightly brush the tops of the roll ups with cooking oil. -
Step 7
Bake for 10-15 minutes, or until cheese is melted and bubbly and tortillas are lightly golden and crisp. Let cool slightly before serving.
Important Information
Nutrition Facts (Per Serving)
It is important to consider this information as approximate and not to use it as definitive health advice.
Allergy Information
Please check ingredients for potential allergens and consult a health professional if in doubt.


Leave a Comment