
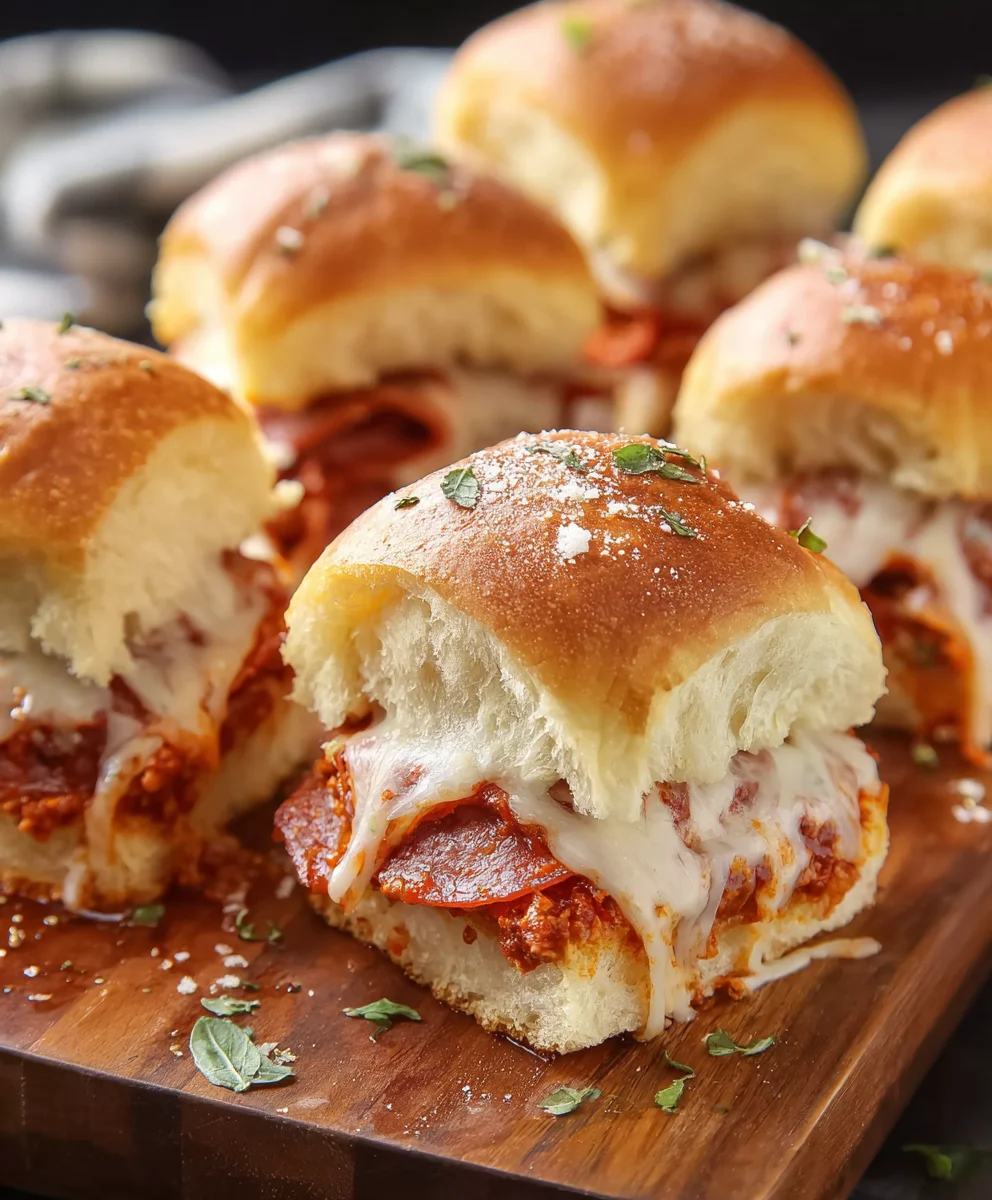
Pizza Sliders are a revelation for anyone who loves the comforting taste of pizza but wants a fun, bite-sized experience. Forget the messy, large slices; these miniature masterpieces are the perfect party appetizer, game-day snack, or even a playful weeknight dinner that’ll have everyone reaching for more. What is it about these little wonders that captures our hearts (and stomachs)? It’s the incredible versatility, for starters! You can stuff them with all your favorite pizza toppings, from classic pepperoni and gooey mozzarella to adventurous combinations like BBQ chicken or spinach and feta. The magic truly lies in the compact form factor, allowing you to sample multiple flavor profiles without the commitment of a whole slice. And the aroma that fills your kitchen as they bake? Absolutely irresistible! Get ready to discover your new go-to recipe for these delightful Pizza Sliders.
Ingredients:
- 12 count package Hawaiian rolls
- 2½ cups shredded mozzarella, divided (1 cup and 1¼ cups)
- ¾ cup pizza sauce
- 20 slices deli style dry cured pepperoni
- ⅓ cup salted sweet cream butter, melted
- 2 tablespoons grated Parmesan
- 1 teaspoon dried Italian seasoning
Preparing the Pizza Sliders
Step 1: Assembling the Base
Begin by taking your 12-count package of Hawaiian rolls and placing them on a clean cutting board. Using a serrated knife, carefully slice through the entire package of rolls horizontally, effectively cutting them in half from top to bottom. This will create a top layer and a bottom layer for your Pizza Sliders. Try to keep the slices as even as possible for uniform filling. Gently separate the top half of the rolls and set them aside on a plate.
Step 2: Layering the Flavor
Now, take the bottom half of the Hawaiian rolls and arrange them side-by-side in a 9×13 inch baking dish. Spread the ¾ cup of pizza sauce evenly over the cut side of these bottom rolls. Make sure to get close to the edges, but avoid letting too much sauce seep down the sides, as this can make them soggy. Next, evenly distribute 1 cup of the shredded mozzarella cheese over the sauce. This initial layer of cheese will help bind the sauce to the bread and provide that classic pizza base flavor.
Step 3: Adding the Pepperoni
It’s time to add the star of our Pizza Sliders: the pepperoni! Arrange the 20 slices of deli-style dry-cured pepperoni over the layer of mozzarella. You can overlap them slightly, or place them in a single layer depending on your preference. For a more balanced flavor in each slider, try to distribute about two slices of pepperoni per roll. Ensure they cover a good portion of the cheese, as they will shrink slightly during baking.
Step 4: The Cheesy Topping and Seasoning
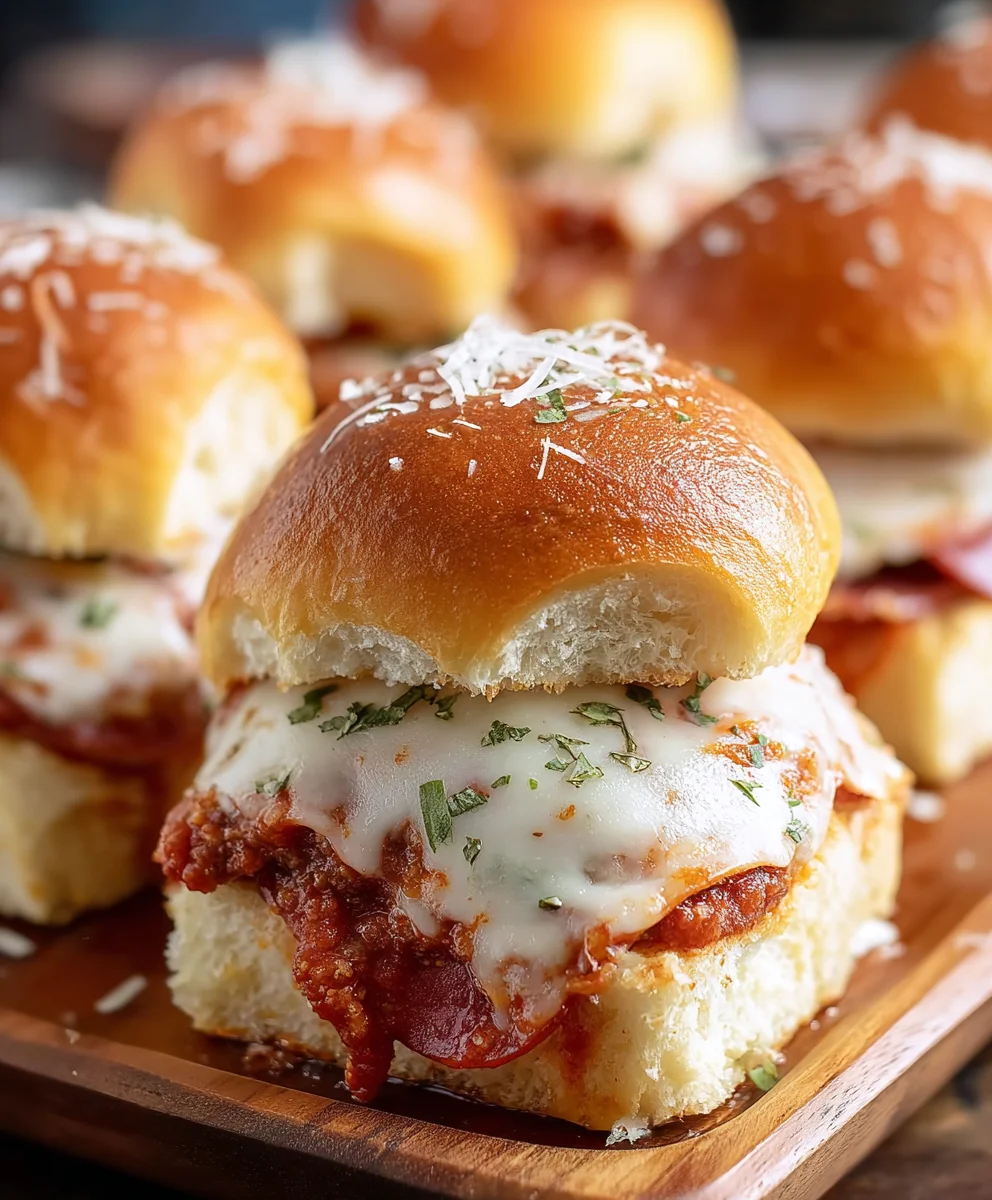
Now, sprinkle the remaining 1¼ cups of shredded mozzarella cheese evenly over the pepperoni. This generous layer of mozzarella will melt and create that irresistible gooey cheese pull we all love in our Pizza Sliders. After the cheese, sprinkle the 1 teaspoon of dried Italian seasoning over the entire top surface. This will add a wonderful aroma and an authentic pizza flavor profile that complements the sweet Hawaiian rolls and savory pepperoni.
Step 5: The Butter Glaze and Baking
In a small bowl, combine the ⅓ cup of melted salted sweet cream butter with the 2 tablespoons of grated Parmesan cheese. Whisk them together until well combined. Carefully pour this butter and Parmesan mixture evenly over the top of the assembled Pizza Sliders, ensuring each roll gets a good coating. This butter glaze is crucial for achieving a golden-brown, slightly crispy crust and adds another layer of rich flavor. Cover the baking dish tightly with aluminum foil. Bake in a preheated oven at 350°F (175°C) for 15 minutes. After 15 minutes, remove the aluminum foil and continue baking for another 5-10 minutes, or until the cheese is bubbly and the tops are golden brown. The aroma will be incredible!
Step 6: Resting and Serving
Once baked to perfection, remove the Pizza Sliders from the oven and let them rest in the baking dish for about 5 minutes. This resting period is important; it allows the cheese to set slightly, making them easier to handle and preventing the fillings from all spilling out when you cut them. After resting, you can either cut the entire block of rolls into individual sliders using your serrated knife, or simply pull them apart by hand. Serve your delicious Pizza Sliders warm and enjoy the delightful combination of sweet, savory, and cheesy goodness in every bite! These are perfect for parties, game nights, or a quick and satisfying snack.
Conclusion:
And there you have it – your guide to creating incredibly delicious and easy Pizza Sliders! We’ve walked through each step, from preparing the dough to layering on your favorite toppings and baking them to golden perfection. These little flavor bombs are guaranteed to be a hit at any gathering, from game nights to casual family dinners. The beauty of this recipe lies in its versatility; feel free to experiment with different cheeses, sauces, and a medley of your go-to pizza toppings. Imagine a spicy pepperoni version, a veggie-loaded delight, or even a breakfast-inspired slider with sausage and scrambled eggs. Serve them warm, fresh out of the oven, with a side of marinara sauce for dipping, or alongside a crisp salad for a more complete meal. I truly hope you enjoy making and devouring these delightful Pizza Sliders as much as I do!
Frequently Asked Questions:
Q1: Can I make the Pizza Sliders ahead of time?
Yes, you absolutely can! You can prepare the sliders, assemble them with your toppings (but don’t bake them), cover them tightly with plastic wrap, and refrigerate them for up to 24 hours. When you’re ready to bake, you might need to add a few extra minutes to the cooking time to ensure they’re heated through.
Q2: What are some great topping combinations for Pizza Sliders?
The possibilities are endless! Beyond the classic pepperoni and mozzarella, consider a BBQ chicken slider with red onion and cheddar, a spinach and ricotta version with a drizzle of pesto, or even a Mediterranean-inspired slider with feta, olives, and sun-dried tomatoes. Don’t be afraid to get creative with your favorite pizza flavors!
Easy Beef Pizza Sliders
Quick and easy game day appetizer featuring savory beef and melted cheese baked inside soft Hawaiian rolls.
Ingredients
-
12 count package Hawaiian rolls
-
2½ cups shredded mozzarella, divided (1 cup and 1¼ cups)
-
¾ cup pizza sauce
-
20 slices deli style dry cured beef
-
⅓ cup salted sweet cream butter, melted
-
2 tablespoons grated Parmesan
-
1 teaspoon dried Italian seasoning
Instructions
-
Step 1
Slice the Hawaiian rolls horizontally to create a top and bottom layer. Gently separate the top half and set aside. -
Step 2
Arrange the bottom half of the rolls in a 9×13 inch baking dish. Spread pizza sauce evenly over the cut side, followed by 1 cup of shredded mozzarella. -
Step 3
Layer the beef slices evenly over the mozzarella. Distribute about two slices per roll. -
Step 4
Sprinkle the remaining 1¼ cups of shredded mozzarella over the beef, then sprinkle with dried Italian seasoning. -
Step 5
Whisk together melted butter and grated Parmesan. Pour evenly over the top of the sliders. Cover with foil and bake at 350°F (175°C) for 15 minutes. Remove foil and bake for another 5-10 minutes until golden brown and bubbly. -
Step 6
Let the sliders rest for 5 minutes before cutting into individual pieces or pulling apart by hand. Serve warm.
Important Information
Nutrition Facts (Per Serving)
It is important to consider this information as approximate and not to use it as definitive health advice.
Allergy Information
Please check ingredients for potential allergens and consult a health professional if in doubt.


Leave a Comment